This post may contain affiliate links. Please read our disclosure policy.
I’m here to tell you all about How to Make Butter at Home-no cow required (although having cows is really fun!) You only need 2 things: cream and a mason jar!

Most people are completely shocked when I mention making homemade butter. Can you remember making butter as a child in school? I was so excited when it was my turn to shake the mason jar and so in awe that making butter was so easy.
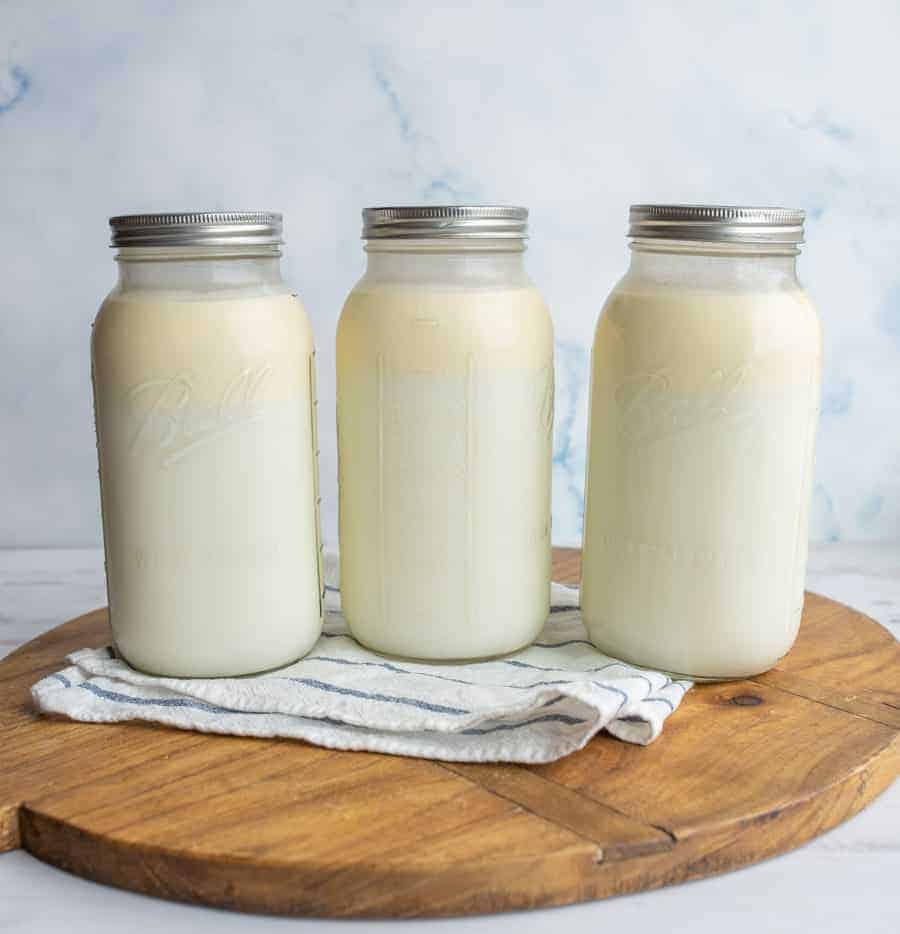
Making homemade butter is a great way to use up cream. Sometimes recipes only call for 1-2 tablespoons of cream, so you are left with a whole lot in the carton. Now, you can turn that leftover cream into butter. (And, as an added bonus, you’ll have buttermilk afterward to make yummy things like biscuits, waffles, and pancakes.)
Table of Contents
Why You’ll Love This Recipe
- Homemade Freshness: You know the old saying “everything tastes better when it’s homemade” and that’s definitely true for butter. Freshly churned butter is heavenly.
- Fun and Educational: The process of making butter is not only fun but also educational, especially for kids. It’s a great way to learn about the science of food and traditional methods of food preparation.
- Economical: Using up leftover cream to make butter is a great way to stretch your budget a little further and keep yourself from throwing groceries away.
Ingredients
- Heavy Whipping Cream or Raw Fresh Cream: make sure your packaging says whipping cream. Half & half and table cream don’t have enough fat content to turn into butter.
- Quart Mason Jar with Lid
- Salt, optional
See the recipe card below for full information on ingredients and quantities
How to Make Butter
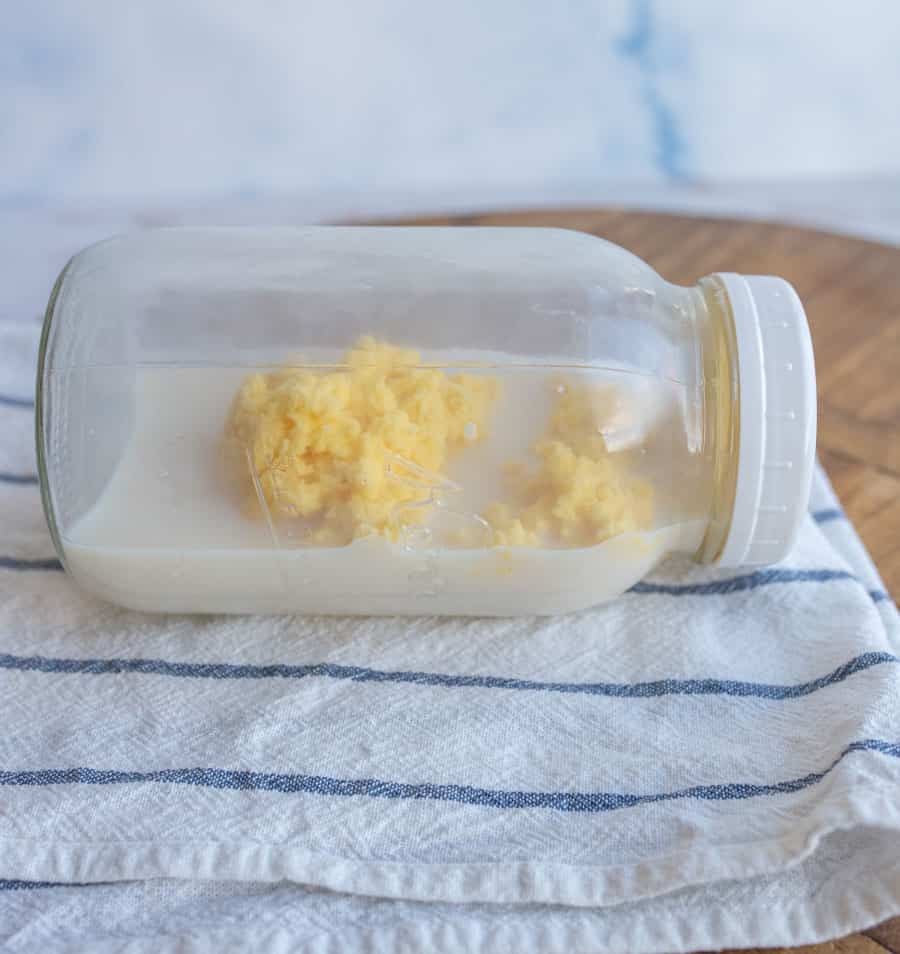
Step #1. Add cream to the mason jar so it is between 1/4 and 3/4 full. Screw the lid on tightly. Start shaking! Continue shaking until the cream “breaks” and you have clumps of butter floating in buttermilk. (Around 15 minutes.)
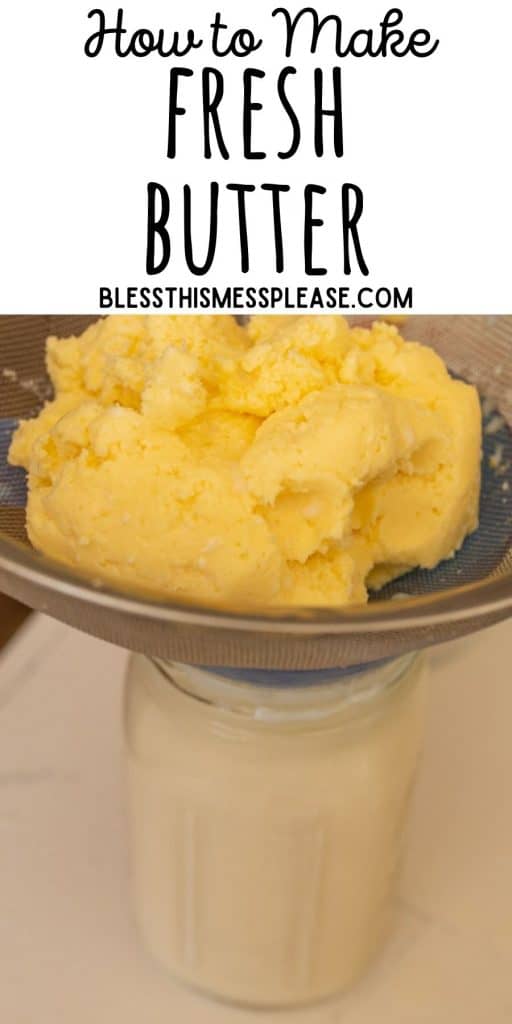
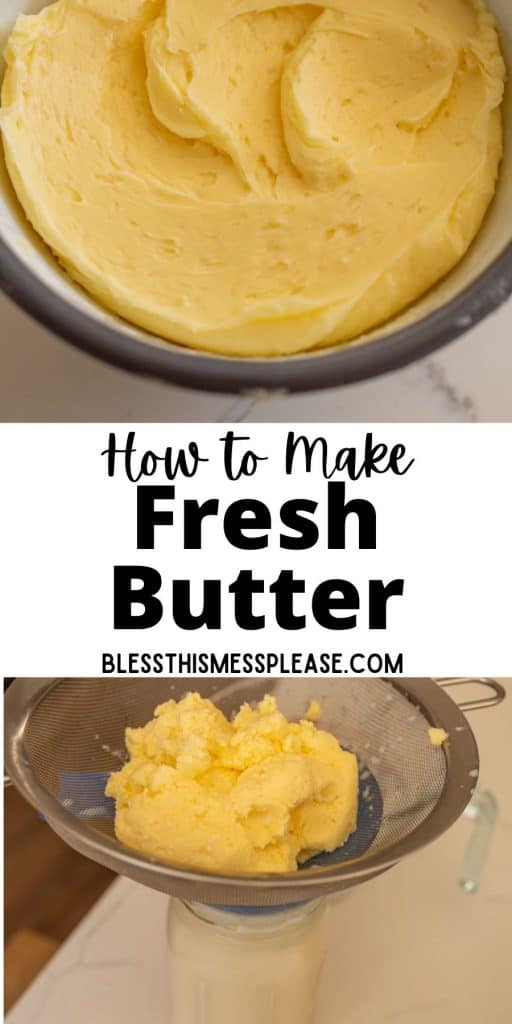
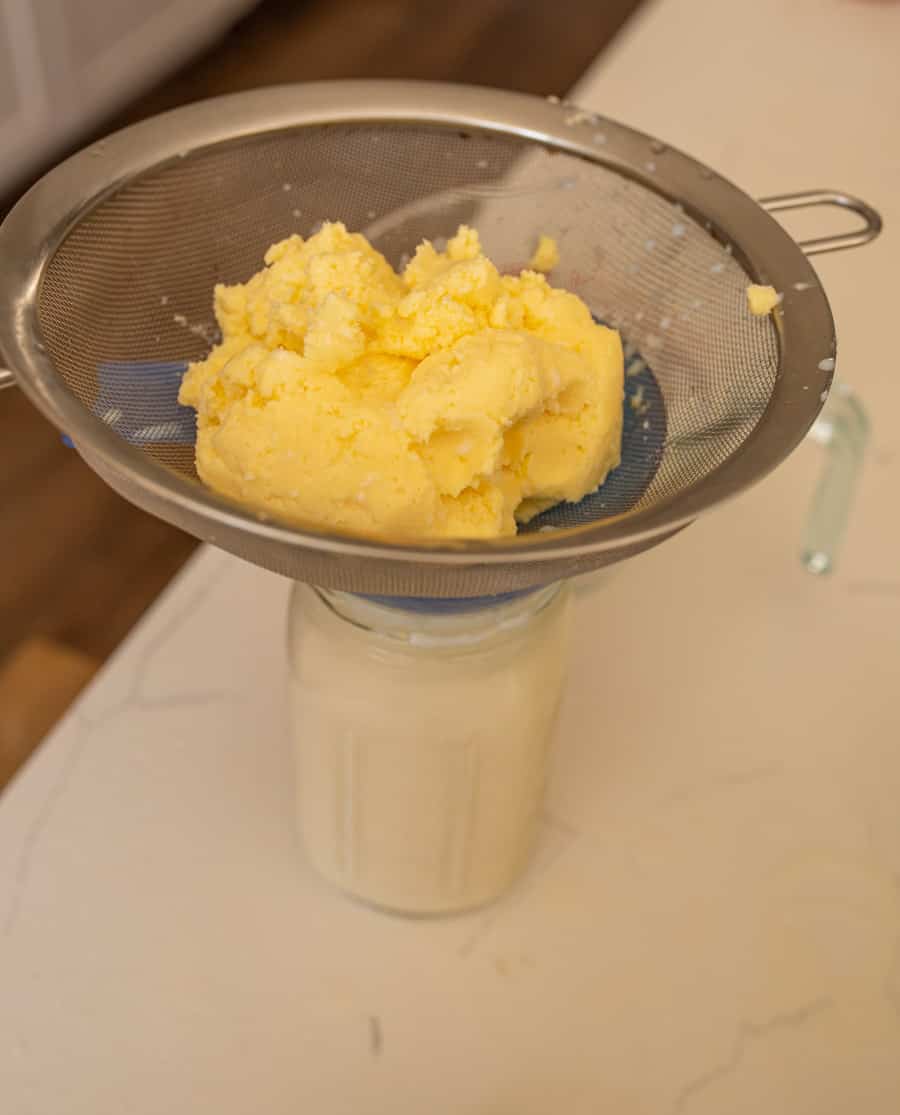
Step #3. Pick up the butter from the strainer and form it into a ball. Shape and work your butter under cold running water to get all the remaining buttermilk out. If using salt, mix it in now.
Step #2. Once it has reached that point, place a fine mesh strainer over a large bowl and then pour the contents of the jar into the strainer. Save the buttermilk in the bowl in the refrigerator.
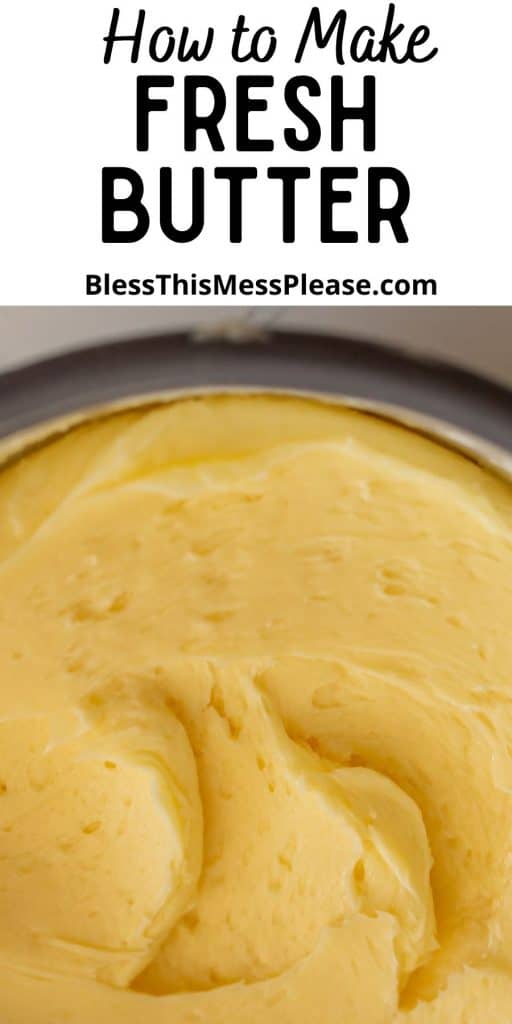
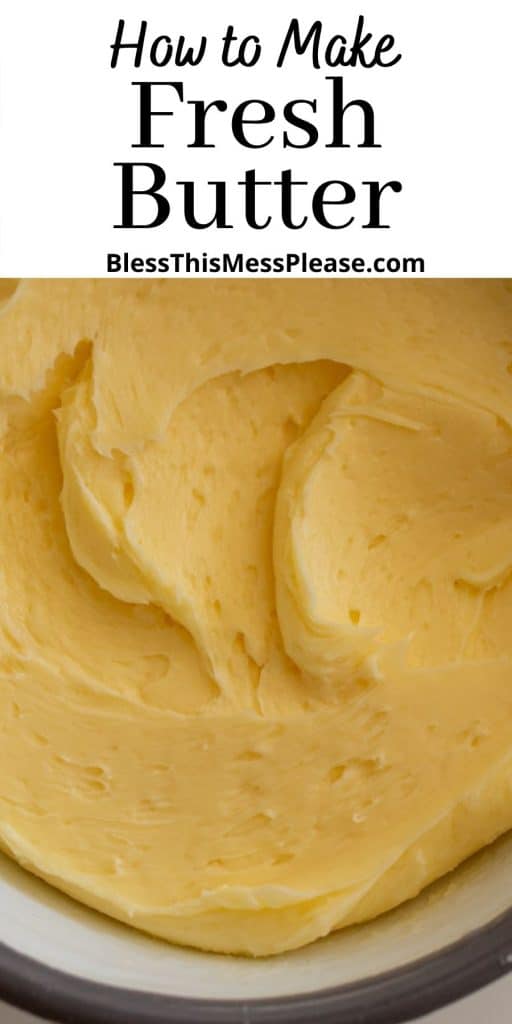
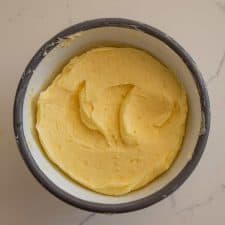
Step #4. The butter is now ready to use. Store in at room temperature for a couple of days or put it in an airtight container and refrigerate or freeze it for later use.
Recipe FAQs
Homemade butter is best when used within a few days. However, if refrigerated it will last 7-10 days.
In order to make butter at home you want a high quality heavy cream. Pick one that is not ultra-pasteurized, they don’t seem to work as well.
Making butter takes about 10-15 minutes in total. After about 5 minutes of shaking the jar, whipped cream will form. Keep shaking until you hear a lump form inside the jar. You want to shake until the butter has formed a solid mass.
I like to rinse the butter under cold water and remove any buttermilk from it. This will keep the butter fresher for longer. It’s easy, just hold the ball of butter in your hands under the water and squish it around a little bit. Put it on a bowl and fold it over on itself a few more times, you’ll see it release extra moisture.
Expert Tips
- As you shake your cream, remember that it has to turn into whipped cream before it “breaks” and turns into butter. It’s all part of the process!
- Also, keep that in mind if you’re ever whipping cream and accidentally whip it too much – if it breaks, you don’t have to throw it away! Just keep mixing until you get to butter.
- If you want to make a flavored butter, wait to add your mix-ins until you have rinsed and kneaded all the buttermilk out of the butter.
How to Freeze
- One option to freeze butter is to put it into ice cube trays. Once frozen, pop the cubes out and place them in a freezer bag or container, then take out as needed.
What to Serve with Homemade Butter
- Homemade Italian Bread
- My Favorite Go-To Sourdough Bread Recipe
- Jolyn’s Extra Soft White Bread Recipe
- Mom’s 4 Loaf Wheat Bread Recipe
- Mom’s Jumbo Dinner Rolls
More Recipes to Consider
From Scratch Recipes
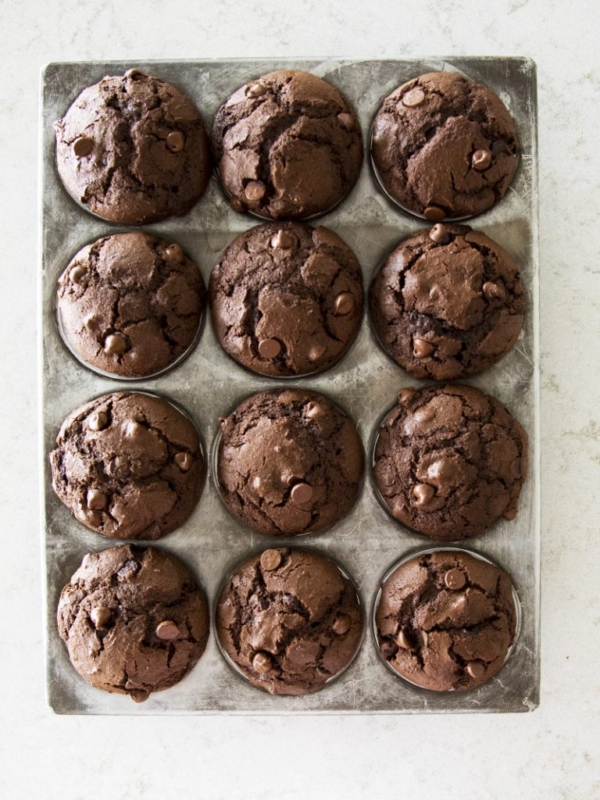
Bakery-Style Double Chocolate Muffins

From Scratch Recipes
Overnight Pizza Dough (Make-Ahead Recipe)
From Scratch Recipes
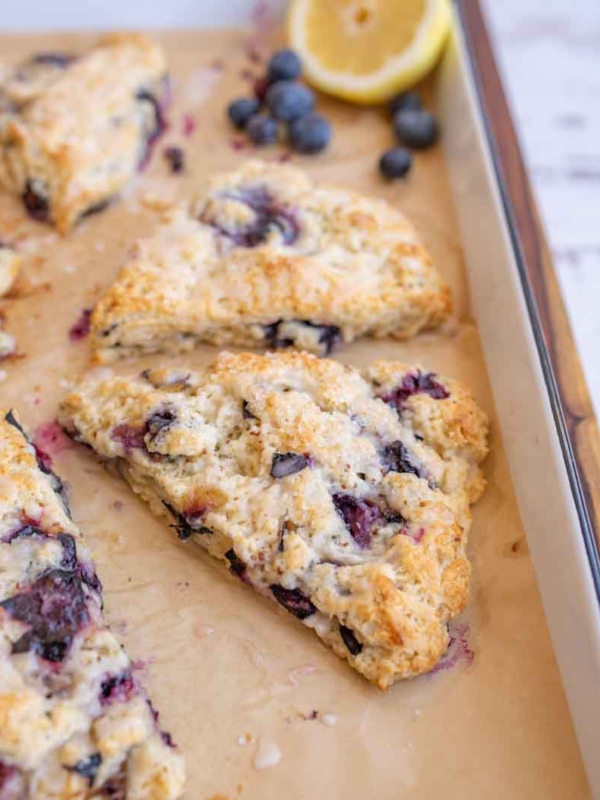
Lemon Blueberry Cream Scones
Homemade Bread
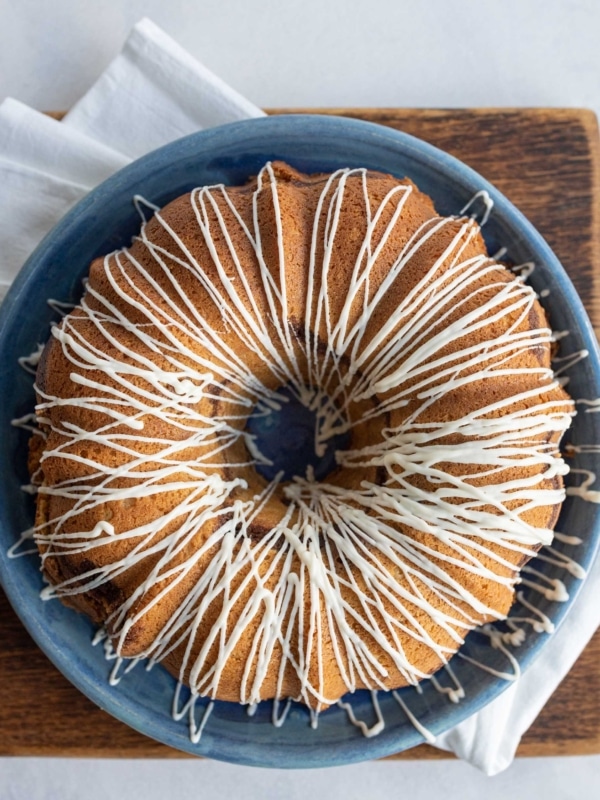
Cinnamon Bundt Cake
How to Make Butter
Ingredients
- 1-2 cups good quality heavy whipping cream or raw fresh cream
- Quart mason jar with lid
- salt, optional
Instructions
- Add your whipping cream to the mason jar and screw on the lid tightly. The amount of cream doesn’t really matter, you’ll end up with more or less butter depending on how much you use. Don’t fill the jar less than 1/4 full or more than 1/2 full (if it’s too full it doesn’t have enough room to move around and agitate the butter out).
- Start shaking! We generally read a book or take turns while everyone else is cleaning up the kitchen.
- Keep shaking! The cream will whip up to thick whip cream and you keep going. Once the cream breaks you’ll have pieces of butter floating in buttermilk. Shake until it happens (the butter will be obviously yellow). It can take 15+ minutes, so don’t lose heart.
- Once your butter and buttermilk have separated, place a fine mesh strainer over a large bowl and pour the contents of the jar into it. Save the buttermilk that falls into the bowl for cooking (like buttermilk biscuits), keep it in the fridge until you are ready to use.
- Use your hands to remove the butter from the strainer and press it into a ball.
- Turn your tap water onto cold and gently press the ball of butter in and out of shape to help press out the extra buttermilk. Do this for a few minutes or until you don’t see anymore buttermilk come out.
- You can salt your butter if you’d like (we really like it salted, especially if you are putting it on fresh bread). I generally add a scant 1/4 teaspoon per 1 cup of butter, but feel free to add to taste. If adding salt, just mix it in.
- The butter is now ready to use! Enjoy with fresh bread or over your favorite waffles. If you are doing this with kids who just want to try it, you can also spread if on a cracker to try.
- We leave this butter out on the counter a few days to keep it soft but if you won’t use it that quickly keep it covered in the fridge or freezer.
Notes
- If you are needing or wanting to make butter more often, the mason jar gets tedious. We had a milk cow for a little while and I made lots of butter. I tried churning it in the Kitchen Aid mixer, a Bosch mixer, in a food processor, AND the blender. My favorite option for making butter quickly often was using the blender. It was the fastest option and the blender didn’t splatter the mess like the other appliances. I just blended for about 5 minutes (work in 1 minute increments) until I could see the butter. It was really easy!
- Make sure not to fill your mixer, blender, jar, etc. more than about half full so there is plenty of room for the whole process.
- Salting the butter will help it stay good longer.
- Don’t forget to use up the buttermilk! There are so many delicious options: biscuits, pancakes, syrup, and more.


