This post may contain affiliate links. Please read our disclosure policy.

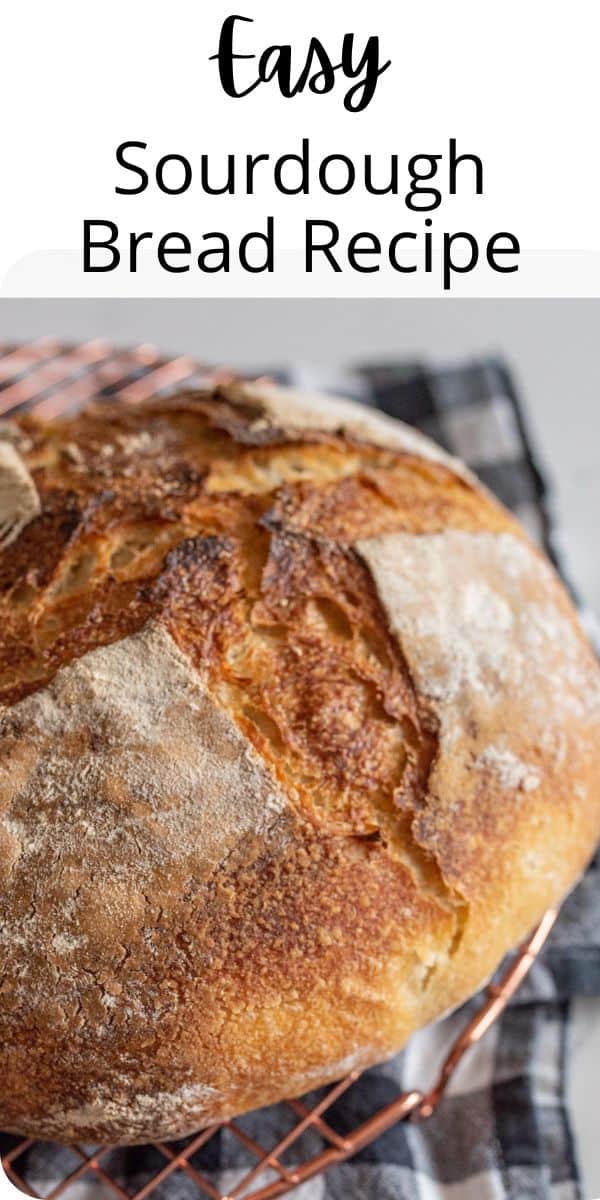
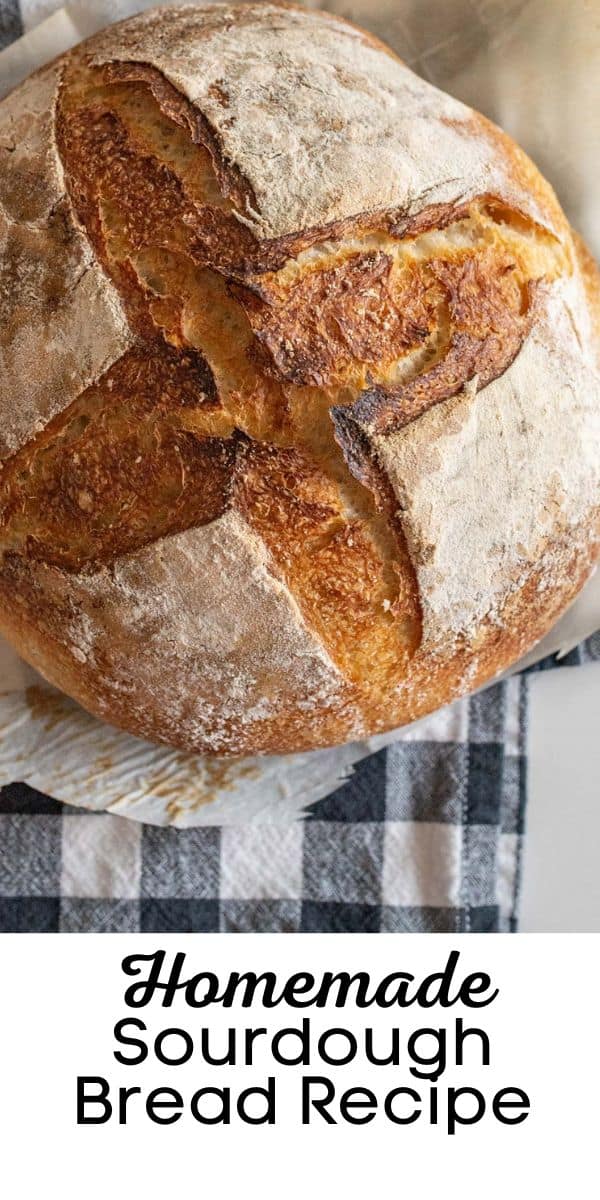
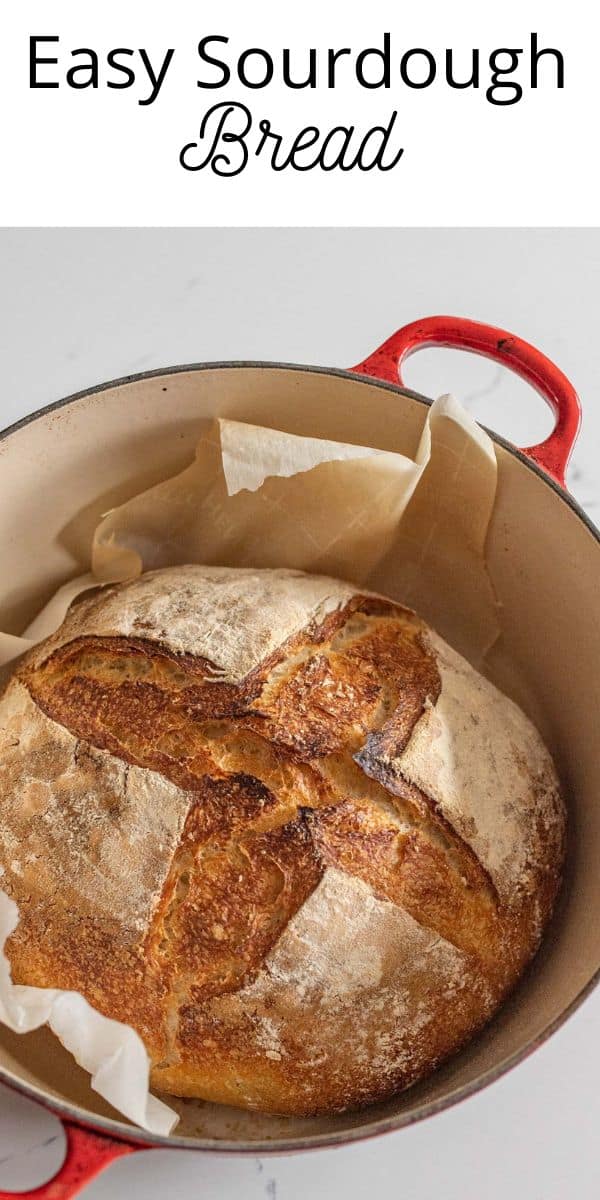
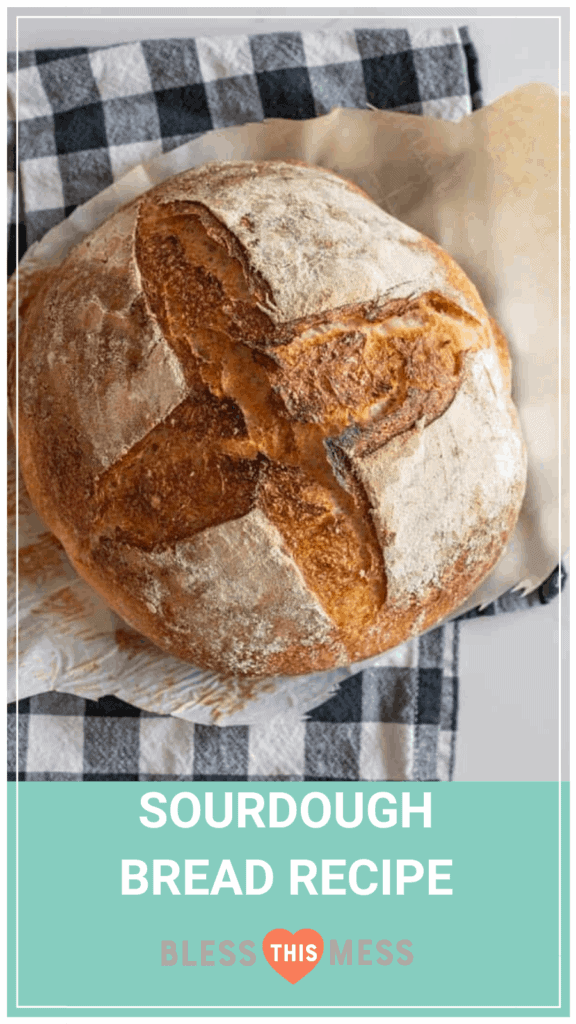
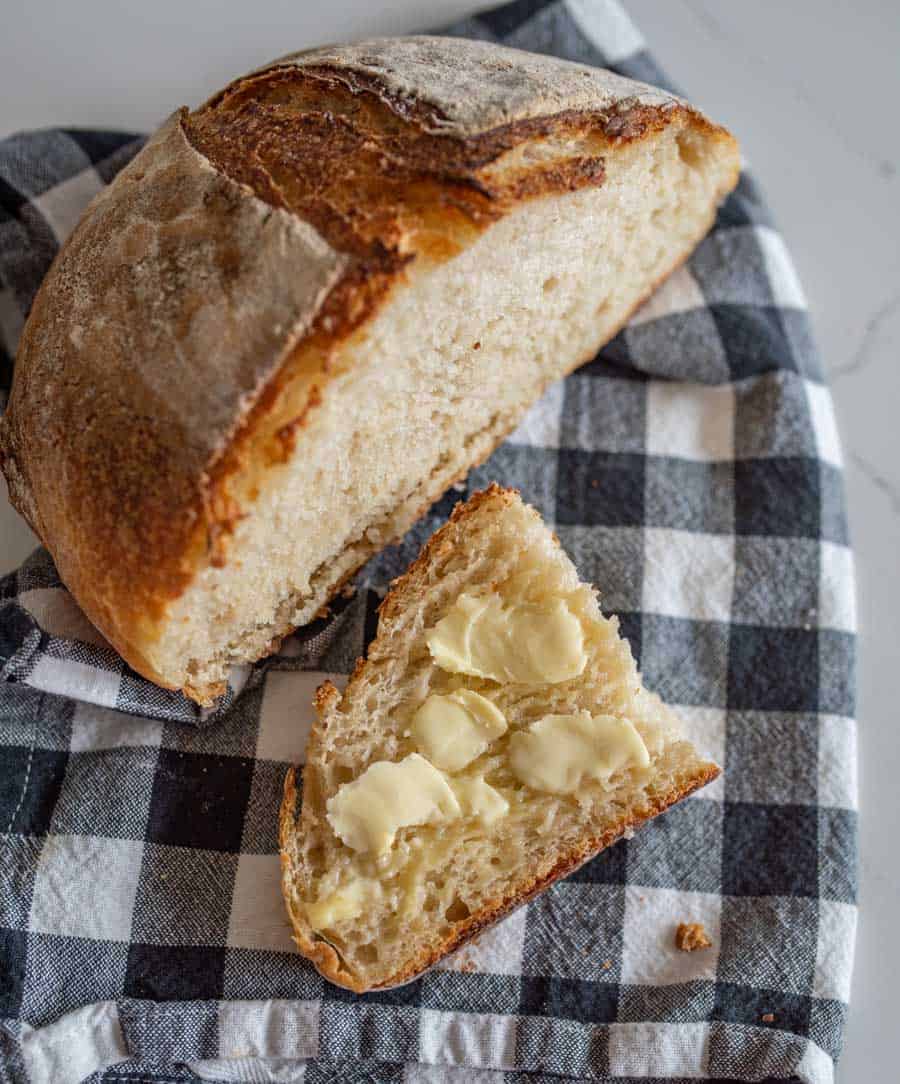
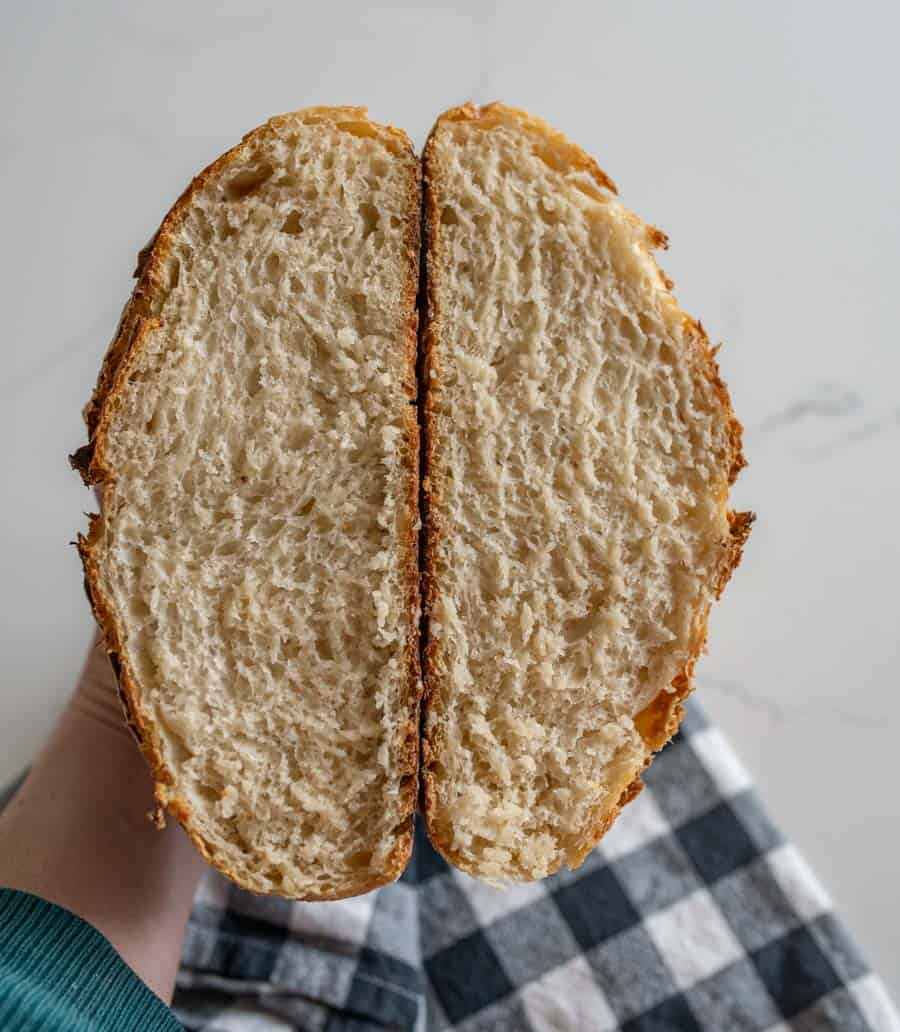
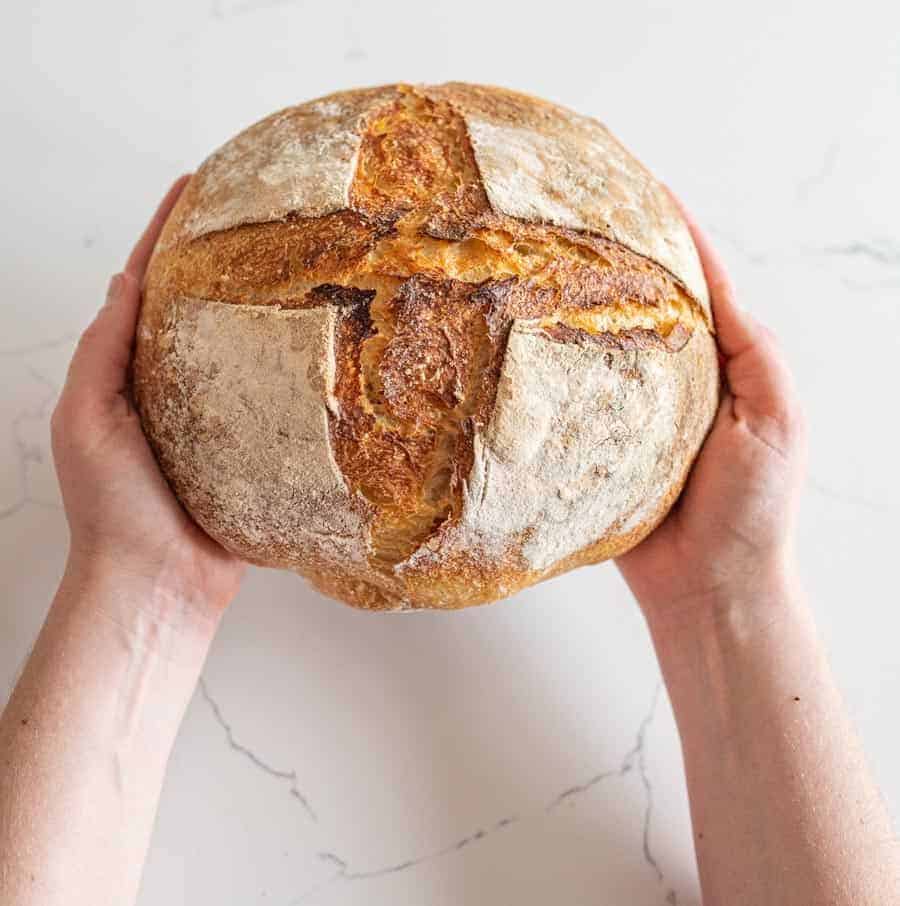
This simple and easy go-to sourdough bread recipe creates a perfectly crusty on the outside, tender on the inside loaf that’s just waiting to be sliced, toasted, and slathered with butter and jam!
I’m here to tell you that sourdough bread baking does NOT need to be fussy or overly complicated. My method for sourdough baking does not include hydration rations, creating an autolyse, or any equipment that isn’t necessary.
It’s simple and easy for anyone to get a handle on. This bread is delicious, dipped in my creamy chicken noodle soup or as the bread on my ultimate hummus and veggie sandwich.
When I first started making sourdough bread, I spent a MONTH trying a million recipes and failing over and over again. I made 7 loaves over one week until I got ONE that was kinda right! 😂
I didn’t understand enough, and they were too fussy, and, you know, that’s not my style. I tell you that for a few reasons. If it takes you more than one loaf of homemade sourdough bread to get it perfect, that’s normal, but you also shouldn’t fail for a month trying, and I’m here to help prevent that.
Now, let’s make your first loaf of sourdough bread!
Top Tip: I have SO many sourdough bread tips and tricks in the notes of this post. I highly recommend reading it and watching the video before starting if this is your first time.
Video Tutorial: Make Easy Sourdough Bread

🍞🥖 New to sourdough? Find out how to make your own sourdough starter here, find my most popular and basic bread recipe here, and search the sourdough archive here.
Table of Contents
- Video Tutorial: Make Easy Sourdough Bread
- Why You’ll Love This Recipe
- Recipe Ingredients
- Equipment Needed
- What is the Best Dutch Oven for Sourdough?
- How to Make Sourdough Bread
- Recipe FAQs
- Expert Tips
- Testing Flours for Sourdough Bread Recipes
- How to Make Sourdough Bread More or Less Sour
- How to Serve and Store Sourdough Bread
- More Sourdough Recipes to Consider
- Easy Sourdough Bread Recipe Recipe
Why You’ll Love This Recipe
- Family Favorite: I love this simple sourdough bread recipe because it generates the best flavor and texture and will surely please everyone in your home.
- The Smell: Your house will be filled with the aroma of fresh-baked bread!
- Crazy Simple: This recipe only uses four simple ingredients.
- Make it Your Own: You can customize the dough by using different flours or adding your favorite herbs and spices, making it adaptable to your preferences.
🍞 18 Easy Sourdough Recipes!
Recipe Ingredients
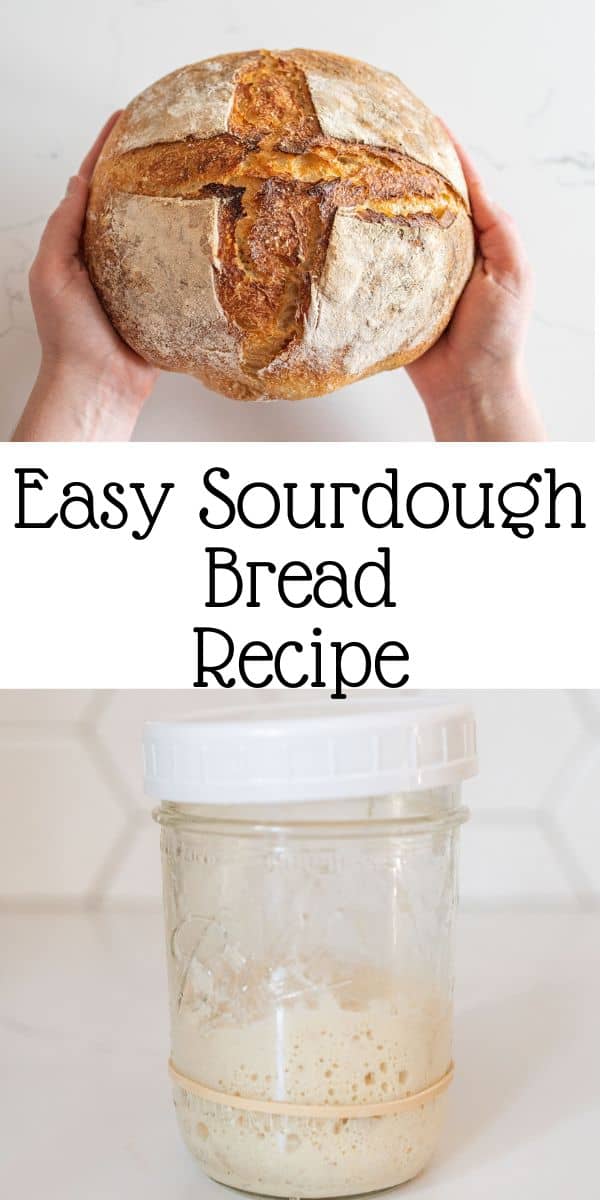
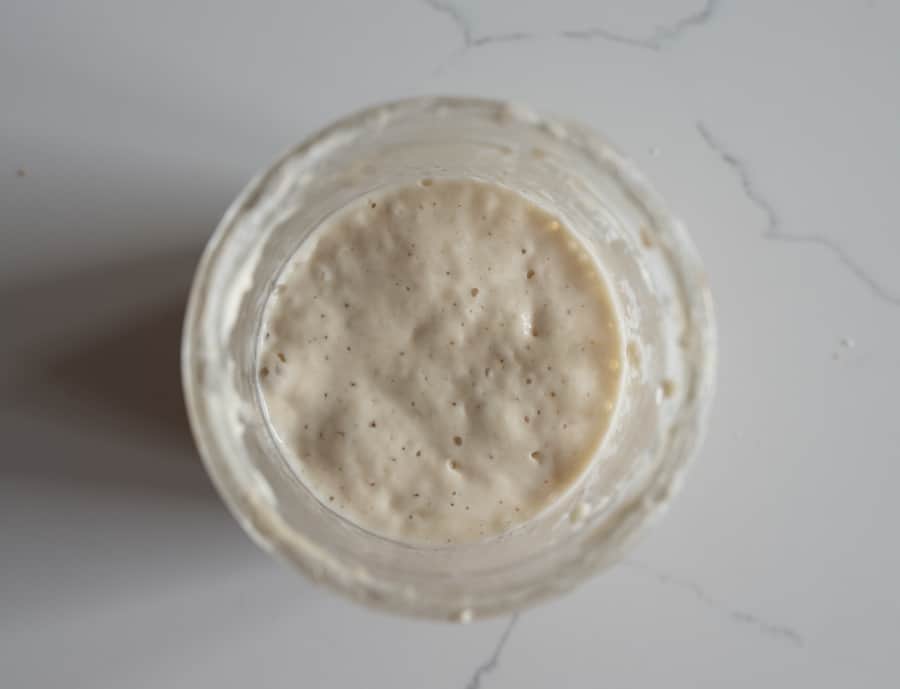
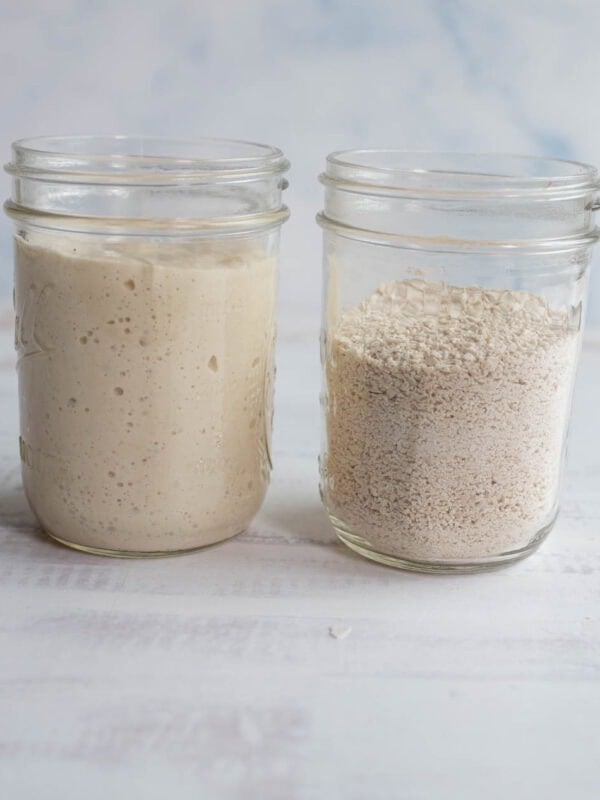
- Active sourdough starter – Making your own sourdough starter is super easy!
- Flour- all-purpose or bread flour
- Warm water
- Salt
See the recipe card below for full information on ingredients and quantities.
Equipment Needed
You can get all kinds of things, but you can make do with what you have at home, too. Here are the minimal items you’ll need:
- A bowl and fork to mix the dough
- A dish towel to cover the bowl with
- Parchment paper for moving the bread to the pan (though foil sprayed with cooking spray works, too)
- An oven-safe pan with a lid (a 4 to 5-quart pan is perfect)
- A sharp or serrated knife to score the top
Things that are nice to have:
- A scale for more accurate measuring
- A Dutch oven with a lid for baking (they trap the heat well and are just so nice to work with)
- A bread-proofing basket instead of a bowl to let your shaped loaf rise in (it’s kind of fun to have)
- A lame (or razor blade on a stick) is fun to make the marks on top
So you can go basic, and if you get more into it, you can get a few specialty items like the bread basket, a Dutch oven, and a lame.
A note on the bread-proofing baskets or banneton: They come in a few sizes and shapes. I’d recommend getting a 9-inch round one. I have found that the long or oval loaves don’t fit in anything to bake them unless you have a really large Dutch oven.
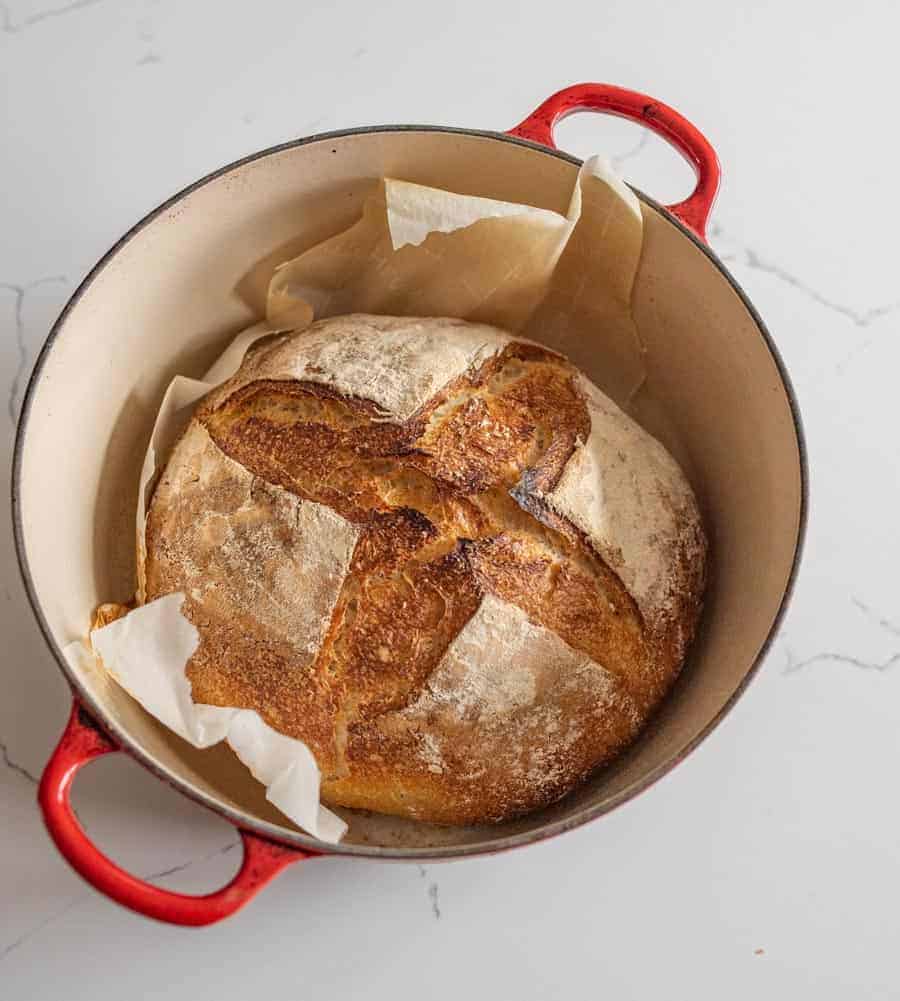
What is the Best Dutch Oven for Sourdough?
I have a few favorite Dutch ovens for making sourdough. The Amazon Basics Dutch Oven is a great basic option because it’s super affordable at around $60. It has a medium 6-quart capacity and is oven-safe up to 500 degrees F, which is perfect for this recipe. I also love the Le Creuset Dutch oven, which is a splurge, but I find it to be a bit lighter and easier to lift. It will last you a lifetime too and looks absolutely stunning on a stovetop.
How to Make Sourdough Bread
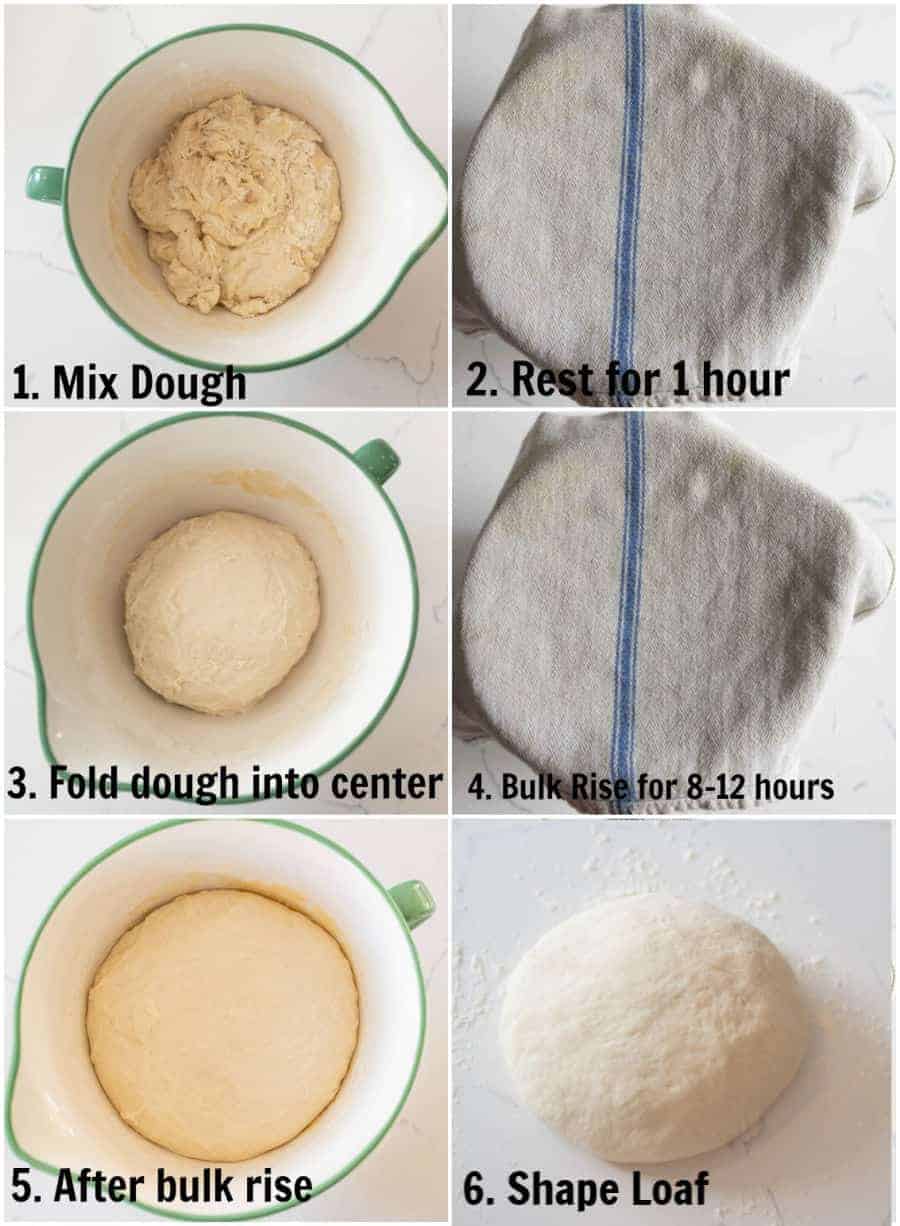
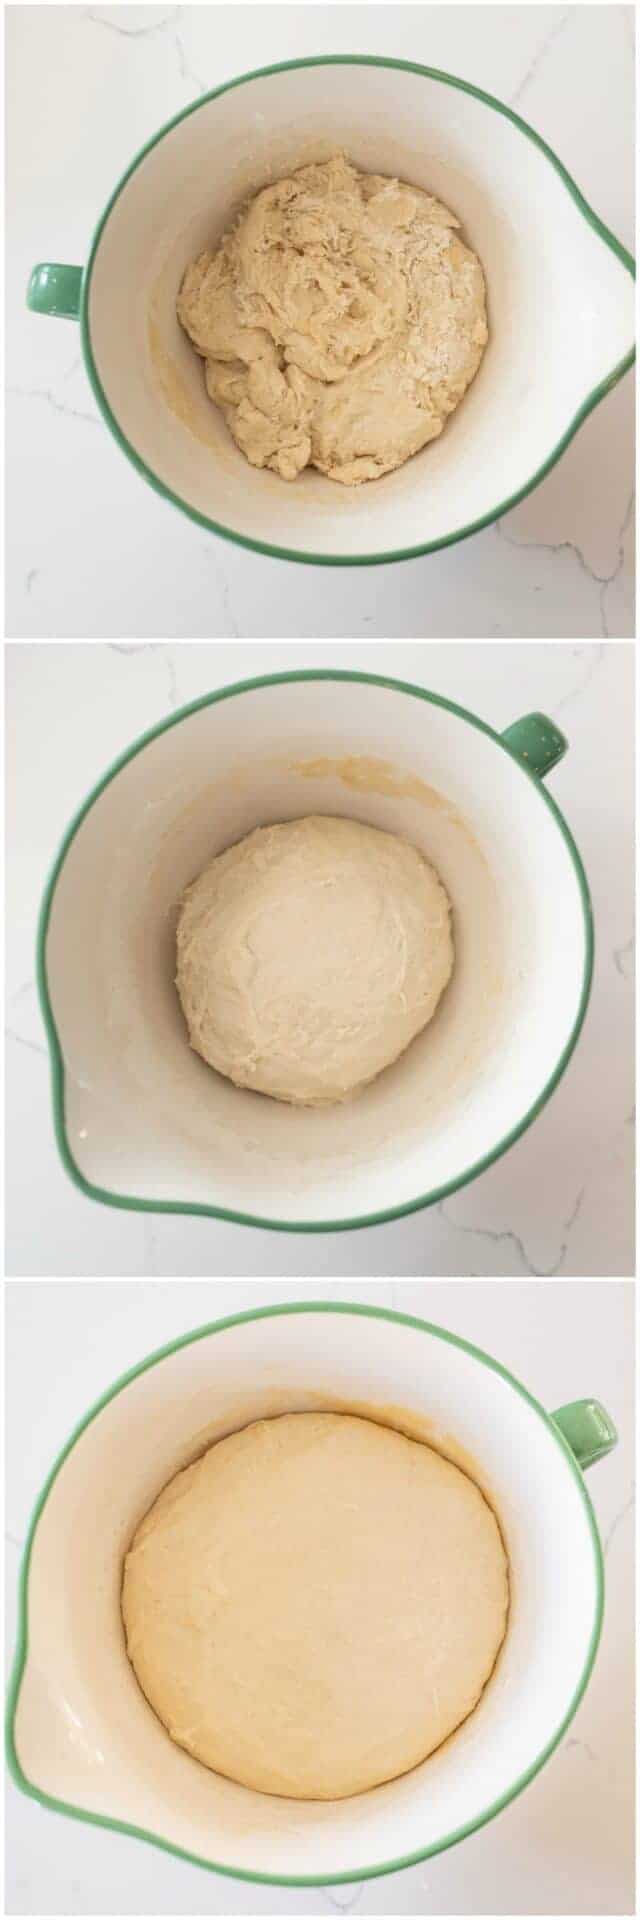
- Combine active starter, warm water, flour, and salt in a bowl. Stir well to form a rough dough. Cover and let it rest for 1 hour.
- After the hour, gently fold the dough edges into the center until it forms a ball. Let it rise for 8-10 hours or overnight.
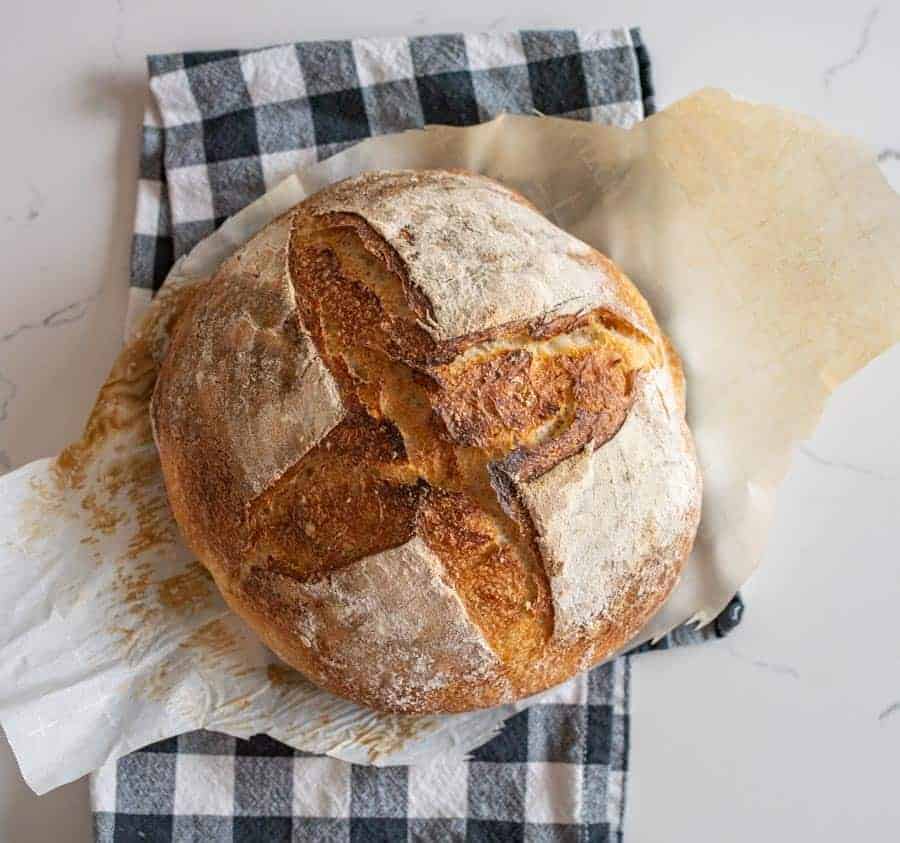
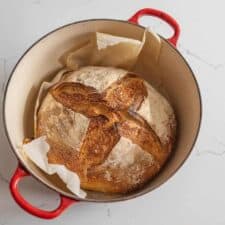
- Transfer the risen dough onto parchment paper, score the top, and place it in a preheated Dutch oven. Bake covered for 30 minutes, then uncovered for 20-30 minutes.
- Once baked, let the bread cool on a wire rack for 1 hour before slicing. Serve fresh or store leftovers for later use.
Recipe FAQs
You only need a sourdough starter, flour, water, and salt.
**I have had the best results using unbleached flour and, if you can, organic flour. The natural wild yeasts in the starter seem to do better with these flours.
**I use tap water. You might consider bottled or filtered water if your water is highly treated. If you have a lot of chlorine in your water, you can let a glass of water set out overnight, giving the chlorine time to dissipate a bit.
Easy—just feed it more! When you are getting it ready for baking, if you’d like to bake more than one loaf or make a recipe that uses more than 50 to 70 grams of starter, feed it double: 100 g water and 100 g flour. If you need even more than that when the starter has peaked, feed it again. Repeat until you have the amount of starter that you need.
The temperature of your kitchen will affect how long it takes for your bread and starter to rise after being made or after a feeding. A cooler house will take longer, and bread will rise much faster in a warmer home. It takes longer in the winter for your bread to get ready, and it’ll be faster in the summer.
To help even out the temperature, you can use warm water in your starter on cool days or wrap a warm towel around the bowl or starter jar. I’d suggest trying this if you are finding your starter or bread is slow to rise.
Lucky for you, I wrote a giant post all about how to start, keep, and revive a sourdough starter!
No! You certainly can, but after a fair amount of testing, I have found that starting my bread at room temperature rather than a hot Dutch oven worked just great, and it was so much easier not to deal with a pot that was 450 degrees and trying to get the bread into it.
Expert Tips
- Active Starter: Ensure your sourdough starter is at its peak before using it in the recipe. Feed it the morning before or at least a 2 hours prior to making the dough.
- Pretty Vents: Scoring the top of the dough allows for controlled expansion during baking.
- The Cooldown: Let the bread cool on a wire rack for at least 1 hour before slicing and serving.
- Sharing Your Starter: See my post on making a sourdough starter for tips on sharing it with friends and keeping it healthy while not baking.
Testing Flours for Sourdough Bread Recipes
A few people have had issues with their dough being very wet and sticky and will not hold its shape when being worked, turning into a blob of dough when handled and spreading as soon as it’s turned out of the container.
I am finding that there is more variation in the amount of protein and gluten in all-purpose flour than I thought would be the case. I recommend using Bob’s Red Mill or King Arthur all-purpose flour, preferably organic, as it has the most beneficial wild yeasts. I have tested all my recipes using those two flours.
If you have this issue, try reducing the water by 50 grams and/or increasing the flour by 50-100 grams when mixing up the dough the first time.
It’s much easier to make these changes in the beginning instead of adding flour at the end.
Please see the rest of the information in this post for pictures and a video describing an appropriate sourdough bread texture. It’s better if the first mixing is a little on the thicker side rather than wet.
How to Make Sourdough Bread More or Less Sour
To make your sourdough bread more sour:
- Feed your starter whole grains, like rye or buckwheat flour; they make the bacteria happy!
- Keep your sourdough starter thinner by feeding it less often. The waste that the bacteria make (like the whey in yogurt) is called hooch, and it will make your bread more sour tasting. Stir it in instead of pouring it off, and use the starter after it has fallen instead of at its peak in rise.
- Choose whole-grain sourdough recipes; they’ll taste more sour than all-white flour recipes.
- Let your sourdough bread dough rest longer. The longer it rests, the more sour it gets.
- Younger starters tend to be milder; your starter will get more sour as it develops and ages.
To make your sourdough bread more mild (less sour):
- Feed your starter white flour (like all-purpose); fewer whole grains lend to a milder flavor.
- Use all-purpose flour in your bread recipes.
- Don’t ferment or rest your dough as long. I do an 8 to 10-hour first rise, but then I only let it rest for another 1 to 2 hours after it is shaped. If you’d like it more sour, you can rest the shaped loaves for another 8 to 10 hours or overnight.
- Feed your sourdough starter often, pour off any hooch it might make, and use the starter when it is at its peak.
How to Serve and Store Sourdough Bread
Enjoy freshly baked sourdough bread on the day it’s made for the best taste and texture.
Serve slices of warm bread with butter, olive oil, and balsamic, or your favorite spread.
Sourdough bread also makes delicious sandwiches such as club, turkey, cucumber, and ham salad and is perfect for a grilled Monte Cristo, pesto grilled cheese, or cheese steak sandwich.
Storing at Room Temperature
Once cooled, store leftover sourdough bread in an airtight container or bread box at room temperature for up to 2 days.
Storing in the Freezer
You can store sourdough bread in the freezer. Let the loaf cool completely, then wrap it in foil, and then wrap it well in plastic wrap (or store in a large zipper-topped bag).
When you’d like to eat it, let it thaw at room temperature for 5 to 6 hours. Then, remove it from the plastic and foil. Spritz the loaf well with water (2 to 3 good spritzes!), and then wrap it back up in the foil. Bake at 400 for 45 minutes. It’s almost as good as new.
More Sourdough Recipes to Consider
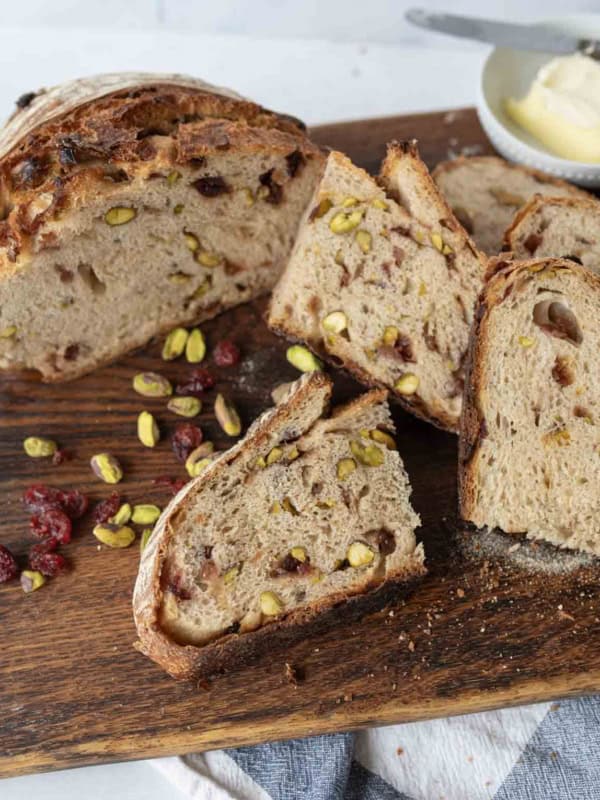
Sourdough Recipes
Orange Cranberry Sourdough Bread with Pistachios
French Toast Recipes
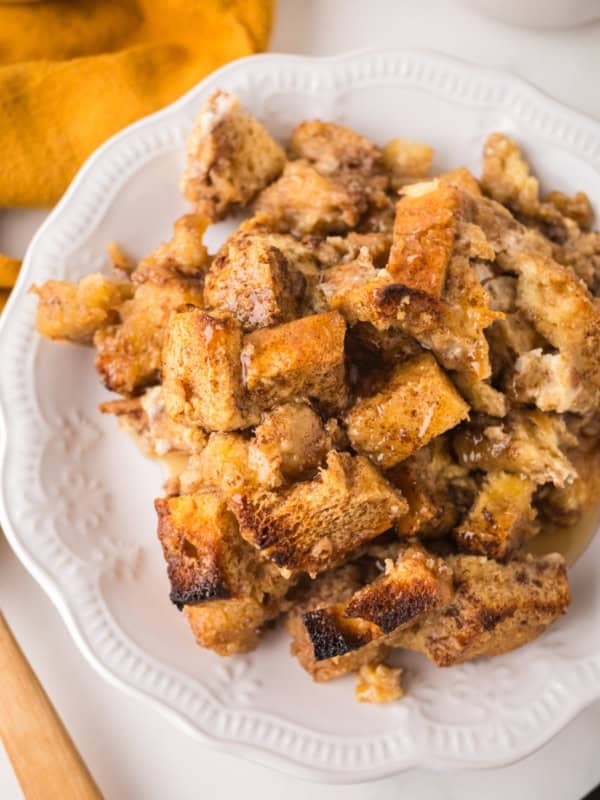
Sourdough French Toast Casserole
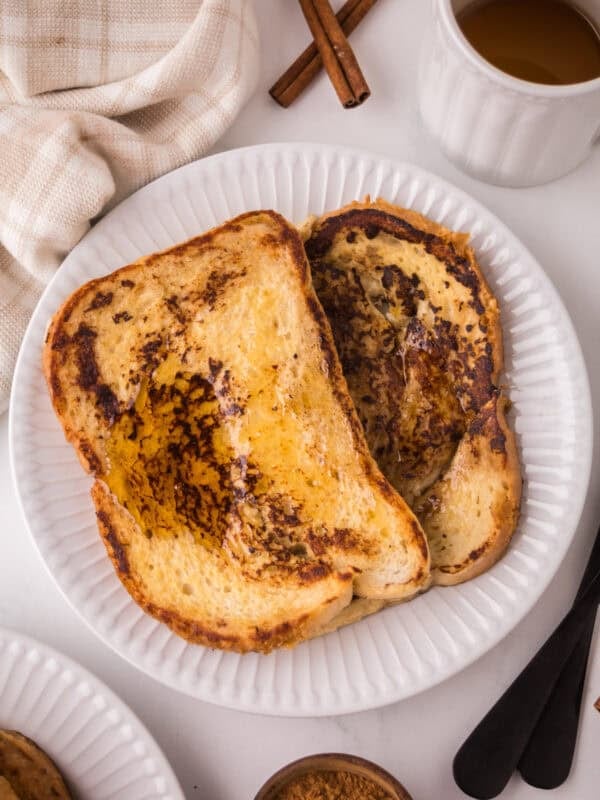
French Toast Recipes
Sourdough French Toast in 15 Minutes
Sourdough Recipes
How to Rehydrate Sourdough Starter
Did you make this recipe? Leave a ⭐️ review and share it on Instagram, Facebook, or Pinterest!
Easy Sourdough Bread Recipe
Equipment
- medium mixing bowl I love these because they have lids and double as serving bowls.
- wire rack These fit nicely in baking sheets.
- kitchen towel I love the off-white color of these kitchen towels. They wash up great and are even large enough to cover full sheet pans.
Ingredients
- 50 grams active sourdough starter, (1/4 cup)
- 350 grams warm water, (1 1/3 cups + 2 tablespoons)
- 500 grams all-purpose or bread flour, (4 cups and 2 tablespoons)
- 10 grams salt, (1 1/2 teaspoons)
Instructions
- The day that you’d like to make your bread, feed your starter. I like to feed mine the morning before I plan to make my dough or at least a few hours before. Your starter will be ready to use when it is at its peak and before it starts to shrink back down in size.
- To make your bread dough, measure out your active sourdough starter into a medium mixing bowl.
- Add the water, and stir well with a fork to combine well.
- Add the flour and salt, and use the fork to combine the mixture well. It will won’t look like like bread dough yet; just stir it well to combine and that’s good enough.
- Cover the bowl with a damp kitchen towel, and let rest for 1 hour at room temperature.
- After an hour, use your hands to gently pull the edge of the dough near the side of the bowl and push it down into the middle of the bowl. Do this, rotating round the bowl, until the dough starts to look like bread dough and comes together in more of a ball. This should take about a minute of going round the bowl 2 to 3 times pulling and tucking into the center.
- Cover the bread dough with a damp kitchen towel and let it rise for 8 to 10 hours at room temperature. This is known as the bulk rise, or bulk fermentation. I typically let mine rise overnight.
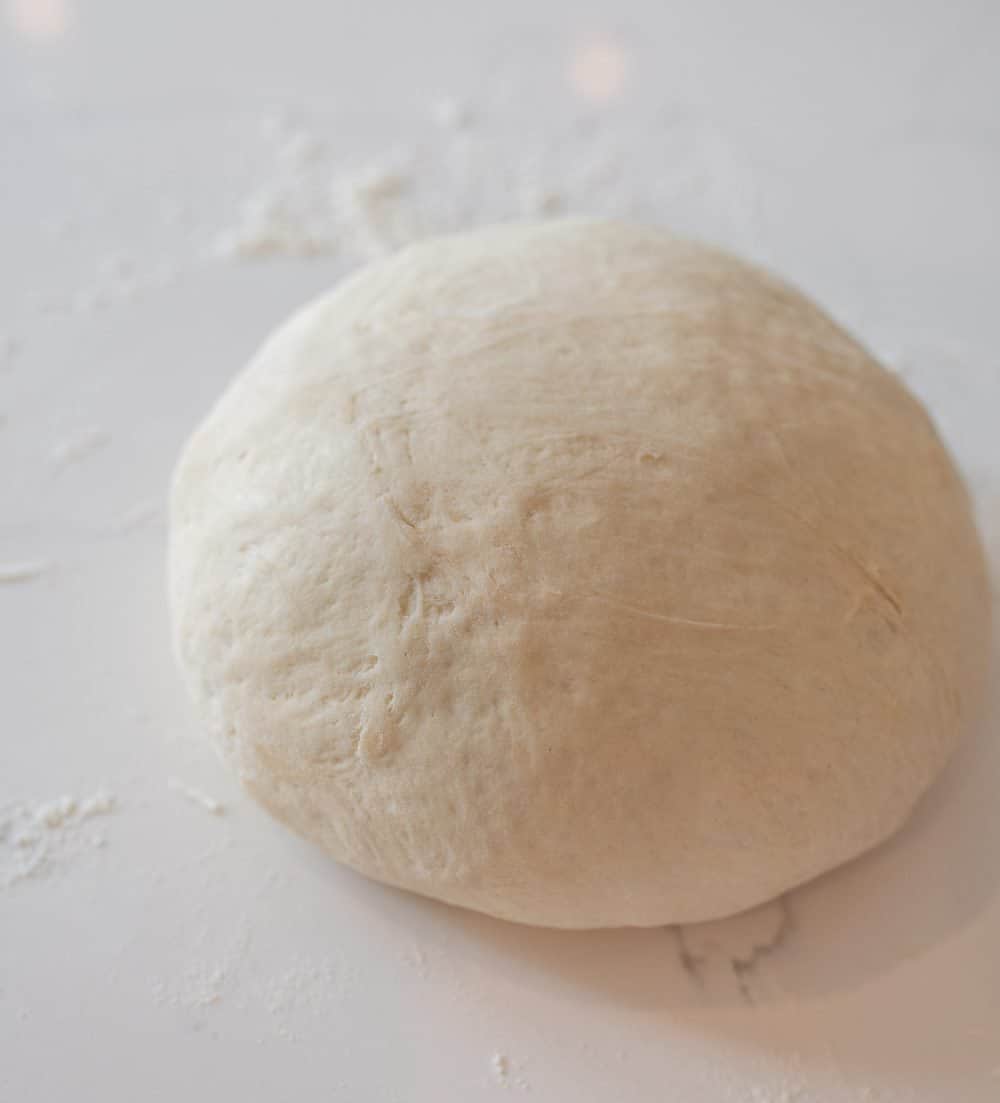
- After the bulk rise, gently remove the dough from the bowl onto a lightly floured surface. Tuck the edges of the dough into the center and work around the edges until you’ve tucked them all in. Flip the ball dough over. Let it rest for 5 to 10 minutes.
- Using your hands, gently pull the dough ball towards you, letting its grip on the counter pull it into a tighter ball. Rotate the dough slightly and repeat around the edges until you’ve formed a tight ball (if this is confusing, watch the video on the post where I demonstrate how to do this! It’s not hard once you see it done once).
- Prepare a bread proofing basket by dusting it well with flour (if it’s new, you’ll need to season it by spraying it with a little water and then adding the flour so it sticks), or you can use a medium mixing bowl (about 8 inches across). To prepare the mixing bowl, you’ll want to coat it generously with cooking spray and then flour very well, or you can line it with a kitchen towel and dust it very well with flour.
- Place your dough ball, smooth top down, into your prepare basket or bowl, and cover with a damp towel.
- Let the dough rest for 1 to 2 hours, at room temperature, or until it’s spread out a bit and looks puffy.
- Preheat the oven to 450 degrees F.
- Gently turn your bread dough out onto a piece of parchment paper (I like to put my parchment paper on top of a thin cutting board, put the paper and board on top of my bread basket, and turn it over gently).
- Remove the dough from the bowl. Score the top with a lame, or sharp knife (serrated knife works, too).
- Use the corners of the parchment paper to lift the dough into your dutch oven. Place the lid on the dutch oven.
- Place the dutch oven in the hot oven and cook for 30 minutes.
- Remove the lid and put the dutch oven back in the oven, uncovered, for another 20 to 30 minutes.
- The bread will be very dark and sound hollow when tapped when it is done.
- Remove the pan from the oven, and then remove the bread from the pan and let it cool on a wire rack for 1 hour before slicing and serving.
- Sourdough bread is best eaten the day of, though leftovers make great toast or grilled sandwiches.
Notes
- I’m sourdough obsessed and wrote a whole cookbook about it! It has step-by-step photos of this recipe if that’s helpful. You can buy a digital or hardcover copy of the sourdough cookbook here.
- If the bottom crust is too dark, try lowering your oven temperature by 25 degrees.
- After I mix up my dough, I refresh my starter by feeding it. I keep 25 grams of the leftover starter and mix it with 50 grams of water and 50 grams of flour by weight. I leave it on the counter if I’m baking tomorrow. If I’m not baking again the next day, I let it rest at room temperature for a few hours and then store it, covered, in the fridge until I’m ready to bake again.
- See the sections above for troubleshooting tips such as making your bread more or less sour, fixing any wet dough issues, and even tips for storing homemade sourdough bread!


After the bulk rise I could not work dough because it was too sticky and I could not shape it. What was my problem? I am determined to try again.
Is it extra warm in your house? That can speed up the fermentation and make things sticky (like how your starter gets wetter and thinner the longer it sits, the bread will do that too) so you can shorten your time and also knead in extra flour as needed after the bulk rice.
I just started putting whey in. In place of milk or water. It gives you extra protein, minerals and vitamins. I get the whey from making Greek yogurt in my breadmaker and draining the liquid from the yogurt normally 2-3 cups.
Super smart! Love that tip, thank you Jean!
I absolutely love this recipe it’s my go to recipe for sour dough bread. I increased the sourdough to 1/2 cup. I normally make one with breadflour, one with 1/2 breadflour/1/2 whole wheat flour. I also make it as a cinnamon, brown sugar raisin bread 2 T of each per loaf. I use a breadmaker. Thank you so much for this recipe. I’ve been doing sourbread for 4 years.
Ohhh perfect! Thank you for sharing your tips!!
after doing the first part where i mixed everything together, my dough just seems a tad dry and not sticky.. i let it rest for an hour and i saw no change in it and i’m now letting it rest overnight. it just seems dense and not airy? … is that normal?
Yep, it’ll loosen up overnight!