• Skip to main content
  • Skip to primary sidebar
Bless this Mess
  • Breakfast
  • Dinner
  • Sides
  • Desserts
  • Snacks
  • Holidays
menu icon
go to homepage
  • Start Here
  • All Recipes
  • Recipe Filter
  • Cookbooks!
  • Our Story
    • Facebook
    • Instagram
    • Pinterest
    • YouTube
  • search icon
    Homepage link
    • Start Here
    • All Recipes
    • Recipe Filter
    • Cookbooks!
    • Our Story
    • Facebook
    • Instagram
    • Pinterest
    • YouTube
  • ×

    Bless This Mess > Recipes > Breads

    Buttermilk Biscuits

    Published: May 3, 2022 · Modified: Oct 28, 2022 by Melissa · 33 Comments

    • Share
    • Tweet
    • Mail
    Jump to Recipe·Print Recipe
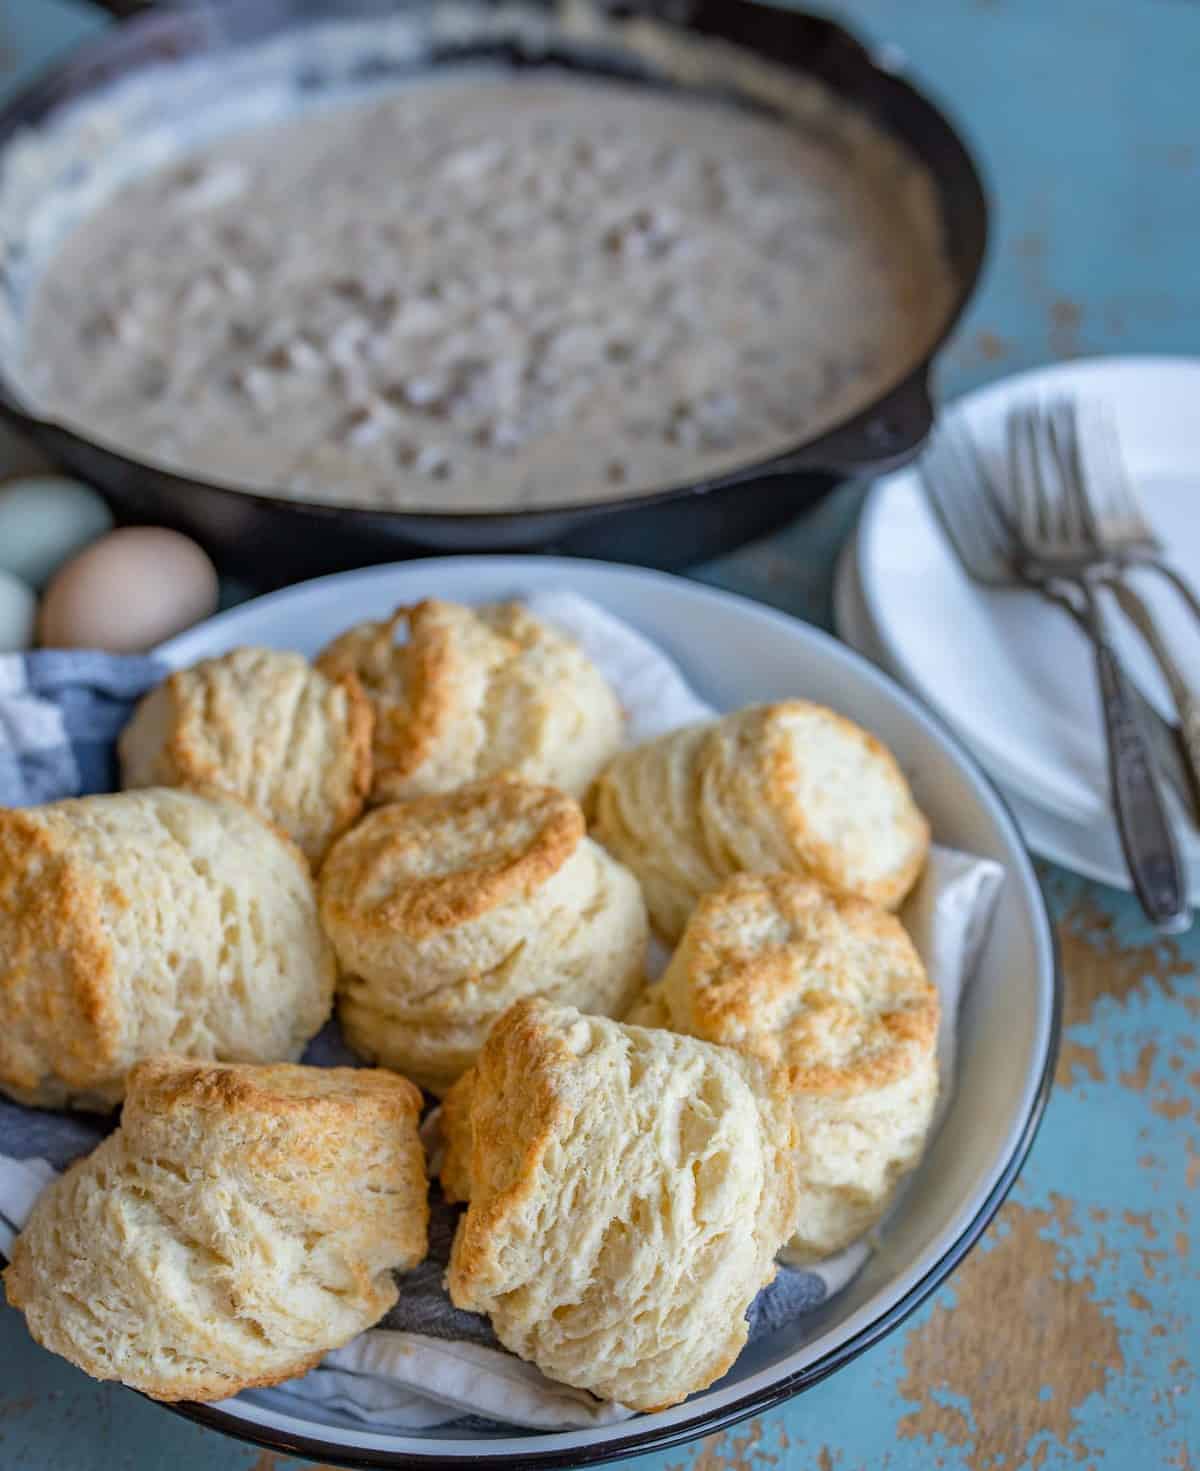
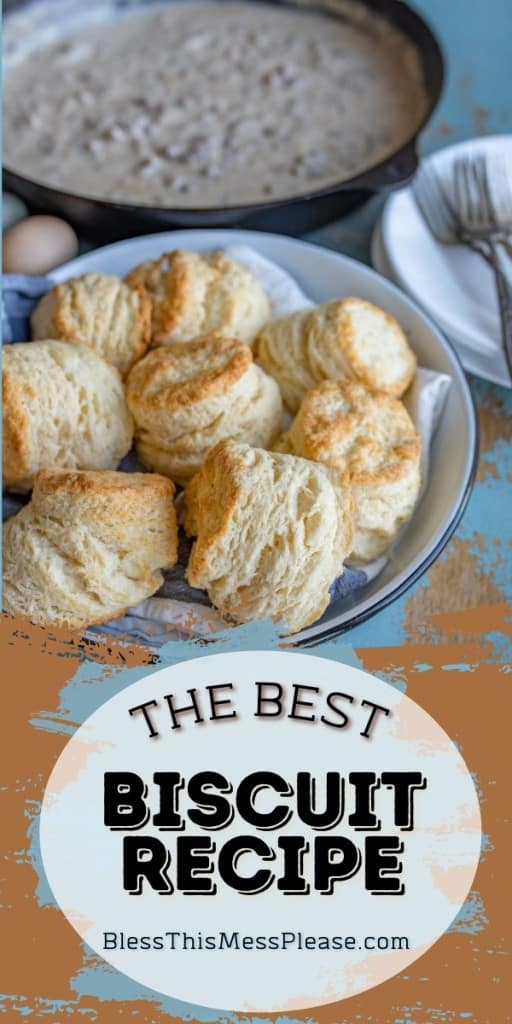
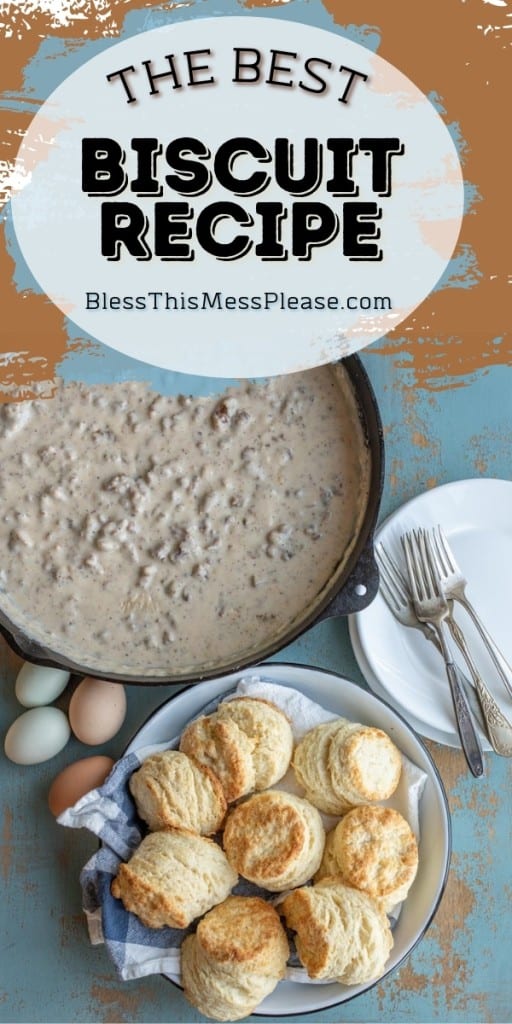
    pinterest pin with title that reads "The Best Biscuit Recipe" plate of rustic homemade baked biscuit and a cast iron skillet of gravy in the background
    pinterest pin with title that reads "The Best Biscuit Recipe" plate of rustic homemade baked biscuit and a cast iron skillet of gravy in the background
    pinterest pin with title that reads "The Best Biscuit Recipe" plate of rustic homemade baked biscuit and a close up of one in a hand
    pinterest pin with title that reads "The Best Biscuit Recipe" plate of rustic homemade baked biscuit and a close up of one in a hand

    The best recipe for extra tall, flaky and fluffy Buttermilk Biscuits. They taste amazing on their own or piled high with sausage gravy, butter, or jam! This is the only biscuit recipe you need!
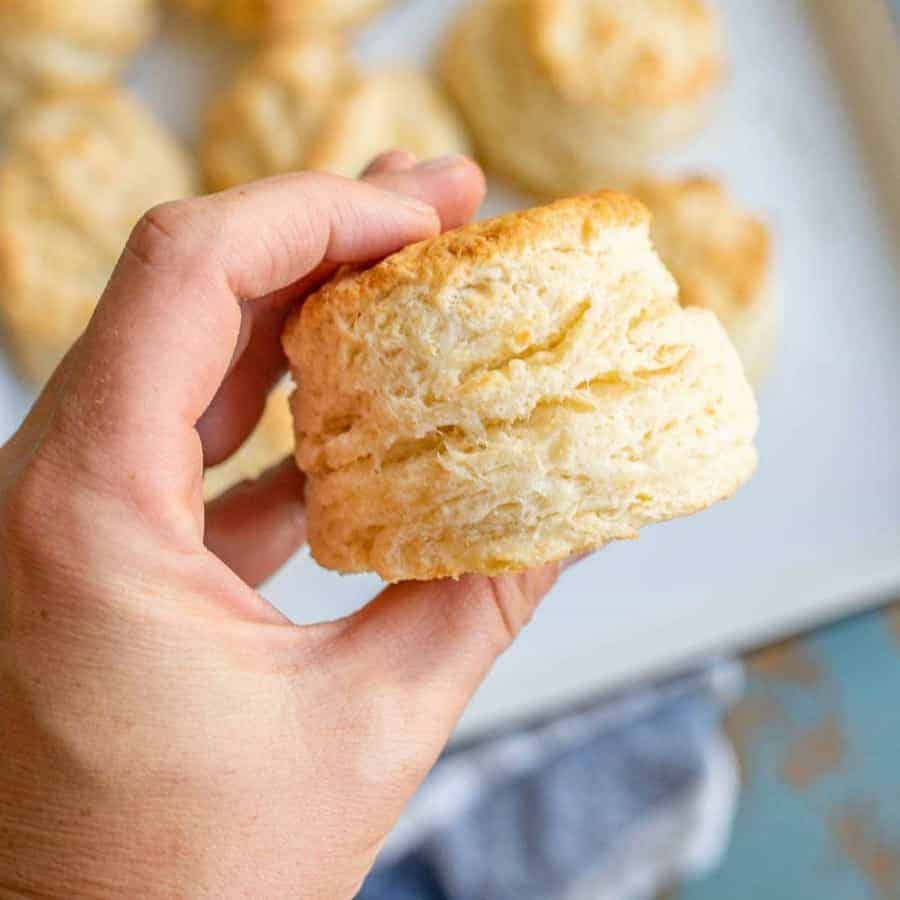
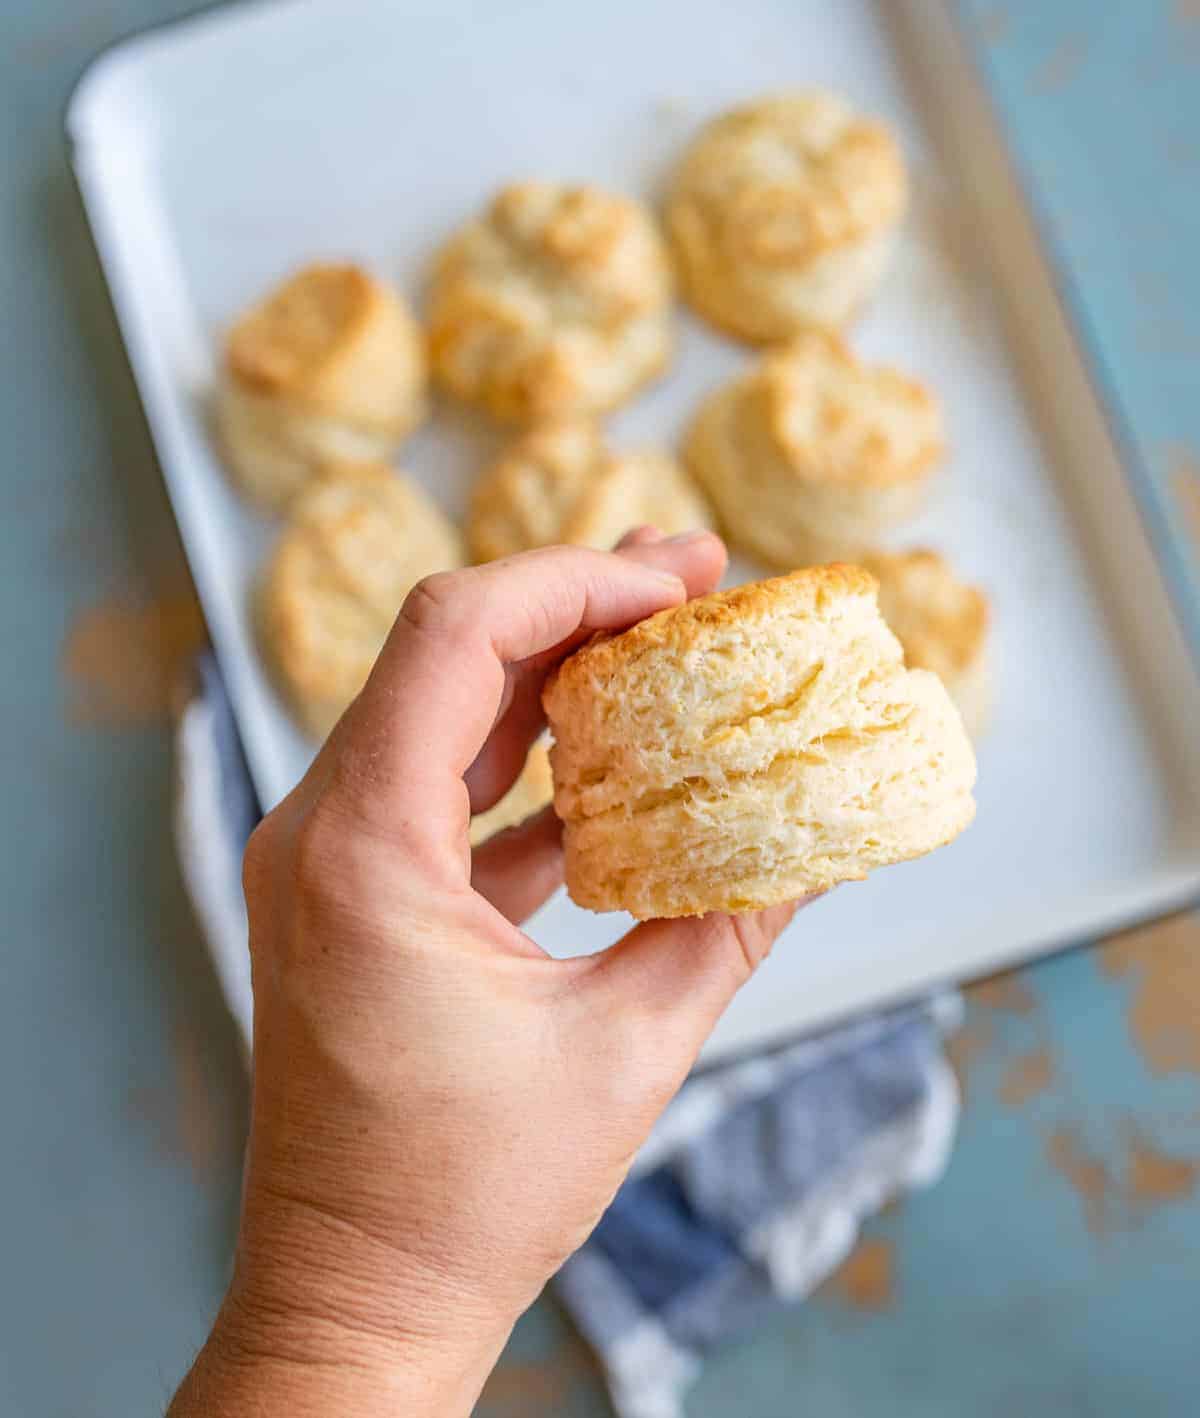
    hand holding a biscuit so that you can see the flaky layers on the side

    The Best Homemade Buttermilk Biscuits

    I have a tried-and-true butter biscuit recipe that I use all the time. I use it so often that I have it memorized. That being said, I was on the hunt for a traditional buttermilk biscuit recipe. That's the funny thing about loving to cook and bake - you're always looking for the next best recipe. Why use buttermilk in a biscuit, you might ask? Well the acid from the buttermilk reacts more prevalently with the baking powder and it lends to biscuits that are extra tall and fluffy. This recipe is also unique in the fact that there's an egg in it. Yes friends, an egg in a biscuit recipe. I found that it made the dough really nice to work with and made the biscuits extra tender.

    These biscuits are perfection.

    Ingredients:

    • All purpose flour: this is the back bone of the recipe, I like using it because I always have it on hand!
    • Sugar: just a little to add a little flavor and balance
    • Baking powder: this is what helps react with the buttermilk and make extra fluffy and tall biscuits
    • Salt: just a bit for balance and flavor
    • Butter: using cold butter and working it into the flour makes for flaky layers in your biscuits
    • Egg: not traditional in biscuits but this helps everything come together
    • Buttermilk: this is the ingredient that helps to add tenderness and flakiness to the biscuits as well a flavor! It's magic. If you are new to using buttermilk or don't have any on hand, read this post for substitutions or how to make your own.

    Buttermilk Biscuits Step-by-Step Instructions

    1. Add your sugar, baking powder, and salt to the flour and mix to combine.
    2. Grate the butter into the flour and mix to combine.
    3. Add the egg and buttermilk and stir until it all comes together.
    4. Turn it out onto a lightly floured surface and roll it out and cut with a biscuit cutter.
    5. Bake, serve, and enjoy! These are great on their own, but butter/jam/and or honey on top or to make breakfast sandwiches with or to serve under some sausage gravy.

    Storing Leftovers

    These are best stored in an air-tight container at room temperature (for 1-2 days) or in the fridge for 3-5 days. You can reheat them gently in the oven and they are good at room temperature. They also freeze very well.

    pan of biscuits ready to be served on a light blue table

    Tips and Tricks for Making the Best Buttermilk Biscuits of Your Life

    • Use a biscuit cutter. No biscuit cutter? Use a knife and cut the dough into squares. A sharp edge when cutting biscuits keeps the flaky layers from getting mashed together.
    • Make sure your baking powder is fresh. Baking powder plays a big rolE in this recipe. If you don't cook much, be sure to check the expiration date before adding it to your biscuits.
    • Use cold butter and cold buttermilk. The cold helps to form the flaky layers.
    • Pro Tip: use a cheese grater to grate cold or even frozen butter into Your flour mixture. Then you can finish working it in with a fork or pastry blender. It speeds up biscuit making a ton.
    • This recipe makes very large biscuits. You can make smaller biscuits by rolling out the dough to 1 to 1 ½ inches thick before cutting, getting almost double the number of biscuits. Adjust baking time as needed.
    biscuits on a white baking sheet all lined up, fresh out of the oven

    Frequently Asked Questions:

    Do I need a biscuit cutter to make this recipe?

    I prefer to use a biscuit cutter. However, if you don’t have one, simply use a knife and cut the dough into squares. A sharp edge when cutting biscuits keeps the flaky layers from getting mashed together.

    Why use cold butter for biscuits?

    Using cold butter helps to form the flaky layers that you want in a biscuit. Using cold butter will create the texture that makes these so desirable. Pro Tip: use a cheese grater to grate cold or even frozen butter into your flour mixture. Then you can finish working it in with a fork or pastry blender. It speeds up biscuit making a ton.

    Why is it important to not over mix biscuits?

    If you over mix or overwork the biscuit dough it will become tough and won’t be as tall as you want them. You want to mix the ingredients just until all the ingredients are combined. If the dough is still just a bit crumbly then you know that you haven’t over mixed the dough and you are good to go!

    What can I substitute for buttermilk?

    One of the best parts about buttermilk is that you can make it at home and substitute it for so many things. I wrote a whole post on buttermilk, it's substitutions, and how to make it at home. You can find more information on buttermilk here.
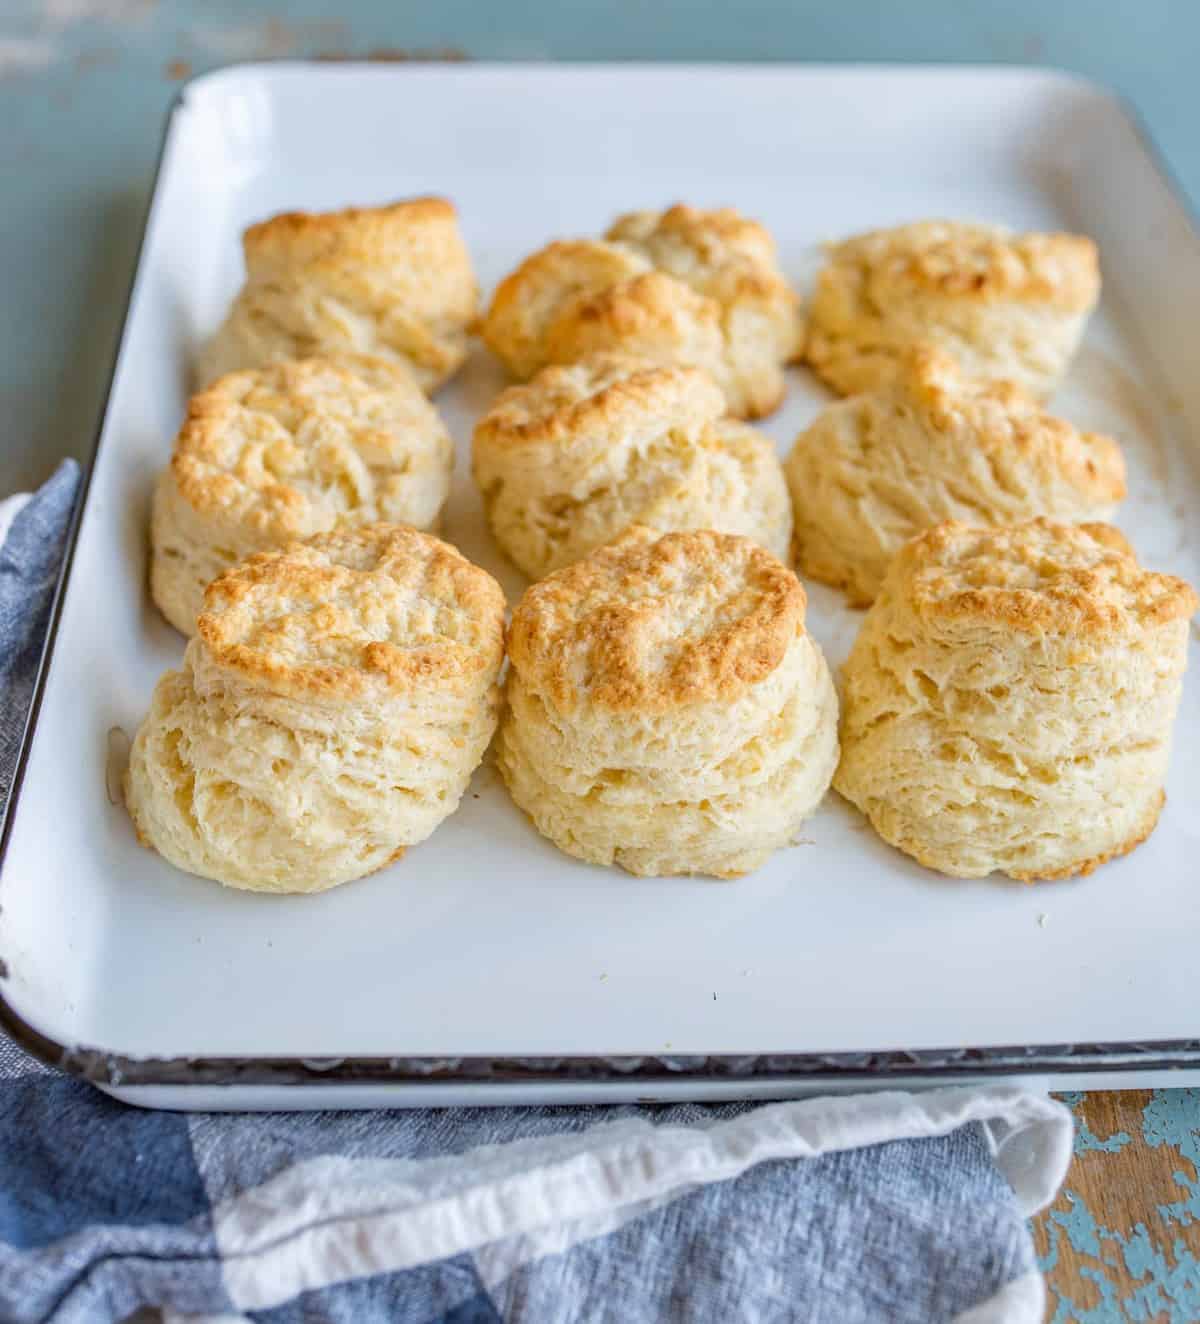
    hand hold a biscuit showing the layers

    Other Biscuit Recipes You'll Love

    • Pumpkin Biscuit Recipe
    • Maple Cornmeal Biscuits
    • Sausage Gravy to go with these amazing biscuits (the perfect breakfast!)
    • How to Bake Bacon in the Oven (so great for breakfast sandwiches with this recipe)

    If you’ve tried this easy homemade easy buttermilk biscuit recipe or any other recipe on Bless this Mess, then don’t forget to rate the recipe and leave me a comment below! I would love to hear about your experience making it. And if you snapped some pictures of it, share it with me on Instagram so I can repost on my stories AND add your photo to your comment so that other can see your creation.

    Print
    clock clock iconcutlery cutlery iconflag flag iconfolder folder iconinstagram instagram iconpinterest pinterest iconfacebook facebook iconprint print iconsquares squares iconheart heart iconheart solid heart solid icon
    Buttermilk Biscuits Image

    The Best Buttermilk Biscuits


    ★★★★★

    5 from 9 reviews

    • Author: Melissa Griffiths
    • Total Time: 30 minutes
    • Yield: 9-12 biscuits 1x
    Print Recipe
    Pin Recipe

    Description

    The best recipe for extra tall, flaky and fluffy Buttermilk Biscuits. They taste amazing on their own or piled high with gravy, butter, or jam!


    Ingredients

    Scale
    • 3 cups all purpose flour
    • 1 tablespoon sugar
    • 2 tablespoons baking powder
    • 1 teaspoon salt
    • ¾ cup cold or frozen butter
    • 1 large egg
    • 1 cup cold buttermilk (buttermilk substitutes here)

    Instructions

    1. Preheat the oven to 425 degrees F and line a baking sheet with parchment paper or a baking mat.
    2. In a large bowl, combine the flour, sugar, baking powder, and salt. Whisk together to combine well.
    3. Use a cheese grater to grate the butter into the flour mixture. Then use a pastry cutter or a fork to combine the butter and flour mixture well (you can use a fork for the whole process but using a cheese grater first works super well - I recommend it). The goal is to have pea-sized pieces of butter mixed into your flour mixture.
    4. Make a well in the center of the flour mixture and add the egg and buttermilk. Use a fork to whisk the two together and slowly bring in the flour mixture.
    5. Stir until the biscuits just come together, taking care not to over mix.
    6. Turn the dough onto a lightly floured surface and finish combining by lightly kneading the dough together.
    7. Roll the dough into a 2-inch-thick slab. Use a  biscuit cutter to cut out as many biscuits as you can and place them on the prepared sheet, 1 inch apart.
    8. Re-roll the dough and cut more biscuits until you have used all of the dough, adding a bit of flour to your work surface and rolling pin as needed. You should end up with 9-12 biscuits.
    9. Bake the biscuits for 15-18 minutes until the tops are very golden brown.
    10. Remove from the oven and serve right away.

    Notes

    • Use a biscuit cutter. No biscuit cutter? Use a knife and cut the dough into squares. A sharp edge when cutting biscuits keeps the flaky layers from getting mashed together.
    • Make sure your baking powder is fresh. Baking powder plays a big role in this recipe. If you don't cook much, be sure to check the expiration date before adding it to your biscuits.
    • Use cold butter and cold buttermilk. The cold helps to form the flaky layers in between.
    • Pro Tip: use a cheese grater to grate cold or even frozen butter into your flour mixture. Then you can finish working it in with a fork or pastry blender. It speeds up biscuit making a ton.
    • These make very large biscuits. You can make smaller biscuits by rolling out the dough to 1 to 1 ½ inches thick before cutting, getting almost double the number of biscuits. Adjust baking time as needed.
    • Don't have buttermilk? See buttermilk substitutions and how to make it yourself here.
    • Prep Time: 15 min
    • Cook Time: 15 min
    • Category: Side
    • Method: Oven
    • Cuisine: American

    Keywords: best biscuit recipe, the best biscuits recipe, homemade biscuit recipe, buttermilk biscuit recipe, homemade buttermilk biscuits, best buttermilk biscuits, how to make buttermilk biscuits, how to make biscuits, how to make homemade biscuits, how to make biscuits from scratch

    Did you make this recipe?

    Tag @blessthismessblog on Instagram and hashtag it #blessthismess

    pin for the post with text

    If the pictures in this post didn't get you hungry, you much have just eaten. I can't wait to make these again! When I was recipe-testing, I made 3 different recipe variations at once so we could compare them side by side. My kids had so much fun eating biscuits and telling me what they thought. This was the clear winner and I'm sure you'll see why.

    Enjoy this amazing biscuit recipe from my kitchen to yours!

    « Crockpot BBQ Pulled Pork
    Skillet Herb Chicken with Easy Quinoa Salad »
    • Share
    • Tweet
    • Mail
    Craving More

    Take the hassle out of meal planning with: Dinner Made Easy, a FREE 1 week meal plan with full shopping list, easy dinners, nutrition information, serving suggestions for each meal, and more!

    Subscribe Now
    about me

    About Melissa

    Melissa is dedicated to helping parents figure out the nightly questions, "What's for Dinner?!" with her no-fuss approach to cooking. Read more...

    Reader Interactions

    Comments

      Leave a Reply Cancel reply

      Your email address will not be published. Required fields are marked *

      Recipe rating ★☆ ★☆ ★☆ ★☆ ★☆

    1. janea

      January 31, 2023 at 9:16 pm

      My family loves your buscuits.... Thank you for this recipe. I make 2 batches at time. They freeze well, I had to figure my oven temp out. I cooke them on 450 and they are amazing

      Reply
    2. Susan

      January 21, 2023 at 8:08 pm

      Thank You for this fantastic recipe! The biscuits turned out beautifully, my husband told me "these are better than my mother used to make."

      Reply
    3. Debra Summers

      December 31, 2022 at 10:32 am

      Enjoyed your recipe for biscuits and gravy. Yum, made buttermilk biscuit recipe.
      Thank you

      Reply
    4. Dinah Rodriguez

      September 09, 2022 at 10:31 pm

      Im 55 and hadn’t made biscuits since my teens but as I did this recipe today, it’s the one I’m sticking with! Came out perfect; Follow all the tips! People raved about the biscuits!

      ★★★★★

      Reply
    5. Karen Haskell

      August 26, 2022 at 3:52 pm

      Do you use salted or unsalted butter and your biscuit recipe?

      Reply
      • Melissa

        August 27, 2022 at 12:39 pm

        I use salted because that's what I keep on hand but you for sure can use either.

    6. Anne T.

      March 07, 2022 at 3:09 pm

      I would like to make these gluten free with Cup 4 Cup gluten free flour. Have you tried the recipe with gluten free flour? Wondering if I need to make any other adjustments.

      Reply
      • Melissa

        March 08, 2022 at 2:48 pm

        I haven't tried them yet but if you did I would use a 1:1 baking flour and just swap it for the called for flour. I have really good luck with that 1:1 baking flour!

    7. Evan Degenfelder

      March 08, 2021 at 5:41 pm

      I would like your take on why the sugar in the recipe? I'm looking for a new buttermilk biscuit recipe and ran across this one, but I've never heard of putting sugar in. Do you think it adds to flavor? The rise?
      Thanks,
      Evan

      Reply
      • Melissa

        March 08, 2021 at 7:17 pm

        I like a sweeter biscuit and I think a little sugar makes a well balanced biscuit. If you don't like a little sweet to your biscuit though feel free to reduce it or omit it.

      • Margaret

        May 22, 2022 at 6:59 pm

        Generally, sugar is added to help the browning. I do not use sugar in a biscuit or in cornbread- sometimes sweetness masks the flavor of the ingredients.

        ★★★★★

    8. Glinda

      August 01, 2020 at 10:29 pm

      I had to come and leave a comment because these absolutely WERE the best buttermilk biscuits we have ever made, or even tasted. We doubled the recipe (so 2 cups of buttermilk and 6 cups of flour, 2 tablespoons of sugar, 2 eggs, 1 and a half cups butter, and double the baking powder) and used Himalayan pink salt. (we were just curious). We added one teaspoon of baking soda (that was not intentional, it was an accident, just an FYI) and after rolling out the biscuits, we cut them into scone triangle shapes just so there would be more crunch on the edges and so we could see the layers. We chilled the biscuits in the fridge for 45 minutes after rolling out. We had preheated the oven to 350 before we started the dough. When we were ready we placed both pans, one on bottom rack and other on top and hoped for the best. In 18 minutes we saw gorgeously risen and golden brown buttermilk scone biscuits and you could actually see each layer just like the canned "flaky layer" Pillsbury brand biscuits at the store. We've made our share of buttermilk and regular biscuits, but none were as delectable as these were today. We are blown away. This is the ultimate recipe and method!!! Thank you so much!!! Tried the rest and this IS the BEST. No need to keep looking after this recipe. Even my youngest noticed and he's a fan of the canned biscuits, so it made quite an impression on us. These are going with our beef stew tonight and I'll have to give some to my neighbors or they'll never believe me how good they came out. You rock! Love from Texas <3

      ★★★★★

      Reply
    9. Julie Catherino

      July 13, 2020 at 6:42 pm

      Another delicious, easy to follow recipe! We used garlic butter on two biscuits and can't wait to eat the rest! I should've made have of the recipe because it is just two of us, but we'll definitely eat all 12!

      ★★★★★

      Reply
    10. Nicole

      April 20, 2020 at 11:52 pm

      These are perfect! So delicious and fluffy! I sometimes throw cheddar and chives in the dough and brush with garlic butter... sooo good!

      ★★★★★

      Reply
      • Melissa

        April 21, 2020 at 3:17 pm

        Chive and cheddar is my favorite! I need to plant another chive plant, I miss mine at our last house!

    11. Natalie

      February 06, 2020 at 12:29 pm

      Mmmmmmmmm. Just made these for my husband's birthday request for biscuits and gravy for breakfast. I have a high standard, and these are delicious, even alone! Thank you!

      ★★★★★

      Reply
      • Melissa

        February 06, 2020 at 3:18 pm

        Happy Birthday to Husband! Thank you so much for coming back to leave a review too, so helpful!

    12. Vivian Robaldo

      January 11, 2020 at 5:48 pm

      I'm a new baker and we're only two people at home. How can I break down this recipe in half? (or 1/3?) Thanks! 🙂

      Reply
      • Melissa

        January 12, 2020 at 8:23 am

        Yes! It will work great if you reduce the recipe by scale, no issues there!

      • Vivian Robaldo

        January 12, 2020 at 9:05 am

        Melissa, could you tell me please, if divided in half, how much BUTTER should I use and what to do about the EGG? Like I said, I'm totally new at baking and just succeeded at making my very first pie crust, my only experience with dough:) My email is vrobaldo@hotmail.com if you like to send me a PM. Thanks! Waiting to make this weekend, please....

      • Melissa

        January 13, 2020 at 3:03 pm

        You would use 6 tablespoons of butter and you can just add the egg to a bowl, whisk it together well, and measure out 2 tablespoon of mixed egg! It'll work great.

    13. Abby

      August 29, 2019 at 9:30 am

      Could these be frozen either before being baked or after? Would love to make for a large crowd.

      Reply
      • Melissa

        August 29, 2019 at 10:47 am

        I haven't played with it much but if I were trying, I'd try to freeze the cut out biscuits and then either bake them thawed or bake them frozen. I think that would be the best. Will you let me know if you try it and they work out?

      • Kaylee

        January 29, 2020 at 12:01 pm

        Personally I always make a few batches and freeze them. Then take them straight from the freezer as needed. They always turn out just as well as freshly made ones!

        ★★★★★

      • Melissa

        January 29, 2020 at 6:08 pm

        So are you making and baking or are you freezing the dough and then baking?

    14. Elma

      August 16, 2019 at 2:35 pm

      Hello - you don't specify salted or unsalted butter. Could you do so please?

      Reply
      • Melissa

        August 17, 2019 at 9:57 am

        Both work great, use what you have! I normally use salted.

    15. Wanda Smith

      July 14, 2019 at 8:51 am

      These turned out so fluffy and delicious! Thanks for a great recipe!

      ★★★★★

      Reply
      • Melissa

        July 14, 2019 at 10:12 am

        Woohoo! So glad that they turned out great for you! Happy eating Wanda!

    16. Nicole C.

      June 18, 2019 at 12:40 pm

      These really are THE BEST! I'm not sure if it is the egg that makes them extra special, or what, but these are going into our family cookbook because I know we will be making them again and again. On the fly, I added chives from our garden and some grated sharp cheddar (I didn't realize you had a chive biscuit recipe). Then I melted some butter with garlic to brush on the tops... waaaaaaaay better than any chain restaurant can put on the table! I just reheated one for lunch and they are STILL to die for, three days later!

      Reply
      • Melissa

        June 18, 2019 at 5:44 pm

        Girllllll that sounds SO good! I think I'll try that myself! Thank you for sharing and enjoying making the recipe your own.

    17. Sue Laird

      June 11, 2019 at 8:59 pm

      I just made these and mine actually look EXACTLY like the ones pictured here. (This is a 1st! ?) Additionally, they taste great too! Will make again.

      ★★★★★

      Reply
      • Melissa

        June 12, 2019 at 8:24 am

        Isn't that the best feeling? So glad you enjoyed them. Thanks for the review!

    Primary Sidebar

    I’M MELISSA, AND I WANT TO HELP YOU FEED YOUR FAMILY WHOLESOME FOOD.

    As a hobby farmer and mom of five, I’m all about keeping it simple in the kitchen. I want healthy meals that feed my family well, and then I want to get back to my (messy) life. Let’s work together to find something yummy for your dinner table.

    More about me →

    Popular

    • Chocolate Babka
    • 5 Ingredient Slow Cooker Chicken Legs
    • Easy German Pancake Recipe
    • Mexican Hot Chocolate
    Dinner Made Easy

    Get Recipes & More for Free!

    Get my FREE Dinner Made Easy meal plan, exclusive recipes, giveaways, and behind-the-scenes updates! Get my newsletter or a new recipe every day! Unsubscribe if you aren’t into it.

    Subscribe Now

    Footer

    ↑ back to top

    SEEN ON

    About

    • Privacy Policy
    • Privacy Tools.
    • Terms Of Service.
    • Accessibility.
    • Bylaws.

    Newsletter

    • Sign Up! for emails and updates

    Contact

    • Contact
    • About Us
    • Cookbook FAQ
    • Find A Recipe!

    As an Amazon Associate I earn from qualifying purchases.

    Copyright © 2022 blessthismessplease.com. All rights reserved.

    • Facebook
    • Pinterest
    • Twitter