Perfect homemade Subway bread recipe, just like the restaurant. This recipes makes a perfect copycat loaf of Subway bread for sandwiches at home.
I’ve been subjecting myself to a crazy thing that I saw a friend on the interwebs doing. I don’t know if she made it up, or saw it somewhere and wanted to do it, but either way, it’s crazy. She vowed to only spend $20 a week for a whole month. $20 for food, gas, eating out, EVERYTHING! Everything except for bills and things you have to pay.
After a harsh slap in the face when we did our taxes and a few other bumps in our road, I decided it was something that I wanted and needed to do, too. The timing is great for me. Since we are planning on moving in a few weeks I don’t mind that this little project is going to eat up my food storage (less to move!), and every penny saved before April 15th is needed… who knew you should be paying quarterly taxes when you become self-employed?! We missed that memo
$20 gets you nowhere, really. Last week I bought 4 gallons of milk, 2 loaves of bread, 6 tomatoes, and a package of salami. This week I need to buy gas (should have filled up before I decided on this little adventure…) and milk will suck up the rest. I wasn’t even going to tell you about it because I was afraid I wouldn’t be able to do it, but I think being accountable will be good for me.
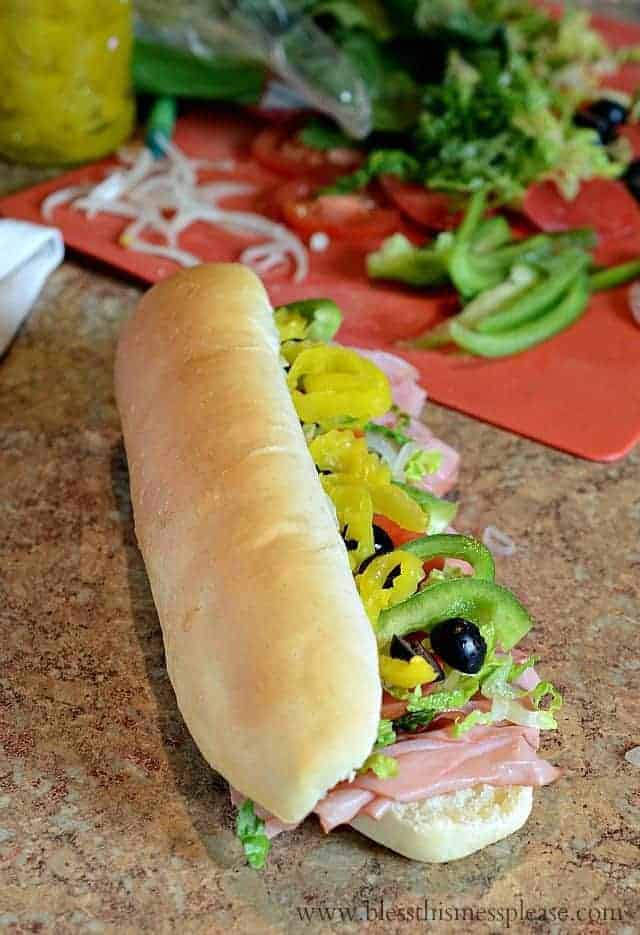
All that being said, I needed a Subway sandwich on Friday and I needed one bad. I had $6 left for the week and one foot-long isn’t enough for our family of 5. So I decided I’d just make some at home (and spent the money on enough salami for about 6 sandwiches). The key to this was finding the perfect homemade Subway bread recipe. Those sub buns are key! I decided to just make white bread too which isn’t normal for me, but I really wanted to make sure I felt like the experience was a treat.
You guys, they turned out amazing! Really and truly. Plus, it wasn’t all that hard to do. Next time I’m going to double the recipe so that I have some leftovers and I’m going to try to freeze them. Lucky for me, I found a jar of pickled banana peppers in the pantry too. My sandwich was half banana peppers and half everything else because those are my favorite thing ever.
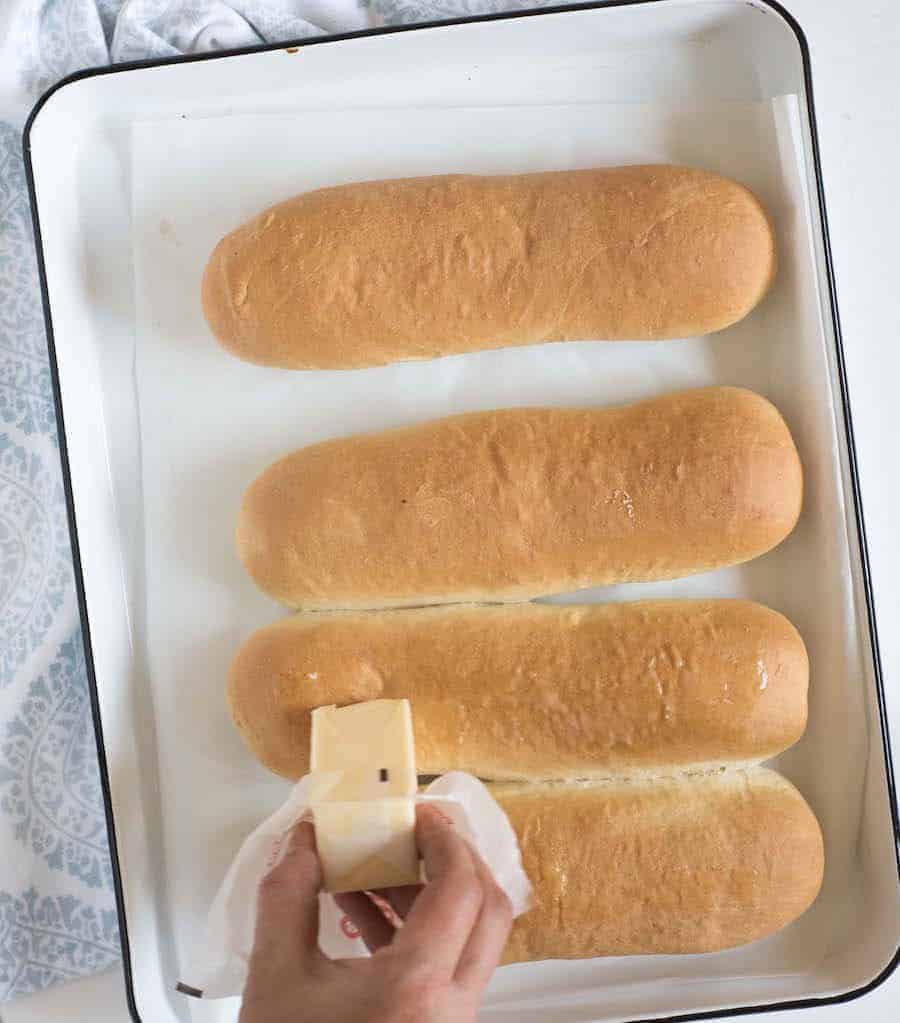
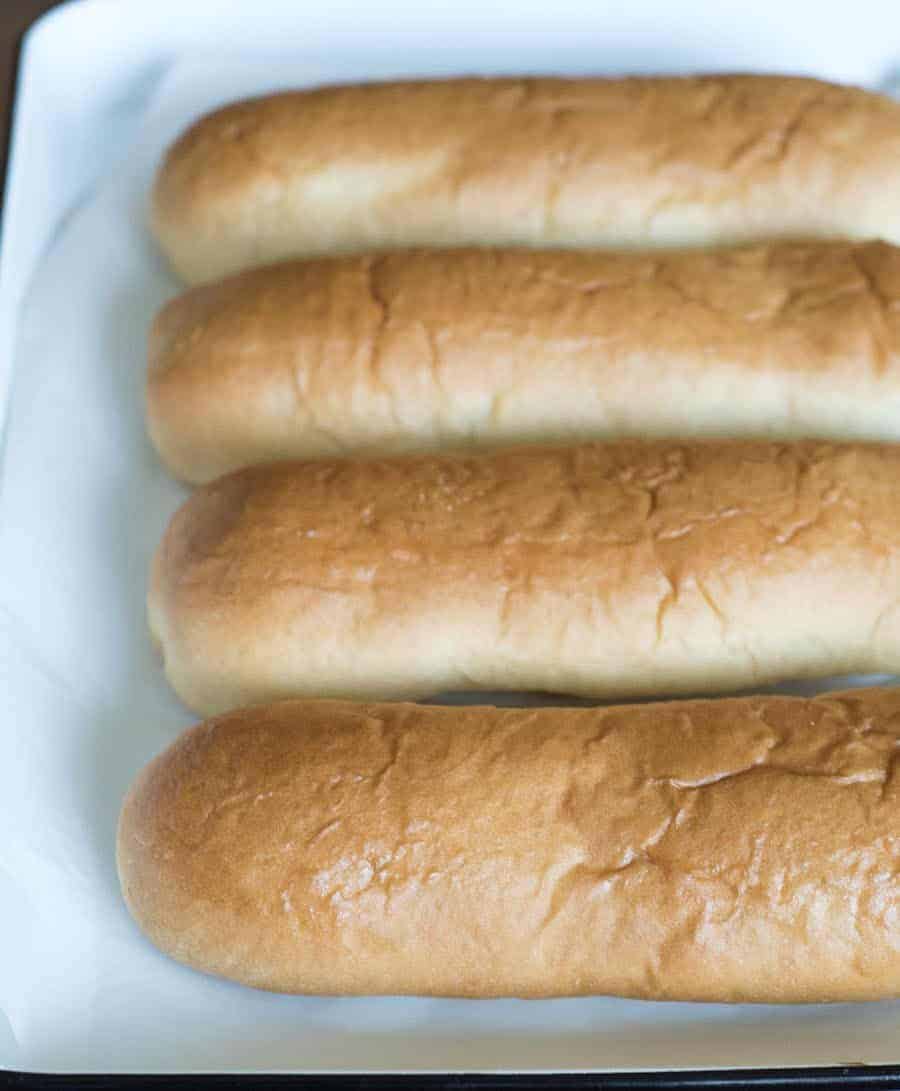
The homemade Subway bread was just perfect. It had a very soft crust (thanks to a little butter and letting them steam in a towel as they cooled) and a light middle, and it kind of smashed into nothing when you ate it. Just like the real thing. Sure, Subway is cheap, but it’s pretty fun to make them at home. Your family will be shocked and amazed at your mad skills and you’ll be able to put on as many banana peppers as your heart desires. Best deal ever!
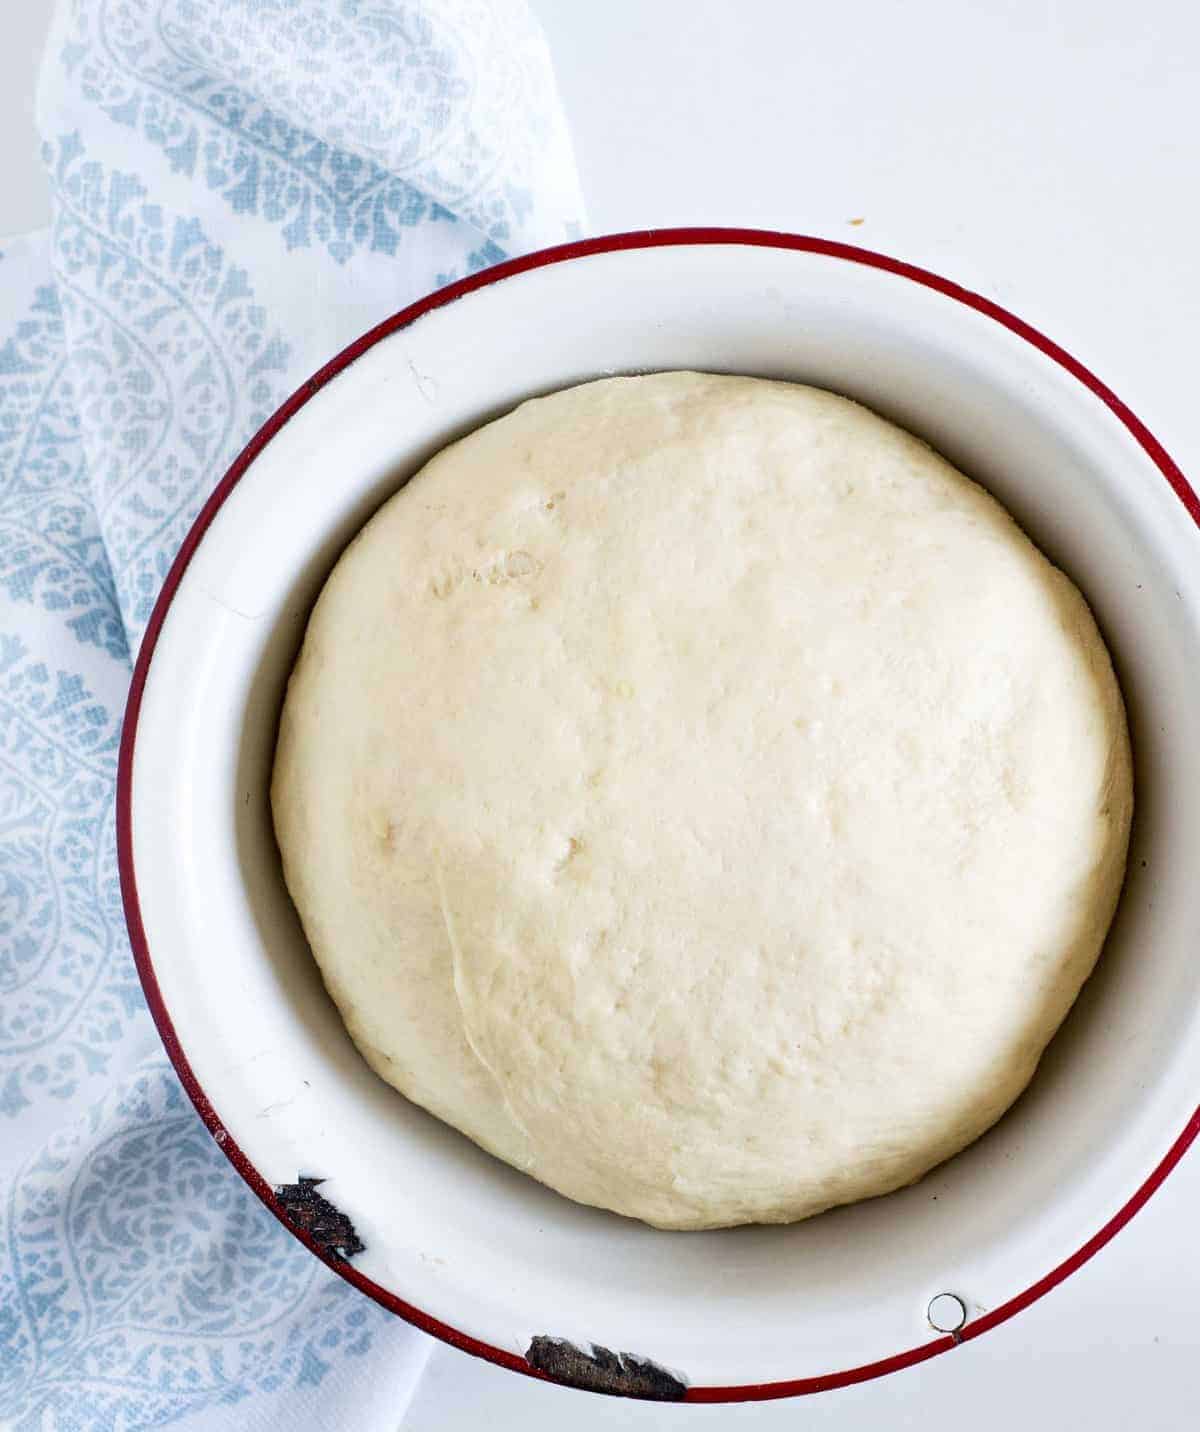
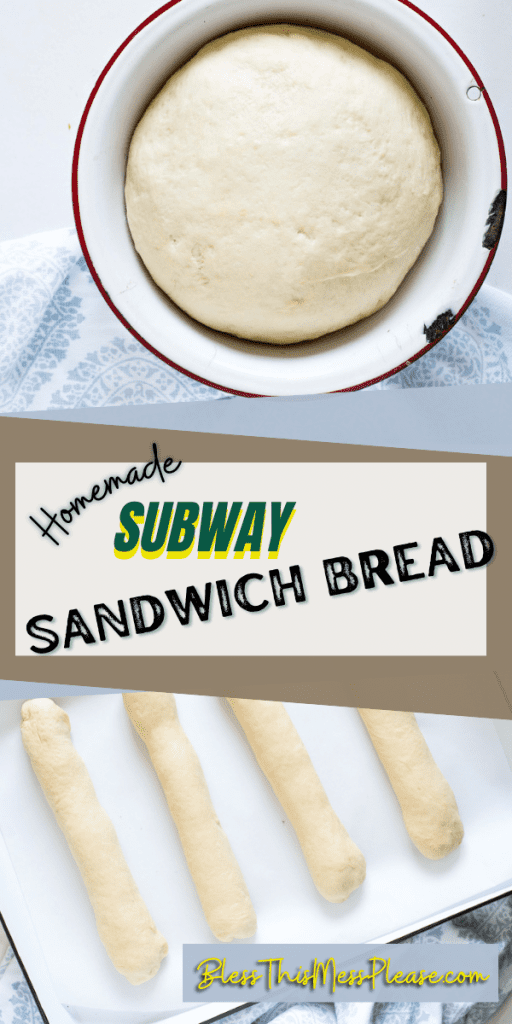
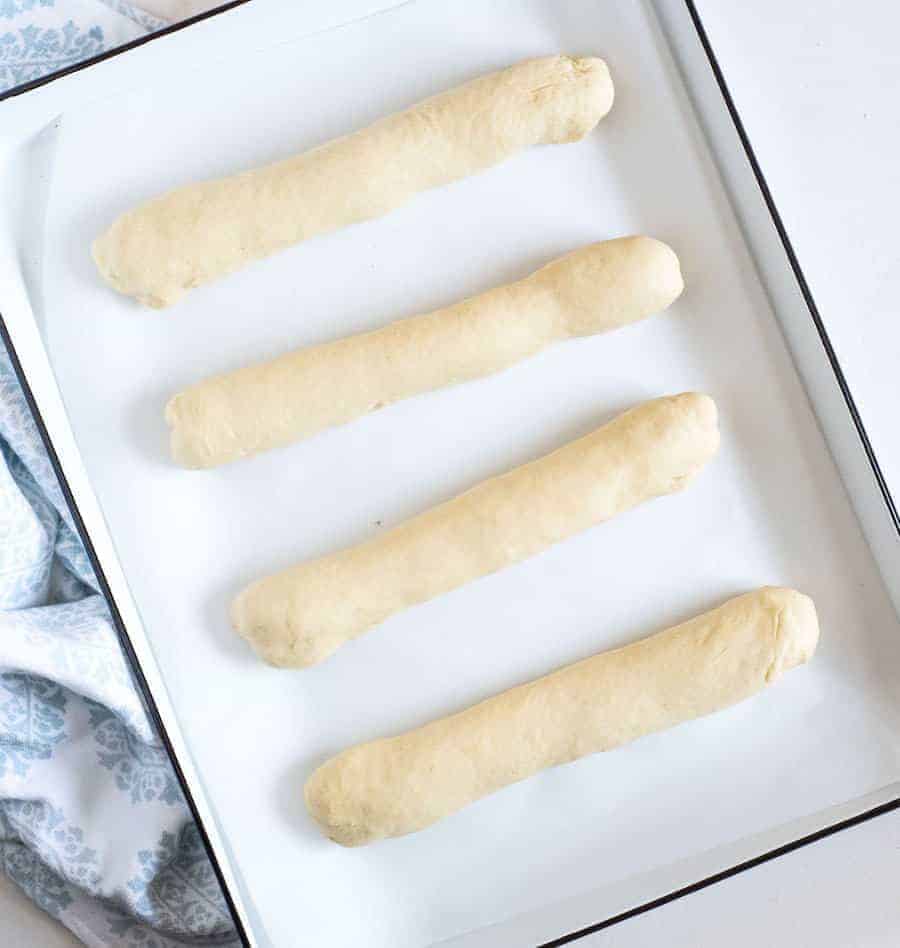
Here’s a picture of the dough after it has risen. Below is a picture of the sub buns rolled out and ready to rise (they’ll be about doubled in size before baking). Isn’t bread dough pretty?
Tips and Tricks for Making Subway Bread at Home
- If you haven’t ever made dough before, the goal is to add just enough flour for it to be a soft but not sticky dough. If you add too much flour, you’ll end up with Subway bricks instead of bread.
- No stand mixer? This recipe can be made by hand, just be sure to knead it for a full 8 minutes. That’s a long time but developing the gluten helps the bread to be soft.
- This recipe works well with half whole wheat flour mixed with half all-purpose flour for whole wheat sub buns.
- I have had a few people email me and say that just before baking they brushed the outside of the dough with olive oil or butter and then sprinkled on some Italian seasoning and some Parmesan cheese for a great homemade Subway Italian Herb and Cheese bread. I can’t wait to try this myself.
- I love making this bread and putting on these vegan meatballs. Tasty meatless meal!
- This bread froze just about as well as other breads. It was still soft but seemed a bit dryer after freezing. Fresh is best but they do freeze and thaw well.
- Like pickled banana peppers as much as I do? Check out my recipe on how to make easy refrigerated pickled banana peppers (great use for extra garden or farmer’s market produce).
Craving more? Subscribe to Bless this Mess to get new recipes, meal plans, and a newsletter delivered straight to your inbox! If you try this recipe, let me know what you think! Leave a comment, pin it, and don’t forget to tag a picture #blessthismesseats on Instagram. I love to see your kitchen skills in action!
Print
Homemade Subway Bread Recipe
-
Prep Time: 50
-
Cook Time: 25
-
Total Time: 1 hour 15 minutes
-
Yield: Makes 4 9-inch sub buns
-
Category: Bread
-
Method: Oven
-
Cuisine: American
Description
Perfect homemade Subway bread recipe, just like the restaurant. This recipe makes a perfect copycat loaf of Subway bread for sandwiches at home.
Ingredients
- 1 cup warm water (110 degrees F)
- 1 1/2 tablespoon yeast
- 1 tablespoon sugar
- 1 1/2 teaspoon salt
- 4 tablespoons olive oil
- 2 1/2 to 2 3/4 cups all-purpose flour
Instructions
- In the bowl of your stand mixer, add the water, yeast, sugar, salt, and olive oil. Let the mixture stand for 5 minutes.
- Add 1 cup of flour and mix with the dough hook for 3 to 5 minutes. Add an additional cup of flour and mix until well combined. Continue adding the flour, 1/4 cup at a time, until a soft dough is formed. The dough should still stick to the bottom of of the bowl, but pull away from the sides. Let the dough mix for around 8 minutes total.
- When the dough has come together but is still sticking a bit to the bottom of the bowl, turn it out onto a lightly floured surface and knead until smooth. The dough should be very soft. Shape the dough into a ball and return it to the bowl. Cover the bowl with plastic wrap and allow the dough to rise for a half hour.
- After the dough has risen, turn it out onto a clean surface and divide it into 4. Roll each piece of dough into a long skinny loaf that is about 9 to 10 inches long.
- Place the rolled loaves onto a baking sheet lined with parchment or a baking mat. Repeat with the rest of the dough. Allow at least 2 inches between each loaf on the pan.
- Cover the loaves with a greased piece of plastic wrap and allow the loaves to rise until doubled, about an hour.
- Towards the end of the rising time, preheat the oven to 350 degrees. When the loaves are ready, bake them in the preheated oven for 25 minutes.
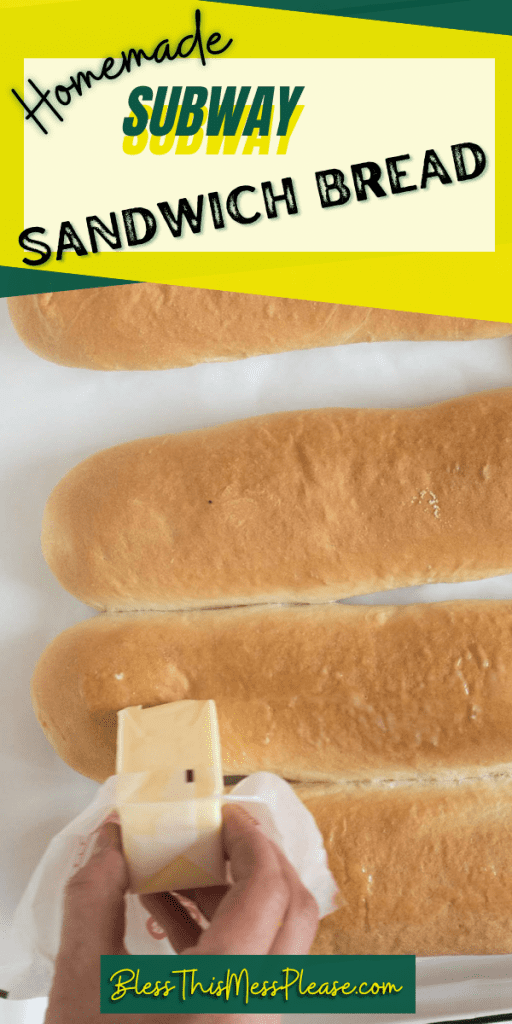
- When the loaves come out of the oven, rub the tops with a stick of butter and cover them with a dish towel to cool.
- Let the loaves cool for at least 30 minutes before cutting down the middle and topping with your favorite sandwich fixings.
Notes
Rubbing the loaves with butter and covering them with a towel to cool are part of what keeps them very soft, so be sure not to miss those steps.
Keywords: subway bread recipe, subway copycat recipe, easy hero bread recipe, best sandwich bread recipe, subway bread
Recipe adapted from Copycat Recipe Guide.
Just top with your favorite sandwich toppings and a heavy hand of mayo and you’ll have yourself something ridiculously close to an authentic Subway sandwich made at home. Even if you aren’t craving Subway, this homemade Subway bread recipe is a great one to keep on hand for any future hoagie needs.
This recipe was originally published in March 2013 and republished in July 2017 with new pictures, new text, and an updated based on retesting and reader feedback. Enjoy!
Totally going to try this…I think they pump out the smell of their bread just to draw you into the restaurant 🙂
I think the same thing! And you know what… Husband was working outside and I had the bread out, veggies being chopped, and he said it ever smelled like Subway which was totally a complement! It smells SO good.
Hi I have an electric ovan upto 250. Is it ok to make this loaf.
Your oven is probably marked in Celsius. Since 350°F equals 180°C, if you bake at 250°C, you will get burned buns, especially if it’s an electric oven.
Looks so yummy! We will be trying these this week. Thanks for the great recipes! Good luck on your $20 a week.
This looks amazing!! YUM!
I would LOVE for you to join my Link Up!
http://www.pluckys-secondthought.com/pluckys-link-up-3/
This is great! Sometimes I walk by a Subway and I can smell their bread baking (I’m sure it’s a marketing trick), and I don’t even want a sandwich I just want a loaf of their bread. Unfortunately, they don’t sell just the bread – I’ve asked. Now I can make it myself!
Actually, I’ve asked if I could just buy the bread by itself, and they told me that it would be the same price for “just the bread” as for the whole sandwich. I can never bring myself to pay for the sandwich and just take the bread though. I guess I’m a sucker that way. lol.
You could always buy the sandwhich and put all the toppings on the side. /shrug
lol.
Was going to suggest the same thing. 🙂
Oh that’s just terrible. The subways here sell the loaves for a dollar. But I’m all about making my own stuff at home to save as much money as possible.
Luck for you Kathy. I’ve tried to buy just the bread, always told would be same price as sandwich. I would pay $1 in a heartbeat! Thanks for letting us know some places it is possible.
This sounds like such a wonderful idea! Please share how it goes!
Pinned this and am so gonna try it!
We’re glad you liked the recipe! We have versions for all the different Subway bread varieties as well as most of their cookies.
http://www.copycatrecipeguide.com/Category:Subway_Recipes
Trying this tonight. Partially because I don’t want to go grocery shopping and mostly because I LOVE sandwiches!! And $20 a week??? That would be a minor miracle in my house! Good luck 🙂
Tried it, Loved it! Thanks!
These buns look legit! Man I’m so hungry now! I too have been trying to live on peanuts… but $20 thats not a lot! I find I try to stay at home a lot, we go to the library for an outing. (And go to lunch at my moms!)
If you don’t have a stand mixer, does doing it by hand work?
Yes! Just make sure you spend the time kneading it because it will take longer to develop the gluten by hand – knead maybe 6-8 minutes by hand and it should do well!
Thanks so much! Can’t wait to try!
Could I make the dough in my bread machine then hand roll and bake it ?
For sure! Let me know how it turns out!
Ok, something isn’t working for me! The first batch I followed exact measurements and my dough was very strange (I might have killed the yeast?) and they baked ROCK hard. My second attempt last night I only used 2 1/2 cups flour and the dough worked much better. However, they didn’t puff up in the oven and we ended up with rather flat loaves. Everyone still gobbled them up, but I’m determined to get this right! I make homemade pizza dough once a week and never have a problem. I applied the same guidelines, as you mentioned also, that the dough should stick to the bottom but not the sides. At 2 1/2 cups the dough was a nice ball on my dough hook still stuck to the bottom….it kneaded very easily and doubled in size in the bowl and almost as loaves (they kinda spread out a little). It was a beautiful dough!!! I’m not giving up…but I am out of flour! LOL
Definitely sounds like a yeast issue to me on the first batch and maybe an over-rising issue on the second… is your yeast old?! An old yeast might not be able to handle the second rise and baking, resulting in flat bread when you are done. Hmmm. I’m so curious! I’ll pop over and we’ll make them together next time! Deal?!
DEAL! Im going to try this again for dinner tonight. This time I bought yeast in a jar and have been using it successfully for pizza crust. If it doesn’t work this time then It’s definitely user error!!
What speed and brand of mixer are you using to mix your dough with? If you are mixing the dough for 8 minutes at high speed, it could be that you are beating the dough too much. Perhaps, try mixing your dough at a lower speed. I used a Bosh Universal Mixer and followed the directions to a tee and the bread came out perfect; I mixed my dough on the lowest speed; had I mixed it on a higher speed with my mixer the bread would have performed exactly as you have described. Also, with my mixer depending on the room temperature, ingredients, and all other factors i; when the dough starts to pull away from the sides of the bowl; I’m through mixing! Once the dough starts to pull away from the bowl, regardless of rather you are making your dough by hand or using a mixer that is your first sign that your dough is ready to be formed, and let rise…
Change your yeast
i’m shocked you spent precious $$ on bread 😉 good luck! i want to heard more about how the $20/week goes.
?? I didn’t buy it, I made it! That’s why it made it so cheap 🙂
Thank u… Any advice for a student who does not have a mixer? Can I do this all by hand?
Of course! Just be sure you are watching the clock and knead, knead, knead. You are the one working the dough and the gluten and it takes a lot of work 🙂 Be sure to mix and knead for as long as it says and it will be great. And ask for a mixer for Christmas 🙂
I just wanted to say that I absolutely love your blog. You are everything I aspire to be-so domestic and good at everything you put your hand to! I just pulled the bread together for dinner tonight. It’s rising now. My husband and I are so excited to have our own Subway sandwiches tonight. Thank you for sharing!
i was curious to see how many people don’t like the bread and am amazed that people are actually trying to re-create it. it’s fake. the ready made ingredientes have been sitting in a disribution center for months. it’s part of the corporate food machine.
I think that is part of the appeal of making it at home… you control what goes in it 🙂 Never a bad thing in my mind!
I totally agree, Tom. I can’t imagine why anyone would want to make subway bread on purpose! Any good italian bread from a local bakery is vastly superior!
If I lived within 2 hours of any sort of bakery I’d so be there… but living in the middle of no where means you have to do things on your own 🙂
Well…if I was going to make bread from scratch anyway, I’d make real italian bread instead.
….well then go for it and stop with the snide comments, Rob.
First of all, Mere,
I never said that I was going to make the bread, I was suggesting that someone else should try real italian bread instead. It’s very delicious. Second, merely stating facts is not being snide.
What a troll. This bread look delish!
Because Subway is popular for a reason, and for a lot of people we like the light texture of Subway bread versus the heavyness of traditional Italian.
Mine ended up hard as bricks!?!? I’m new to making bread did I miss something?
Was your yeast super old or you water too hot?! Both of those things will make the yeast no good…. bread making is a fun art to work on! I hope you don’t give up…
Yeast is brand new, I used thermometer for water…. I made a 2nd batch & they turned out the same way. I followed the directions STEP BY STEP….
Booo! That is so so frustrating isn’t it?! I’ve made this recipe at least 3 times since I posted it without a hitch… you much a bread demon in your mixer.
I just made this bread and it really didnt rise much at all. I am used to bread DOUBLING at least in size and this did not do that. Instead of having single loafs of bread I have thing breadsticks. They are still soft and taste good but i want actual subs bread to make sandwiches on. Any suggestions???? Also followed recipe to a T
Do you know if your yeast is fresh? I’d try adding more if you think it didn’t rise enough! Or sometimes I’ll make the loaves the size I want even if it makes less than a recipe calls for so that the end product is larger… does that make sense?!
Putting the salt and the yeast together at the same time will also kill the yeast. Try adding the salt with the flour.
Use 1 cup warm water and you’re good to go.
The recipe calls for 1 cup. Do you think that it needs 2? I’ve made it 4 or 5 times with the one cup and it’s ok for me. I’d gladly make it again though! What amount have you been using?
I know from experience it is best to let your yeast rise with the water and sugar before adding salt. Salt kills yeast so salt should be the last wet ingredient
Your yeast may have been bad even if new. I would proof it first before using it. I bought an expensive bag of SAF yeast from Amazon from a 3rd party seller. It was dead on arrival and was not expired. The 3rd party seller would not refund my money.
Melissa concerned about the first rise only being 30 minutes instead doubling in size. ? Thanks neurotic Terry
Terry, no worries! It’s just better to let it rise for a certain amount of time so that you don’t accidentally over rise it in the end or the yeast goes flat while baking.
wow,thanks for the info will try it.and can u do the honey oat bread they do
Melissa, thanks a lot for this recipe. I made it this weekend end and was a success! I want to make a large quantity and I need to freeze the dough. Do you know if I must freeze it after the first (half hour) or second (one hour) fermentation?
I can tell you (as a former sandwich artist.. In high school) the process of baking bread at Subway. The dough comes in (frozen) in 10″ sticks. The night before baking, the frozen sticks are placed in pans with handy silicon dividers and thawed overnight in a refrigerator. Once thawed, they go in a proofer (warm, moist oven type machine) for about an hour. Then baked. It’s been 20 years so I can’t recall temp and time 🙁
So I would say to freeze the sticks of dough before the 2nd rise?
I sure wouldn’t unless you want to store them long term… I doubt the freezing does much to change the end ingredient. Long live the sandwich artist!
[…] Homemade Subway Bread // Bless This Mess Please […]
1 1/2 tablespoon or teaspoon????
tsp. is teaspoon 🙂
I was wondering the same thing. I know that tsp = teaspoon, but your recipe calls for 1 1/2 tablespoons of yeast. I yeast packet is only 2 1/4 teaspoons, so this would be 2 packets of yeast. Seems like a lot for just 4 sub rolls.
It helps to make them fluffy! I use instant yeast most of the time but both work.
I love Subway bread it is so soft and my kids love it! This will be perfect for making sandwiches at home. Just pinned this winner recipe 🙂 Krista @ A Handful of Everything
Thanks for the pin love girl! Cute site BTW 🙂
I didnt read all the comments too many… Is there a recipe for the wheat bread?
Not yet… but I should! Thanks for asking though, just the motivation I need!
I was excited to make this & I followed the directions step by step….unfortunately they tasted nothing like Subway bread. I’m disappointed considering how long they took to make!!
That’s so sad… I wonder what the difference in our kitchens is?! I’ve made it a bunch of times and even had a “Subway” party (everyone brought toppings) and it was such a hit. Hope you can find what you are looking for.
[…] Check out this blog for a feedback on homemade Subway Bread recipe from http://www.copycatrecipeguide.com/How_to_Make_Subway_Bread and try it out yourself!https://www.blessthismessplease.com/2013/03/homemade-subway-bread-recipe.html […]
[…] Homemade Subway Bread Recipe […]
I don’t have a mixer with dough hook. Could I make this in food processor?
Do you have the dough blade for the food processor?! If so, I sure think it would work fine. Let me know if you try it!
Haven’t tasted mine yet but smells like subway and I just made our sandwiches for tomorrow. Unfortunately my oven temps r off so they were a bit dark but after sweating them under the towel they were super soft.
For people having a rising issue-combine the water sugar and yeast and let dissolve then add the oil salt and flour.
Thanks for sharing:)
I just wanted to thank you for this recipe.
I made this last night for Philly steak subs and they were phenomenal!
The bread is about twice as dense as Subway’s, but it is so good that this recipe is now my #1 sandwich bread.
Mmmm. That sounds wonderful! Thanks for the great comments.
Loved them
I have a bread machine, can I make this in that? I don’t have the handy dandy bread mixer you suggested?
I”m sure you could let the dough mix in there and then pull it out to shape the loaves… it might even be able to rise there! What do you think?? I say it’s worth a try 🙂
Just made this recipe. Bread turned out hard. Haven’t tasted them yet though – they are still cooling. Wish I had read these comments before I attempted. Also, wish I could post a picture of how they turned out.
Hhhmmm. I wish you could post a picture too! I wonder what went wrong. In my mind either the bread didn’t rise properly or your oven temp is off. What do you think? Were they edible?!
Made these last night and they were fantastic and so easy. Thank you, my new favorite recipe.
Thanks for the recipe! I too followed directions to a tee! My bread didn’t rise….hardly.at all….but went ahead and baked the loaves..they are buttered, covered and cooling now. Hoping they taste good for our meatball subs tonight! 🙂
can you just use a hand mixer?
Yes ma’am! A Kitchen aid is a girl’s best friend 🙂
These were amazing! I don’t know if it’s my climate (my apartment isn’t overly warm this time of year) or if I was mixing at too high a speed like someone mentioned (I used setting 3 out of 12), but I stopped adding flour at probably 2 and a quarter cups because if I could tell the dough was going to toughen up if I added any more. They turned out so nice and fluffy. 🙂 I bet this recipe would make awesome dinner rolls as well.
can one make this dough in a bread maker?
I bet you could mix it and let it rise in the machine! Let me know if you try it…
thank you I will try…also, do you have a thought on how to make bread machine bread
soft in the middle? I added an egg to the simple plain white bread recipe and it seemed to help…I guess I’m a sucker for soft ‘wonder bread’ type of bread…
What does T mean? I used teaspoons for everything with a T. I used the bread machine for the dough and cooked it in the oven. The bread felt a little heavy, I froze it and used it the next day and aside from the smell of yeast I thought it made a beautiful bread and the texture was perfect for subs. I wish I could get rid of that smell of yeast and I can taste it too.
Can u use oil instead of olive oil if u r out???
Yep! It might have a little less flavor but I bet you won’t notice…
Just made this and it turned out perfect!! Looking forward to a “subway” picnic tonight. Thanks for the recipe.
YEA!!!! And now I want some too 🙂 Thanks for leaving some feedback!
[…] Italian roll? Add some herbs on top and you have a wonderful sandwich roll. I took this recipe from Bless This Mess, and made a few adjustments, and I had sandwiches for a week! It was fantastic. This bread […]
Im a bad baker with that being said every time I make bread I call it sorry bread cause it is so heavy. I followed your times of the mixer and kneading it very little. Would kneading it not enough cause it to b heavy or over working the dough. Another question do u use active dry yeast or fast raise yeast.
@ Lesley ..a few factors here ..I proof my active dry yeast in the mixing bowl with the warm water ( temp. is a factor- somewhere around 110* + / – a couple of degrees ) …sugar , warm water , yeast ..I leave that to sit for 5 minutes or so ..you will know if the yeast is active .. add olive oil and salt .. .follow with the 1 cup of flour ..if you are using a KA mixer with dough hook , I mix for about 2 minutes on speed 1 then speed 2 for about 2 minutes .. add 1 more cup flour ..speed 1 for a minute or so and same on speed 2 ..you should be around 4 minutes mixing time ..I add flour by the heaping tablespoon for the next 2 with the mixer on low speed .incorporate for about a minute …stay with it at watch it .. as it starts to pull away from the side , I add another level tablespoon of flour . this is your call now ..I use to over add flour , but I have found leaving out the 1 more you wanted to add is best left out ..I use this one to dust my kneading area with ..you should be nearing your 8 minutes of mixing time in the mixer bowl ..the dough should be sticky feeling almost to the point of staying on your finger ..roll out on your “lightly” floured surface and knead by hand for about 3 minutes or so .. you should be getting a nice smooth dough now that no longer seems sticky ….form into a ball ..return to bowl with 1/2 tablespoon olive oil ..turn to coat evenly , cover , then rest for the 1/2 hour …I have found I would rather cut 3 loafs out of this batch over the 4 ..making 4 does not yield as large a bun as you would expect from the sandwich shop .. oven temp is critical to any baking ..I use an in oven thermometer as well as check with a digital one when the one in the oven reads 350 … I found 25 minutes was too long in my oven and brought them out aournd 19 to 20 minutes..baste with the butter and cover with a dish towel and be patient and wait the half hour or so cool down .. I am very pleased with the my results after a couple of tries ..good luck and enjoy 🙂 ..
You sound like a baking pro! Thanks for all the tips.
Thanks Tom I’ll try your tips next week and let u know how it turns out.
I am not a baking pro ..I have learned through trial and error ..alot of errors ..those errors just made me more determined….stay with it Lesley untill you get the feel for it ..once it clicks you will be smooth sailing ..enjoy :).. I say this for all baking ..not just the subway bread !
I don’t have a stand mixer… are there “kneading” directions?
Just how you’d make any other bread without a stand mixer… just knead your heart out 🙂 Enjoy!
Ooh this looks good, I want to try this today. Do you reckon instant yeast would work?
How much is 1 cup of flour (grams?) approx.? And does dry yeast work?
A very nice conversion program for cooking
http://www.convert-me.com/en/convert/cooking/
Just made these for sloppy Joe last night. DELICIOUS
Hi, can you please tell me the weight of each bun?
[…] Homemade Subway Bread – this recipe is so fun to have and make, and tasty too! I think this recipe is popular because the […]
Made these last night. WOW!!! They were very good. Granted they aren’t fine Italian bread, but they aren’t suppose to be.
This is a great recipe for a good soft white subway roll.
Will definitely be making again!!!!!
Stephen, thanks for the comment! We really like this bread too. If you are on the hunt for a really good Italian bread I recommend this recipes. It’s one of my best! https://www.blessthismessplease.com/2012/08/rustic-italian-bread.html
Hello! I made your sub roll recipe!! Omg!!! They are super beautiful and so soft and delicious! Thank you for this post!!
I recommend making half the ingredients first as try out/ experiment. So you can really work out if any problems need adjust or perfect and need no change. This time you can make according to equipments you have available ie. type of mixer brand and speeds -fast or slow, hand mixed only and how long for, watch it might have to do with the oven function ie. Temperature of your oven need adjust, the water temperature right or not for yeast to work on rising the dough – check expiry date of yeast if passed definitely not going to work. I recommend sugar with yeast and salt on flour to start with. Good luck and thanks Melissa for the inspiration and for sharing this great recipe. I will sure try this and let you know.
I just made halves of the ingredients and my kids won’t want to keep it for long after cooked so we break it up and slam some better inside and it was gone within 5 minutes.
I put 2 teaspoon yeast and same with sugar. I boil my kettle and I used half cup from that boiling water and half of normal cold water together I mix and add to the yeast and let it sit. I sieve 1 1/2 cup flour into a bowl and along with the salt. So I made a well in the middle and I pour two table spoon olive oil to the yeast and straight into the well. Then I use the back of my wooden spoon to mix in a circular way. I see that the mix is still too sticky so I keep adding very little by little of flour until you see the dough has come out of the sides but still stick to the bottom. I then turned it into a clean surfaces with some dry flour. Try to put the dough together by folding it in with fingers and push with back of your palm. Keep adding little flour until they just about to stop sticking to my hands. This stage the dough is still very soft. I rub olive oil onto a bowl and I cover dough with plastic wrap and put aside. After one hour I cut into two and roll it out without any dry flour. I put into the baking tray which I spray oil into. I then cover with plastic wrap which i rubbed some oil on. So I let it set then bake. My oven was too hot so i pulled it out 7 minutbefore when I see it’s getting too brown and check under bread it’s already little brown. Well this is how i made mine. Now I can make according to the full recipe with the twists than will work for me. Thanks once again. I might add sprinkle of herbs and cheese on the top before bake for some Italian taste. But I’m happy with just your recipe.
That sprinkle of herbs and cheese sounds perfect! Thanks for all the tips Elisa!
Have you ever tried to double the recipe??
Yep, it worked great! Have fun making it Margo.
Hi Melissa. Can you please have another look at the amount of warm water needed that must be the reason why there’s so many hard bread. I’ve been making 3 times now with doubled the amount of warm water and never had problems. By the way this timeI made garlic bread (warm up in a bowl some butter, garlic paste or grated fresh garlic, some dried oregano and parsley. Slice up the roll and spead lots of the mix, wrap with foil and put in oven for 10-15 minutes. Open up the foil on the last 5 minutes for a crispy garlic bread. Trust me you’ll never want to buy any garlic bread from the shop coz this is the best. Thanks again Melissa.
My 5 yo daughter has discovered Subway and loves it. So we made these at home this evening. On second rise they went more out than up. Ours didn’t rise while baking, slightly flat, but still great! We’re ready to do it again and she wants to have a Subway party! Thanks for posting!
The first round was great but just physically a little flatter than I wanted. On second go round I tried some advice from the comments. 1) Bought new yeast 2) Put mixer on lowest setting 3) Didn’t mix as long as last time. We went through the flour quicker. 4) Our second rise was for about 45 minutes instead of an hour. 5) When covering dough for second rise last time we only had foil. This possibly could have forced the rise out instead of up. Used plastic wrap this time. So the results this time were much better. It held a better shape. Also, with about 8 minutes left of cooking we snatched it out of the oven real quick, buttered the top of one loaf and sprinkled a parmesan, garlic, oregano mix we had prepared… then threw it back in to finish baking. Mmmmm….
Eric you are a bread baking ninja! Thanks for all the tips!
I am yeast-sensitive and have learned that I can make bread with much less yeast than the recipes call for as long as the dough has a nice, warm place to rise. I don’t have a mixer, so mixed and kneaded the traditional way. I used 1 teaspoon of yeast for this recipe, let the yeast ferment in just the water and sugar until bubbly, added the salt and oil to some of the flour, then added the yeast mixture to the flour, then kept adding flour and mixing, then kneading, until the dough was the right consistency. I didn’t measure the flour. I put the dough in the microwave and let rise until double, heating the microwave for 15-20 seconds occasionally, then divided and formed 6 buns (more the size we like for sandwiches. I may make 7 or 8 next time). Covered and let them raise in the oven at 115 degrees, then baked and finished as directed. They turned out very well! Thank you for the recipe and tips. I buy yeast either in the glass jar or in bulk from our local health food/bulk food store, and keep in the freezer.
[…] love all things pickles and pickled banana peppers top my list. They are excellent on sandwiches, including hot grilled ham and cheese, perfect for salads, and I’d be a fibbing if I said I […]
Can’t wait to try this recipe. I ADORE Subway! Just a couple of things – if you sub milk for the water, your bread will be softer. Quick-rise yeast is different than regular yeast, so people having rising issues may want to check the type of yeast they’re using. It’s also best to “prove” the yeast before adding it to the rest of the ingredients. Just add the yeast to the warm milk/water with a teaspoon or so of the sugar and mix. Then let it sit for a few minutes to bubble up. If it doesn’t bubble up, the yeast has gone bad. Throw it out and start over with new yeast/milk/sugar. You can also add a crushed vitamin C tablet to the flour mix to help it rise more (I know, sounds weird, but it works!) Hope that helps!
Great thoughts! Thanks so much for the details 🙂
Thank You for sharing such a great recipe. Made this by hand start to finish as I don’t have a mixer with a dough hook attachment, came out wonderful. I am learning that yeast is not the enemy..LOL many failed attempts trying to make dinner rolls. Left it alone for years but this recipe has given me confidence that it can be done. I mean who doesn’t appreciate fresh, out of the oven..
Smells great, just took out of my oven right now. But I think I left them in too long 🙁 got distracted with my tiddler and didn’t hear my timer. Hope they still taste great!,
LOL we are so on the same page today. I burned THREE sheets of cookies, not my normal one. Boo! Hope it turned out great.
[…] Homemade Subway Bread Recipe – Bless This Mess – Perfect homemade Subway bread recipe, just like the restaurant. This recipes makes a perfect copy-cat loaf of Subway bread for sandwhiches at home…. […]
[…] Homemade Subway Bread […]
Did you mean to put 1 1/2 TBSP yeast here? Seems like a lot. Did you mean 1 1/2 tsp?
how long are these good for after you make them? say, in one of those metal counter top bread containers?
I’d say a day or two. I live in the dessert though so I would keep them in an airtight container because everything dries out really quick…
I did this tonight And WOW, it turned out great! Only one gripe… You should list the flower by weight. 120 grams to a cup. I found 440 grams worked with this. But yes, you hit the Subway bread on the head! Excellent!
I have tried this recipee twice. In the substance is not similar with SUbway.. Subway is hardly to break and soft.. is there any special YIS for yr recommendation or special floor I should use?
[…] Find the recipe at blessthismessplease.com […]
Made some yummy bread the last two days. Too heavy for sub buns! I am going to try this one on Friday. First time ever making bread was Monday.
good luck and enjoy ! bake by weight if you can , instead of cups and spoonfuls ..One cup = 120 grams . this is very good recipe ..you can shape it different for hot dog and hamburger buns ..I have also made it into boules and made dinner rolls with it 🙂
Making this as I type. It is turning out great so far. On the last step of the baking.
Seems this would be a good freeze recipe. I live alone, and could make up a batch, and freeze unbaked, and/or baked
Have some in the oven now. Thank you 🙂
My homemade bread always turns out too dense, what could be the problem???
I had this problem, turned out I wasn’t kneading long enough. I do at least 15 minutes by hand.
Second time making this recipe, and I absolutely love it for sandwiches. Thanks so much!
I made this recipe today! Was AWESOME! Love the part about adding butter once cooked. It certainly made all the difference.
THANKS SO MUCH for sharing! It’s the best! I will be making it over and over.
(Used canola oil instead of olive oil, didn’t have olive oil)
(Only needed about 2.5 cups of flour to get the right consistency.)
Made twice and Neither of the times it didn’t rise well. Wish you posted… Pictures of step by step.
[…] ble etter grundig googling av begge husets innbyggere funnet her: Homemade Subway Bread. Det virket fortreffelig. De ble som de skulle, myke og gode. Guttungen forsynte oss begge med de […]
Can dough be frozen?
I tried this recipe and it turned out great!!!
I made them and they turned yummi, real subway, thanks for.sharing tomorrow I will Dow it again.love it
Thanks for sharing such a good recipie,.made it and.they turned real.good,.tomorrow.will.do.it again
I’ve been making this recipe with great success, I have been making “buns” and “hotdog” sizes and whoa……….my kids and husband say no more grocery bread! Which is awesome because we buy strictly organic processed food, so this will save a ton of dough (see what I did there) anyway, I’ve made breakfast sandwich w cheese egg bacon, deli sandwich, cheeseburgers and hotdogs (organic/local fixings of course) garlic rolls, and just plain ol butter and jam. I want to thank you so much for posting this EASY and SIMPLE recipe. I plan to use this as long as we are eating bread !!!
I made this today. It’s so fluffy and yummy! I had a problem with the shaking, though. Do you have a video you recommend for how to shape the loafs? Mine came out kind of lumpy.
I don’t have a video but that’s a fabulous idea! Mine aren’t always pretty, but my moms… beautiful! She should show us and I’ll film 🙂
Just came out from oven….it’s so fluffy & yummm…
Hey! This recipe looks amazing! I found your recipe, and I followed the directions exactly as you explain…. The bread turned out perfect! I loved it!
I made this recipe as close as possible and the rolls came out like breadsticks, I put the right amount of yeast in and let it rise the right amount of time. Im going to try this again.
Any number of reasons:
1)salt can kill yeast so try mixing the salt with the other dry stuff before adding the “yeasty water”
2)old yeast. Assuming you proofed it, it should have a creamy froth on top of the water (maybe 1/8″-1/4″ depending on container used–I use a two cup measuring cup)
3)location you used to proof it was too cool (s/b around 75oF). It’ll still rise at cooler temps but will take another 1/2 hr or so.
4)water used was too hot ; should be around 100-110oF.
5)over-kneaded the dough at the start.
It came out amazing . What do I do if I want to use whole wheat ?
use 25% whole wheat flour so 3/4C w.w. and 2 1/4C white flour so it totals the same as the original. So, as much w.w. you add, subtract that amount from the white. Don’t go over 40% w.w. though. It’ll be really dense if you do.
[…] Get the recipe at Bless This Mess […]
[…] same. This one looked tasty but looked like it might be too crusty compared to the result I wanted. This other one purports to be a way to match the rolls you would get at Subway. Now, I don’t know from […]
The recipe is great . But for some reason the outer part of the sub is a bit hard for some reason but the inside is soft . Any idea of what I’m doing wrong ?
This is currently my go-to recipe. I’ve started doubling the batch and it turns out great. Splitting this into 8 parts makes perfect hamburger sized rolls. Adding Italian seasoning and cheddar before the final rise makes a great treat. I must say these are nothing like Subway imo, rather, very close to a Jimmy John’s bun.
Awesome recipe. Tried it ,i even add oats with barley and linseed with chia seed.
1.5 TBSP of yeast, or TSP of yeast?! Most recipes I’ve found are TSP, so just confirming
tablespoon! It helps it rise nice and fluffy!
Looks amazing! I can’t wait to try this. Thank you for the recipe.
Perfect fail proof recipe! I am a novice bread maker and have made this recipe about 3 times now. Each time it has turned out perfect and delicious!
[…] recipe. Here’s the reason why. I tried making copycat Subway Italian Bread using Melissa’s recipe from Bless This Mess. My yeast was apparently very slow and barely rose, so I got a delicious, but […]
Just tried this and I definitely did something wrong. The bread is very dense and flat. Any suggestions from advanced bread makers?
I should mention that the one modification I made was to use whole wheat flour.
Chop that up and drdry it out for croutons. I find using only whole wheat to be denser and more spongey, use half white flour. My first attempts at bread always came out flat,dense and yeasty tasting and once I figured out why I haven’t had issues since. I underkneaded and let it rise too high, which makes it fall flat in the oven. I always knead 15 minutes. When rising do not let it go higher than doubled, it’ll rise more in the oven and if it gets too big before crusting up hit falls. I also only use one tsp salt with this recipe, salt hinders risingfrising. Hope this helps!
Cant substitute whole wheat without making other changes, like adding more water and also adding vital wheat gluten.
You need to proof your yeast, I would suggest not adding the salt until you put in your second cup of flour, salt kills yeast and if your yeast is already week it may have finished it off.
Another hubby approved recipe! Perfect for a picnic lunch in the mountains. I had to cut the yeast by a 1/3 because of my high altitude(7000′). They still flattened out…..I got sidetracked during the 2nd rise and over-inflated the poor things so they fell . No matter….they tasted wonderful!
Mmm! What did you put on them? Any great toppings?
Oh haha….remember…he was eating. It had to be roast beef, mayo and cheese only. I tried to slip cheddar jack cheese by him the first day….busted….2nd day he got the yummy processed stuff they label as American. Me…I kept the cheddar jack and the only toppings I had available…..lettuce and red onion. I hate it when the cupboard is bare….oh well…they were still drool worthy!!
made rolls turned out great love it
What if you don’t own a dough hook? All I have is a hand mixer.
very easily done by hand, no expensive gadgets required from my experience. Just takes a little more elbow grease. I have been making bread and buns for years without mixers or bread machines etc.
This may be a dumb question, but I am new to this bread making thing. I will be doing this by hand. Is it something you need to be careful not to overwork?
It would be hard to over work this by hand, I think you’ll be just fine! ENJOY!
this is looking so far like a great recipe, it in the first rise now so we shall see. Anyway Katie you are going to find this bread making thing addicting but in a healthy way. You should start looking for a stand mixer with a dough hook, better yet just a low end Kitchen aid model. I like them cause there are some neat attachments for lots of other stuff. You will use this mixer for everything. I found the best price on my white classic model on Amazon, but Walmart was close. Maybe even a thrift store may have a used one.
For some reason mine don’t seem to want to brown, what did I do wrong? I’m not trying to burn them but they’ve been in for 30 minutes now
Hmmm… now sure! Did you figure anything out?
Easy but disappointingly devoid of taste. This bread needs a reason to eat it.
Agreed. Easy to work with and roll out, but completely flavorless. Needs less yeast and a slower rise.
Has anyone tried this with bread flour instead of all-purpose… just wondering. I’ll probably try both.
We shall see, I Only had 1 cup all-purpose flour on hand but a bunch of bread flour. so I used the 1 cup then the rest with the bread flour. Its rising now so — results later.
Mine turned out perfect!Great recipe!
Do you know if these buns freeze well or if it’s better to just make them fresh
Fresh is always best but they do freeze well. I often make a double batch and stick half in the freezer!
[…] Subway Bread […]
Ooh this is very nice, I used to work for Subway, we’d spritz some water on the top of the bread and roll them in seasonings too for our italian herbs and as well as our oats bread. You can do the same thing for these if you want specific types of bread. I highly suggest experimenting with these seasonings because you can make your ideal sandwich bread this way ^^
That’s such a great idea! Thank you for sharing Daniela!
Success – kind of. This came out tasting great and made a great sub but not quite subway. I think I know why and I did a few things different I probably shouldn’t have. The issue I had was good bread but it flattened out. Still baked fine but not a round slice more of a flat oval. Reasons, I think. First of all I used 2/3 bread flour 1/3 all purpose because that is what I had on hand. 2nd I used packaged active dry yeast rather than the bulk in a jar. 2 packages make real close to the 1 1/2 tbls in the recipe so I did that, – well I think my bread rose too fast so maybe I should use the bottled yeast or just use 1 packet, another reason is maybe it was too warm where I had it rising. Room temp may have been better.It rose to more than double in 35 minutes well short of the hour. Lastly Parchment paper, – who uses this stuff, really? I just lightly buffed a non stick baking sheet with grease then sprinkled a little corn meal to put the loaves on to rise and bake. I don’t think that was my problem I am sure it was just rising too fast and I need to control that better. I am going to experiment baking it on a pizza stone next go around to see how it does as well.
Turned out great…. sort of. First time for me trying anything like this but end result was good tasting with my “everything” seasoning sprinkled on top 🙂 I was good up until putting it in oven. I brushed the top of loaves with whisked egg white and water to sprinkle my seasoning on just before popping into oven. When I brushed it on, it flattened my bread 🙁 next time I’ll maneveur that step. Thanks for sharing
Tried this today and my bread was flat too. It did not turn out like subway AT ALL. I’ll try it again.
Delicious. But i needed only 3 cups of flour . Not flat at all. Soft and wonderful. I did cut them in half trying for a smaller sub, to thin. Pretty darn good, saver for me. Thanks
[…] Subway Bread from Bless This Mess […]
This recipe is perfection!!!!! This will now be a staple at our house. Thank you so much.
Turned out pretty good. Next time I will cut back a bit on the salt and the yeast and let it rise a bit longer. Thanks for the recipe.
Hi! Ive tried this recipe a few times and my loaves seem to deflate in the oven and come out rather flat. I know the yeast is good and both rises go well. My only thought is maybe Im using too much flour? Any thoughts are appreciated- TIA! 🙂
Would be better if the ingreadents were in grams.
I made this recipe by hand (no mixer or kitchen aid) and it worked beautifully. MY HOUSE SMELLS LIKE SUBWAY and the bread tastes great. Kids will have their favorite lunch tomorrow ?
Seriously, what smells better than fresh bread. Well done mama!
I followed the recipe as it says.. But I had to use only half the flour as my dough formed and the dough is not that soft. What did I do wrong. Pls help. I really wanna learn how to make a subway bun…
I can’t wait to try this!! I’m using a Kitchin aid mixer would I use a middle setting to beat dough? And also I have instant yeast would it still work the same?
Instant yeast will work great, and I normally mix mine on the #2 speed in my kitchen aid!
It really does look identical! Awesome to create a more wholesome homemade version!!!
Can this be done gluten free?
Gluten free baking isn’t something that I know much about… I think you’d be better off finding a gluten free sub bun recipe to start with instead of trying to adapt this one. Good luck!
These look so good going to try them
In case anyone else come across this recipe it’s awesome! However, I think the written yeast measurement is supposed to be teaspoons not tablespoons. After I made several wondering why they didn’t brown or rise properly I realized all my other bread recipes were in teaspoons. Tried it that way tonight and Bam! They are perfect just like the pictures! So use 1 1/2 teaspoons yeast instead of tablespoons.
★★★★★
I enjoyed this recipe very much, thank you!
★★★★★
Excellent recipe,perfectly soft and make an amazing sub ?. I don’t usually rate recipes but this deserves 5 stars. Thanks for sharing.
I’ve just made these as buns for our American hotdogs, they look brilliant!!
★★★★★
I had to do this 3 times but I was able to perfect it on the 3rd round. 3rd round, I used King Arthur bread flour. Although it made it more difficult to roll out. It made a perfect sub roll like the ones I used to get in my home town back East.
★★★★★
I just rolled it into sticks and waiting for it to finish raising. So far it seems like I did something right….it’s looking like loaves …. I brushed 2 with olive oil and sprinkled pizza seasoning and left 2 plain. In about an hour I’ll know if it’s edible ☺
Thanks for not publishing my comment last night, and if you didn’t see it yet, I hope you don’t! I made these again. Because I figured it had to be something done here on my end. Honestly, I did it exactly the same and they came out the same. They didn’t seem to rise once they went in the oven. They kinda went more flat. Not sure why. I followed all directions. Anyway, I have to say that even though they lay there flat, I could still cut it like a sub roll, but it wasn’t a roll. lol but OMG it tasted amazing! I almost fell over and thought omg I left that comment. I TAKE IT BACK! 🙂 Thank you!
★★★★
I was just sorting though comments and I’m so glad that it worked out for you! I didn’t publish the other comment yet but I still can unless you’d like me not to. Let me know! Thanks for taking the time to come back and share how it turned out!
no don’t publish it. 🙂 I have another one in the oven now! LOL I will get it right! This time they haven’t fallen. I did some searching and reading so I didn’t let the yeast sit as long, and I didn’t proof as long either. So far so good! 🙂 The house smells so freaking amazing! I don’t even need the book. the recipe is so easy!
I’m so glad you are giving it another try, it really is a great recipe and that smell… oh that smell!
So last night one came out absolutely perfect! It just didn’t get brown. So I’m doing it again this morning but doubled the recipe. My new favorite sandwich bread recipe. Thank you!! I love that I can add any type of flour …… I have a mix of flax seed, wheat germ, oatmeal and I don’t know what else (all ground together ) and I added a cup of that last night ….. so one less cup of flour ….. and it was just fine. Today one is already raising ….. so I’m happy. Going to bake it in about half hour.
☺
★★★★★
Oh wow! thanks for sharing. I love the idea of less flour! 🙂
How half an hour +an hour + 25 minutes + kneading and shaping time makes up of total one hour and 15 minutes? USA has it’s own time measurement, like “time inches” or something?
I tried this and I must have done somehing wrong. I think I had to add more than the called for amount of flour unless I didn’t let it go long enough in stand mixer. I let it go over 8 minutes but it was still sticking to the sides. Also, how long do you hand knead it after taking out of bowl? Maybe I didn’t knead long enough?? I sure would like to see a video of how you make it and what it is suppose to look like while it is mixing. I will try again but please think about doing a video.
This works great in a bread machine set on bread and first rise then follow the main instructions. You just put all the ingredients in at once ?
★★★★★
This works great in a bread machine. Put all the ingredients in at once .set machine at bread and first rise. Then follow main instructions ??
★★★★★
I love this recipe! It’s easy and delicious! Thank you for posting it!!
Awesome recipe—very simple steps and the results are the perfect flavor. I experimented with cooking for only 20 minutes and achieved even better results: the outsides were less browned and softer and the interior was identical.
Hi there, well every step went great they looked awesome not sure what happened but after the went in the oven the rolls fattened
Everything went great but when I put them in the oven they fell. Twice any suggestions
Thanks for sharing this recipe.
It’s my go to sandwich bread recipe. Have made it multiple times now.
Okay this is probably a stupid question but i’m a first-time bread baker, here! ??♀️ What kind of yeast do I use?? I bought “active dry yeast” and also “fast rise yeast”
My bread doesn’t rise very much. I have tried this recipe several times with the same results. Please help?
Is your yeast fresh?
I have made these rolls twice and both times the first and the second rise we’re beautiful! However, once I put them in the oven (the temp was 350) they flattened and stayed that way until the end of baking; also, they come out very pale and look like they need more bake time after 25min.
I have to say that they are delicious and fully baked but look horrible. What causes that?
Hey I was hoping to make this recipe today I don’t suppose you have the measurements in grams? I do not have cups but have scales. Many thanks.
The recipe turned out really well done by hand I was really impressed! Made some meatball subs with them tonight, thank you for sharing.
★★★★★
Great recipe you can also make 3 or 2 larger rolls if so desired
★★★★★
You should adjust your total time to reflect the rise times. The total time for this recipe is closer to 3 hours.
traditional or quick rise yeast?
I’ve used both with success.
Well what was the type of yeast you used? Quick yeast u don’t have to use near as much as opposed to traditional.
I did use quick, feel free to use what you have.
I would like a recipe for the white flat bread. I can’t eat a sub roll.
thank you very much for the article and also for the recipe.
You left out the sawdust.
★★★★★
LOL. I do try to omit sawdust when I can!
Hi there, made these today and the flavor is amazing, but it seems they didnt rise enough??? the 30 min and 1 hr seemed not enough should i let them rise more next time??
Looks yummy. Going to try ut soon
Remove bread from freezer, thaw, place in microwave 5-7 seconds, [times may vary according to microwave,] it will seem oven fresh again.
Thank you for letting us know that that worked well!
Definitely not Subway bread by any stretch; however, it is still good. It is more dense and more sourdough tasting than anything.
★★★
Made this twice now. My kids and husband love it so much they want it on the weekly menu. ?❤️
★★★★★
That’s so fun! Thank you for leaving a comment to tell me, that means a lot to me.
This is the best loaf. I made it half wheat, half white and added some Italian seasoning for our meatball subs. It was perfect. Very soft and light.
★★★★★
Great recipe! I was very dubious about the amount of yeast (for that quantity of flour I would normally use 1/2 TEASPOON) but having read other comments I thought I’d go with it and see how things turned out. I used 50% strong white bread flour and 50% whole wheat bread flour and just put all the ingredients in my bread-maker on the whole wheat/dough setting. Boy did it rise! Knocking back and shaping was interesting but using oiled hands was a great tip. The shaped dough was as bit uneven but too wet for me to mess around with it further, but by the time it had proved the worst of the bumps had evened out. My baguette tray only holds three, so I made three 12 inch subs and the result was excellent. Using a block of butter rather than faffing around with melted butter to glaze after baking was also a good tip. The subs turned out really soft and my wife much preferred them to the harder rolls I usually manage to make. We had one each with grilled bacon and melted camambert, which was far too much, but the bread was fresh and once the pack of bacon is open you have to eat it all, don’t you? I put the third sub in a plastic bag and it was just as nice the next day. I’ll try this again with 100% white flour, and I also want to try with about 1 tablespoon of yeast to see the difference that makes., but this is definatlet a recipe I will use again and again. Thanks you Melissa.
Thank you SO much for the long helpful review. Let us know if you make any changes and how it goes for you, I’m always learning too!
luv to try yur recipe
★★★★★
Allow the dough to rise for half an hour and allow the finished loaves to proof for an hour, and the recipe still says an hour and fifteen minutes total time at the top. I mean, I bake all the time and know full well bread takes well over 2 hours. But it never fails to amaze me how these recipes don’t even try to estimate the actual total time.
In the oven right now and the smell is amazing!! How long will they stay fresh?
About like normal baked good, a few days. For long storage wrap well and keep in the freezer!
I’ve made these three times now, and perfect results have ensued each time. Thank you for a wonderful recipe that is easy to follow and that has such great results!
★★★★★
Hooray for a great review! Thank you for coming back to share your success with us!
What type of yeast? Regular, rapid rise, or instant rise?
Instant or regular will be fine in this recipe.
Hi Melissa,
I’m a homesteader and have been providing my family with homemade bread for more than 35 years. This morning I was making my everyday bread and came across this recipe so I made this as well and decided that we would make one of my families home made steak, steak and more steak sub for dinner. I have a beautiful recipe that makes 30 dinner rolls or 12 sub buns and it is very good but we don’t always want a dozen sub buns so I thought I would give this recipe a try. While I was waiting for the bread to rise, I was reading through a lot of comments and found that a lot of people were having problems with the recipe. I would like to put in my two cents for whatever it is worth to whoever wants to read it.
1 – I don’t believe you can over knead dough or at least, I never have.
2 – When I first started making bread I kept jumping around trying all different kinds of yeast until one day I came across “Fermapan Instant Yeast”… No I don’t work or represent them in any way…lol. Since I have since then found that it is a commercial yeast which I can only means… “guaranteed to please” It seems to rise 3 times… 1st in the first proof, 2nd in the second proof and then again in the oven. I have passed this yeast on to everyone I know that makes or wants to make bread as it is the first failing point if the yeast does no co-operate. For years I use to order it on line 7 pounds a year… It comes in a 1 pound airtight package and I keep it in a baggie in the fridge once I open it. I keep the other pounds in the freezer. I use Fermapan the way I would a dry active yeast.
3 – I always follow certain rules when it comes to making bread.
Always put the “sugar, Honey, maple syrup, (sweetener) in the bottom of a glass 2 cup measuring cup
Always add the liquid on top of the sweetener and mix ( liquid should never be too hot to touch)
Always sprinkle your yeast on top and mix in until it sinks and set aside.
Always add the salt to the flour in the mixing bowl (NEVER to the yeast mixture)
Never add butter/eggs/oil into the yeast mixture, until yeast is ready for the flour/salt mixture,
Always do a pinch test before removing the dough from the bowl
The pinch test consists of pinching the dough with two fingers very hard and then release
and there shouldn’t be any dough on your fingers but it felt like it was going to stick when
you released. if it doesn’t stick but feels like it will your dough is PERFECT and ready to use
In your recipe I followed my above rules and placed the sugar in the measuring cup and then the water and then sprinkled only 1 Tablespoon of yeast and set aside until ready to add to the flour/salt in the mixing bowl.
I added the salt to the flour mixture and with the dough hook mixed until blended
Once I could see the yeast growing, I added the oil and mixed and poured into the mixing bowl while the mixer was on low.
I continued to mix in flour about 1/4 cup at a time until it made a really really soft ball… it did not stick to the bottom of the bowl or the sides but when I did the pinch test it was still very sticky to my fingers, but didn’t stick.
The buns turned out perfect and I am very pleased with the finished product.
Fermapan Instant Yeast can be found at the below website for anyone interested in having the largest and most successful bread ever.
https://www.breadbeckers.com/store/pc/Instaferm-Fermipan-Instant-Yeast-p2359.htm
I have a facebook page called The Martin Homestead located in Tamworth, Ontario i will be posting your recipe there with pictures of the finished product which is just beautiful…
I thank you Melissa!!!
Fiona
★★★★★
Such a helpful comment! Thank you so much taking the time to educate and explain and I’m excited to see your pictures of the bread!
Im going to make the sub rolls to day Can you please explain how to measure the flour and do you swift it
Thanks
You’ll just want to use a spoon to scoop the flour into a measuring cup and then use the back of a butter knife to level off the top, no need to sift. And as for the subway vinegar, the internet says that it’s equal parts red wine vinegar and canola or vegetable oil that they shake together before using. You’ll have to try it and let me know if it tastes the same!
Also do you know how to make the vinegar that subway uses on the sandwich my husband will want that one his
Thanks
Ok, Thanks
You mentioned you can make this in the bread machine. The recipe says to only let it rise for a half hour where as the bread machine rises for an hour. Should I take it out half way of rising and then continue to roll out and let it rise for an hour on pan? Thanks!
Yes, I’d take it out after the half hour mark and finish as directed. Happy baking Stephanie!
Also one needs to properly activate their yeast with just enough warm water if it is too hot you might have just killed the yeast before even adding. So fresh yeast and suitable activate must be used within dough for getting the maximum proof for your breads.
★★★★★
I made this in my bread machine. I added the ingredients per my machines directions. I used 2 3/4 c flour called for and took it out ofter the first rise in my machine. Rolled and baked as normal. Rubbed with butter when done and covered to cool. They came out perfect.
★★★★★
Ooohhh thanks for sharing the bread machine tips, I’m sure many others will appreciate that too.
Can you use bread flour with this recipe??
Yep, it makes them extra chewy and is a great option for this recipe! ENJOY!
I think I Love You! Thank you, keep up the good work.
LOL, best comment of the day. ENJOY Dave!