
This post may contain affiliate links. Please read our disclosure policy.
If you’ve ever wondered how to paint furniture without sanding, this easy tutorial is for you! My step-by-step guide will walk you through giving old furniture new life with a can of paint and a few handy tools.
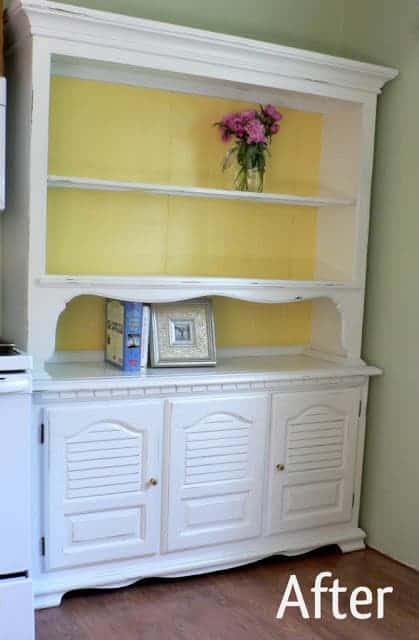
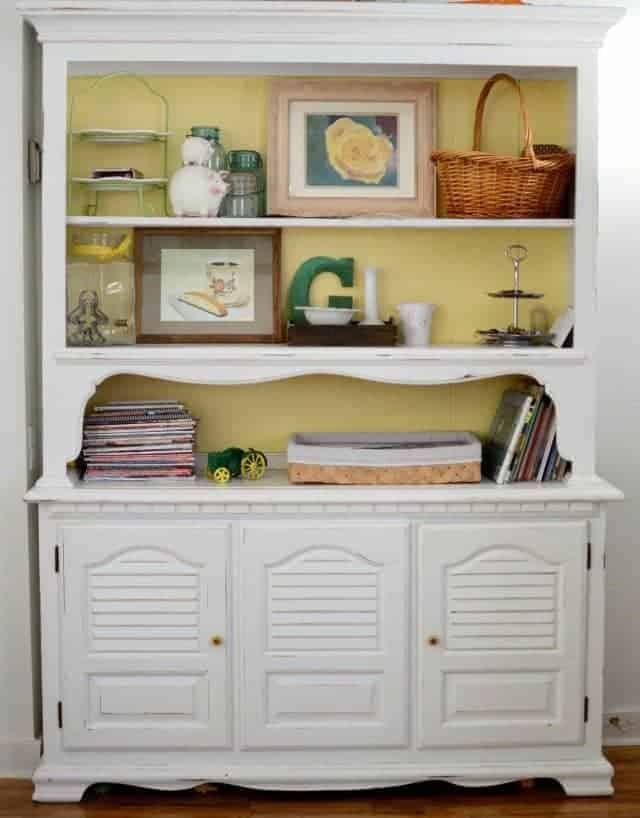
It’s done! It’s finally done! I now own the kitchen hutch of my dreams. I’ve been wanting, craving, a hutch for years, and now I own it. I’m beyond pleased with how it turned out.
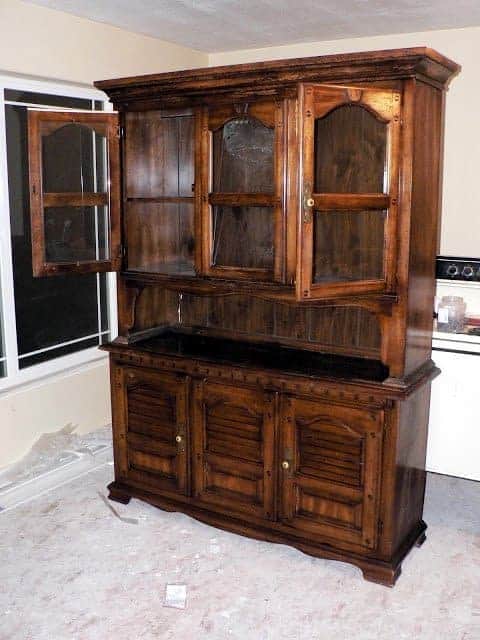
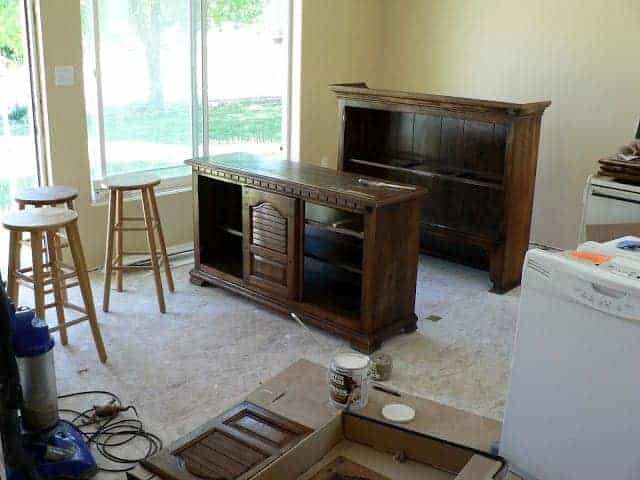
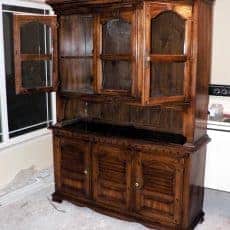
I bought this beauty at a garage sale last Saturday for $50. It’s large. Very, very large. It’s just shy of five feet wide and almost seven feet tall. The whole thing is wood except for the back panel which is a laminate panel.
I was not going to sand the entire thing down to the wood, so did some research to see how to paint furniture without sanding. I read lots and lots and went with a method that involved very little sanding. Painting furniture without sanding is the way to go!
Table of Contents
My Research for This Project
Although I’m no stranger to home DIY projects, including home renovations and farm-life housing, I wasn’t really excited about the idea of sanding and more sanding. Hence the serious research in preparation to paint this hutch.
The most useful site that I found was Centsational Girl. The woman is a genius, has painted tons of things, and is so clear in her instructions. I am so glad I found her site because it’s great.
Most big-time furniture painters are very specific about the brands and types of primer, paint, conditioner, and polyurethane they use. Many of the women I found paint and then sell furniture in shops, so they do it for a living.
I simply went with what the experts said, and I’m very pleased with how this project turned out.
What You Will Need
- Furniture
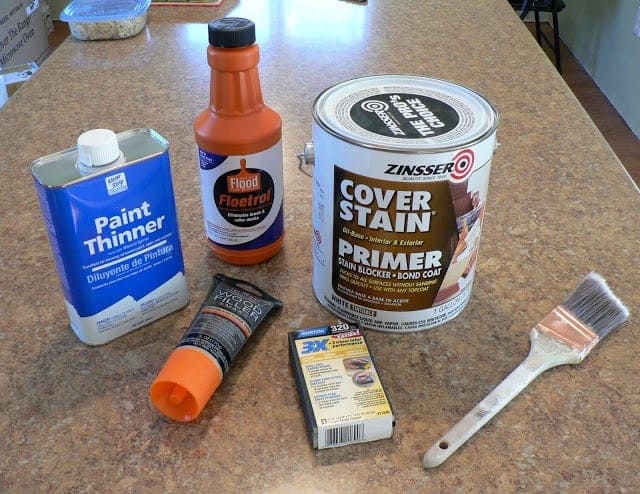
- Zinsser Cover Stain oil-based primer
- Floetrol paint conditioner
- Paint thinner
- Elmer’s wood filler
- Good quality two-inch angled brush (mine is a Purdy brush)
- Fine-grit sanding block, medium-grit sanding block, coarse-grit sanding block
- Paint of your choice
- Minwax water-based Polycrylic (Varathane water-based polyurethane was also an acceptable choice)
- Screwdriver
- Tack cloth or lint-free rag for wiping and dusting
How to Paint Furniture Without Sanding (Including Laminate)
Step 1: Prep the Furniture
Remove all of the doors and hardware using a screwdriver.
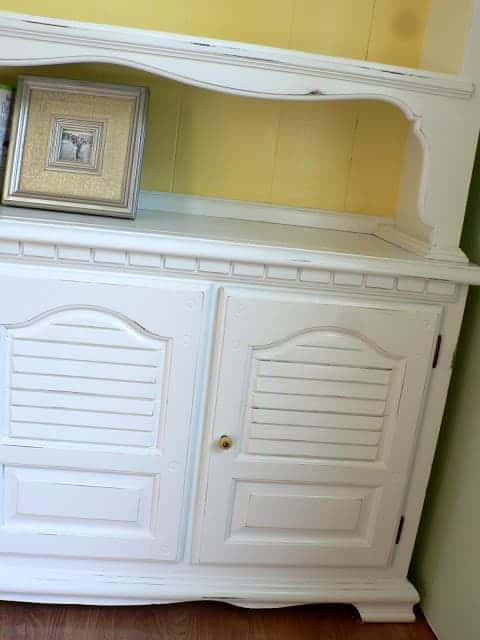
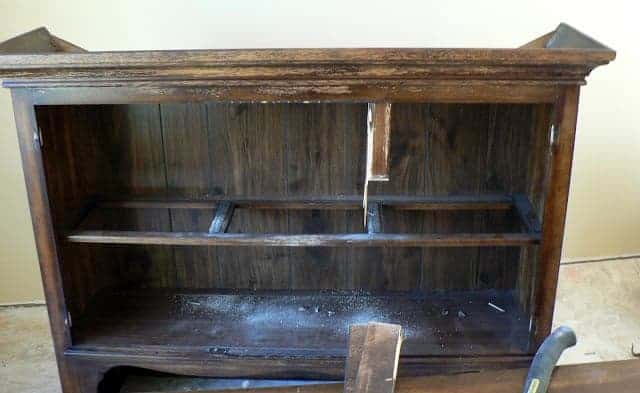
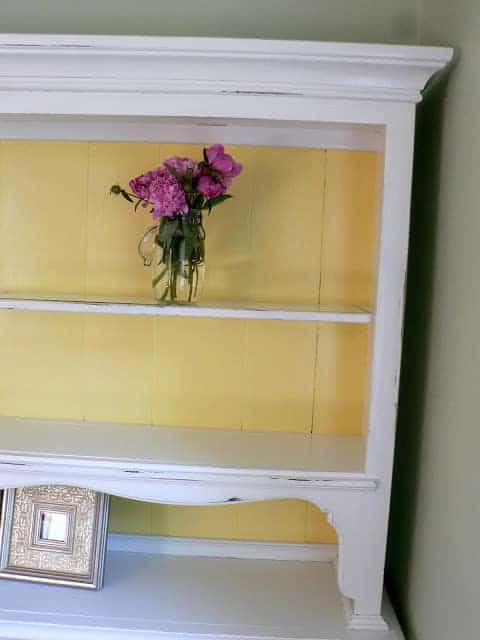
I decided that I didn’t want the doors on top at all, so I removed them and used a Sawzall to cut the two vertical boards that attached to the doors. I pulled out the boards but was left with holes where the boards were and where the hinges were screwed in. I followed the directions on the Elmer’s wood filler to patch the holes and then sanded them smooth.
If you plan on changing the hardware, you may also need to patch the old hardware holes. Wood filler is also great for fixing large scratches and dings.
Step 2: Light Sanding
Use the medium-grit sanding block to rough up all surfaces you will paint. I didn’t paint the inside of the cabinet bottoms; it’s a personal preference.
You aren’t really sanding, you are just lightly scratching the surface to give the primer a better finish to adhere to. I quickly went over the entire piece, which only took me 15 minutes.
Remove all of the dust completely before moving on.

Step 3: Prime
Using Zinsser Cover Stain oil-based primer is the key here. It’s the only primer the big-timers use, and I have to agree that it worked great. It’s the key for painting without sanding and for painting laminate furniture.
Around $20 for the gallon, it’s well worth the time you save on sanding. It is oil-based, so you will need paint thinner or mineral spirits to clean your brush. And be warned—this stuff is not low-VOC. Holy stink! I had all of the windows and doors open, as well as a fan blowing air out the window.
I opted for two coats of primer because two is better than one in this case.

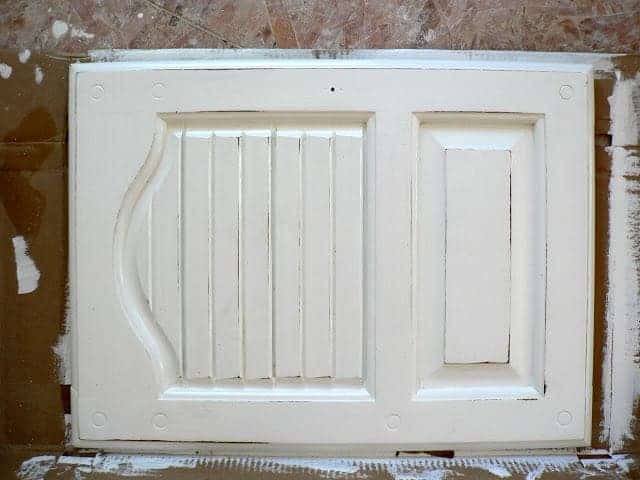
Step 4: Paint
Even though the primer is oil-based, you can use whatever paint you want. Most people suggested using an acrylic water-based paint. I had lots of white paint left over from painting the ceilings of our remodel, so I used that.
The sheen of the paint doesn’t really matter because you are going to cover it anyway. I added the Floetrol paint conditioner, which is meant to help reduce brush marks. Just follow the instructions on the bottle.
Again, I did two coats of paint. Allow the paint to dry for 24 hours before moving on to the polyurethane.
Step 5: Distress
If you want the shabby chic/vintage look, distress the paint. If you like it without, skip this step. I wasn’t sure if I wanted to distress this piece, as it was my first big painting project.
I had my fair share of paint drips and brush strokes regardless of the care I took to prevent them, so I decided that distressing was a good option for me. Scratching up my freshly painted piece was painful at first, but in the end, I’m glad that I did it.
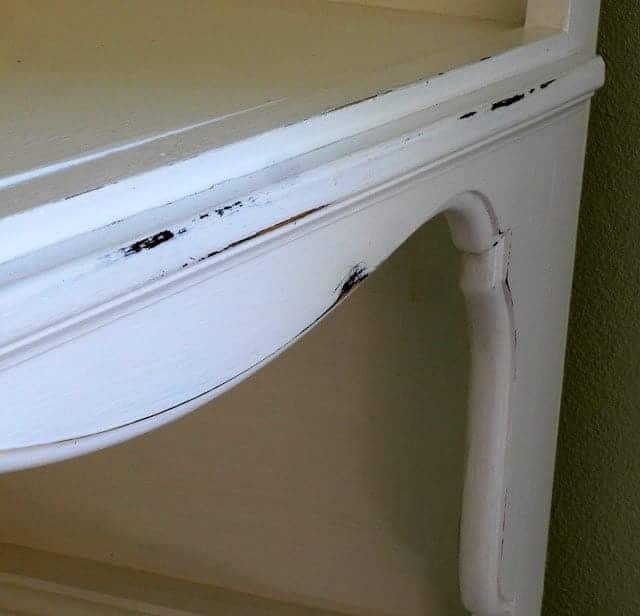
I like the look, but it will also make using it more family-friendly. I don’t want to worry about a little wear and tear from the babies. Now, the first scratch will blend in.
Use the coarse sandpaper block to go over the edges, then follow up with the medium-grit sandpaper. The coarse cut through my 4 layers well, and the medium fanned out the scratch lightly to make it look more real. This step was really fun once I made the plunge.
Step 6: Apply Polyurethane
This is the protective top coat that you don’t want to skip. This will prevent more of the paint from scratching off and really makes the piece last.
Minwax and Varathane were the two main brands big-timers used. There are a few types, including a wipe-on paste, that people like. Everyone seems to agree on one point, though: do not use an oil-based top-coat. The oil-based (and off-brands) will yellow, and on a light piece you definitely don’t want that.
I applied two coats of Minwax water-based semi-gloss polycrylic. This is the final coat, and the sheen you choose will determine the end result.
I lightly sanded with the fine-grit block and dusted between the coats to remove drips and brush strokes.
If you are finishing a desk or tabletop that will get lots of wear and tear, 4-6 coats of polyurethane is suggested.
Best Tips for Painting Furniture Without Sanding
- It is recommended to wait 24 hours before using the piece. I let the hutch cure over the weekend before using it.
- Be sure to read labels, wear old clothes, and paint in a well-ventilated area.
- Don’t worry about perfection! The hutch didn’t turn out flawless- it had its share of drips, brush strokes, and dust that I polyurethaned to it, but it was well worth the effort.
Project Cost Breakdown
Garage sale Hutch: $50
Zinsser Primer: $20
Sanding blocks: $7
Floetrol: $8
Paint thinner: $4
Minwax Polycrylic: $17
Brush: $0 (used what I had on hand)
Paint: $0 (used what I had on hand)
Hardware: $0 (re-used original hardware)
Total: $106
I really, really liked doing this and can see myself getting into the business side of this hobby in the future. Most of the ladies who do this to sell their pieces own spray guns which would make the process 10 times faster and the end result much smoother.
Purchasing a spray gun is something that I will consider looking into in the future.
Painting Furniture FAQs
Yes, cleaning the furniture is an important first step of the preparation process. Use a mild cleaner or degreaser to remove dirt, grime, or grease from the surface. This helps the paint stick and provides a smoother finish.
Painting furniture without sanding can save time and effort, especially if you’re working on a piece with intricate details or curves. It also minimizes dust and mess in your workspace. It’s a great option for those who want to do their own DIY projects and don’t necessarily need it to be professional grade.
Sanding helps prepare the furniture’s surface for a stronger bond with the paint, but it’s still possible without sanding. Cleaning the surface, using two layers of a good primer, choosing the right paint, and finishing with a polyurethane protective coat are all helpful for ensuring a good quality paint finish.
More DIY Projects to Try


Christmas Recipes
S’mores Hot Chocolate Bombs

Crafts & DIY
Simple Holiday Gift Ideas For Your Neighbors
Did you try this project? Share it on Instagram, Facebook, and Pinterest!
How to Paint Furniture Without sanding
Equipment
- 1 Good quality two-inch angled brush
- 1 Sanding blocks – fine
Ingredients
- Furniture that you want to renovate
- Zinsser Cover Stain oil-based primer
- Floetrol paint conditioner
- Paint thinner
- Elmer’s wood filler
- Good quality two-inch angled brush, mine is a Purdy brush
- Sanding blocks – fine, medium, and coarse-grit
- Paint of your choice
- Minwax water-based Polycrylic or Varathane water-based polyurethane
- Screwdriver
- Tack cloth or lint free rag for wiping and dusting
Instructions
- Prep the furniture by removing all doors and hardware using a screwdriver. Follow the directions on the wood-filler to patch the holes and then sand them smooth.
- Use the medium-grit sanding block to rough up all surfaces you are going to paint. You aren't really sanding, just lightly scratching the surface to give the primer a better finish to adhere to. Remove all of the dust completely before moving on.
- Apply the primer. Two coats is recommended, but it will need to dry in between.
- Apply 1-2 coats of paint, allowing to dry in between. Let final coat of paint dry for at least 24 hours before distressing or applying the polyurethane.
- Distress, if desired, using the sanding blocks to achieve the look you want. Remove all dust before applying polyurethane.
- Apply the first coat of polyurethane and let dry. Lightly sand with the fine-grit block to remove drips and brush strokes and then remove all dust. Repeat for as many coats of polyurethane is needed to give the sheen and protection required.
Notes
- A paint spray gun will make this project go much faster and will result in a better finish.
- Any project with paint or dust, and especially polyurethane, should be done with as much ventilation as possible so please use precautions such as wearing a suitable mask, opening windows, and running fans.
- Go easy when distressing! Using the finest sanding block is best since you can always sand more, but you can’t undo it.
- To save time, energy, and supplies, don’t worry about finishing the underneath or back parts of areas that will not be seen.


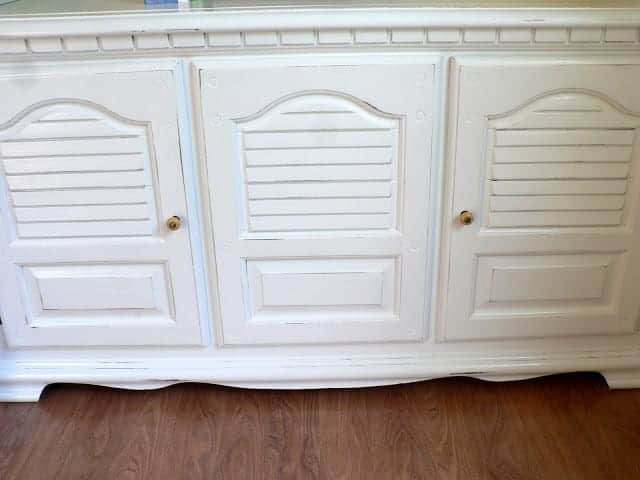
Here it is finished.
With some advice from Melissa and time invested, I repurposed this piece.
The most important step is using a good quality primer. Zinsser makes an excellent product, and I used it to prime my ugly dark oak kitchen cabinets before painting them white. It’s amazing how primer can smooth out a finish and cover small crevices. And it is a must before painting any surface. For instance, if the surface were painted with an old oil-based paint and you tried to paint over with a water-based paint, the result would be a peeling mess. So my motto has always been
Yes looking beautiful just send the to my son to fix tools with a reward just to make him do it fast nuff respect and blessings 👍👍👍👍
It’s looking good. Looking forward to seeing part 2. Happy Christmas to you and thanks for the videos. Keep em comin’
Yes looking beautiful just send the to my son to fix mind with a reward just to make him do it fast nuff respect and blessings
What if you want to paint over very light stained pine? Do you still have to sand and prime? Can you use a milk paint type product. My project is starting today. HELP
I used milk pain for my piano and I didn’t need to sand anything! This is more for using traditional paint.