This post may contain affiliate links. Please read our disclosure policy.
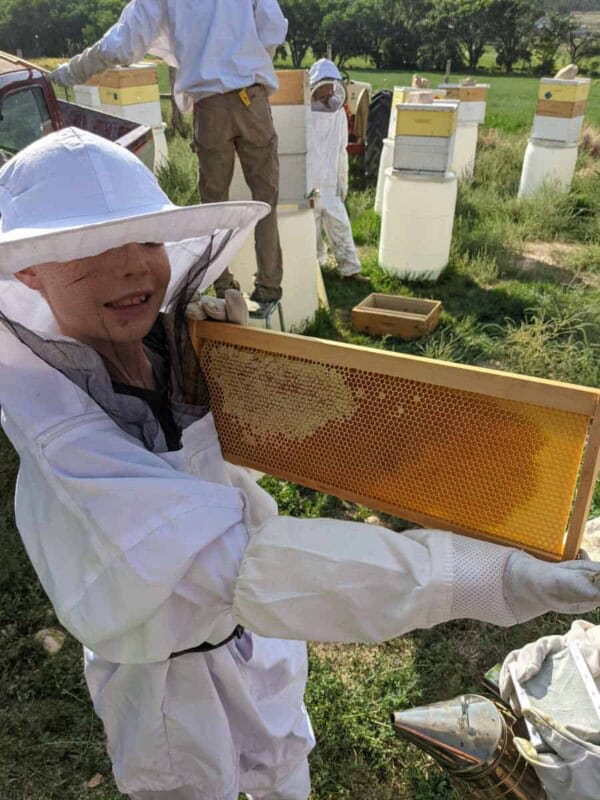
Spring is in the air, so it’s time to start preparing for backyard chickens! I will tell you everything you have ever wanted to know about Chicken Waterers and feeders and how to DIY your own from a 5-gallon bucket.

Providing animals with water to drink seems like a no-brainer, but there are many factors that go into watering chickens. For instance, how much water do chickens need, what type/material of waterer is best, how to keep the water clean, and how to DIY a simple and cost-efficient chicken waterer.
Appropriate access to clean water drastically influences how healthy a chicken is and how well it produces. If a chicken does not have ample water, they will stop laying eggs! Water also aids in the digestive process and helps a chicken eliminate waste.
When sufficiently hydrated, chickens can more effectively regulate their body temperature. A chicken that drinks clean, cool water also has a healthy brain. This will keep the animal in tip-top shape and its mind sharper to watch for predators.
And if they’re well-hydrated, they’ll keep laying those beautiful eggs for delicious meals like an egg and potato casserole, perfect for breakfast, lunch, or dinner.
Table of Contents
How Much Water Chickens Drink Per Day
It doesn’t seem like chickens drink much water because they just take small sips throughout the day. However, on average, a single chicken will drink about 1 pint of water daily. They will drink more if the temperature is hot.
Cool and Fresh Water, Please!
They also like cool, fresh water. If the water has been sitting out in the sun too long, hasn’t been refreshed regularly, or starts to get dirty from the chicken’s own doing, they may stop drinking. You don’t want a chicken that isn’t drinking, so remedy the issue quickly.
The process of chickens drinking water is fun to watch. Chickens use their tongue to push food to the back of their mouth to be swallowed, but that method doesn’t work for drinking.
If a chicken wants to drink water you will see them dip their beak into the water and rapidly tilt their head back to let the water drip down their throat. So you can imagine they can’t drink a whole bunch of water at once.
Tips for Keeping Chicken Water Fresh and Clean
Keeping the water you feed your chickens clean is essential.
- You should refresh their water daily to prevent bacteria buildup and algae forming.
- Sanitize the waterer at least weekly. Clean it with dish soap, a brush, or a diluted bleach solution.
- Place the water containers in shaded areas to prevent overheating and algae growth.
- Elevate the water containers off the ground to prevent dirt and droppings from getting into the water.
Project FAQs
Chickens typically do not need water at night. They sleep on their roosts until morning.
You want to place your waterers without direct sunlight to keep the water as cool as possible.
I plan for one large waterer per 6-8 chickens. Remember that each chicken will drink about 1 pint daily, so plan accordingly.
The general rule is that if it is safe enough for you to drink, your chickens can also drink it.
You will want to remedy the situation quickly if a chicken is dehydrated. When a chicken isn’t getting enough water, its egg-laying will slow down or stop completely. It will become lethargic, and you may notice it panting or having a pale comb.
DIY Chicken Waterer and Feeder From 5-Gallon Buckets
Chicken waterers can come in various shapes, sizes, and dollar amounts and can be constructed from various materials. In my experience, you don’t need to break the bank to provide water for chickens. Your chickens will thrive if they have clean, fresh water and lots of it.
We have used this DIY version for chicken waterers for years and have found great success.
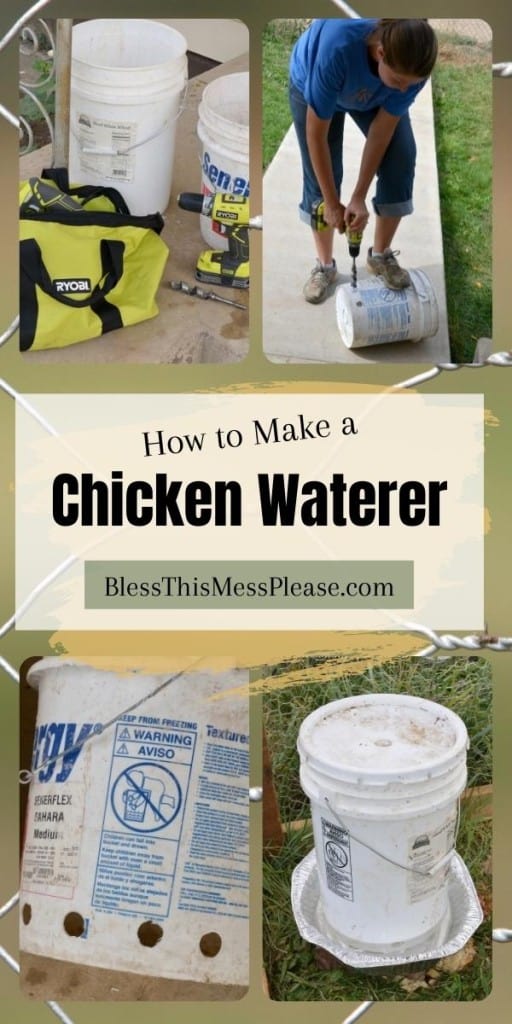
Materials Needed for Chicken Feeder and Waterer
- Two 5-gallon buckets with lids
- Drill
- 1-inch standard drill bit or paddle drill bit
- Two large foil roasting pans
Where to Get Materials
Buckets: Find a free source for the buckets. They are everywhere, really! Just ask your local sandwich shop to save you a few that the pickles come in. Bakeries are also a good source for free buckets.
Pans: Pick them up at the dollar store for a few bucks, or get these large feed pans.
How to Make the DIY Chicken Feeder
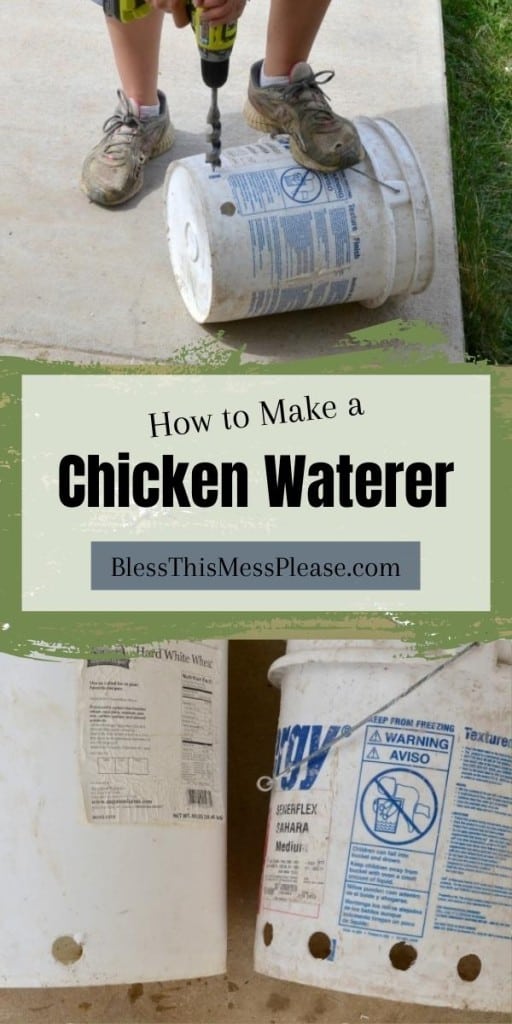
- Clean and empty a bucket
- Drill 1-inch holes around the bottom edge, spacing the holes about 2 inches apart.
- Place the bucket inside the pan, right-side-up (holes in the pan), and then fill it with chicken feed. The feed will pour through the holes into the pan, and as the chicken eats, more will come out.
- Replace the lid to the bucket so the chickens can’t get to the food from the top. Easy!
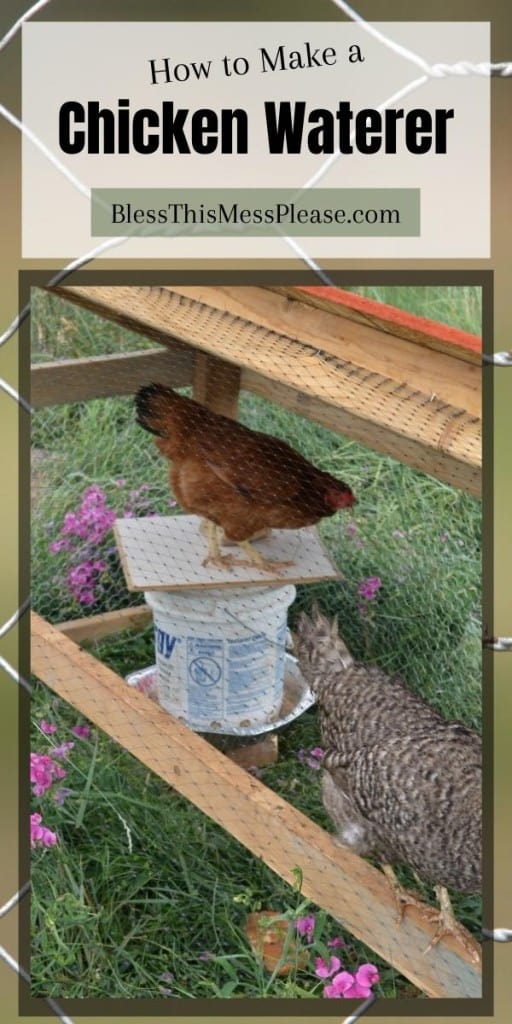
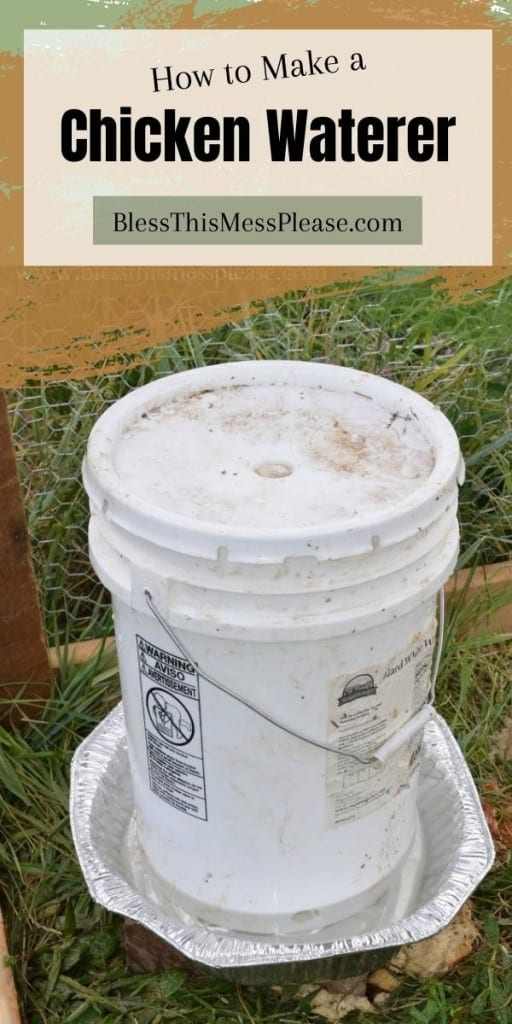
How to Make the DIY Chicken Waterer
- Clean and empty the 5-gallon bucket.
- Along the bottom edge of the bucket, drill two 1-inch holes opposite of each other.
- Place the bucket inside the pan, right-side-up (holes in the pan), and then fill it with water.
- Replace the lid and make sure that it has an airtight seal.
This seal is key!! The water will stop coming out of the holes once the water covers the holes completely if the lid is airtight.
If there isn’t a good seal, the water will keep running out of the bucket and overflow the pan. It’s a hydrodynamics thing—just ask my water engineer husband; he’d gladly explain it to you!
How to Make a DIY Chicken Feeder and Waterer – Picture Tutorial


Sometimes life on the farm can be much simpler than we think, and this DIY chicken waterer and feeder from 5-gallon buckets is the perfect example. An easy and cheap way to provide an effective and reliable feed and watering system for your chickens.
If you’ve been bitten by the DIY spirit, you might try your hand at building a chicken coop for the little egg factory in your backyard. I believe happy chickens make more eggs!
Update: October 2017
I have been using these same buckets as a DIY chicken waterer and feeder for over 4 years, though I have upgraded from the foil turkey roaster pans. Those pans lasted about 6 weeks, but I was in it for the long haul.
I picked up some large (about 16 inches wide and 4 inches deep) round metal pans from our hardware store to replace the pans in these pictures. Similar pans are available on Amazon.
They cost me less than $10 each and have lasted 4 years. So for $20 total, instead of $2, I have a large feeder and waterer that I’ve used for years. They work great and I still highly recommend making these.
More Farm Fun!
Did you try this project? Share it on Instagram, Facebook, and Pinterest!


I set the buckets n the round metal pans sold for oil changes. In winter i set the bucket and pan on top of round metal cookie container with a few holes punched in the sides and 3-4 tea lights burning inside. It warms the water enough to keep it from freezing. Works well in 6300 ft elevation high mountain desert country. Just 2 tea lights on below zero days work nicely. Old style electric light bulbs work well but I don’t have power out there. I ke we p some little solar light around the edges so I can see whats happening if predators get too close. I can see to shoot if needed.
Hi,
Thank you for the tip on the tea lights. I use solar yard lights around my plants just to give them some extra light and warmth. I live in 5300 elevation, with a zone 7a/7b in AZ. I do have property in a zone 9a and 9b that I will retire to. I will be able to have my meat rabbits and hens again out there. Any other insights you all could give for my area is appreciated. I may have to live out there sooner if the Covid or other continues to be a problem economically.
How do you fill them fast enough??? The water runs out so fast when trying to fill because you can’t fill with airtight.
I fill it upside down through the holes that you drilled then flip it over. It won’t work if you open the top.
I hate the problem with the water feeder is you literally have to have the bucket full of water upside down and then flip it over completely full with the lid on sealed in order for this to work it did not work the way that you described it
Really? I clean mine fill the pan with water sit the bucket in it fill it quickly with water and put the lid on!! Of course turning it upside down would not work…duh
Drill some holes under the lid easier to carry and fill
Thanks,it’s a great idea I’ll try it out. The pyiscs behind is that the partial vacuum prevents water from following , when the hole are above the water level air gets in, permitting some more water to follow our .
Since am a Christian please permit me also to tell you guys that Jesus saves
Thanks much Melissa
Hi Melissa we are a mission here in Zambia your ideas are helpful stay blessed.
So which is better for a waterer? Drill holes at the bottom of bucket or at the top below the lid?
I don’t think it matters as long as the bucket is air tight.
I would seem to think the bottom for 2 reasons. 1) filling it would be way easier 2) you can hang it . Just my thinking.
I did one with the holes at the top just above the lip on the bucket. I fill it up put the lid on it and then flip it over into their drinking tub.
At the top, I have been doing this for years. Feeder is fine with holes on the bottom but waterer holes have to be on top and then flip it over, easy to carry also.
Hmm – Drill the water holes a half inch below the lid closure edge, fill the bucket, seal it and gently turn it over into the bucket. Going out to try my modification!
This sounds genius…..I’m on my way to try it too thanks for this idea!
This is great. I have a new house that came with chickens and rabbits and mini pigs. I am going to make this for my animals so the pigs will not eat there food.
I’m still using mine all these years later, you’ll love it. And how fun to have an instant mini farm! I just love it! Send me some pictures!
Great ideas! For the water, how do you fill the bucket without it running over the sides since the water only stops when the lid is on
We just flip them over never to the metal pan, stick a hose in one of the holes, fill it up, and then flip it back down into the pan. It’s not perfect but I don’t mess with the lid either…
I drilled my holes on the opposite end (about an inch or two) to prevent water spilling out when I filled it. Make sure you dont drill the holes too high because they should be submerged under the water in the pan. Worked great for me 🙂
Thank you for the tip!!
Do you mind if I ask how long each fill lasts? I know that would depend largely on the number of chickens you have, but that would be helpful to know. Great job – thanks for sharing your expertise!!!
I have 18 hens with one right now and it lasts 3-4 days, so I fill it about twice a week. If we are going out of town I’ll fill up a second one and it’ll last a week or so for my hens in the desert.
This is a GREAT idea!!! This will help me get to my goal faster as I am on a tight budget and kept crying each time I saw the cost of a waterer and feeder!!!
I live in Arco Idaho… I am concerned with this freezing and making a terrible mess with the bucket busting???
Curious if you know how the chicken nipples would work in a similar set up but hanging up instead of on the floor??? Maybe making two buckets so I can rotate them during freezing temps???
I have just enough experience to get myself into trouble!!! and second guess myself way more than I should>>>
Thank you for this great idea!!!
I could never get my chickens to use a chicken nipple bucket, I tried for weeks… so no experience their. My buckets haven’t frozen and cracked in the winter but they water does freeze and make the bucket unusable. I normally just pack out a few milk jugs with steaming hot tap water in them in the winter and dump them on the ice so that it can melt some. Most of the time I end up not using the bucket and just keep the pan filled with the hot water one or two times a day. That being said, we did use incandescent light bulbs in homemade wood boxes under the pans one year (because the light bulbs produce heat) and that worked really well to keep them from freezing. If you have power to your chicken lot, that’s what I’d do!
Excellent info. I like it.