
This post may contain affiliate links. Please read our disclosure policy.


If you’re a fan of chicken, buttery goodness, and a burst of flavors, then Chicken Kiev will be a dish that you love.
Originating from Ukraine, Chicken Kiev has gained popularity worldwide for its succulent chicken breast, oozing buttery filling, and crispy golden coating. It’s a dish that never fails to impress, whether you’re serving it up for a dinner party or indulging in a cozy night in.

Chicken Kiev
So, what’s the secret behind this mouthwatering creation? Well, it all starts with a boneless chicken breast. You want it to be plump, juicy, and tender. Carefully slice into the side of the breast, creating a pocket to hold the glorious filling. Fillings consist of a mixture of butter, garlic, parsley, and sometimes a touch of lemon zest for that zingy twist. It’s like a little surprise waiting to burst out with every bite!
Chicken Kiev an be served with lots of different sides. Mashed potatoes or rice are great to soak up all that buttery goodness. And don’t forget about the vegetables! A vibrant medley of roasted veggies or a fresh green salad will provide the perfect balance to the richness of the chicken.

Ingredients
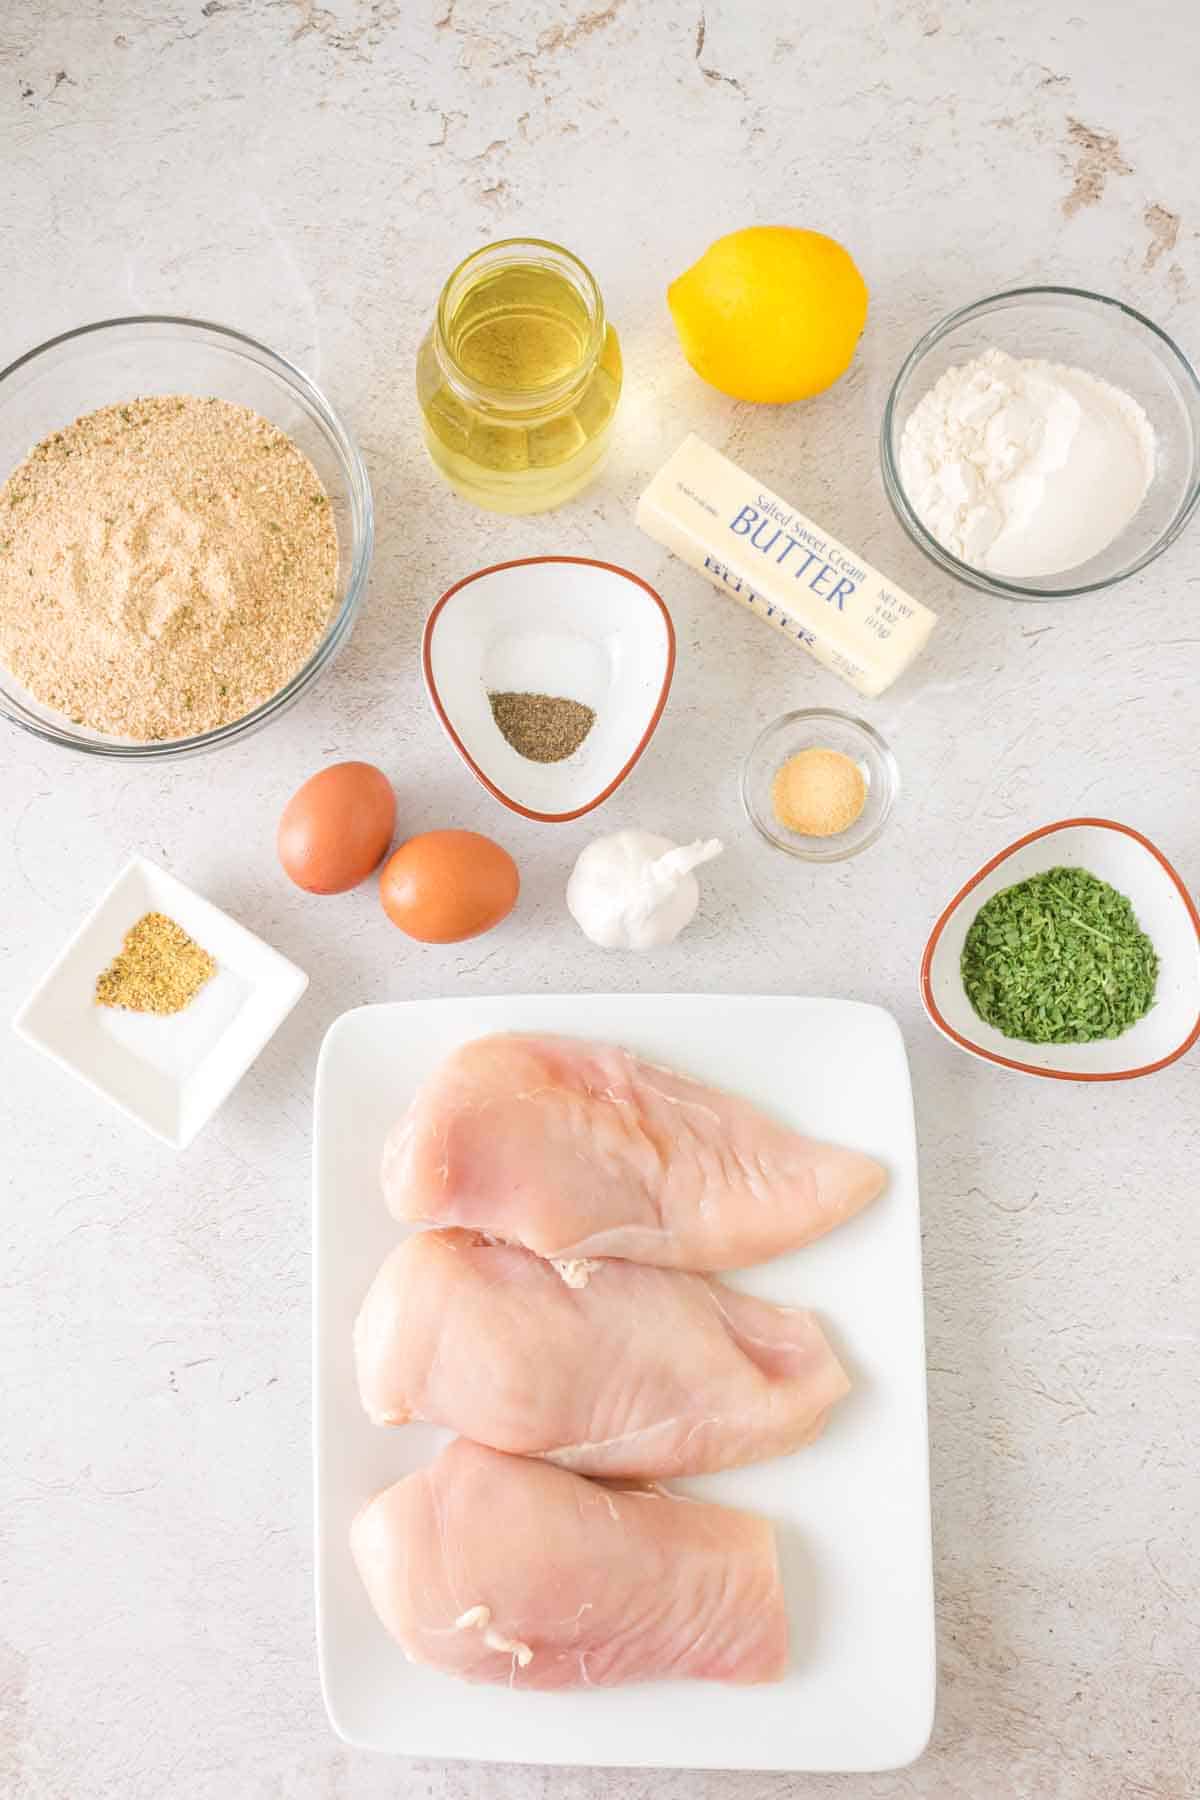
- Chicken breasts
- Lemon pepper
- Eggs
- Flour
- Panko bread crumbs
- Butter
- Garlic cloves
- Garlic powder
- Lemon juice
- Parsley
Keep scrolling to find a full, printable recipe with a detailed ingredient list.
Recipe Instructions
- First step is preparing the chicken breasts. Cut each chicken breast to creat a pocket without cutting all the way through and then set aside.
- Now, make the garlic, parsley and butter filling. Scoop about a tablespoon of the filling into each chicken breast pocket. Place the filled chicken breast in the fridge.
- Next, coat the chicken breasts using breadcrumbs and eggs. Shake off the excess and transfer to a plate.
- Finally, fry the chicken breasts in a skillet coated with oil. Fry for about 3 minutes per side.
- You are finished! Time to serve and enjoy!
Ingredient Substitutions
- Trimmed chicken breasts: Chicken breasts are often irregular in size. Some have a very thick side and a thinner side. For this recipe, I trimmed each breast for a more even thickness throughout the breast.
- If you trimmed the chicken and have chicken bites, cubed. Roll them into the flour, egg, breadcrumb mixture and fry them. Excellent chicken bites for the next day’s lunch.
- You can get the garlic butter ready ahead of time and place it in the fridge until you are ready to use it. You can also make a double recipe and use the other half to make garlic bread.
- After having made the chicken kiev both ways, I prefer this technique. It is simple and easy to make. You can follow the other technique if you prefer, which is to flatten out the breasts, place the butter in the middle, and roll like a burrito. Place in the fridge then coat and finally fried.
- We found out the chicken is tender with a crisp edge. The butter brings smoothness and the garlic is well dispersed through the chicken

Frequently Asked Questions
Yes, you can bake Chicken Kiev instead of frying it for a healthier alternative. Preheat your oven to around 400 degrees F and bake the chicken breasts for about 20-25 minutes or until they are cooked through and golden brown.
Chicken Kiev pairs well with various side dishes. Popular options include mashed potatoes, rice, roasted vegetables, steamed asparagus, or a fresh salad. You can also add a dipping sauce like garlic aioli or a tangy tomato sauce for an extra flavor boost.
The internal temperature of the cooked chicken should reach 165 degrees F to ensure it is safe to eat. You can use a meat thermometer to check the temperature by inserting it into the thickest part of the chicken breast.
Yes, you can freeze Chicken Kiev. Once assembled and coated, place the chicken breasts on a baking sheet and freeze until solid. Then transfer them to a freezer-safe container or bag. When you’re ready to cook, thaw them in the refrigerator overnight and follow the cooking instructions.

More Recipes
- The BEST Baked Chicken Breast
- The 4 Best Ways to Cook a Chicken Breast that Everyone Should Know
- Baked Chicken Parmesan
- Chicken Fricassee
- Quick Stovetop Chicken and Rice
If you’ve tried this Chicken Kiev recipe or any other recipe on Bless This Mess, then don’t forget to rate the recipe and leave me a comment below! I would love to hear about your experience making it. And if you snapped some pictures of it, share it with me on Instagram so I can repost on my stories.

Chicken Kiev
Ingredients
- 3 chicken breasts, trimmed
- ½ teaspoon salt
- 1 teaspoon lemon pepper, (you can substitute with ½ teaspoon ground black pepper)
- 2 eggs
- ½ cup unbleached all-purpose flour
- 2 cups Panko bread crumbs, (I used seasoned breadcrumbs but you can use the original)
Garlic Parsley Butter
- ¼ cup butter, (I used salted butter but you can also use unsalted, room temperature)
- 2 minced garlic cloves, (or 1 teaspoon of garlic powder)
- ½ teaspoon garlic powder
- 2 teaspoons fresh lemon juice
- 1 tablespoon dry Parsley
- Salt and Pepper to taste, (I used ⅛ teaspoon salt and ¼ teaspoon ground black pepper)
- Oil to fry
Instructions
- Place the trimmed chicken breasts onto a plate.
- Cut each chicken breast to create a pocket. Don’t cut all the way through. Set aside.
- In a medium size bowl, mix the butter garlic cloves, garlic powder, lemon juice, dry parsley, salt, and pepper. Mix until all ingredients are well incorporated.
- Scoop about 1 tablespoon into a chicken breast pocket. Gently massage it to distribute evenly in the breast and press down to close the cut. Place in the fridge.
- In a shallow bowl, beat the eggs with a fork. Set aside.
- In a second shallow bowl add the flour
- In the third shallow bowl add the breadcrumbs.
- Take one chicken breast and place it in the flour mixture, coat both sides and shake the excess off.
- Transfer the chicken breast to the egg mixture and coat both sides. Shake the excess off.
- Finally, coat the chicken breast with the bread crumbs on both sides.
- Place the coated chicken breast on a plate and repeat for the other 2 chicken breasts.
- Pour frying oil into a skillet and bring to 350 degrees F. I used olive oil but any oil of your choice for frying will work.
- Fry the chicken breast for 3 minutes then flip. When you flip the chicken, take its temperature and adjust accordingly, you may need to cook for an additional 3 to 4 minutes or until the internal temperature reaches 165 degrees F
- Place the fried chicken breasts on a plate lined with a paper towel to soak the excess oil.
- Sprinkle with salt if desired.
- Serve and Enjoy!
Notes
- Storage: Once completely cooled, place in the fridge for up to 3 days.
- Re-warm: Place in the air fryer at 350 degrees F for 3 to 4 minutes until heated through and crispy
- Have fun with the recipe, make it spicy: Rub the chicken breasts before coating them with a hint of chili powder or your favorite BBQ rub.
- Use different flavored breadcrumbs
Nutrition
Chicken Kiev is like a surprise party for your taste buds, with its juicy chicken, oozing buttery filling, and a crunchy coating that’s like a flavor explosion in every bite – it’s a dish that will make you say, “Kiev me more!”


