
This post may contain affiliate links. Please read our disclosure policy.
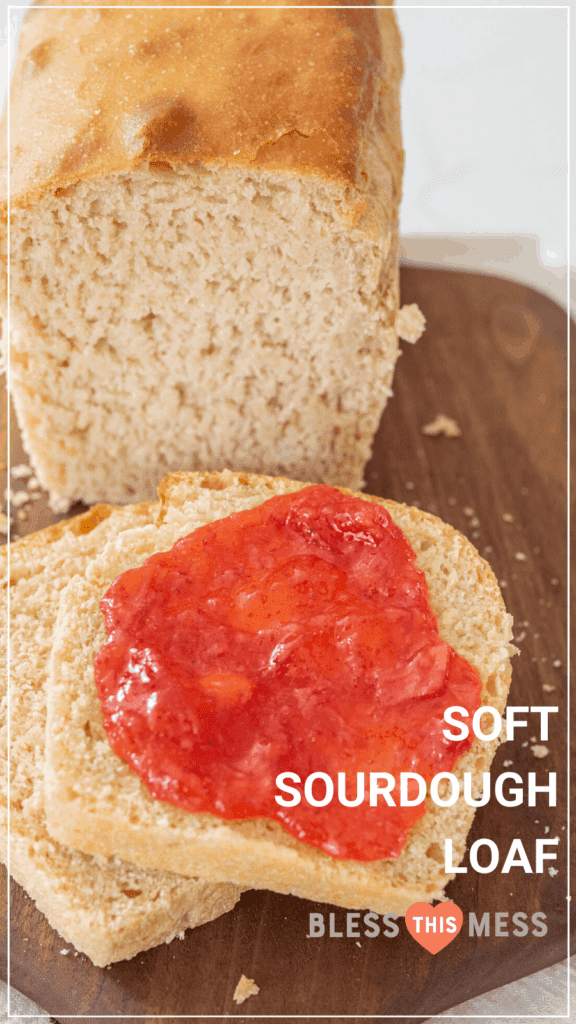
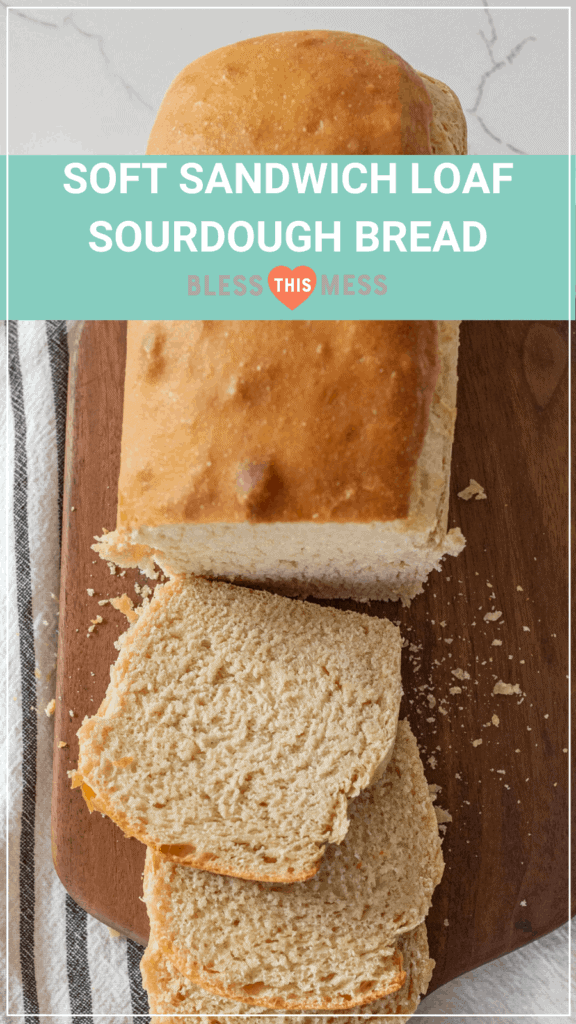
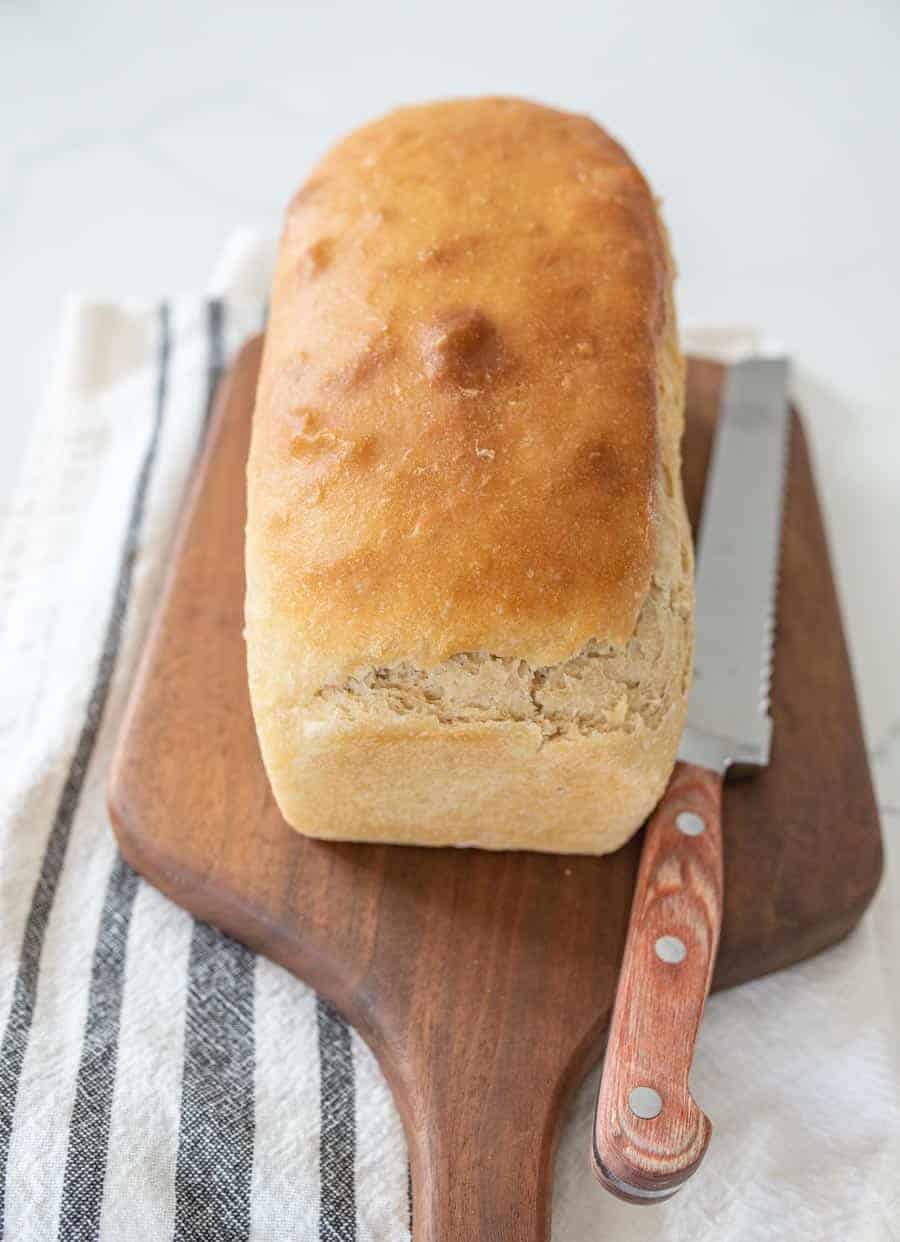
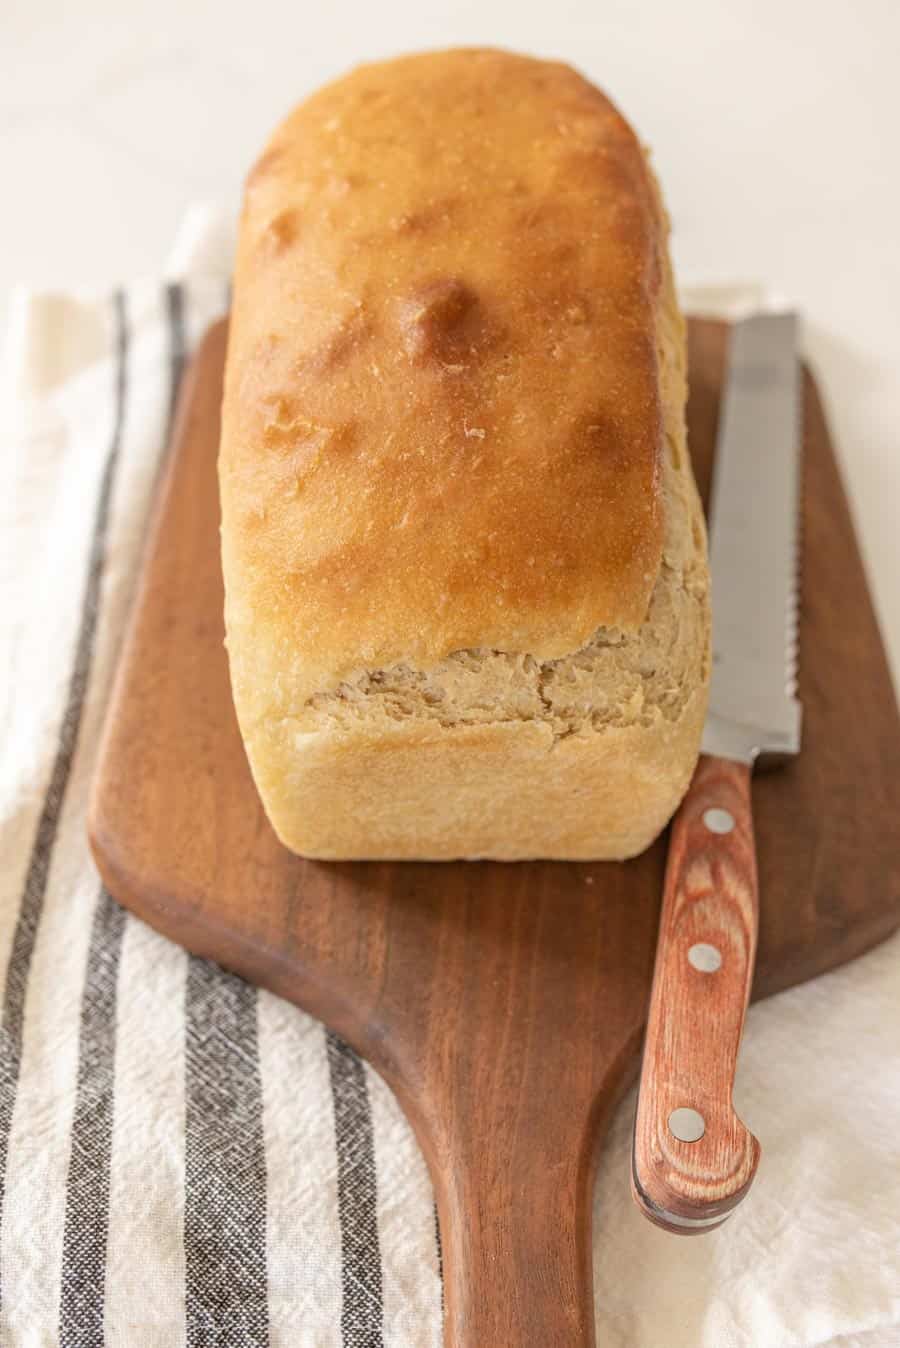
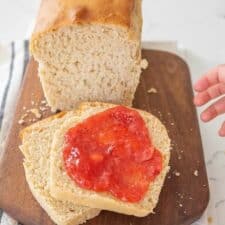
Want to bake Soft Sourdough Sandwich Bread that’s perfect to pile your favorite sammy fillings into? This fluffy bread is easier to bite into than crusty sourdough and is unbelievably delicious.
This simple soft sourdough bread recipe makes chewy, tender bread with that tart flavor you love in sourdough; it makes the best sandwiches like this Homemade Club Sandwiches and pesto grilled cheese!
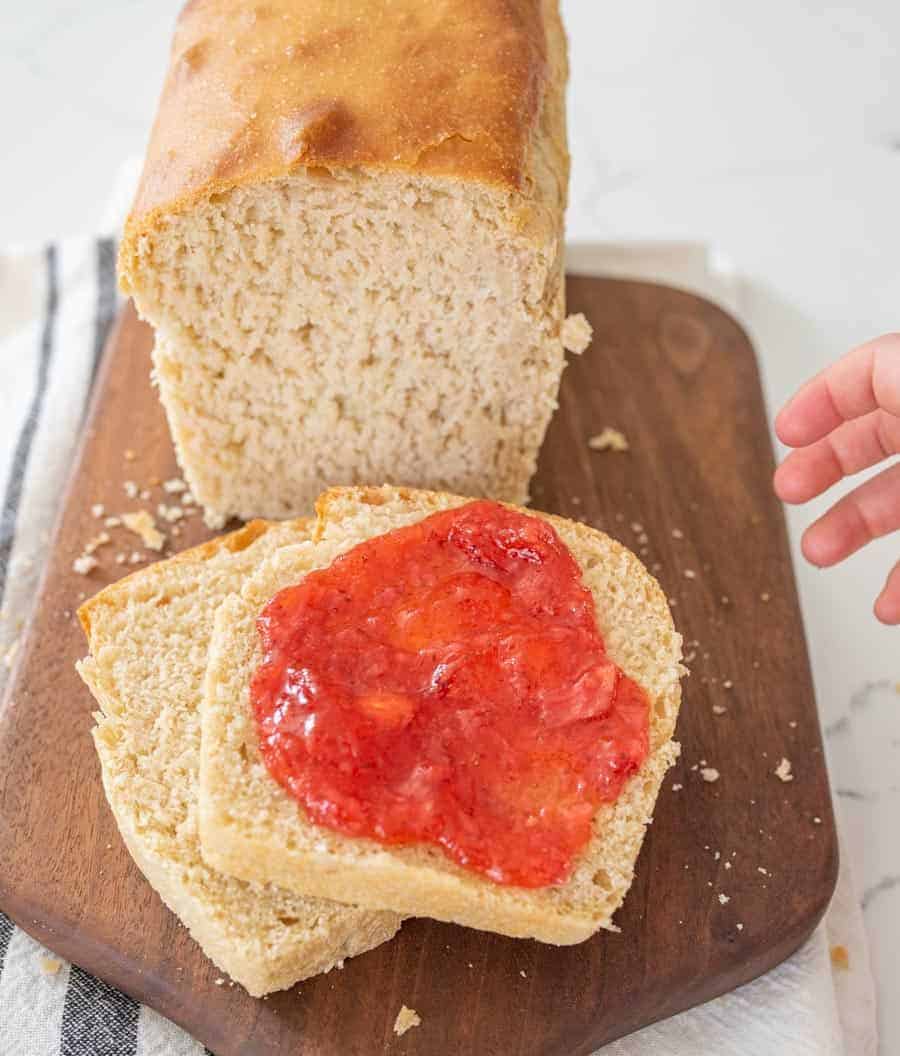
If you’ve been searching for a more kid friendly recipe for sourdough bread, look no further! My soft sandwich loaf sourdough bread is ideal for all the ham-and-cheese’s and PB&J’s your heart desires. Listen, I love a good ol’ crusty, crunchy-on-the-outside slice of sourdough, and that sort of bread certainly has its place in my heart (and on my plate). But for sandwiches? I’d go with this rendition all day. You want something soft and cushiony to bite into when making a sandwich, not crusty.
Table of Contents
🍞 18 Easy Sourdough Recipes!
Ingredients:
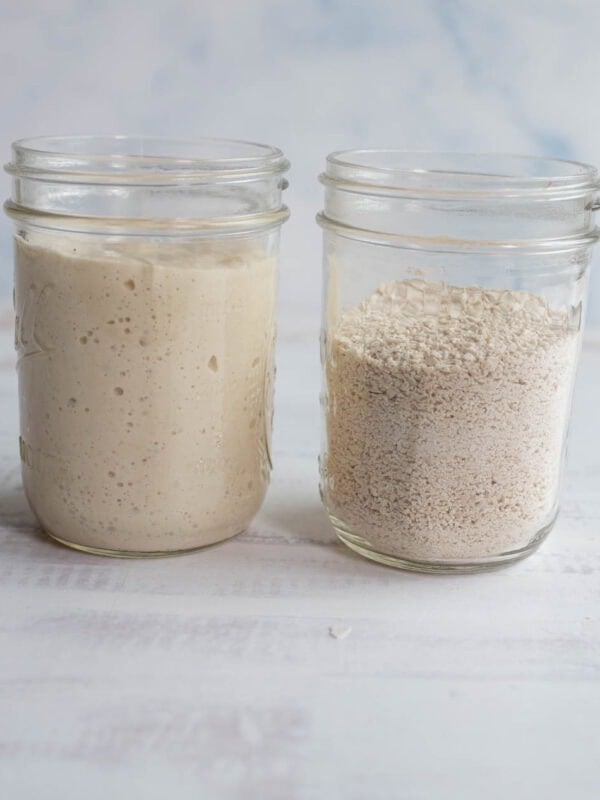
- Sourdough starter: Have you made bread using a sourdough starter before? It’s so easy! It just takes a few days to prep your starter, so if you want to make your own, plan accordingly. Here’s a post all about making your own sourdough starter.
- Water: The water thins the sourdough starter before adding the rest of your thick ingredients.
- Sugar: Using a little bit of sugar adds a touch of sweetness to balance the tart from the sourdough flavor.
- Light oil: Oil is what makes the bread really soft and tender.
- All-purpose flour: Flour is the essential ingredient in making bread! I like all-purpose because it’s versatile and makes a nice chewy, soft-textured bread.
- Salt: Salt adds balanced flavor to the rest of the ingredients.
See recipe card below for full information on ingredients and quantities
Frequently Asked Questions:
If the dough doesn’t rise, it may be because the room is too cool. Try moving the bowl into a warmer spot in the room to activate the natural yeast. This is the most common issue I see with sluggish bread and starters!
Using a light flour helps sourdough bread to be lighter. I like using all-purpose white flour. You can also sift your flour to make it extra light. This recipe yields a softer and fluffy bread thanks to the oil used in the ingredients, too.
Store soft sourdough loaf bread in an airtight Ziploc bag for up to 5 days.
The best way to keep your bread from drying out is storing it in an airtight bag, and not slicing it until you are ready to serve it. Slicing ahead of time lets air touch more of the bread, which can make it drier and more crumbly.
Homemade sourdough sandwich bread keeps for up to 5 days in the fridge. You can also freeze an entire loaf for up to 4 months. Just thaw in the fridge overnight before you want to serve it!

Expert Tips
- I love this easy loaf so much. It’s our favorite sandwich bread and it makes great toast.
- New to sourdough? You can learn how to make a starter here.
Other Sourdough Breads To Try
These are some of my other dare-I-say amazing sourdough recipes that have become family favorites!
- No Knead Sourdough Bread {Easy Beginner’s Recipe}
- Fluffy Sourdough Rolls
- Sourdough Baguettes
- Sourdough Hamburger Buns
More Sourdough Recipes to Consider:
Sourdough Recipes
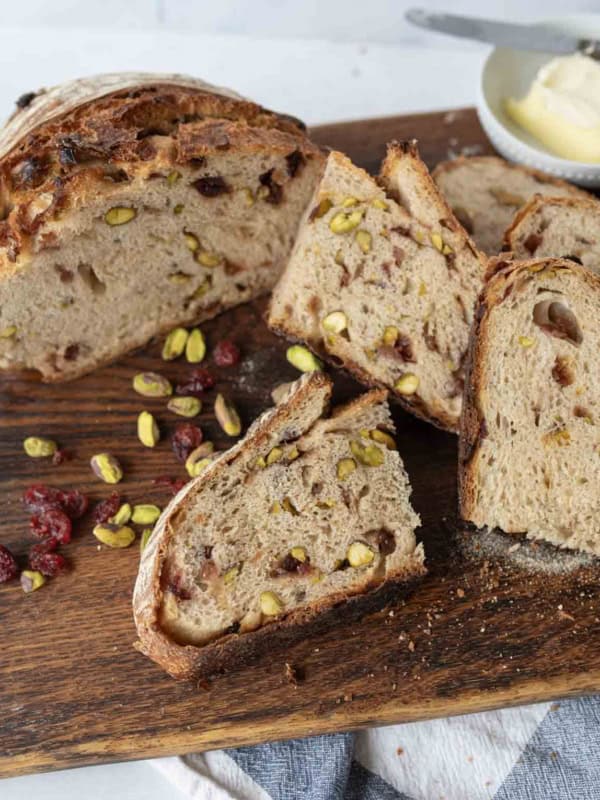
Orange Cranberry Sourdough Bread with Pistachios
French Toast Recipes
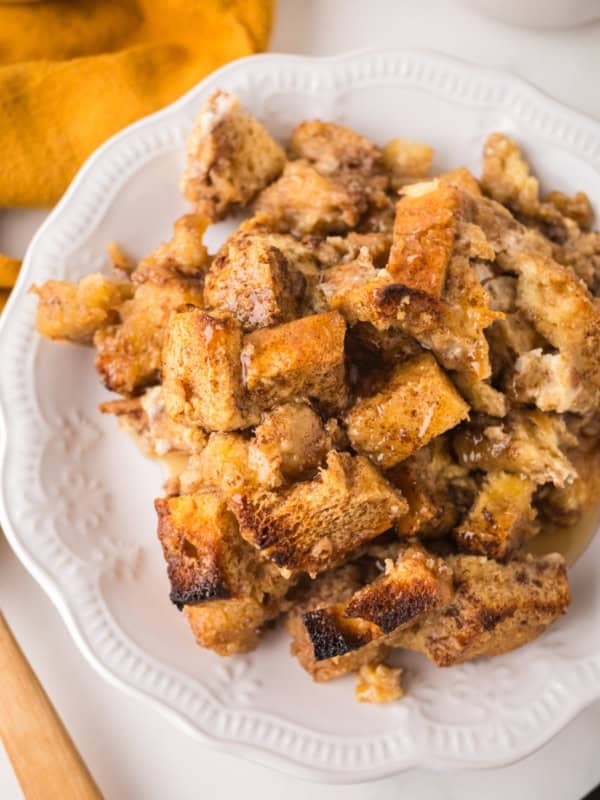
Sourdough French Toast Casserole
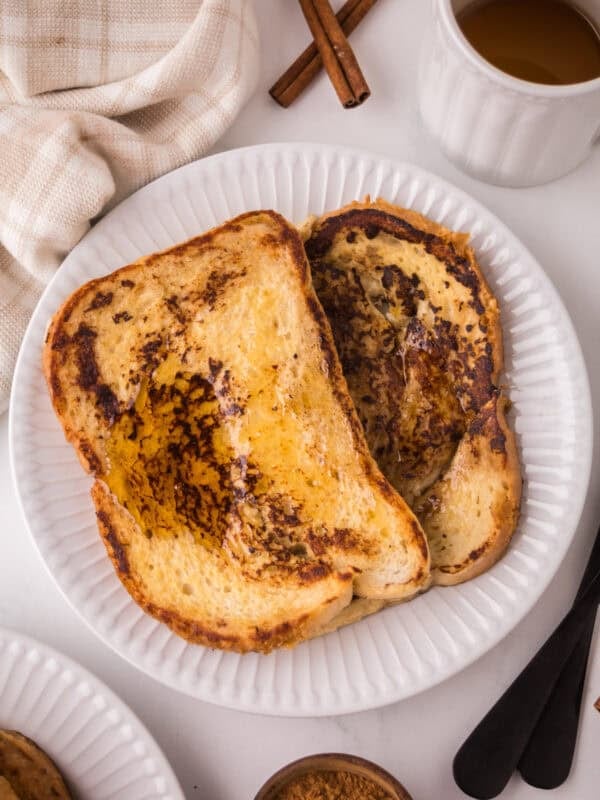
French Toast Recipes
Sourdough French Toast in 15 Minutes
Sourdough Recipes
How to Rehydrate Sourdough Starter
Did you make this recipe? Leave a ⭐️ review and share it on Instagram, Facebook, or Pinterest!
Soft Sandwich Loaf Sourdough Bread
Ingredients
- 75 grams active sourdough starter, (very full 1/3 cup)
- 300 grams water, (1 1/4 cup)
- 15 grams sugar, (1 tablespoon)
- 15 grams light oil, (1 tablespoon)
- 500 grams all-purpose flour, (4 cups)
- 10 grams salt, (1 1/2 teaspoons)
Instructions
- Feed your starter 12 or so hours before you plan to make the dough. The timing should be such that you are using your starter at it’s peak, so feed it so that it’s peaked when you want to make the dough, it’ll vary based on your starter and house temperature.
- When you starter is fed and has grown in size, make the dough while the starter is still tall and full, at its peak.
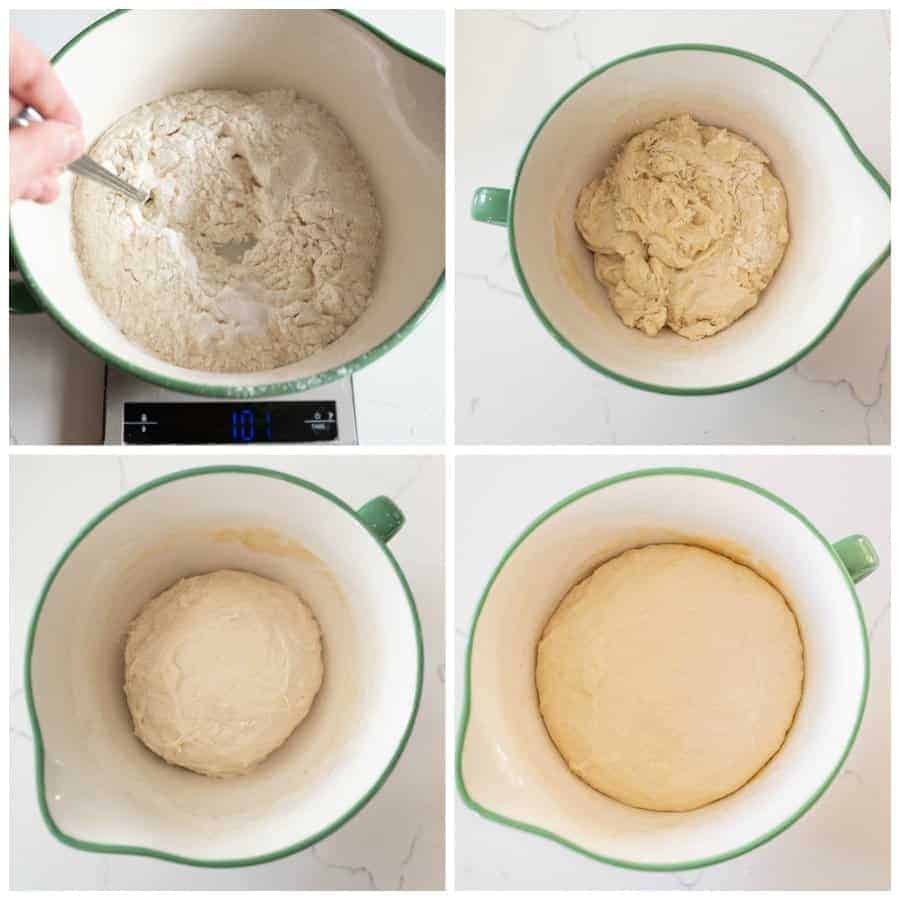
- To make the dough, measure out your starter into a medium to medium-large mixing bowl.
- Add the water, and whisk the starter and the water together until well combined.
- Add the sugar, oil, flour, and salt to the bowl.
- Use a fork to combine well; it’ll be a little stiff but just mix it up well.
- Cover the bowl with a damp clean kitchen towel, and let it rest for 1 hour.
- After an hour, come back to the bowl, and gently pull the edge of the dough in the bowl and push it into the middle. Work your way around the bowl, pushing the dough to the center each time. Do this a few times until the dough comes together in a ball. It will look more like traditional bread dough at this point.
- Cover the bowl again with a damp kitchen towel, and let the dough rest at room temperature for 8 to 12 hours, depending on your schedule.
- Prepare a loaf pan by spraying it with cooking spray or greasing well with butter.
- Turn the dough out onto a lightly floured surface. Don’t punch it down or be too rough with it — it’s worked for hours to rise — no need to deflate it on purpose.
- Roll the dough into a long log and tuck in the ends. Use your hands to gently press the loaf into an even shape, pressing along the bottom of the loaf near the work surface.
- Place the loaf into the pan, smooth side up. I like to use an 8×3 inch loaf pan for this recipe, slightly smaller than a 9×5 loaf pan as it helps the top dome up more.
- Cover with a damp towel, and allow to rise for 1 to 2 hours or until it has risen a 1/2 inch or so above the rim of the pan. How quickly it rises will depend a lot on the temperature of your house.
- While the bread is rising, preheat the oven to 375 degrees F.
- When the dough is ready, bake it for 40 to 45 minutes. The loaf will be a deep brown color.
- Let the loaf rest 5 minutes in the pan, and then remove it and let it cool on a wire rack. Let the loaf cool at least an hour before cutting.
- Store in a plastic bag for 3 to 5 days. It will cut best once it has cooled completely.
Notes
- I love this easy loaf so much. It’s our favorite sandwich bread and it makes great toast.
- New to sourdough? You can learn how to make a starter here.


I find that I need just a smidge less water and my second rise needs to be longer – up to 4 hours. The bread turns out very good!
I love this bread! I’ve made it 9 or 10 times, always to rave reviews. We love that it has the sourdough flavor, but not the crust that’s hard to eat. I often sub out 50g old fashioned oats for flour. I let that sit with the water and starter for a few minutes to soften. Thanks for this recipe!
I love hearing that! Thank you for letting me know and I do that with the oats too!
I like that idea! I will try the oats next time!
This intrigues me, I am going to have to try that with the oats!
Today I made this bread for the second time and it’s so amazing!!!!
I never thought I could make bread but now I can and will be doing it a lot.
I have now made 5 loaves of this bread…..its always perfect. I used to bake bread all the time. He felt bad “making” me have to bake it so he started insisting on buying bread at the store. Well, its official…..because this bread is so darn good and easier than easy to make, no more store bought bread in this house! The recipe fits perfectly into our lifestyle……. I let it rise the first time until it’s convenient for me to flop the dough into the loaf pan….its even gone 20 hours without a problem. If I accidentally deflate it or something comes up, it doesn’t freak out if the second rise is 5-6 hours either……I love, love, love it!!!!!! Tons of thanks!!!!!
I feel the same way about it! It’s so flexible and just turns out great!!
This was so easy and delicious! I have been living off sourdough the past 2 weeks, can’t get enough. This made the best sandwiches and the best toast. I will be making this regularly!
Hi, I miscalculated the time and will be asleep after an 8-12 hour rise as it will be in the middle of the night. Can I let the dough rest for 17 hours ? Either outside or in the fridge ? Thank you !
It’ll be find, just more sour in taste! I rest at room temperature!
Thanks so much !
WOW! It worked!!!!! I usually have a bit of a problem baking bread due to my altitude(7000′). I always have to alter the recipe(less yeast, salt, more water) otherwise the gluten structure isn’t strong enough to support the height and I end up with a collapsed, dense loaf of bread. This recipe worked perfectly with no changes! What came out of the oven was picture perfect….nice and tall, the crumb is gorgeous, the flavor is yummy and the texture…..oh my….so soft. It was also the easiest loaf of bread I have ever made……and I’ve made hundreds over the years. Melissa, thank you….you just changed my bread baking world forever with this recipe!
Add a picture!!! I’d LOVE to see it!! I’m so so happy to hear this!
My pan measured a wee bit under 4 x 8 on the bottom…..and the bread rose, stayed and baked 4 1/2″ high!!!! I resisted the temptation and let it cool before I cut into it….I then immediately ate two pieces, no butter, no jam….just scarfed the goodness down…..he had two pieces toasted this morning….said it was really good too! I am soooo excited about this bread!!!!
It’s beautiful!!! And I LOVE how tall it is!
I just made this sourdough loaf yesterday and it was so delicious (and pretty!). I had made a different sourdough sandwich loaf recipe recently and I liked it but this recipe blew it out of the water. This is my now my go to for sourdough sandwich loaf bread.
Best compliment ever! Thank you!
Great bread! Easy and light homemade bread. My family couldn’t get enough of it : )
I love that you made it already! Thank you for leaving reviews, it’s so appreciated!
I just got this started! Haven’t baked it yet but I’m sure it will turn out wonderful as all the recipes I make of yours turn out. I’ll report back once its done.