This post may contain affiliate links. Please read our disclosure policy.
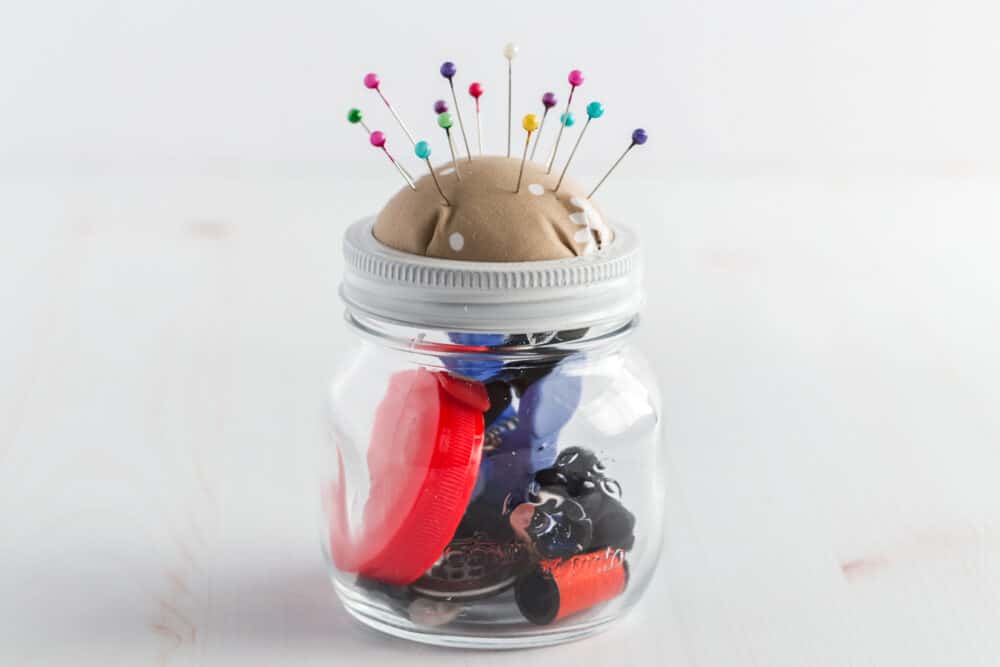
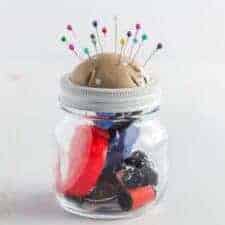
This DIY sewing kit in a jar is such a fun & creative gift idea for your favorite crafty person! They’ll love this simple homemade gift that only takes a few moments to make.
Simple Sew Kit in a Jar
Raise your hand if you have a crafty friend or loved one in your life! I would definitely say the majority of my creativity is expressed in the kitchen — hence: running a food blog! — but I love a good DIY project every now and then, too. That’s the fun in this DIY sewing kit in a jar! It’s a simple creative project for you, and makes a great gift for another creator in your life.
If you have sewers, knitters, cross-stitchers, or quilters in your life especially, this is such a fantastic gift. Or a mama who happens to be mending tears and seams from her on-the-go children — this gift is perfect for her, too! Sewing kits are something we’ve all wished we had on hand at one time or another, and we often don’t realize how much we need one until, well, we really need one. Know what I mean? Have fun making this cute DIY sewing jar, and keep one on hand for yourself, too!
How do you make a pin cushion for a DIY sewing kit?
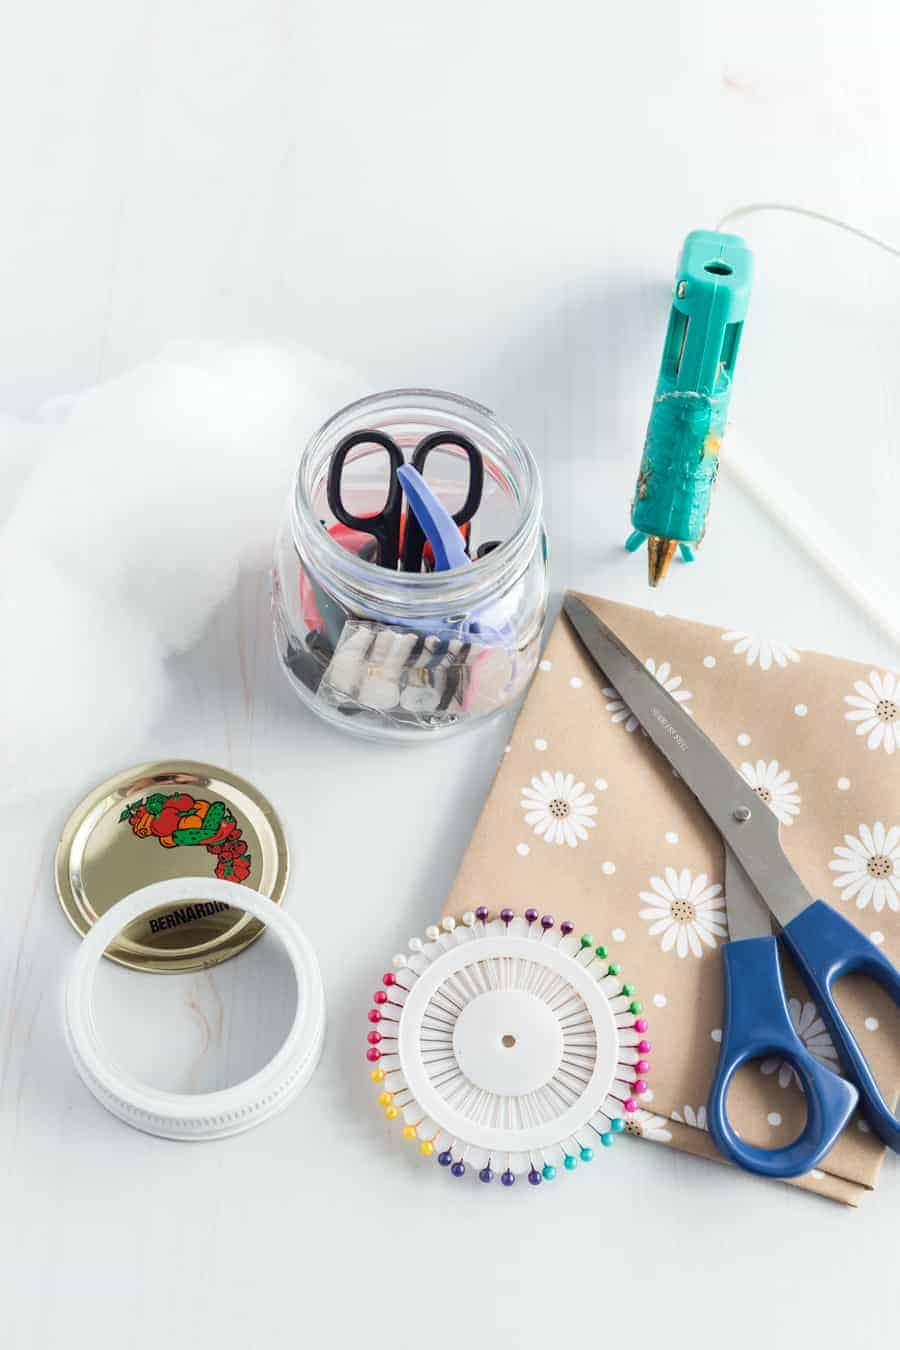
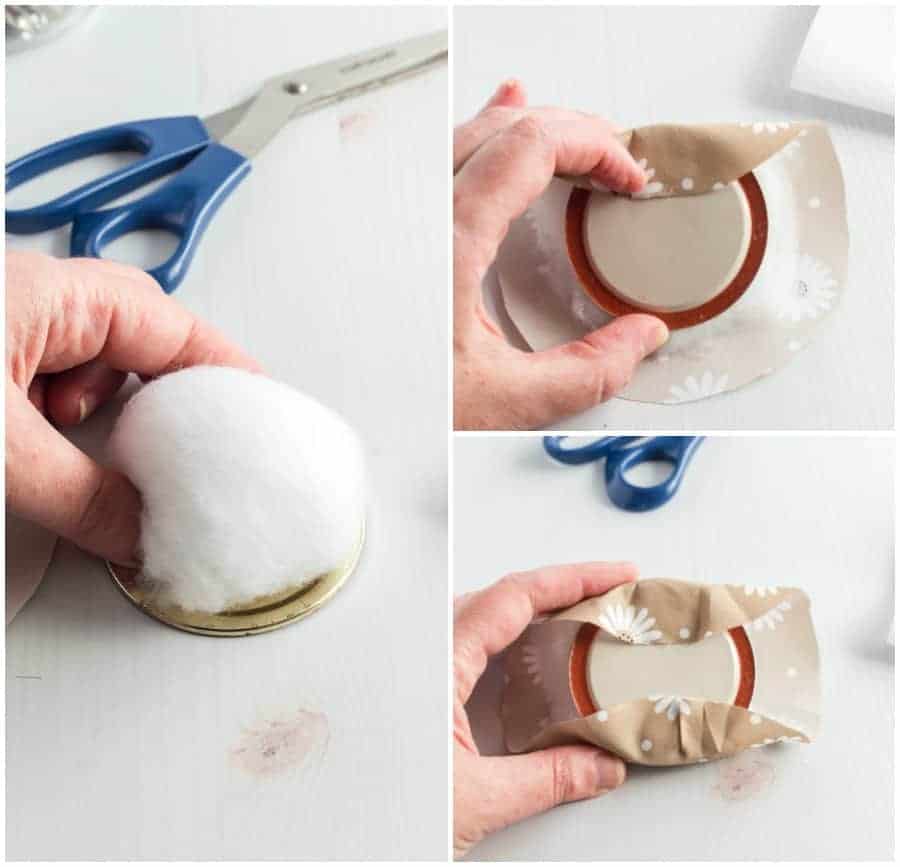
The pin cushion is super simple to make. Take the round of a jar lid, and cut out a piece of fabric in a circle shape that’s 2 inches wider in diameter than the round. Grab a handful of quilt batting or fiber fill (something to stuff in the pin cushion) and press it to the top of the round. Wrap the fabric around the stuffing, and hot glue the ends of the fabric to the bottom of the jar lid bottom.
What do you put inside a DIY sewing kit in a jar?
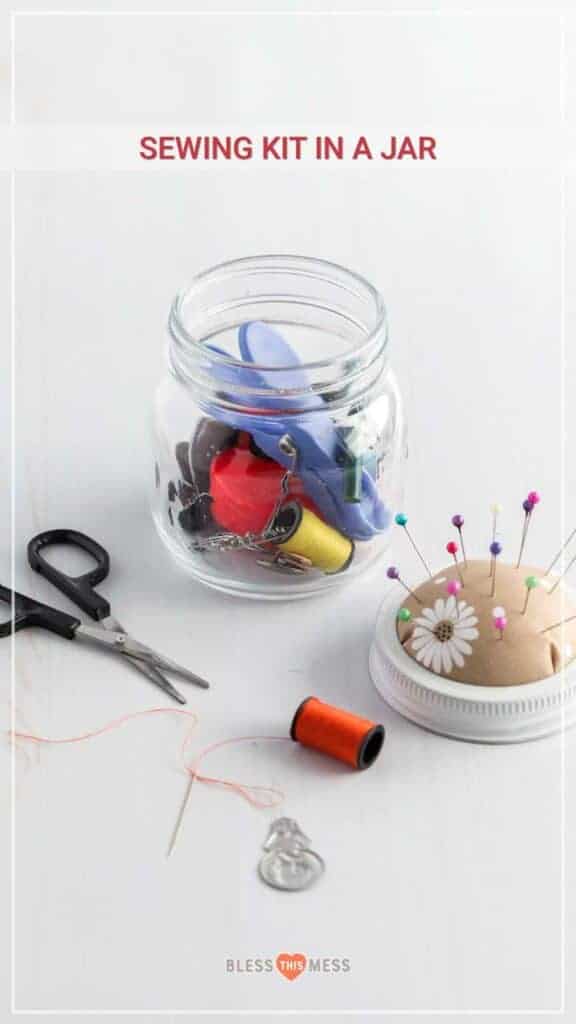
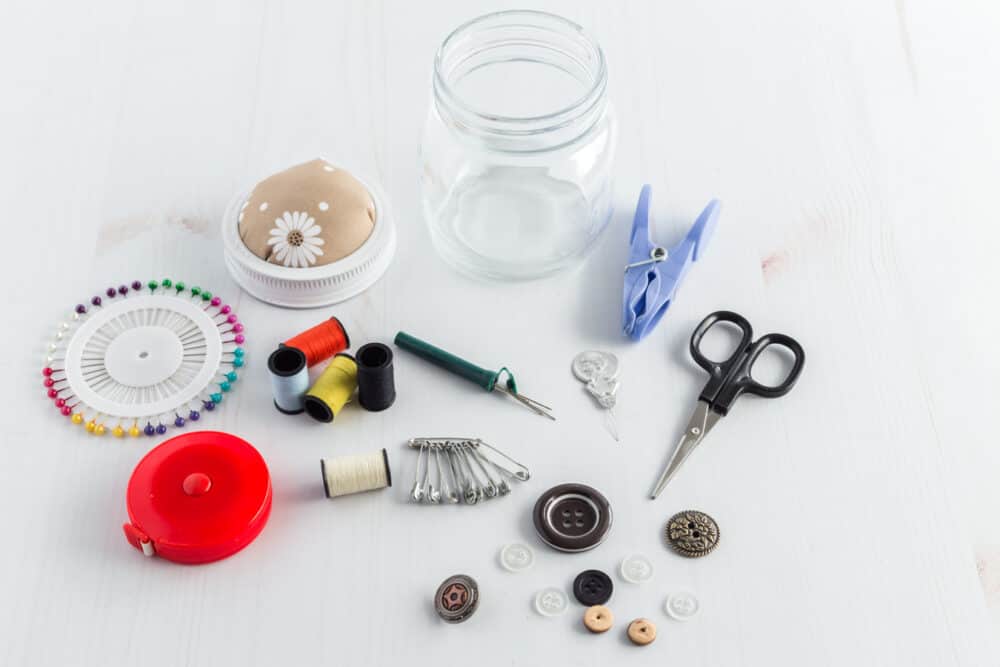
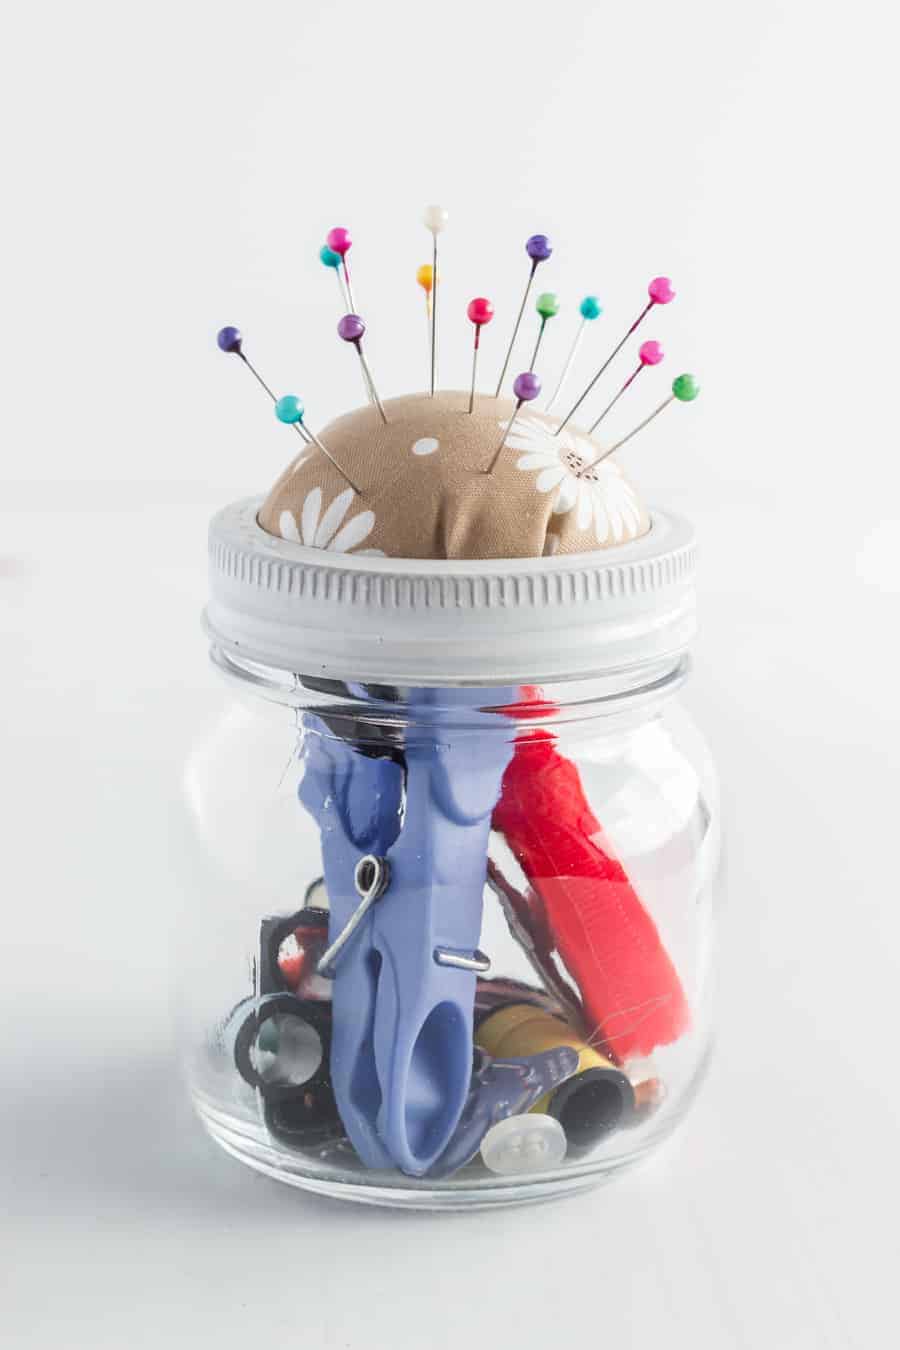
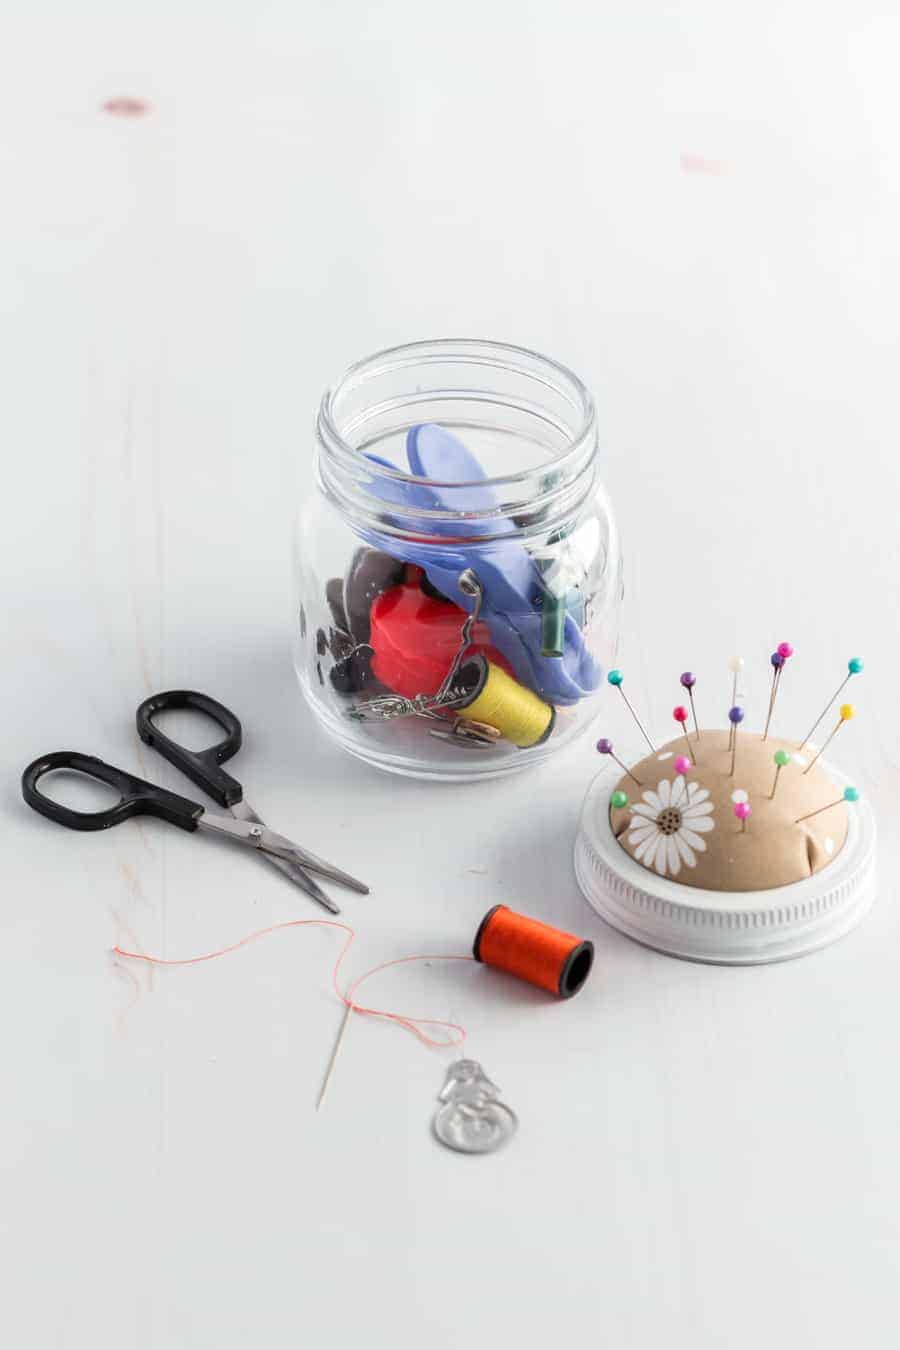
You can add so many fun things to a DIY sewing kit! Make sure you get some thread, needles, little scissors, and bobbins. You can also add buttons, tape measure, pins, eyelets, and other notions wrapped around clothespins.
Who can you give a DIY sewing kit to as a gift?
A sewing kit makes a great gift for crafters, creatives, mamas, teachers, crafty teens, grandparents, neighbors — really and truly, anyone! We can all use a sewing kit to keep on hand.
DIY Sewing Kit Gift in a Jar
Ingredients
Here’s what you’ll need:
- Glass jars with a flat and ring, (the two pieces to the lid)
- Fabric
- Scissors
- Hot glue
- Quilt batting or fiber fill
- Spray paint, optional
Things to fill the jar:
- Thread
- Bobbins
- Little scissors
- Tape measure
- Eyelets
- Buttons
- Pins
- Needles
- Notions wrapped around clothespins, Ric-Rac, ribbon, yarn, elastic…
Instructions
- If you want to spray paint the ring of the lid, do that first so that it has time to dry.
- Cut a circle out of your fabric that is about 2 inches wider all the way around the flat (the flat metal part of the lid). If the flat is 3 inches across, then your circle of fabric should be 7 inches across.
- Wad a piece of batting or fiber fill in your hands until you have a hard ball just smaller than the size of your fist. Using two hands place the material circle around the stuffing/batting ball. Carefully put the wad of stuffing or batting on the shiny side of the flat so that the fabric is facing your palm, batting, and then the flat.
- Are you with me? It’s not really hard, but it was near impossible to get a picture of the process while doing it. The goal is just to hold it all together while you glue the fabric to the underside of the flat.
- Pull the fabric to the back of the lid and hot glue it in place. I found it easiest to glue a piece and then glue opposite of where you just did. So glue the top then bottom, the left then right, and work your way around like like a clock. This helped the fabric to stretch evenly.
- Now you can pop the pin cushion into the ring and screw it onto the lid. Fill the jar with your favorite sewing supplies (bonus points if the colors match the fabric), stick a few pins in the pin cushion, and you are ready to give a beautiful handmade gift. Easy!
Notes
- I would let the rings dry overnight if you choose to spray paint them. I tried to use mine after a few hours and some of the paint scratched off easily. The paint was much harder the next day.
- These are the jars I bought at Fresh Market, and I saw them at Walmart too. I think they’d be where ever you can buy Ball canning jars.
- Quilt batting was very easy to use and would recommend that. See if any quilters you know have scraps leftover from when they trim the quilt before binding.
Nutrition
Other DIY gifts you’ll love:
- DIY Bath Salts and Sugar Scrubs (Great Homemade Gifts!)
- Homemade Beeswax Lip Balm
- Simple DIY Beeswax Candles
- Hot Cocoa Gift Set
- Simple Embroidered Ornaments
This post was originally published in 2012, and has been updated and rephotographed in December 2019.


I liked you on FB (I can’t believe it’s taken me this long to do that!).
I found you through our mutual friend, Emily (of triplet fame), and have been following your blog for quite some time. I love your ideas! Best gift I’ve been given is a close tie between my little sewing machine and my kitchenaid mixer.
Best gift… Last year my don gave me a calendar he made at school with his handprints made into fireworks, Santa, Easter Bunnies, etc. I have been enjoying it all year.
*son, not don
I like you on Facebook
Love the giveaway! I’m hoping for a brand new set of white dishes this year!!
Best gift? I don’t know… is saying my kids cheating? I really felt like they were each a special gift (and it’s the very first thing that comes to mind). If that’s cheating, I’d have to say a blanket my husband made for me. He managed to keep it a surprise and now it’s kept me warm for over 2 years!
(PS this is an amazing package!)
following on pinterest: Rae Pavey
liked on facebook: Rae Pavey
Best gift was last year my mom bought me a plane ticket to Chicago so I could spend the holidays with my sister 🙂 This year my sister is coming to see us but we are keeping it a secret from our parents so that when she shows up they will be surprised. I can’t wait to see the look on my mom’s face 🙂
I follow you on pinterest. I am very excited to make those double chocolate peppermint cookies and pinned them for later in the month.