This post may contain affiliate links. Please read our disclosure policy.
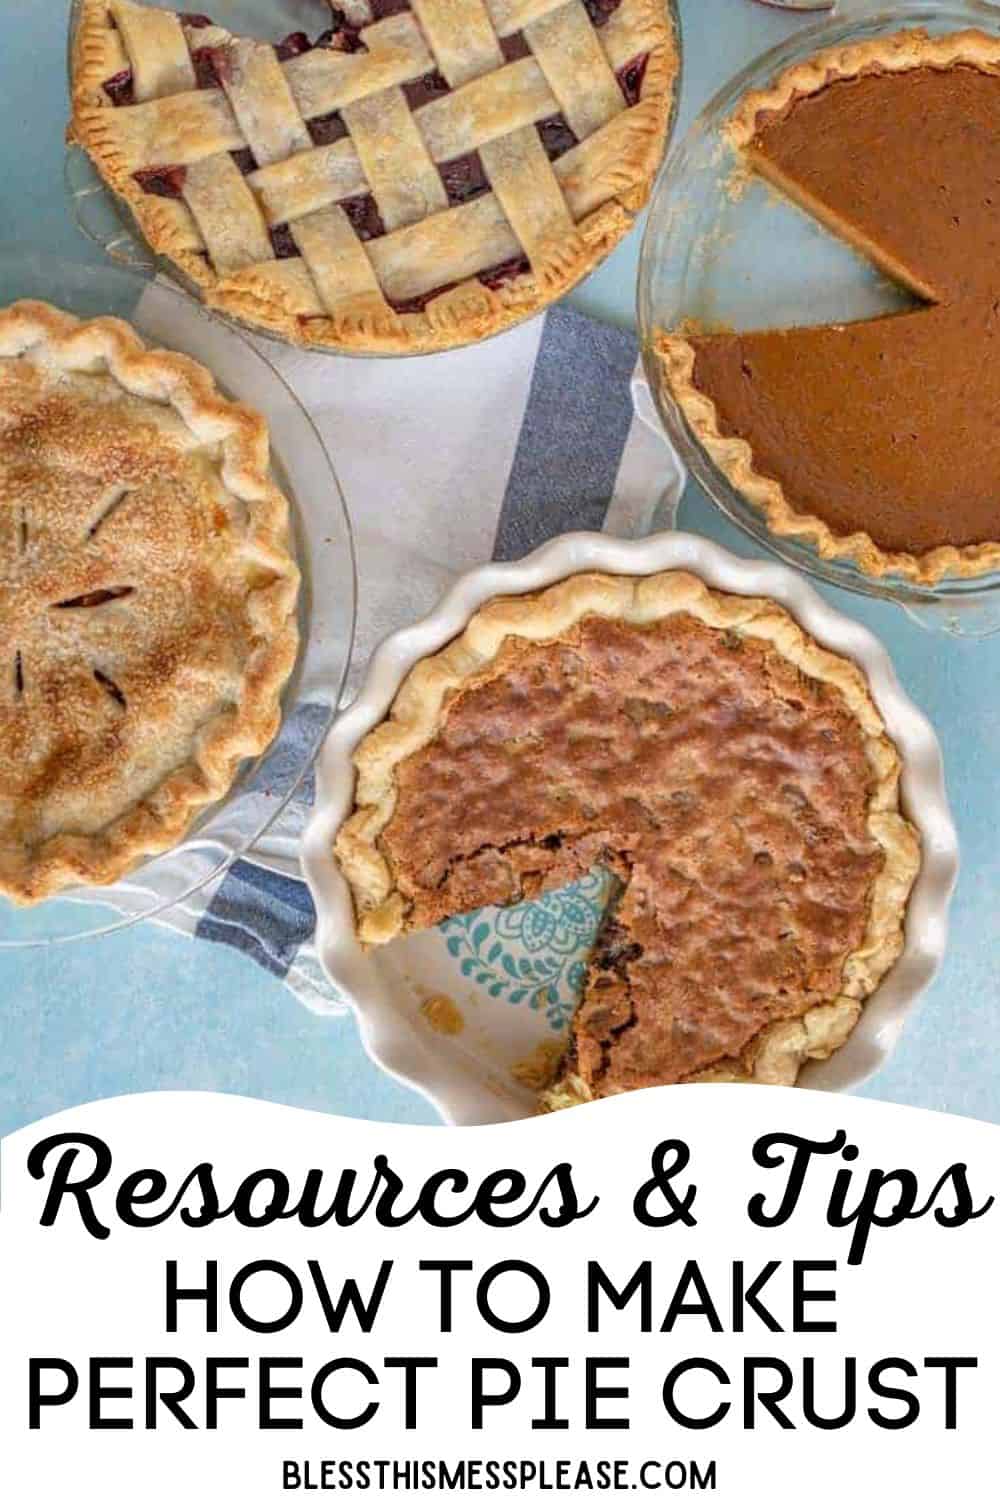

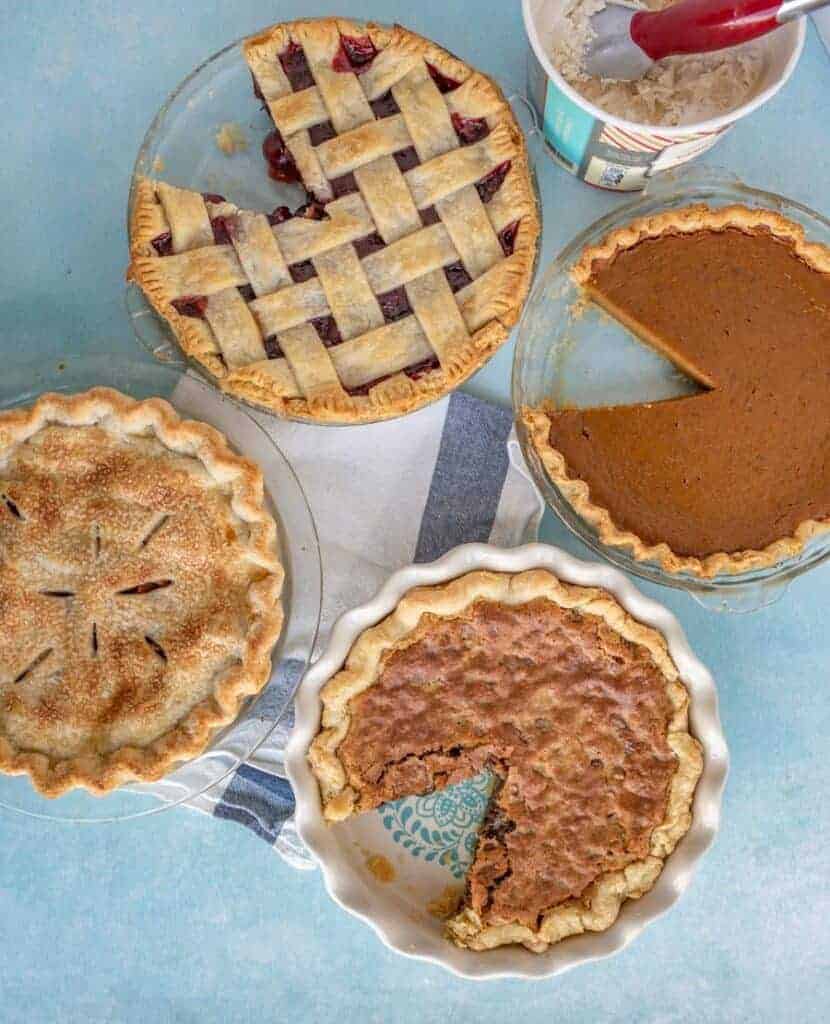
Learning How to Make Pie Crust from scratch will change your entire baking game. There’s something almost magical about turning simple ingredients into those beautiful, flaky layers that make people think you’re some kind of kitchen wizard! Here are my best tips and techniques to master homemade crust.
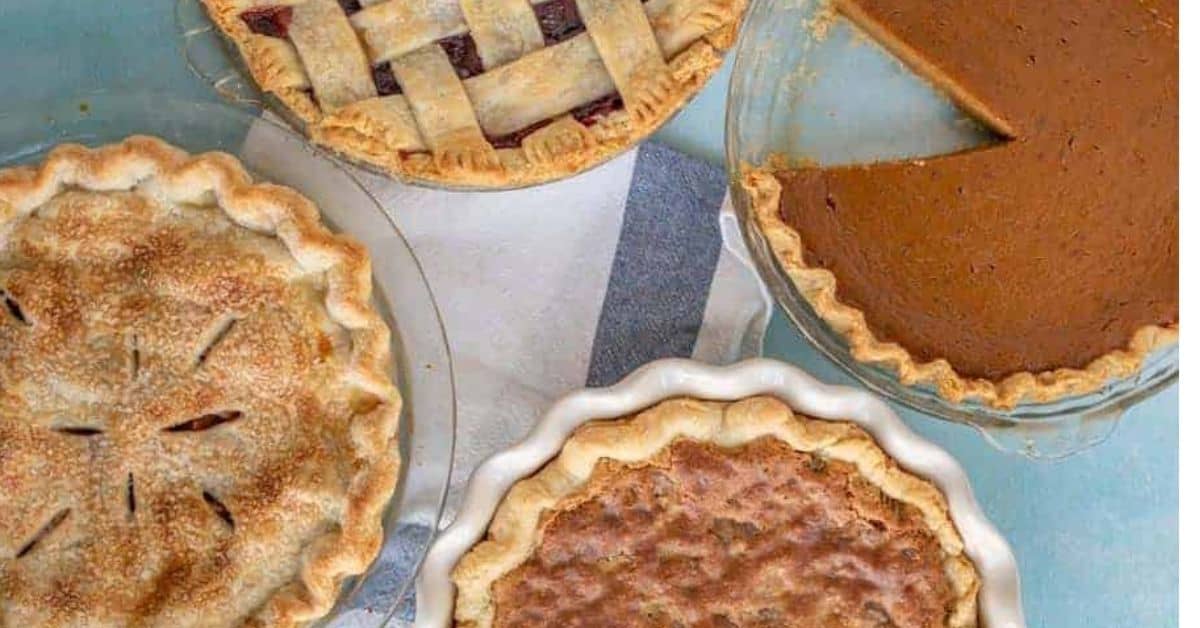
Table of Contents
- Homemade Pie Crust Recipes
- Proper Pie Crust Techniques and Shortcuts
- How to Properly Seal a Pie Crust
- FAQs: Troubleshooting Seal Failures
- Master the Art of Crimping and Decorative Edges
- FAQs: Common Edge Problems
- How to Bake Pie Crusts: The Complete Guide
- How to Bake a Single Regular Pie Crust (Unfilled)
- FAQs: Baking Unfilled Pie Crust
- How to Bake a Double Regular Pie Crust (With Filling)
- FAQs: Baking Double Pie Crust
- How to Make and Bake a Cookie Crust (Like Oreo or Chocolate Wafer)
- FAQs: Cookie Crusts
- How to Make and Bake a Graham Cracker Crust
- FAQs: Graham Cracker Crusts
- How to Blind Bake a Pie Crust (The Professional Method)
- Baking Crusts With Filling (Custard Pies, Pumpkin, Pecan)
- FAQs: Custard Pies
- My Final Thoughts on Pie Crust Success
- More Pie Related Goodies For You
Homemade Pie Crust Recipes
Take a deep breath, pour yourself a cup of coffee, and enjoy the pie making process. Your family and guests are going to be absolutely blown away by your gorgeous pies. You’ve got this! 🥧
Best Pie Crust Recipe
This is my favorite homemade pie crust recipe! It’s flaky and buttery, which makes the best pies ever! Anyone can make it thanks to this simple recipe!
Easy Pie Crust Recipe
This Perfect Pie Crust (made with shortening and butter) comes together with just a few ingredients, one of which may just surprise you: vinegar.
Oreo Pie Crust (Chocolate Cookie Pie Crust)
A Chocolate Cookie Pie Crust that works great for simple cheesecake recipes and creamy pies. This cookie pie crust recipe is irresistibly good, and your family will love you for making it. Plus, you can snack on cookies while you work!
Butter Pie Crust
This buttery and flaky all-butter pie crust is a simple recipe with just four ingredients. It’s the perfect crust for all your favorite pies!
Pie Crust For Mini Pies
Mini pie is just like a traditional pie, but so little you can eat it like a cookie. These adorable little desserts are easy to make, too. Follow the recipe for how to get the smaller pie shells and fill it with your desired pie filling.

Proper Pie Crust Techniques and Shortcuts
The Cold Butter Method (My Go-To Technique)
This is the traditional approach that creates those coveted flaky layers!
The Process:
- Cut cold butter into small cubes (I’m talking straight-from-the-fridge cold)
- Use a pastry cutter or two forks to work butter into flour until it resembles coarse crumbs
- Some pieces should be pea-sized, others smaller—this variety creates the flakiest texture
- Add ice water gradually, one tablespoon at a time
- Mix just until dough comes together (overworking = tough crust)
My Favorite Shortcut: Freeze your butter for 15 minutes, then grate it on a box grater directly into your flour. Game changer! The butter stays cold and distributes perfectly without overworking the dough.
The Food Processor Method (For Busy Days)
When time is tight, my food processor saves the day.
Quick Steps:
- Pulse flour and salt together
- Add cold butter cubes
- Pulse 8-10 times until mixture is crumbly
- Drizzle in ice water while pulsing
- Stop the second it starts clumping together
Critical Tip: Don’t let the food processor run continuously—you’ll end up with paste instead of dough. Those short pulses are key!
How to Properly Seal a Pie Crust
If you’ve ever made a pie where the filling leaked out during baking, please raise your hand (me, raising both hands! ✋✋). But it’s actually caused by a not-tight-enough seal.
And it’s easy to fix, too. A well-sealed pie keeps all that delicious filling inside where it belongs and creates a professional-looking finished product.
Why Sealing Matters
Think of sealing as creating a fortress around your filling. Without a proper seal:
- Juices bubble out and burn on your oven floor (been there, cleaned that)
- The top crust can slide off during baking (heartbreaking!)
- Your beautiful lattice work might separate
- Steam escapes unevenly, causing soggy spots
No stress, though, because here is your cheatsheet to skim through to ensure all crusts are sealed in your next pie baking session.
The Basic Double-Crust Seal (Essential Technique)
This is your foundation for all two-crust pies:
Step-by-Step Process:
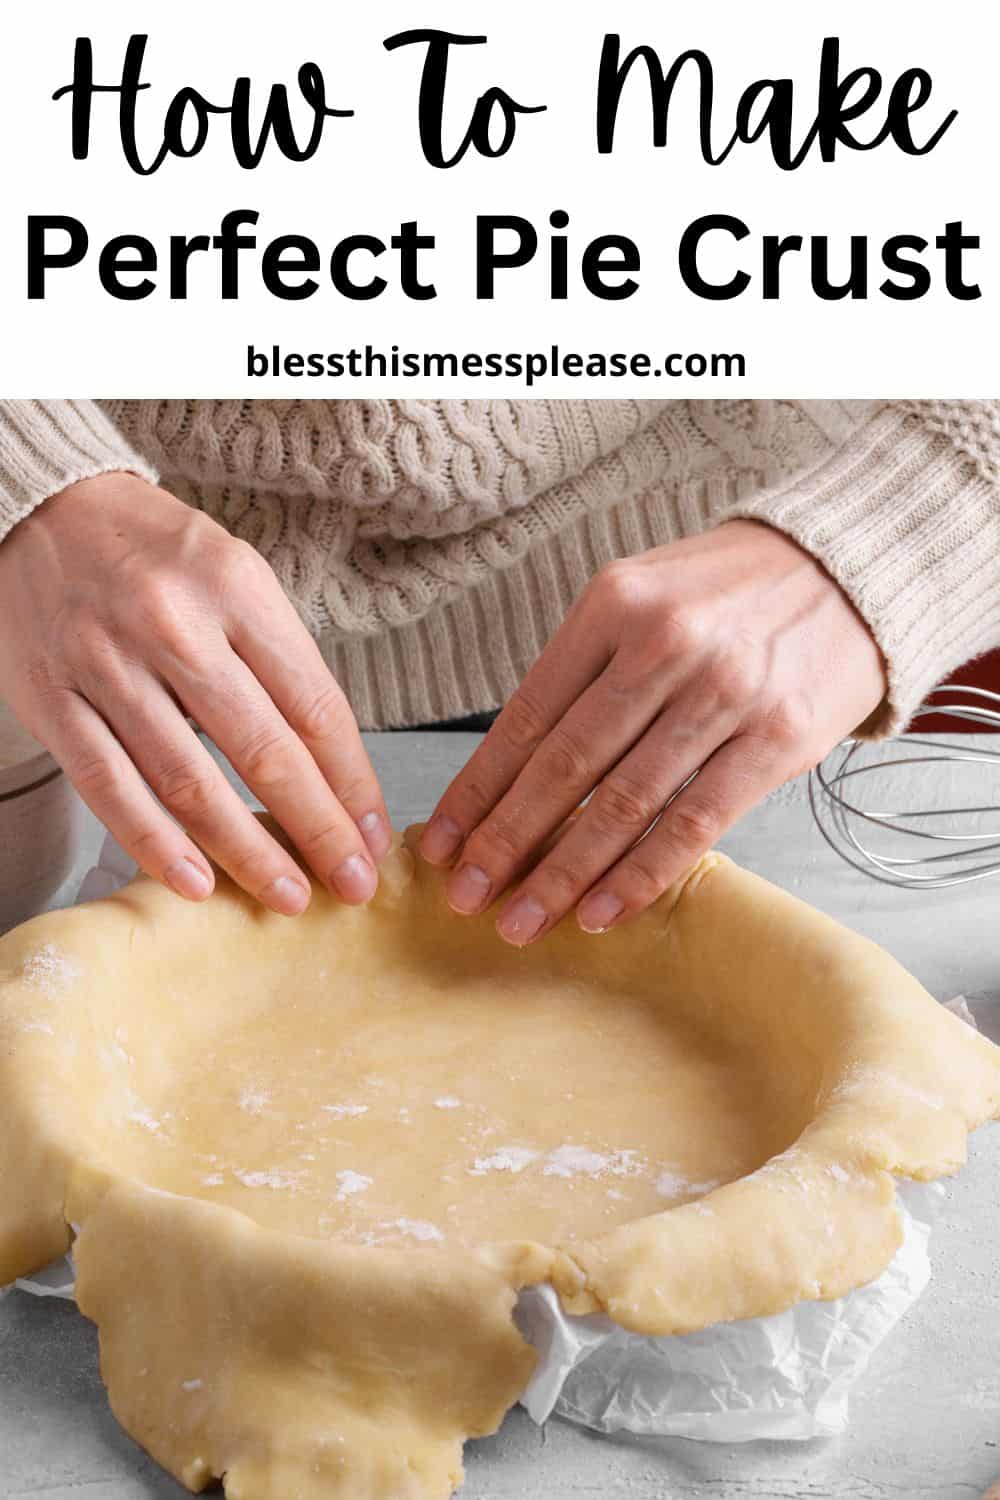
- Prepare the Bottom Crust First
- Roll out your bottom crust to about 12 inches in diameter
- Fit it into your pie plate, gently pressing into corners
- Let excess hang over the edge (don’t trim yet!)
- Add your filling, mounding slightly in the center
- Apply the Seal
- Lightly brush the overhanging edge with water, milk, or beaten egg
- This moisture acts like glue—don’t skip this step!
- Roll out your top crust to about 11 inches
- Carefully drape it over the filling
- Create the Seal
- Press the top and bottom crusts together firmly around the entire edge
- Use your fingers to press straight down, not at an angle
- You should feel the two layers merge together
- Trim the Excess
- Using kitchen scissors or a sharp knife, trim the edges leaving about ¾ to 1-inch overhang
- Fold this overhang under itself, creating a thick edge that sits on the rim
- Press firmly to seal once more
My Pro Tip: Work your way around the pie systematically—I go clockwise and press every 2 inches. This ensures I haven’t missed any spots where filling could escape.
The Fork-Crimp Seal (Quick and Effective)
This is my go-to when I want a secure seal without fuss:
The Method:
- Trim both crusts even with the pie plate rim (no overhang)
- Press the edges together firmly
- Dip a fork in flour
- Press the fork tines all around the edge, going through both layers
- The fork creates a decorative pattern AND a tight seal
Why It Works: The fork tines actually pierce through both layers of dough multiple times, creating dozens of little connection points. It’s nearly impossible for filling to escape!
The Water Seal Method (For Stubborn Dough)
When your dough is being difficult or keeps separating:
Emergency Fix:
- Use a pastry brush to generously paint water between the layers
- Press firmly with your fingers
- Use a fork to create additional anchor points
- Freeze for 15 minutes before baking—this helps everything set
Real Talk: I’ve saved more than one Thanksgiving pie with this method when my dough was too warm and wouldn’t cooperate! (I call these my teen crusts…😂)
Sealing Lattice Crusts (Special Technique)
Lattice tops require a different approach, and if you’ve gone through the trouble hard work to get a beautiful decorative crust, then this will help keep it looking perfect through the last slice.
Lattice-Specific Sealing:
- Weave your lattice strips across the filling
- Trim lattice strips so they overhang the pie plate by ½ inch
- Fold the bottom crust overhang up and over the ends of the lattice strips
- Press firmly to seal the lattice ends into the bottom crust
- Crimp as desired—the bottom crust should encase the lattice ends completely
Critical Point: Each lattice strip must be anchored into the bottom crust. I’ve had lattice strips pull away during baking when I didn’t seal them properly—not pretty!
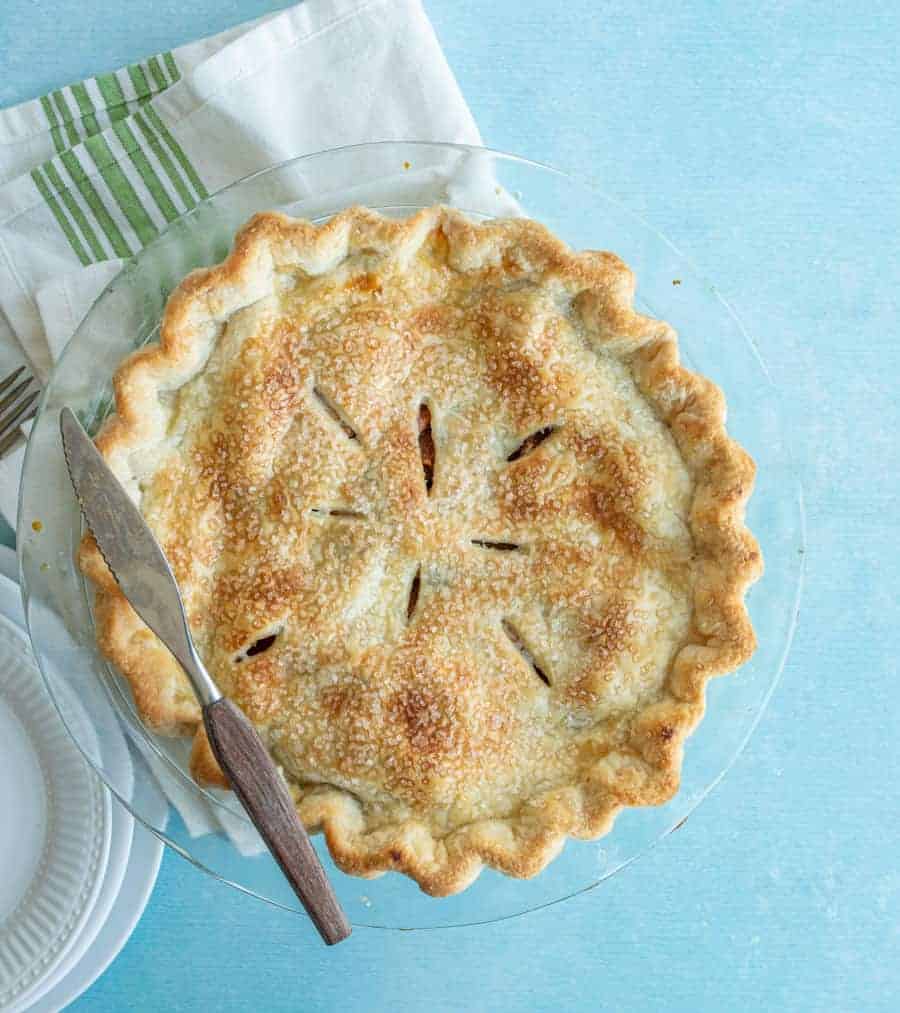
Venting: The Final Seal Step
Even perfectly sealed pies need to breathe! These vents allow steam to escape without breaking your seal.
For Full Top Crusts:
- Cut 4-6 small slits in the top (each about 2 inches long)
- Or use small decorative cutters to remove shapes
Common Mistake to Avoid: Making vents too small. The steam needs somewhere to go, or it’ll find its own way out—usually by blowing holes in your crust or breaking your seal.
The Egg Wash Seal Enhancement
Here’s an extra layer of insurance I use for very juicy pies. (I usually sprinkle super fine sugar on top to add some extra sparkle since I’m adding the egg wash anyway.)
Double-Security Method:
- Seal the crusts together as usual
- Brush the entire sealed edge with egg wash
- The egg proteins cook and create an additional moisture barrier
- This is especially helpful for berry pies with lots of liquid
FAQs: Troubleshooting Seal Failures
It’s possible your dough was too warm when you sealed it. Solution: Freeze the assembled pie for 20 minutes before baking.
Don’t worry, we’ve all missed that one area during sealing! Next time: Work methodically around the entire circumference.
If there is not enough moisture applied before sealing, then it’s possible for the top to come off of a double crust pie. Solution: Be generous with your water or egg wash!
Usually this happens when the dough shrinks during baking due to overworking or gluten development. Solution: Let dough rest longer before rolling and handle it as little as possible so the gluten doesn’t become too active.
Master the Art of Crimping and Decorative Edges
This is where your pies go from “homemade” to “wow, did you make that?!” I promise these techniques are easier than they look, and with a little practice, you’ll be creating bakery-worthy edges in no time.
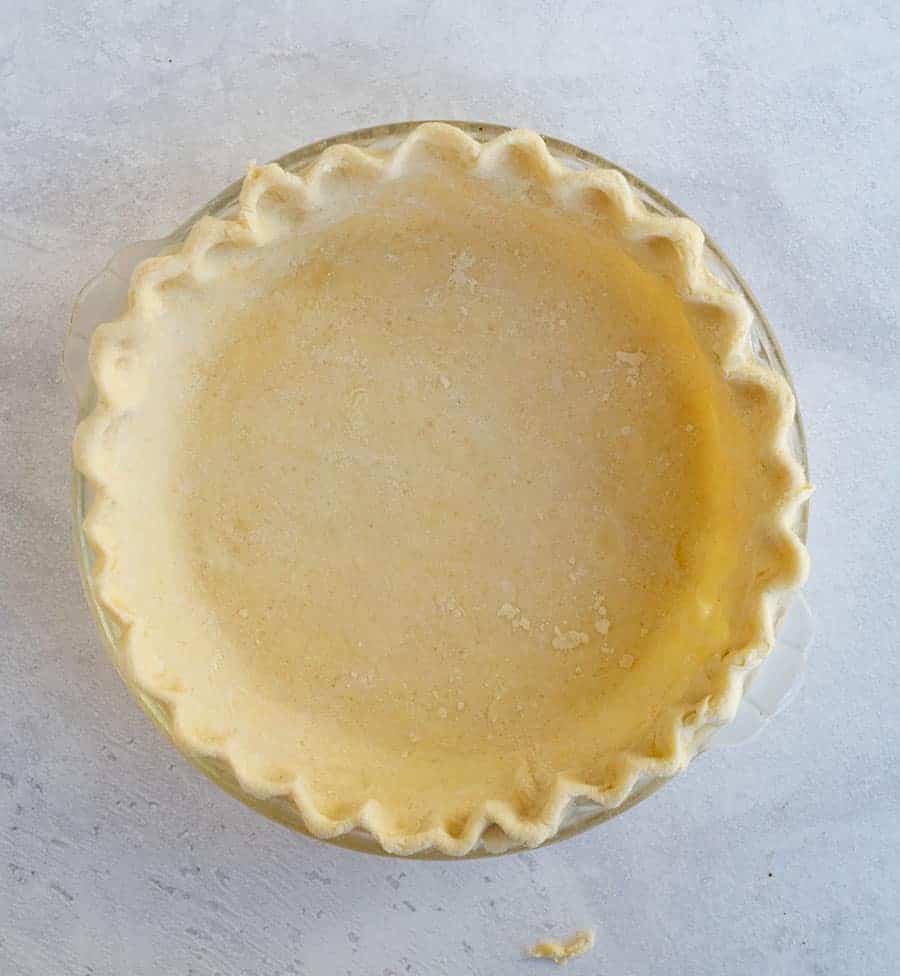
The Classic Fluted Edge (Start Here)
This is the traditional crimped edge everyone recognizes and how I learned to edge crusts from my mom and grandma.
How to Crimp or Flute Pie Crust:
- Trim dough so it hangs over pie plate edge by 1 inch
- Fold the overhang under itself to create a thick edge sitting on the rim
- Place your left index finger on the inside edge of the dough
- Using your right thumb and index finger, pinch the dough from the outside around your left finger
- Repeat every inch or so around the entire pie
My Tip: Keep a small bowl of flour nearby for dipping your fingers—prevents sticking and creates cleaner crimps. And don’t stress about perfection! Slightly uneven crimps add rustic charm.
The Fork Edge (Foolproof for Beginners)
When I’m short on time or just want something simple and classic, I just grab a fork or hand one to whichever child is in the kitchen with me.
Simple Steps:
- Trim dough to hang over edge by ½ inch
- Fold under and press flat on rim
- Dip a fork in flour
- Press fork tines firmly around the entire edge, creating a pattern
Why I Love It: Takes literally 2 minutes and looks intentionally simple-elegant. Perfect for rustic pies or when you’re making multiple pies.
The Rope Edge (Impressive Yet Easy)
This technique makes people think you went to pastry school!
How to Make a Rope Edge on Pie Crust:
- Create your folded-under edge as usual — steps 1 and 2 per above
- Pinch the dough between your thumb and bent index finger at an angle
- Move about ½ inch and repeat, creating a twisted rope appearance
- Continue around the entire edge
Secret: Angle your fingers consistently in the same direction for a uniform rope effect. It takes practice, but once you get the rhythm, it’s oddly satisfying!

Decorative Cutouts (Show-Off Level)
For when you really want to impress your family and guests, such as Thanksgiving or another holiday meal!
What You’ll Need:
- Small cookie cutters (leaves, stars, acorns work beautifully)
- Pastry brush
- Egg wash (1 egg beaten with 1 tablespoon water)
The Process:
- Roll out extra dough to ¼-inch thickness
- Cut out shapes using cookie cutters
- Brush the back of each cutout with egg wash
- Arrange cutouts around pie edge or on top of pie
- Brush entire decorated area with more egg wash
- Sprinkle with coarse sugar if desired
Real Talk: I only do this when I’m making a statement pie—like the centerpiece of Thanksgiving dessert. It’s time-consuming but absolutely stunning!
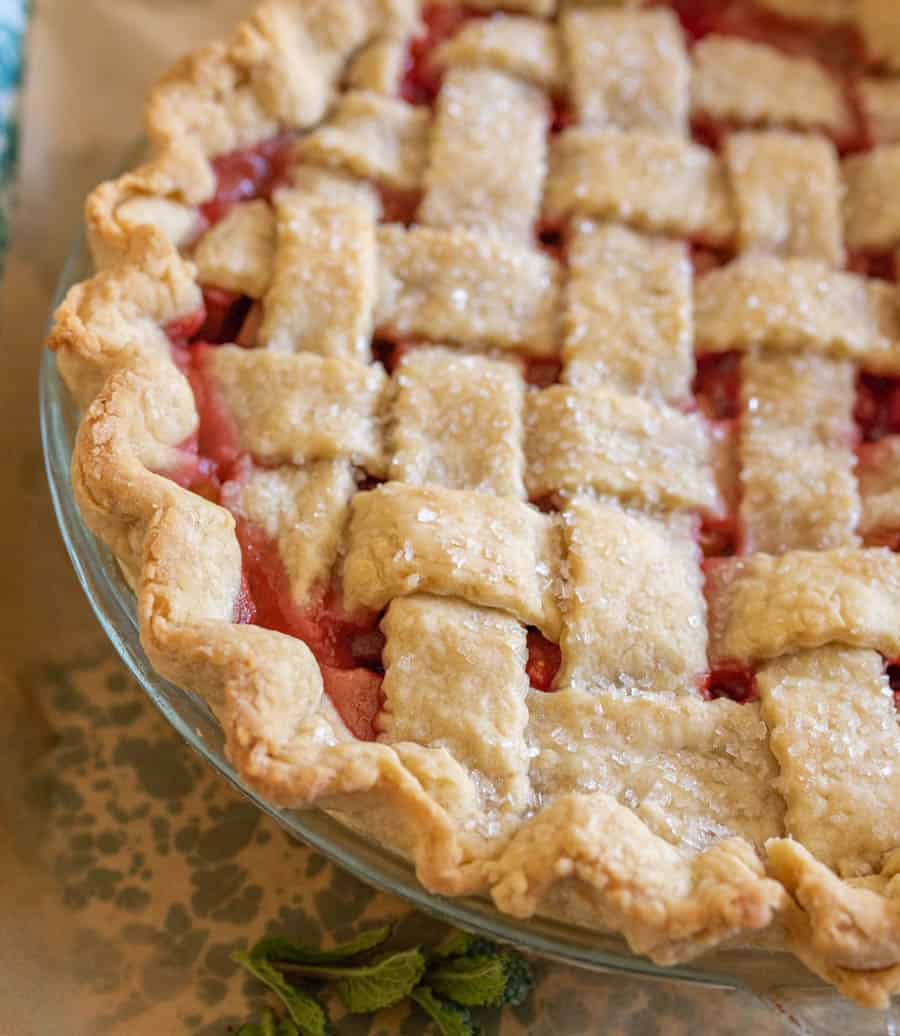
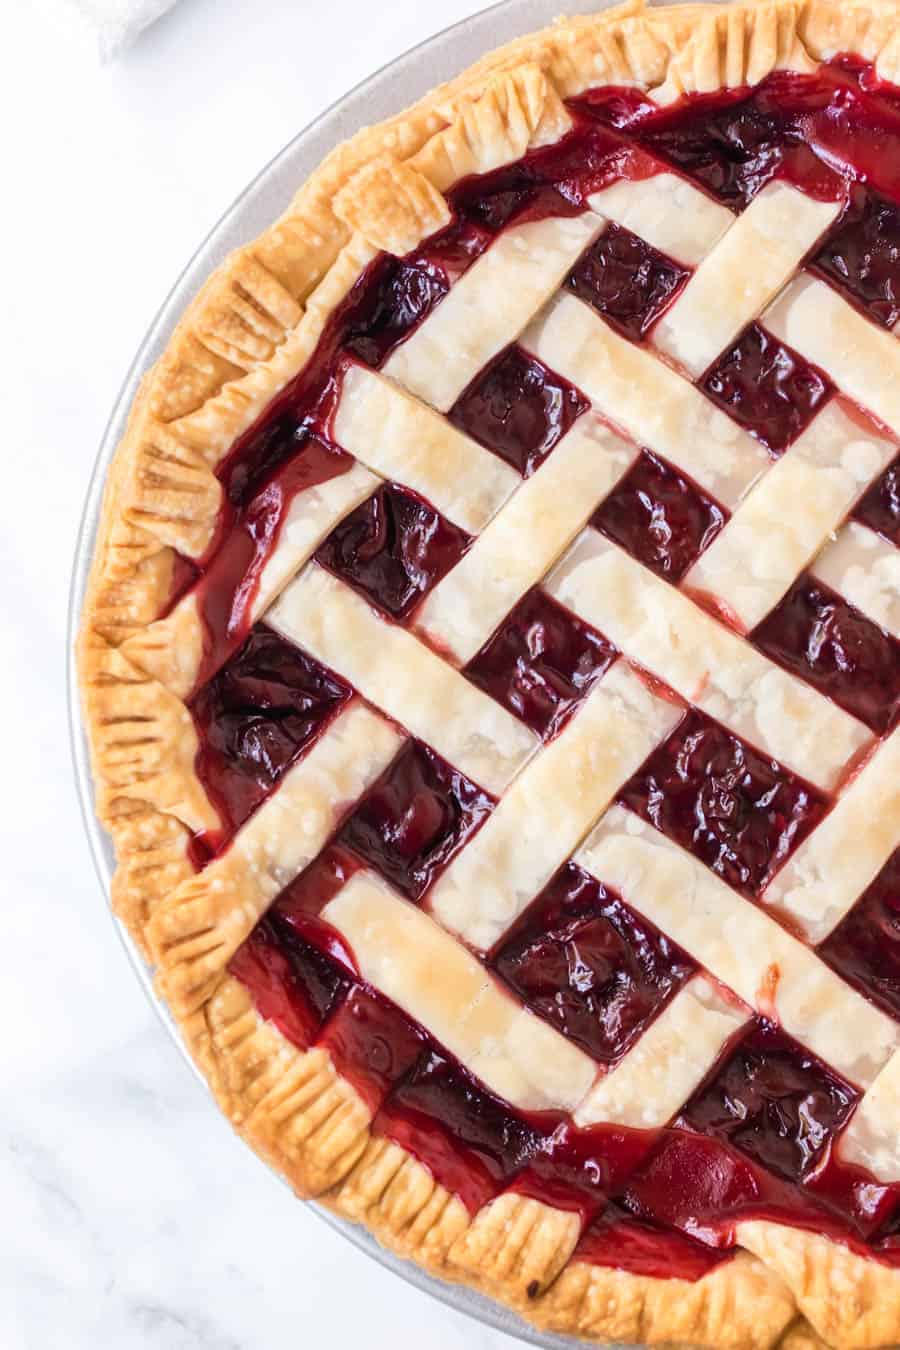
Lattice Top (The Showstopper)
I have an entire guide for making lattice crusts (definitely check that out!), but here’s the quick version.
Basic Lattice:
- Roll out top crust and cut into ¾-inch strips
- Lay half the strips across the pie filling
- Fold back every other strip halfway
- Lay a perpendicular strip across the unfolded strips
- Unfold the folded strips back over the perpendicular strip
- Repeat, alternating which strips you fold back
My Honest Opinion: Lattice looks incredible but requires patience. Save it for when you’re not juggling 17 other dishes for a holiday meal. A simple vented top crust is just as delicious!
Essential Tools for Beautiful Edges
These are the tools I use when making the various pie crust edging I’ve shared with you — basic but worth having in your baking arsenal.
Pie Crust Edging Tools
- Bench scraper for trimming excess dough
- Small bowl of flour for dusting
- Pastry brush for egg wash
- Sharp knife or pizza cutter for clean cuts
- Ruler (yes, really!) for measuring even lattice strips
FAQs: Common Edge Problems
It’s possible the dough is too cold, especially if it’s been chilling in the fridge or was made ahead and frozen. Solution: If taking out of fridge, let it sit at room temperature for 15-30 minutes before working with edges. For frozen dough, let it thaw in the refrigerator overnight and then come to room temp before trying to roll it out.
Create foil shields or use a silicone pie crust shield. I start the pie without the shield and then add it after the crust edging is as dark as I want it to get.
It’s likely your dough is too warm; this causes the dough to shrink. Solution: Pop the assembled pie in the freezer for 15 minutes before baking to set the details in the crust edging.
If the pie dough is overworked or isn’t cold enough, then the edges may separate from the pie plate and from the rest of the crust. Solution: Let dough rest in the refrigerator for at least 1 hour before rolling.

How to Bake Pie Crusts: The Complete Guide
Alright, this is where the rubber meets the road—or rather, where the dough meets the oven! I’ve made every mistake possible when baking pie crusts, from soggy bottoms to burnt edges to crusts that shrank into unrecognizable shapes.
But here’s the good news: once you understand the principles behind baking different types of crusts, everything becomes so much easier!
Let me walk you through every scenario you’ll encounter.
Understanding Oven Temperature and Positioning
Before we dive into specific crusts, let’s talk about two critical factors: oven rack placememt and temperature.
Oven Rack Placement
- Bottom third of oven: Best for pies with bottom crusts (fruit pies, custard pies)
- The closer to the heat source, the crispier your bottom crust
- I learned this after years of soggy bottoms!
Temperature Strategy
- High heat start (425-450°F): Sets the crust quickly, creating flakiness
- Lower heat finish (350-375°F): Allows filling to cook through without burning crust
- This two-temperature method is my secret weapon, and I now hand it off to you!
The Baking Sheet Trick: Always place a baking sheet on the rack below your pie to catch drips and making it much easier to clean up after baking. The baking sheet also provides extra bottom heat for a crispier crust!
How to Bake a Single Regular Pie Crust (Unfilled)
This is for pies where you’ll add filling after baking, like cream pies or no-bake fillings.
The Basic Method
What You’ll Need:
- One rolled-out pie crust fitted into a 9-inch pie plate
- Aluminum foil or parchment paper
- Pie weights, dried beans, or uncooked rice
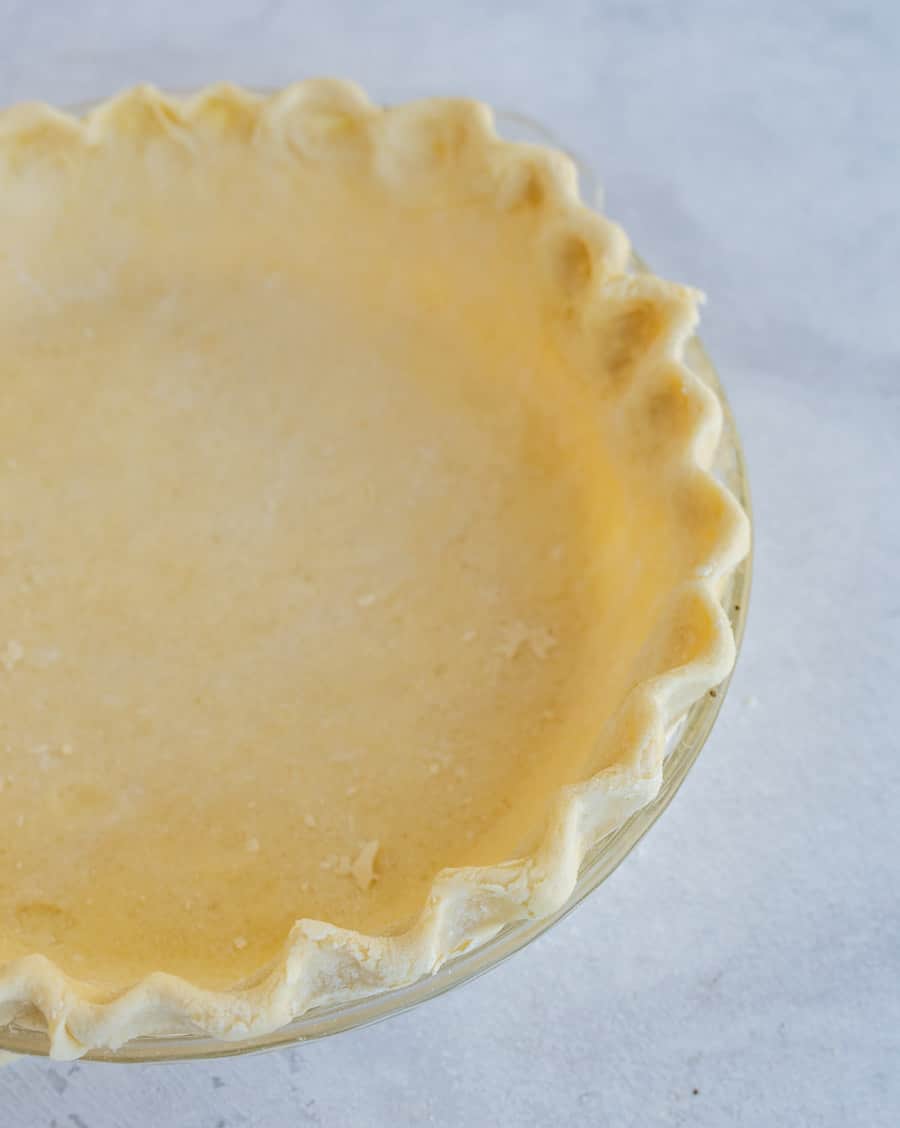
Step-by-Step Process:
- Prepare the Crust
- Roll out dough and fit into pie plate
- Trim edge to 1 inch overhang
- Fold overhang under and crimp edges
- Prick bottom and sides all over with a fork (called “docking”)
- Refrigerate for 30 minutes minimum (this is crucial!)
- Preheat Oven
- Set to 425°F
- Position rack in bottom third
- Place a baking sheet on the rack to preheat
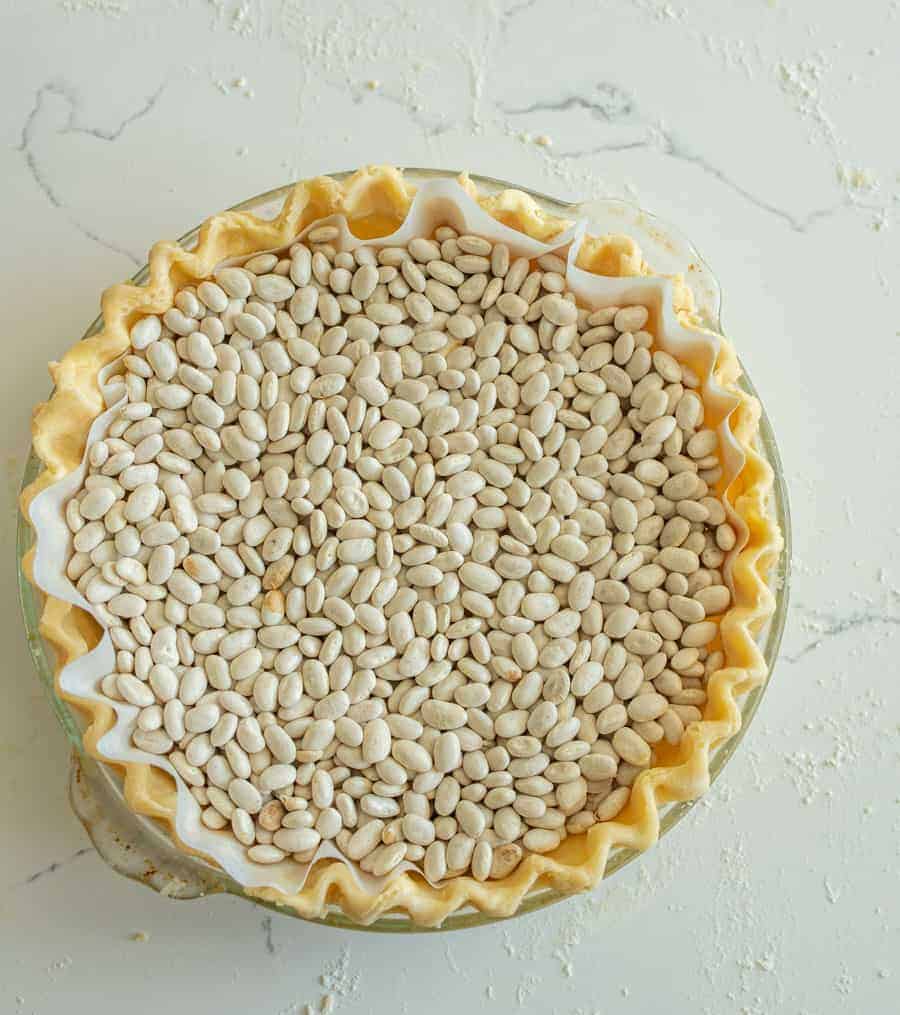
- Blind Bake the Crust
- Line chilled crust with parchment paper or foil
- Fill with pie weights, beans, or rice (spread evenly)
- Weights should come up the sides, not just cover the bottom
- Bake for 15-20 minutes
- Remove Weights
- Carefully lift out parchment and weights
- The crust should look set but pale
- Return to oven for 10-15 more minutes
- Bake until golden brown all over
- Cool Completely
- Let crust cool on a wire rack
- Must be completely cool before adding filling
- Usually takes 30-45 minutes
My Critical Tips
- Don’t skip the refrigeration step—warm dough shrinks dramatically
- Use enough weights—skimping leads to puffed-up crusts
- Watch the edges! Cover with foil if they brown too quickly
- The fork pricks allow steam to escape, preventing bubbling
FAQs: Baking Unfilled Pie Crust
It’s likely you didn’t poke enough holes in the crust, or the weights weren’t heavy enough or well-distributed. Quick fix: Gently press down puffed areas with a spatula while still warm.
Pie crusts shrink when the dough isn’t cold enough before baking or when it’s stretched when being fitted into the pan. Prevention: Always let dough relax after rolling—just chill it in the fridge for an hour or so!
To keep pie crust edges from burning, create an aluminum foil ring to shield edges or use a silicone pie crust shield (best investment I’ve made!). Cover edges for the last 10-15 minutes of baking.

How to Bake a Double Regular Pie Crust (With Filling)
This is your classic fruit pie scenario—bottom crust, filling, top crust.
The Two-Temperature Method
This technique gives you the best of both worlds: crispy crust and perfectly cooked filling.
Preparation Steps
Step 1: Assemble Your Pie
Line the pie plate with the bottom crust. Add filling, making sure you don’t overfill! Cover with top crust or lattice.
Seal and crimp edges thoroughly. Cut vents in top crust (4-6 slits). Brush with egg wash. Sprinkle with coarse sugar if desired.
Step 2: The Freezer Secret
Place assembled pie in freezer for 15-20 minutes This firms up the butter, preventing shrinkage. It really helps so don’t skip this part!
Baking Process
Phase 1: High Heat (425-450°F)
1. Place pie on preheated baking sheet
2. Position in bottom third of oven
3. Bake for 20-25 minutes until the crust is set and just starting to brown
Phase 2: Lower Heat (350-375°F)
4. Reduce oven temperature
5. Continue baking for 30-45 minutes
Total baking time: 50-70 minutes depending on filling
How to Tell When a Pie is Done Baking
There are a few signs that will tell you a pie is ready to come out of the oven. It’s not rocket science and has a bit of flexibility, depending on how crispy and/or dark you like your crust.
Signs a Pie is Done
Pies are ready to be removed from the oven when
- The crust is deep golden brown
- Filling bubbles vigorously through vents
- Juices are thick, not watery
- You can hear it bubbling
The Toothpick Test
You can also use the toothpick test to see if a pie is done. Simply insert a thin knife or toothpick through a vent and pull it back out.
For fruit pies, the fruit should be tender, not crunchy as you’re pushing the knife or toothpick into the filling.
For custard-filled pies, the knife or toothpick should come out mostly clean, and the filling should be set well around the perimeter of the pie so that it doesn’t jiggle when the pie pan is moved (though the center may jiggle a bit — it will finish setting up as the pie cools).
Protecting Your Crust
Edge Protection Timing
To get the perfect doneness for your pie crust, start checking the edges at the 30-minute mark. If the edges are browning too quickly, shield with foil by making a foil ring that just covers the crimped edge.
Or use a pie shield from the start, removing it towards the end if you want the edges crispier and darker.
Bottom Crust Insurance
To make sure your bottom pie crust is cooked perfectly, bake it on the lowest rack for the first 25 minutes. The bottom of the pie should be golden brown, not pale. This is one reason I like using a clear glass pie plate, so I can peek underneath!
Cooling Protocol
This is crucial—don’t rush this step!
Initial Cooling (1-2 hours): Place pie on a wire rack and let it cool to room temperature. This allows the filling to finish setting up.
The Patience Test: If you cut too soon, filling runs everywhere. I know it smells amazing, but wait! Fruit pies need 2-4 hours to set properly.
Serving Temperature: Serve warm (not hot) for fruit pies or completely cool and reheat slices. Add vanilla ice cream at room temperature if that’s your thing!
FAQs: Baking Double Pie Crust
Usually this means there was too much filling for the pan size or that the filling wasn’t thick enough (it was too liquidy). Next time: Use a deep-dish pan or reduce filling slightly. Always place a foil-lined baking sheet under the pie to catch drips!
The sogginess was probably caused by the oven rack not being low enough or the pie just didn’t bake long enough. Try this next time: Brush bottom crust with egg white before adding filling or sprinkle bottom with ground nuts or cookie crumbs to absorb moisture.
It’s likely the oven temperature was too low. Easy fix: Increase heat to 425°F for last 5-10 minutes.
I suspect the filling shrank while cooling, which is normal for some fruit fillings. It doesn’t affect the taste, just the appearance. Prevention: Pack filling more densely, as full as possible without overflowing your dish!
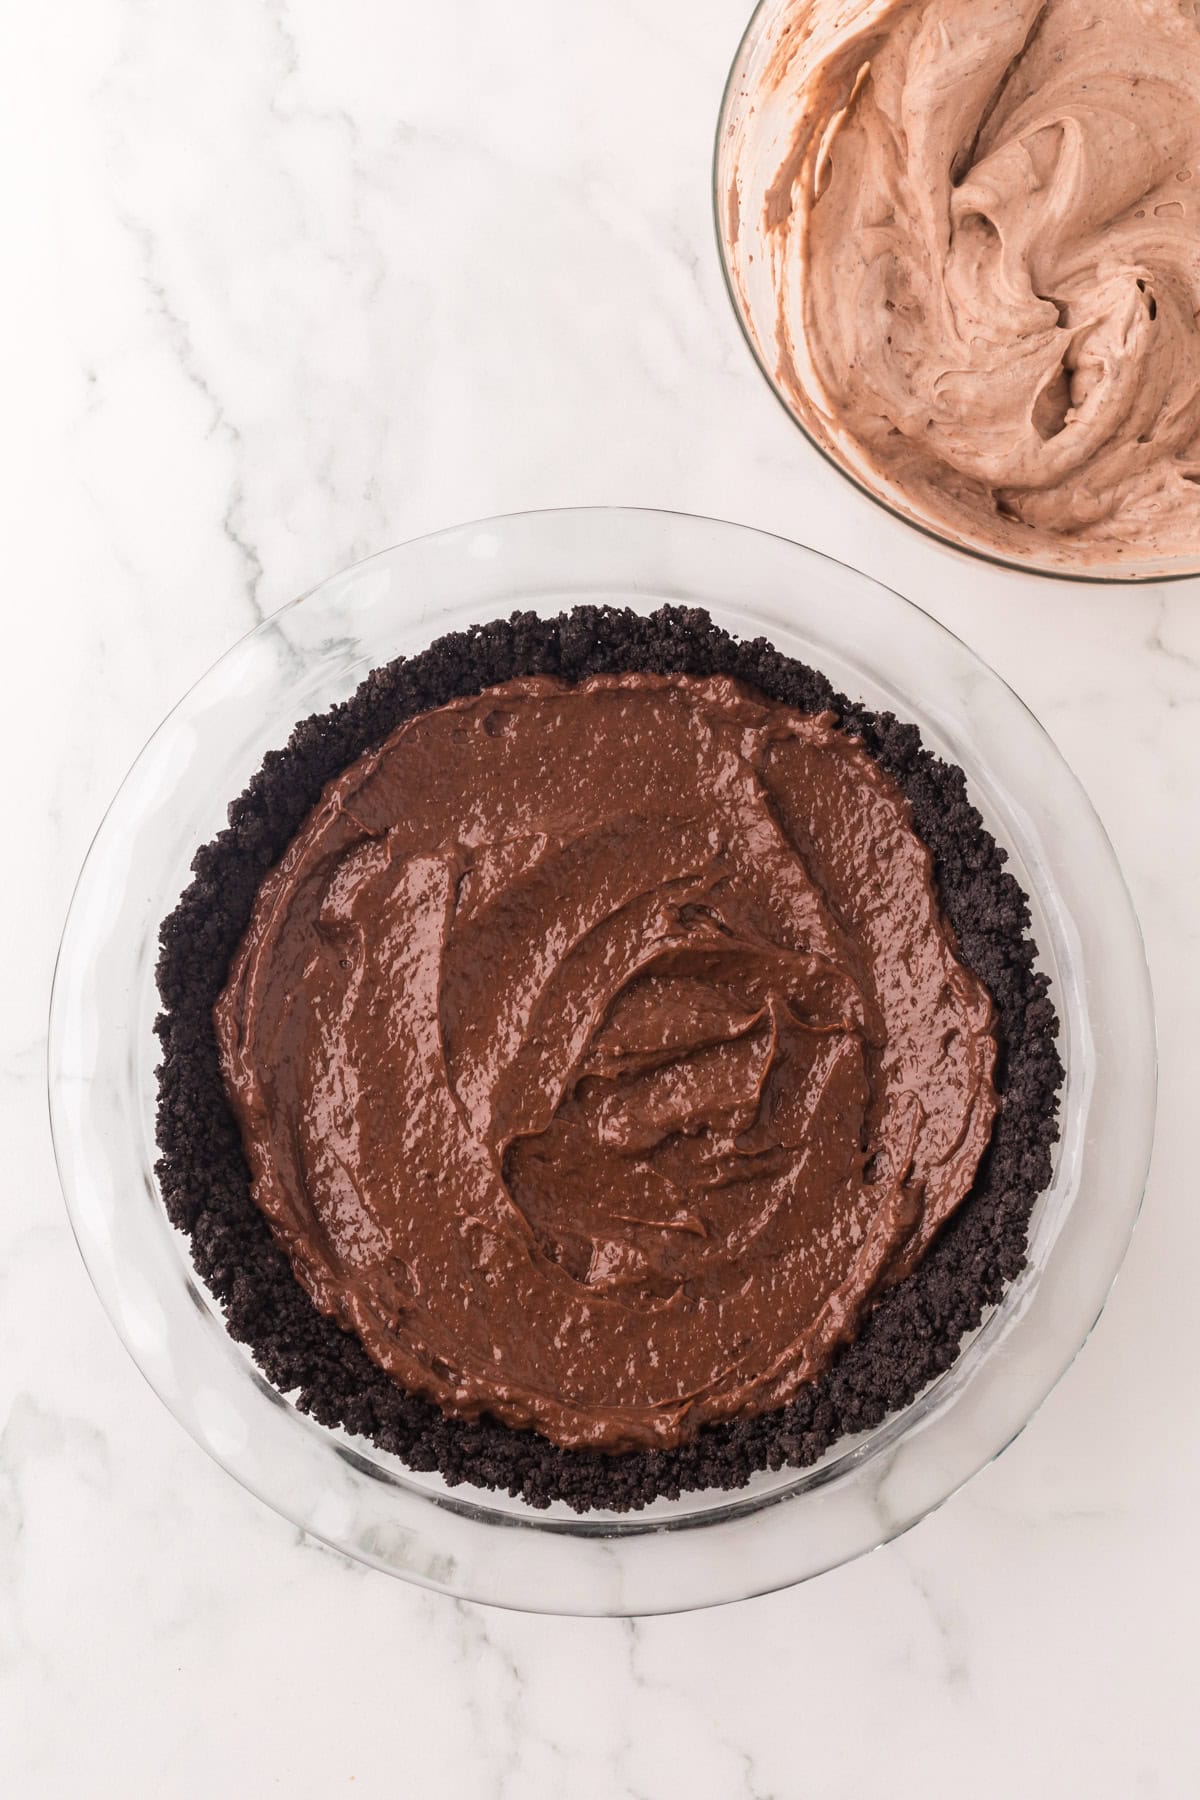
How to Make and Bake a Cookie Crust (Like Oreo or Chocolate Wafer)
Cookie crusts are a quick option for easy, impressive desserts. They’re no-bake in most cases, but sometimes benefit from a quick bake.
Basic Cookie Crust Formula
The Ratio:
- 1½ to 2 cups cookie crumbs (about 24-30 cookies)
- 6 tablespoons melted butter
- 2-4 tablespoons sugar (depending on cookie sweetness)
Popular Cookie Options:
- Oreos: Remove and discard the filling, or leave it in for extra sweetness
- Chocolate wafers: My favorite for chocolate cream pie
- Vanilla wafers: Great for banana cream pie
- Gingersnaps: Perfect for pumpkin or sweet potato pies
- Graham crackers: Classic and versatile (see next section)
Making the Crust
Method 1: Food Processor (Easiest)
- Break cookies into chunks
- Pulse until fine crumbs form
- Add melted butter and sugar
- Pulse until mixture resembles wet sand
- Should clump together when squeezed
Method 2: By Hand (More Therapeutic)
- Place cookies in a zip-top bag
- Seal bag, pressing out air
- Crush with a rolling pin until fine
- Transfer to bowl
- Mix in melted butter and sugar with a fork
Pro Tip: I like to leave some slightly larger crumbs for texture—totally smooth can taste a bit processed.
Pressing the Crust
This is what keeps it together or breaks your cookie crust.
The Right Method:
- Pour crumb mixture (see above) into pie plate
- Use the bottom of a flat-bottomed measuring cup or glass
- Press firmly starting at the center
- Work outward and up the sides
- Make sure the thickness is even throughout
- Pack it tightly—loose crumbs fall apart when slicing
Common Mistake: Pressing too lightly. Really pack it in there! The crust should feel solid, not crumbly.
To Bake or Not to Bake?
No-Bake Method (For Cold Fillings): Simply refrigerate for at least 2 hours until the crust firms up from the cold butter.
Best for: cream pies, ice cream pies, no-bake cheesecakes
Baking a Cookie Crust (For Better Flavor)
- Preheat oven to 350°F
- Bake for 8-10 minutes until crust smells toasted and looks set
- Cool completely before filling
Best for: any cream pie that you want to give a deeper flavor
My Preference: I almost always bake cookie crusts for 8 minutes. The toasted flavor is noticeably better, and the crust holds together better when slicing.
FAQs: Cookie Crusts
This happens when the crust is either not packed firmly enough or when not enough butter is used. Easy fix before baking: Mix in 1-2 more tablespoons melted butter and re-press crust into the pan. Otherwise just know for next time to use a bit more butter and pack very firmly!
The crust either has too much butter or it was over-baked. Next time: Reduce butter by 1 tablespoon and start checking for doneness at 8 minutes.
To allow the cookie crust to release easily when ready to serve, spray the pie plate with cooking spray before pressing in crumbs. You can also line the pie pan with a parchment circle on the bottom and even around the sides—or just spray the sides.
This usually happens when the pie hasn’t been chilled long enough. Make sure pie is very cold before cutting. Extra tip: Dip the knife in hot water and wipe clean with a paper towel between cuts!
How to Make and Bake a Graham Cracker Crust
The ultimate classic! Graham cracker crusts are slightly different from other cookie crusts—they’re sweeter and have that distinctive honey-cinnamon flavor.
Perfect Graham Cracker Crust Recipe
For the perfect taste and texture, you’ll only need graham crackers, butter, sugar, and salt.
The crackers are already sweetened, but the crust will need a bit more sugar, and the tiny bit of salt adds just enough of a balance to offset the sweet so don’t skip it.
The ratio of crumbs to butter is crucial for stability of the crust so be sure to follow this formula.
The Graham Cracker Crust Formula
- 1½ cups graham cracker crumbs (about 10-12 full crackers)
- ⅓ cup granulated sugar
- 6 tablespoons unsalted butter, melted
- Pinch of salt (enhances flavor)
- Optional: 1 teaspoon cinnamon for extra warmth
Ingredient Tip: Just use regular graham crackers, which can be turned into crumbs in a food processor, a strong blender, or even in a bag with a rolling pin. Don’t spend the extra money on the crumbs from the store.
Step-by-Step Graham Cracker Crust Preparation
- Make the Crumbs: Break crackers into rough pieces and then process in a food processor until fine (or do it by hand).
- Mix Thoroughly: Combine crumbs, sugar, salt, and cinnamon in a bowl. Pour melted butter over crumbs and stir with a fork until evenly moistened. The mixture should hold together when squeezed.
- Press Into Pan: Pour into a 9-inch pie plate. Using the bottom of a measuring cup or a glass, press firmly on the bottom first and then up the sides. You want to create an even thickness—aim for about ¼-inch. Pay special attention to where the crust bottom meets the sides, as this is a common weak spot!
The Glass Trick: I use the bottom of a drinking glass to press the bottom, then my fingers for the sides. Creates the most even crust!
Baking Graham Cracker Crusts
How to Bake a Graham Cracker Crust
- Preheat oven to 350°F
- Bake for 8-10 minutes until the crust is fragrant and slightly darker and the edges have browned slightly—that’s perfect!
- Cool completely on a wire rack for a minimum of 30 minutes before filling.
Graham Cracker Crust: Bake vs. No-Bake
Always Bake For:
- Pies that will be baked with filling (like pumpkin pie)
- When you want maximum crunch and toasted flavor
- If you’re making the crust ahead (baked crusts keep better)
No-Bake Works For:
- Cold cream pies
- Ice cream pies
- No-bake cheesecakes
- When you’re short on time
My Take: I bake 90% of my graham cracker crusts. The 10 minutes in the oven deepens the flavor so much, and the crust holds together better. It’s worth it!
Advanced Graham Cracker Techniques
For Extra-Crispy Crusts
Bake at 375°F for 10 minutes instead but watch carefully to prevent burning. This is perfect for pies with very wet fillings.
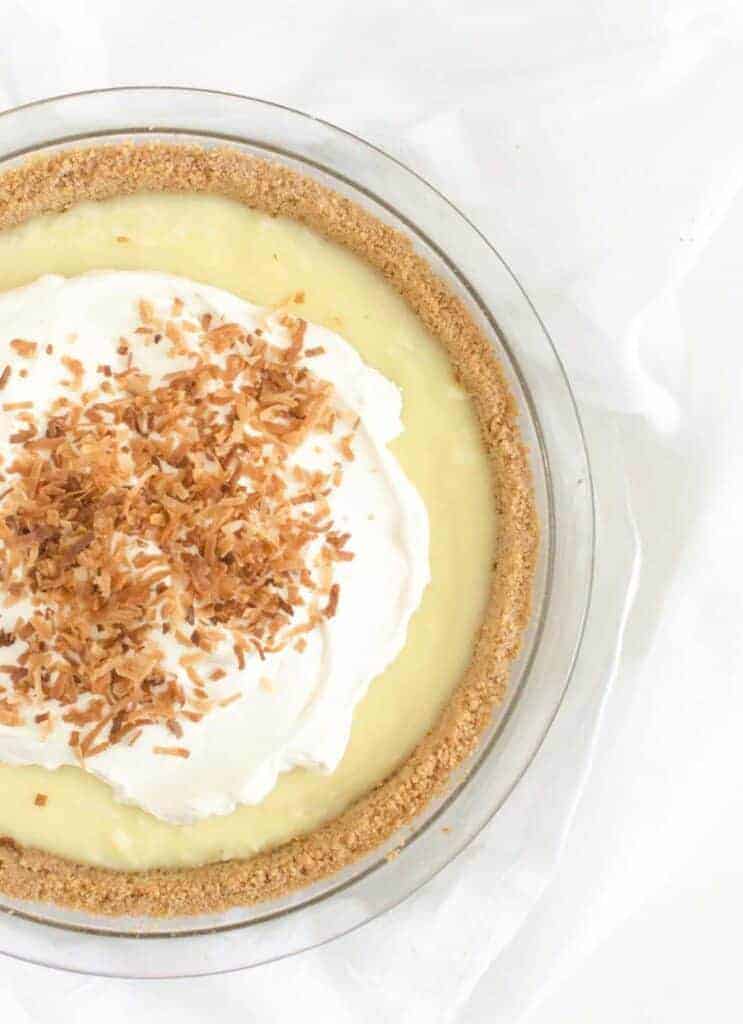
For Coconut Cream Pie
Mix ½ cup toasted coconut into graham cracker crumbs for extra flavor and texture. Toast the coconut first at 350°F for 5-7 minutes.
For Key Lime Pie
Add 1 tablespoon lime zest to the crumb mixture to brighten the flavor and complement the filling. This is one of my favorite variations!
For Extra-Thick Crusts
This is needed when making a bigger pie in a deep-dish pie pan.
Simply double the recipe (see above) and press the sides up higher, about halfway up the pan. Increase the baking time to 12-15 minutes.
FAQs: Graham Cracker Crusts
The culprit is either that it wasn’t pressed firmly enough or that it didn’t have enough butter. Solution: Melt 1-2 more tablespoons of butter, mix into the crumb mixture, re-press, and bake.
Did you forgot the salt? This actually makes a huge difference! Under-baking can also cause a bit of a blah taste for crusts. Quick fix: Sprinkle a tiny pinch of sea salt on top before serving.
It’s possible the crust along the sides was not pressed firmly enough. It really likes that firm hand when pressing! Next time: Really pack those sides firmly, don’t hold back.
To prevent soggy bottom crusts, be sure the crust is baked until fragrant, a bit darker, and is set—this usually takes 8-10 minutes. You’ll also want to use filling that is not too thin, as too much liquid can soak into the crust before it starts baking the bottom of the filling. My favorite prevention method: Brush cooled crust with melted chocolate or white chocolate for a moisture barrier when the taste will be complementary or covered.
How to Blind Bake a Pie Crust (The Professional Method)
Blind baking—partially or fully baking a crust before adding filling—is the secret to crispy crusts for cream pies, custard pies, and quiches. I used to skip this step and always regretted it. Soggy bottom crusts are the worst!
When You Need to Blind Bake
Always Blind Bake For:
- Cream pies (chocolate, coconut, banana)
- Custard pies with wet fillings
- No-bake pies
- Quiches and savory tarts
- Any time filling goes into an unbaked crust
Sometimes Blind Bake For:
- Very juicy fruit pies (extra insurance against sogginess)
- Pumpkin pie (partial blind bake helps)
Never Blind Bake For:
- Double-crust fruit pies
- Pies where filling and crust bake together
Understanding Partial vs. Full Blind Baking
Partial Blind Baking
For partial blind baking, bake the crust with weights until it is set but still pale—about 15-20 minutes at 425°F.
Use when the pie will bake again with filling, such as pumpkin, pecan, and custard pies.
Full Blind Baking
For full blind baking, first bake the crust with weights, then finish baking without the weights until golden brown, for about 30-35 minutes total.
Use when adding no-bake filling or already-cooked filling.
The Complete Blind Baking Process
Step 1: Prepare Your Crust
- Roll out dough and fit into pie plate
- Trim to 1-inch overhang
- Fold under and crimp edges beautifully
- Critical step: Refrigerate for 30-60 minutes (or freeze for 15 minutes). The colder the crust, the less it will shrink
Why This Matters: I learned this the hard way. Warm dough + hot oven = massive shrinkage. Now I always freeze my crust for 15 minutes before blind baking.
Step 2: Dock the Crust
- Use a fork to prick the bottom crust all over, making holes about 1 inch apart
- Prick the sides too, every few inches
Why? These holes prevent the dreaded crust bubble!
Common Question: Won’t the filling leak through the holes? No! The dough seals up during baking.
Step 3: Line with Parchment and Weights
Choosing Your Liner:
- Parchment paper: My favorite—doesn’t stick and is reusable
- Aluminum foil: Works but can stick a bit
Press liner into all corners and up the sides
Weight Options:
- Pie weights: Ceramic or metal beads, reusable, expensive but worth it
- Dried beans: Cheap, work great, can reuse many times for baking (not for cooking)
- Uncooked rice: Also works, slightly lighter than beans
- Granulated sugar: Can be used afterward for baking (gets toasted flavor!)
How Much Weight:
- Fill to the top of the crust, covering completely
- About 2 pounds of weights
- Skimping on weights = puffed-up crust
Pro Tip: I have a dedicated container of dried great northern beans that I’ve used for pie weights for years. I keep them in a jar labeled “pie weights only”—they work perfectly and cost almost nothing.
Step 4: First Bake (With Weights)
- Preheat oven to 425°F
- Position rack in bottom third of oven
- Place pie on a preheated baking sheet
- Bake for 15-20 minutes
The edges should be set and just starting to color, and the bottom will still be pale. The crust should no longer look wet or shiny.
Step 5: Remove Weights
- Carefully lift parchment with weights out of the pan. Save those weights for next time!
- Return empty crust to oven immediately
- Continue baking for either partial or full as below
Step 6: Second Bake (Without Weights)
For Partial Blind Bake: Bake 5-8 more minutes until the bottom looks dry but is still pale.
Use for pies that will bake again with filling.
For Full Blind Bake: Bake 12-18 more minutes until entire crust is golden brown and the bottom is fully colored, not pale
Use for no-bake or pre-cooked fillings.
Baking Crusts With Filling (Custard Pies, Pumpkin, Pecan)
These pies are unique because the filling and crust bake together. Getting both perfectly cooked requires specific techniques.
The Challenge
What makes getting custard type pies just right is that the filling needs time to set (45-60 minutes) but the crust can over-brown during that time. Or the bottom crust can stay soggy or the edges can burn while the center is still jiggly. The struggles!
The Solution: Strategic temperature management and timing.
The Best Method for Custard-Style Pies
Preparation Phase
Step 1: Choose a Pre-Bake Option
Option A: Partial blind bake (my preference). Bake the empty crust at 425°F for 10 minutes. This head start helps prevent soggy bottoms.
Option B: Skip blind baking. Brush the bottom crust with egg white and let dry for 5 minutes before adding filling. (I personally have had better success with the partial blind bake.)
Step 2: Prepare Filling
Make the pie filling while the crust pre-bakes and cools. The filling should be room temperature, not hot and not cold. Cold filling will require longer baking time, which will lead to an over-browned crust.
Baking Phase
Step 3: Baking & Temperature Strategy
High Heat Start :
This sets the bottom crust quickly and is optional but it is my recommended method.
- Preheat to 425°F
- Place pie with filling on lowest oven rack
- Bake 15 minutes at high heat
Lower Heat Finish:
- Reduce to 350°F (or whatever recipe specifies)
- Continue baking until filling is set
Total time usually 45-60 minutes for most pies.
Testing for Doneness
The Jiggle Test: Gently shake the pie. The outer 2-3 inches should be set, though the center 3-4 inches can jiggle slightly.
If the whole pie jiggles, it needs more time, but start watching it closely. Over-baked custard pies crack!
The Knife Test: Insert a thin knife or toothpick into the pie about 1 inch from the center. It should come out mostly clean, though a few moist crumbs are okay
If wet filling clings to the knife, bake 5 more minutes and check again.
Temperature Test: Insert an instant-read thermometer into the center of the pie. Suggested internal pie temperatures range from 170° to 200°.
FAQs: Custard Pies
Pumpkin and other custard pies will often crack on top for a few reasons—if the oven is too hot, if the pie has been overbaked, or if the pie has cooled too quickly. Prevention: Don’t overbake—remove the pie when the center still jiggles slightly, cool slowly at room temperature away from drafts, and don’t refrigerate until completely cool (2-4 hours).
To help the crust on a custard pie stay firm, try these helpful tips: Partial blind bake the crust before adding filling, bake on the lowest oven rack, and make sure the oven is fully preheated.
The separation of a custard filling and pie crust is more common with egg-based custards, and though it’s not as pretty as we’d like, it actually doesn’t affect the taste. This will often happen because the filling shrinks as it cools. Quick fix: Cover the pie with whipped cream for an instant pie face lift!

My Final Thoughts on Pie Crust Success
Here’s what years of pie-making has taught me: perfect technique matters less than understanding the principles. Keep your butter cold, handle the dough gently, and don’t be afraid to stick it back in the fridge whenever it feels too warm.
Some of my best pies have slightly wonky crimps or imperfect lattices—and you know what? Nobody cares when they’re tasting that buttery, flaky crust with delicious filling!
The beauty of homemade pie is that it’s supposed to look homemade. Those little imperfections tell people you made this with your own hands, and that means so much more than bakery perfection.
So take a deep breath and enjoy the process. You’ve got this! 🥧

More Pie Related Goodies For You
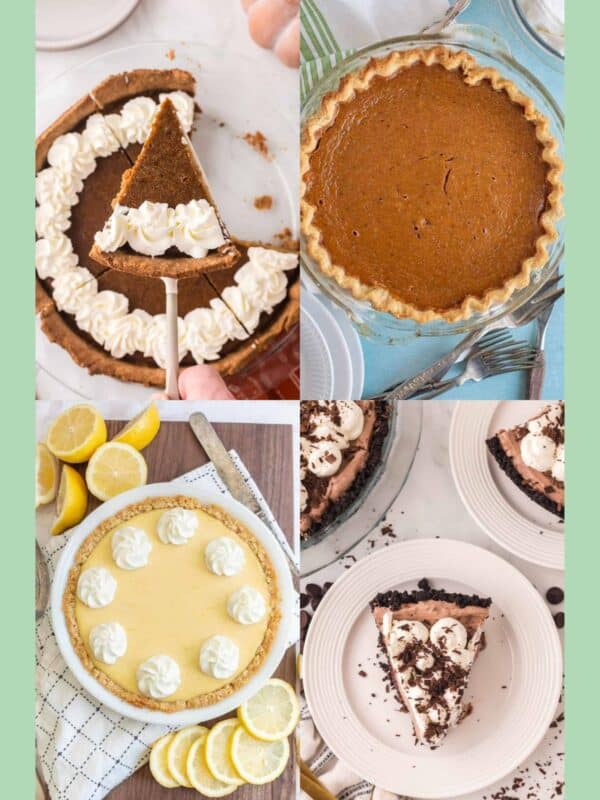
Pies, Crisps & Tarts
Christmas Pies: 19 Best Holiday Pie Recipes
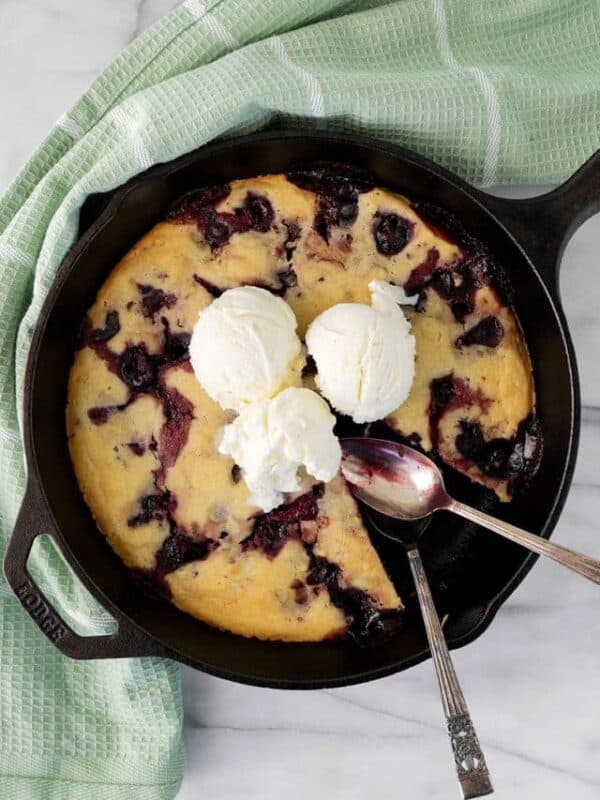
Pies, Crisps & Tarts
Easy Cherry Cobbler Recipe
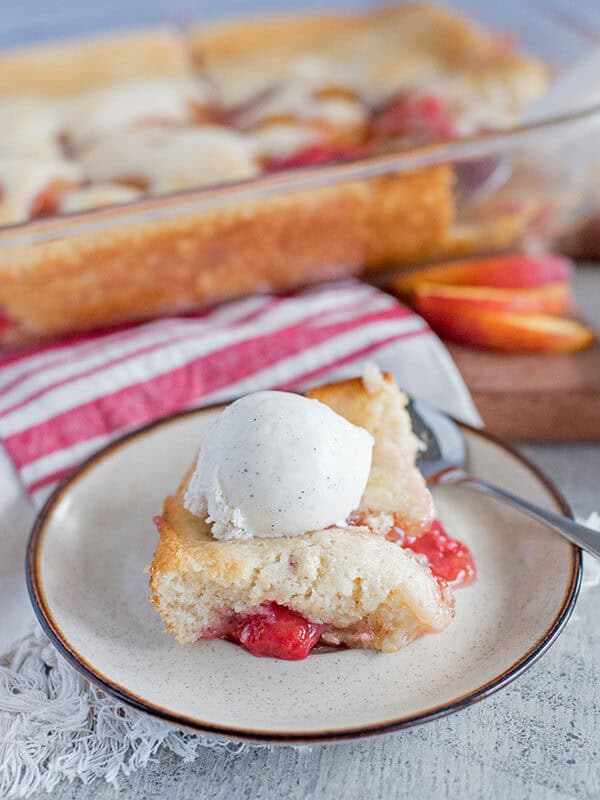
Pies, Crisps & Tarts
Peach Raspberry Cobbler

Pies, Crisps & Tarts
Healthy Pumpkin Pie Recipe
Did you find this article helpful? Leave a ⭐️ review and share it on Instagram, Facebook, or Pinterest!


I’m a vetran pie maker of many decades. I read this entire piece on pie crust success and it is excellent for seasoned bakers and inexperienced alike. I picked up a few tips that will make a difference and will definitly recomend this site to anyone asking for pie making tips. You cover all aspects of pie making in a way that if your instructions are followed, the pie will turn out beautifully. This was an excellent article, thank you.