This post may contain affiliate links. Please read our disclosure policy.
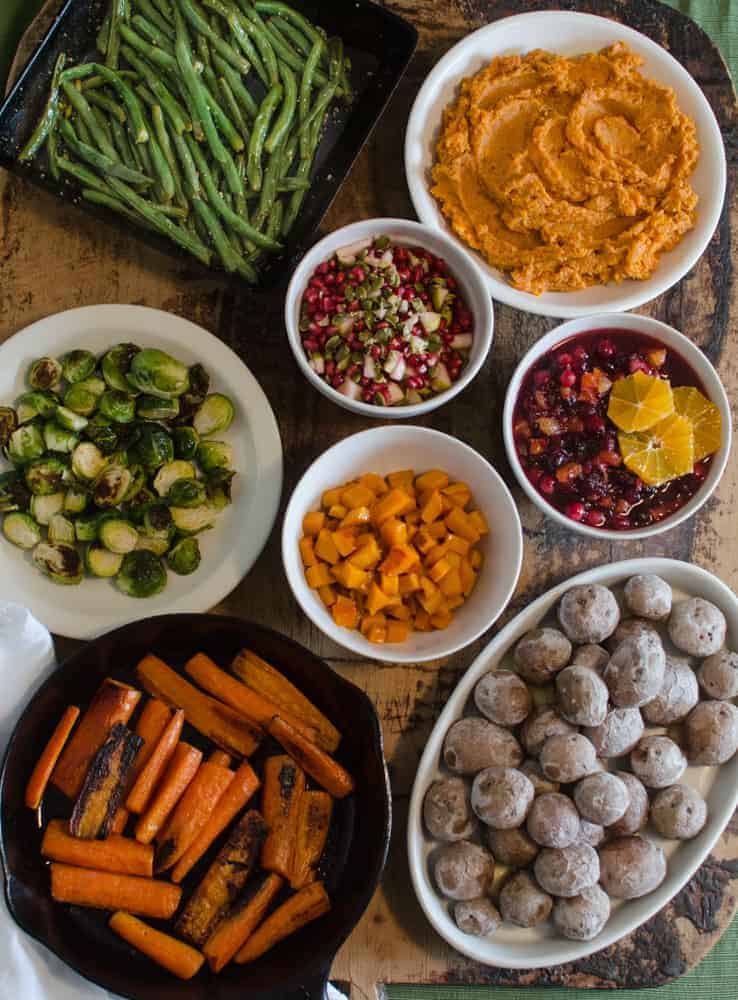
Fill your holiday table with the best Thanksgiving Dinner Side Dishes from these easy, crowd-pleasing recipes. From roasted vegetables to classic casseroles, find perfect sides for your holiday feast that everyone will love!

Table of Contents
- My Favorite Thanksgiving Dinner Side Dishes
- Classic Roasted Vegetable Sides
- Simple Roasted Brussles Sprouts Recipe
- Caramelized Butternut Squash Recipe
- Pan-Seared Carrots Recipe
- Salt Potatoes Recipe
- Mashed Roasted Sweet Potatoes Recipe
- Pomegranate Pear Salad Recipe
- Easy Cranberry Orange Sauce Recipe
- Buttery Garlic Green Beans Recipe
- FAQs About Thanksgiving Dinner Side Dishes
- Best Tips for Cooking Thanksgiving Side Dishes
- More Thanksgiving Recipes to Consider
🦃 These easy thanksgiving side dishes will help you create a memorable holiday meal that brings everyone together around the table. Happy Thanksgiving!
My Favorite Thanksgiving Dinner Side Dishes
Thanksgiving dinner is all about gathering around the table with loved ones, and while the turkey takes center stage, we all know the side dishes are what truly make the meal memorable.
After years of hosting holiday dinners, I’ve learned that the secret to a stress-free Thanksgiving isn’t complicated recipes with endless ingredients—it’s choosing simple, flavorful dishes that complement each other beautifully.
The beauty of these 5-ingredient sides is that you can serve them all fall and winter long, not just on that one special day in November! You could pick one or two to try for dinner this week. With fewer than 5 ingredients each, these are recipes that you are going to come back to again and again.
These sides also pair well with a Garlic and Herb Whole Chicken whole roast chicken or Honey Garlic Pork Chops – both are made in the slow cooker so that your oven is free! And if you have time, make one of these pie recipes for dessert.
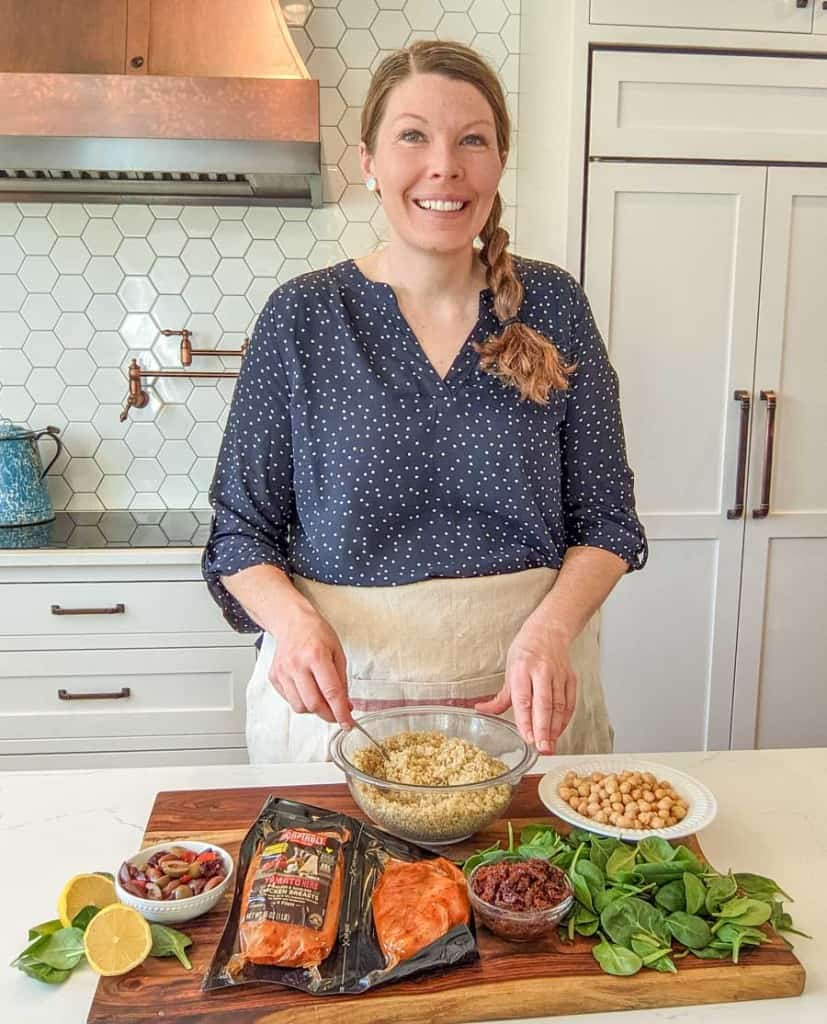
🩷 Melissa
Why You’ll Love These Recipes
🩷 Simple ingredients in each recipe!
🩷 All of the recipes are wonderful throughout the fall and winter.
🩷 Super easy sides that can round out your Thanksgiving menu.
🩷 All recipes are naturally gluten-free and nut-free.
🩷 Can easily be made dairy-free and/or vegan.
Classic Roasted Vegetable Sides
Roasting vegetables brings out their natural sweetness and creates those irresistible caramelized edges that make even the pickiest eaters come back for seconds.
These roasted vegetable dishes are the backbone of any great Thanksgiving spread, offering vibrant colors and rich flavors with minimal effort.
From butternut squash glazed with maple syrup to perfectly charred Brussels sprouts, these best sides for thanksgiving transform simple produce into show-stopping accompaniments.
The carrots are actually sautéed on the stovetop, but they could be roasted in the oven, too! This recipe is a simple hearty side dish that I actually make year-round since carrots are one of the most affordable fresh vegetables available all year.

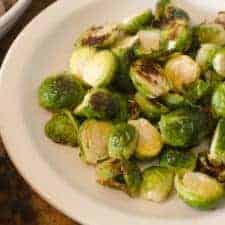
Simple Roasted Brussles Sprouts
Ingredients
- 1 pound Brussels sprouts
- 2-3 tablespoons olive oil
- 1 teaspoon kosher salt
- fresh black pepper
Instructions
- Preheat the oven to 425℉.
- Wash and trim the bottom of the sprouts. Cut each sprout in half and add them to a small bowl. Drizzle with olive oil and toss to coat.
- Place the Brussels sprouts on a baking sheet, cut side down. Don't crowd them too much on the pan. Use a second baking sheet if you need to.
- Sprinkle with salt and pepper.
- Roast for 15 minutes or until fork tender and starting to char.
- Taste and adjust the seasoning as needed and serve right away.
Notes
- Pick Brussels sprouts that are bright green and have nice firm leaves on the outside.
- Roasting Brussel sprouts brings out the delicious sweetness in them – do not boil them.
- Brussels sprouts are best roasted just before serving them but you can cut off the stems and cut them in half a day or two ahead and then store them in an airtight container in the fridge.
- Be sure not to crowd the pan or the Brussels sprouts will steam instead of roast and they won’t get the crispy edges that make them so good.
- To reheat the leftover Brussels sprouts, melt about 2 to 3 teaspoons of butter in a frying pan. Throw in the leftover Brussels sprouts and heat them until the sprouts are warm.
Nutrition
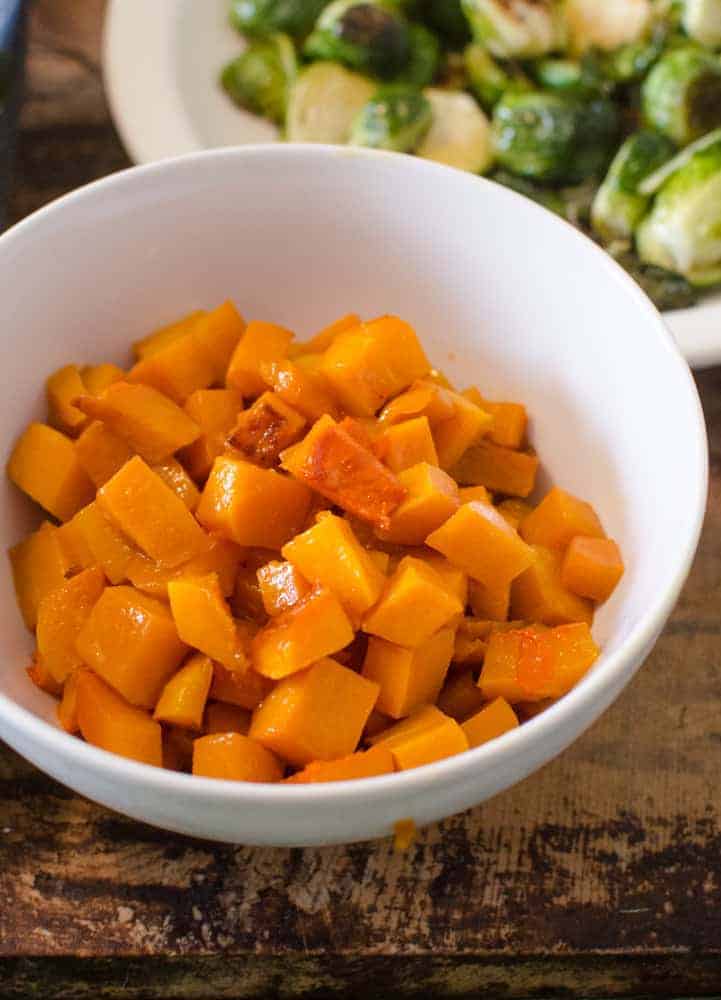
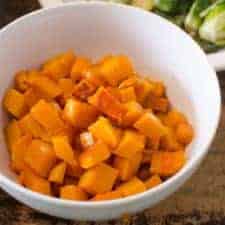
Caramelized Butternut Squash
Ingredients
- 1 large butternut squash, about 3 pounds
- 2 tablespoons coconut oil or olive oil
- 1 teaspoon kosher salt
- 1/4 cup pure maple syrup
Instructions
- Preheat the oven the 375℉.
- Remove the skin and the seeds from the butternut squash and cut the flesh into ¾-inch cubes. I ended up with just over 4 cups of cubed squash.
- Toss the cubes with coconut oil or olive oil and place them on a rimmed baking sheet. Sprinkle with salt. Bake for 20 minutes.
- Remove the pan from the oven and gently flip the squash over with a metal spatula.
- Drizzle the maple syrup over the squash and return the pan to the oven.
- Cook for another 15-25 minutes, stirring after 10 minutes, until the squash is tender and the maple syrup starts to thicken.
- Place the squash in a serving bowl, drizzle any leftover syrup from the pan onto the squash, adjust the salt to taste and serve right away.
Notes
- Put the maple syrup on halfway through cooking. If you put it on at the beginning, it will burn in the oven before the squash is done cooking.
- It’s ok to have a heavy hand with the salt because the salty sweet combination is so delicious.
- Butternut squash prepared this way is best right out of the oven but you can cut up the squash a day or two before and store it in an airtight container in the fridge.
- This is a great recipe to double so you ensure you have leftovers.
Nutrition

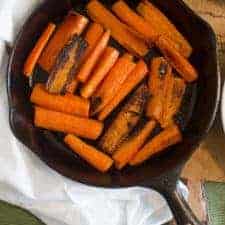
Pan-Seared Carrots
Ingredients
- 1 to 1 1/2 pounds carrots, about 8 medium to large sized carrots
- 2 tablespoons olive oil
- salt and pepper
Instructions
- Peel and trim your carrots. Cut them into 3- to 4-inch pieces and cut them in half as needed. The goal is to have carrot pieces that are similar in size so that they cook evenly.
- Preheat the oven to 400℉.
- Add the oil to a large cast iron or oven proof skillet over medium high heat. When the oil is shimmering, add the carrots, cut side down.
- Let the carrots sear until charred, about 3 minutes. Remove the pan from the heat and turn the carrots over so that the seared side is up.
- Place the pan in the oven and let the carrots bake until they are tender, about 15 minutes.
- Add salt and pepper to taste and serve hot.
Notes
- Using larger whole carrots saves yourself some time peeling and cutting.
- Be sure to cut the carrots into fairly uniform pieces so they cook evenly.
- This recipe is best served fresh but you can peel and cut up the carrots a day or two before and store them in an airtight container in the fridge.
- A little bit of good quality hard cheese (such as Parmesan) grated right on top just before serving is amazing on these but not necessary (or pictured).
Nutrition
Comfort Food Potato Dishes
No Thanksgiving table feels complete without potatoes in some form, and I can’t help loving the classics! These recipes deliver all that starchy comfort we crave during the holiday season.
Since we often have creamy mashed potatoes on any given weeknight, I like to try something a little more unique like salt potatoes for the big meal. These dishes will still provide the perfect canvas for soaking up delicious gravy.
Sweet potatoes also shine here, offering a naturally sweet counterpoint to savory main courses while keeping preparation refreshingly straightforward. Mashing the sweets is a bit simpler than making the classic sweet potato casserole.
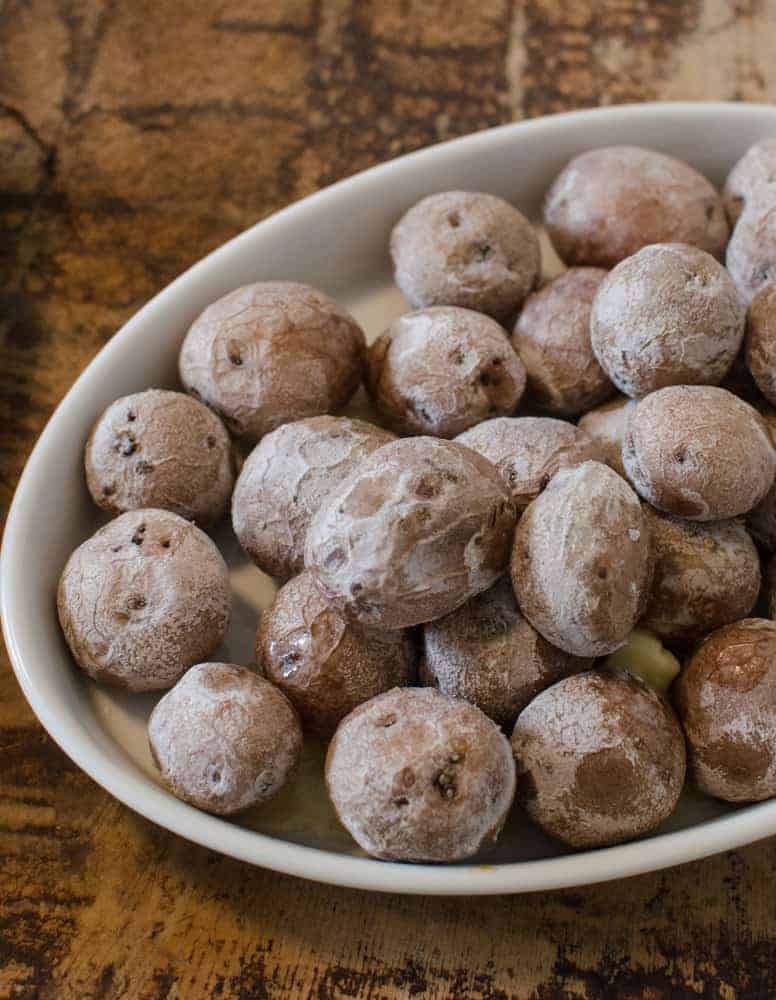

Salt Potatoes
Ingredients
- 3 quarts of water
- 12 ounces about 1 1/2 cups fine salt
- 4 to 4 1/4 pounds one-to-two bite sized new boiling potatoes, washed, see notes
- 1 stick cold butter (4 ounces), cut into 8 pieces
Instructions
- Add the water to a large pot and bring it to boil over high heat.
- When the water starts to boil, add the salt and stir until it dissolves.
- Add the potatoes to the pot, one or two at a time, taking care not to splash yourself.
- Return the water to a boil, lower heat to medium and simmer until the potatoes are tender, between 15 and 25 minutes (see notes to help determine doneness).
- Pour the water and potatoes into a colander in the sink and leave to air dry for 5 to 10 minutes.
- Transfer the potatoes to a serving dish and dot with the pieces of butter. Serve warm with extra butter for dipping.
Notes
- If you live in New York, you can find salt potato kits or buy potatoes that are Size B Grade US No. 2.
- If you live elsewhere, look for small potatoes that you can eat in one or two bites. The shape of the potatoes doesn’t matter.
- To test for doneness, lift one of the larger potatoes from the boiling water with tongs and plunge a skewer into the potato. The skewer will pass through the potato completely if it’s done.
Nutrition


Mashed Roasted Sweet Potatoes
Ingredients
- 2 1/2 to 3 pounds sweet potatoes, about 5 medium sweet potatoes
- 2-3 tablespoons olive oil
- 1 tablespoon melted butter or coconut oil
- 1/2 teaspoon salt
- 1/2 teaspoon ground cinnamon
Instructions
- Preheat the oven to 400℉. Line a baking sheet with parchment paper or a baking mat for easier clean up.
- Wash the sweet potatoes and then cut them in half from end to end and place them on the baking sheet.
- Drizzle the olive oil over the cut potatoes. Use your hands or a pastry brush to coat the outside and cut side of each potato half with the olive oil completely.
- Place the potatoes on the baking sheet cut side down and roast them in the hot oven until fork tender, 25-35 minutes.
- Remove the potatoes from the oven and let them cool enough that they can be handled safely.
- Use a spoon to scoop the soft sweet potato flesh from the skin and place it in a medium bowl.
- Add the melted butter or coconut oil, salt, and ground cinnamon.
- Use a fork or a potato masher to mash the sweet potatoes until they are smooth and creamy.
- Add salt to taste. Serve warm.
Notes
- These mashed sweet potatoes are roasted to make them extra sweet – I don’t recommend boiling them for this recipe.
- If you want to make this recipe dairy-free or vegan, add coconut oil instead of butter to the potatoes when you are mashing them.
- Make a double batch and use half to top a Shepherd’s Pie made with Thanksgiving leftovers.
- This recipe can be made a couple days ahead of time and stored in a casserole dish with a cover and then reheated before serving.
Nutrition
Fresh & Vibrant Salads
While Thanksgiving is known for its rich, hearty fare, a bright salad provides essential balance to the meal and refreshes the palate between bites of more indulgent dishes.
The pomegranate pear salad featured here adds a pop of color and a delightful crunch that cuts through heavier flavors beautifully. It’s an easy recipe to pair with the classic Thanksgiving side dishes.
Fresh salads also accommodate guests who prefer lighter options, ensuring everyone finds something they’ll genuinely enjoy at your holiday table.
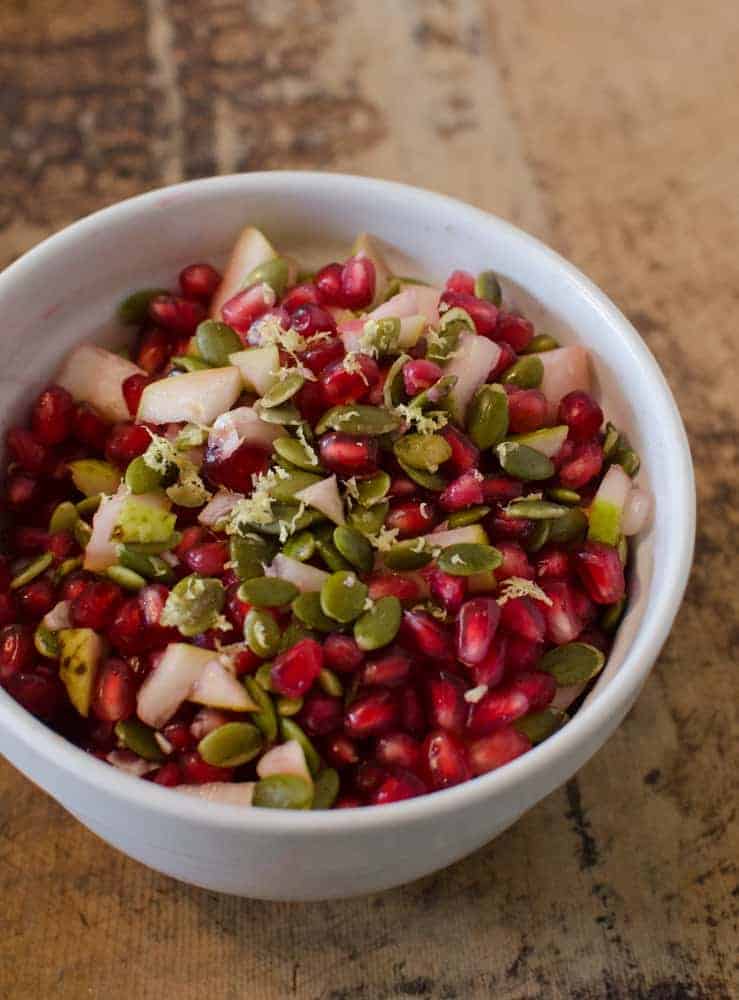
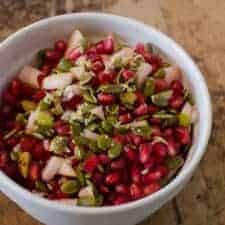
Pomegranate Pear Salad
Ingredients
- 1 large pomegranate, seeds (arils)
- 1 large pear, cored and chopped small
- 1 tablespoon fresh lemon juice
- zest from one lemon
- 1/2 cup hulled pumpkin seeds, pepitas
- 1 tablespoon honey or 2 tablespoon maple syrup
Instructions
- Add all of the ingredients to a medium bowl and mix to combine.
- If your honey is a bit thick, you might want to whisk it with the lemon juice and lemon zest before stirring it into the fruit.
- Serve right away.
Notes
- You can use any kind of citrus you want. Lemon or lime would make it tangy and bright, but you could also use grapefruit, blood orange, orange, tangerine, or whatever other citrus you have on hand.
- If you change the type of citrus in this recipe, be sure to use the same kind of citrus juice as you do zest. You may need to adjust the honey to taste.
- To remove the pomegranate seeds (arils), I cut it in half and hit the back with a spoon – you can do this a day or two ahead of making the salad and store the seeds in an airtight container in the fridge.
- This is the easy healthy version of Dixie Salad, which you might also want to put on your Thanksgiving table this year.
Nutrition
Traditional Cranberry Sauce
I have family members who think cranberry sauce is the BEST Thanksgiving side! I definitely always include a dish of this tangy-sweet sauce on my Thanksgiving dinner table because it’s really so delicious.
Homemade cranberry sauce is worlds apart from the canned version, and once you’ve tasted this easy cranberry orange sauce, you’ll never go back.
The combination of tart cranberries with bright citrus creates a condiment that elevates every bite of turkey and adds a beautiful jewel tone to your dinner presentation.
Best of all, this classic Thanksgiving side can be made several days in advance, freeing up precious oven space and reducing your day-of stress!
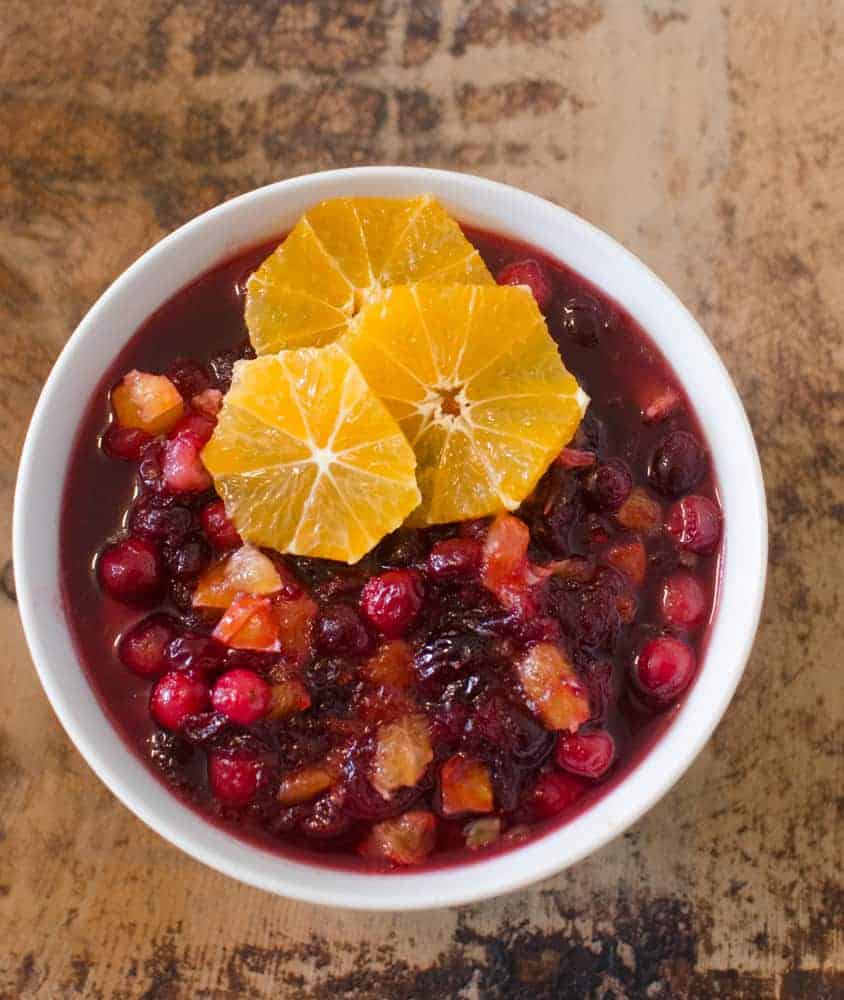
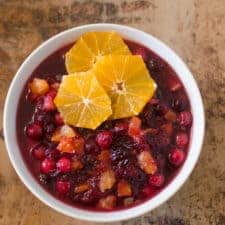
Easy Cranberry Orange Sauce
Ingredients
- 1 bag fresh cranberries, 16 ounce bag
- 1/2 cup fresh orange juice, juice of one orange
- zest of 2 oranges
- 1 cup maple syrup
- 2 oranges, peel removed and then chopped into small pieces
- dash of salt
Instructions
- Add the cranberries, orange juice, orange zest, and maple syrup to a medium pan. Place the pan over medium heat and let it slowly come to a gentle simmer.
- Simmer until the liquid starts to thicken a bit and most of the cranberries pop, about 30 minutes.
- Remove from the heat and stir in your chopped orange pieces and a dash of salt.
- Let this stand at room temperature until thickened, and then serve cold or at room temperate.
Notes
- If you like your cranberry sauce spiced, feel free to add spices like cinnamon, ginger, nutmeg, or cloves to your liking.
- You could use frozen cranberries if you can’t find fresh cranberries at your local grocery store.
- This sauce keeps well, so you can make it a few days in advance and store it in the fridge in an airtight container.
- This is a great addition to enjoy on top of your favorite turkey, chicken, or pork dishes – a little goes a long way.
- You can also store leftover sauce in an airtight container in the freezer for up to three months.
Nutrition
Green Bean Preparations
Green beans offer that essential touch of green on the Thanksgiving plate, and this buttery garlic version is a delicious way to strike the perfect balance between elegant and accessible.
While green bean casserole remains a beloved tradition for many families, these simply prepared beans allow the vegetable’s natural flavor to shine through while still delivering plenty of richness and satisfaction.
They’re also incredibly versatile, pairing beautifully with virtually every other dish on your holiday menu.
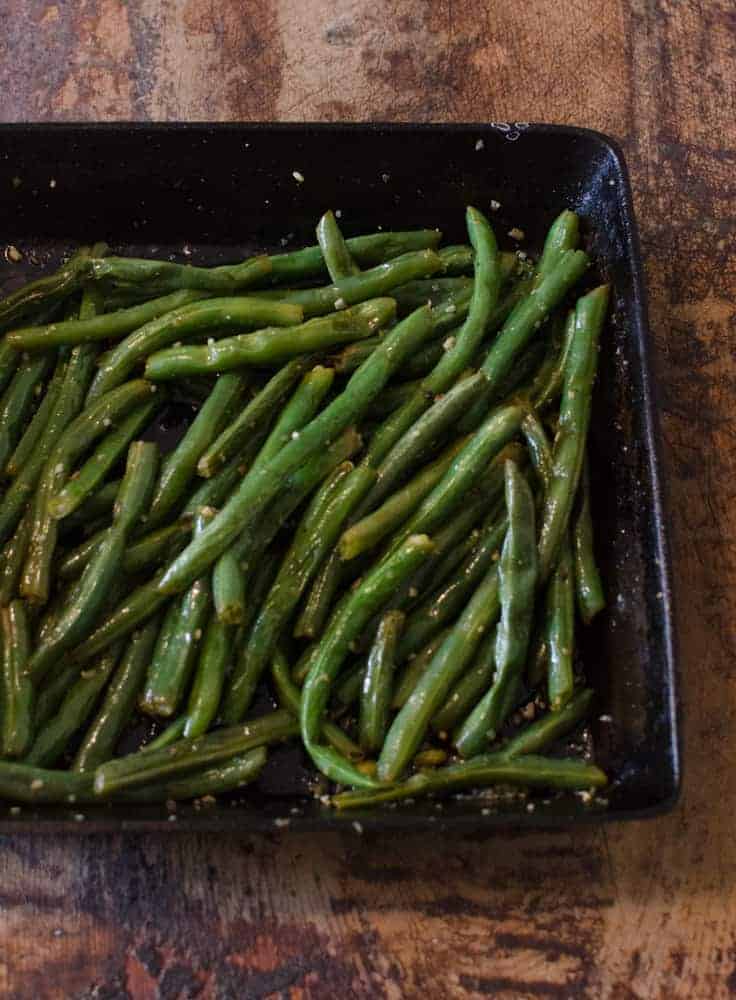
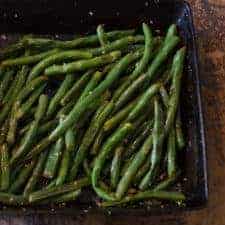
Buttery Garlic Green Beans
Ingredients
Instructions
- Bring a large pot of water to a boil and add a tablespoon of salt.
- Add the green beans to the boiling water and let them cook for 2 to 4 minutes, until they reach your desired tenderness.
- Remove the green beans from the boiling water and stick them in a bowl of ice water (to stop the cooking process). This method is called blanching the beans.
- It’s great because it works really well for cooking beans thoroughly, but you can still add flavor on the stove top. Don’t skip this step.
- When the beans are cold, dump them into a strainer and then pat them dry with a clean tea towel.
- In a large skillet over medium heat, warm the olive oil and butter.
- When the butter is melted, add the minced garlic and stir until the garlic is fragrant, about 15 seconds.
- Add the green beans, salt, and pepper, and stir to coat the green beans in the butter and garlic mixture.
- Cook for 3 to 4 minutes, until the green beans are hot and well-coated in the butter. Adjust the salt to taste and serve right away.
Notes
- Make sure you get good quality green beans. I bought mine a few days before I planned on using them, and that was a mistake this time of year; lots went bad in the fridge.
- Add chopped onions while sautéing if you’d like.
- If you want to make this recipe dairy-free or vegan, you could omit the butter and use extra olive oil.
- Boiling the green beans before you sauté them is worth the extra bit of effort because it results in the best texture.
- This recipe comes from The Weeknight Dinner Cookbook by my friend Mary at Barefeet in the Kitchen.
Nutrition
FAQs About Thanksgiving Dinner Side Dishes
For gatherings of 8-12 people, aim for 4-6 different sides to provide variety without overwhelming yourself. Smaller groups (under 8) can comfortably serve 3-4 sides, while larger gatherings (15+) benefit from 6-8 options. Choose dishes with different flavor profiles and textures to keep the meal interesting.
Don’t skimp on salt—vegetables especially need proper seasoning. Taste and adjust before serving. Use quality olive oil, fresh garlic, and real butter when possible. Add brightness with citrus zest or fresh herbs. Remember that roasting and caramelization naturally intensify flavors, making easy side dish preparations taste extraordinary.
Cranberry sauce can be made up to 5 days in advance. Vegetables can be washed, trimmed, and cut 1-2 days ahead and stored in airtight containers. Mashed sweet potatoes can be prepared the day before and reheated. However, roasted vegetables are best prepared the day of for optimal texture, though you can prep ingredients beforehand.
Use your oven’s “warm” setting (around 200°F) to hold finished dishes. Cover dishes with foil to prevent drying out. Alternatively, transfer sides to a slow cooker set on “warm” or “low.” For casseroles and potato dishes, undercook slightly and finish heating when ready to serve.
Many of these recipes are naturally gluten-free and can easily be made vegan by substituting olive oil or coconut oil for butter, and maple syrup for honey. Roasted vegetables, simple salads, and cranberry sauce work beautifully for most dietary needs. Always label dishes at the table so guests know what they can enjoy.
Best Tips for Cooking Thanksgiving Side Dishes
🦃 Plan Your Oven Schedule: Map out cooking times and temperatures for all dishes ahead of time to avoid oven traffic jams on Thanksgiving day.
🦃 Prep Ingredients in Advance: Wash and trim vegetables, measure out spices, and chop aromatics 1-2 days before to streamline cooking.
🦃 Choose Complementary Flavors: Select 3-5 side dishes that offer variety in texture, color, and taste—pair sweet with savory, creamy with crunchy.
🦃 Consider Dietary Restrictions: Make simple substitutions like coconut oil for butter or vegetable broth for cream to accommodate vegan and dairy-free guests.
🦃 Use High-Quality Ingredients: Since these recipes are simple, quality matters—choose fresh vegetables, pure maple syrup, and good olive oil.
🦃 Don’t Overcrowd Your Menu: Five well-executed sides are better than eight mediocre ones; focus on dishes you can prepare confidently.
🦃 Embrace Room Temperature Serving: Many vegetables taste excellent at room temperature, reducing the pressure to keep everything piping hot simultaneously.
🦃 Double Your Favorites: Popular dishes disappear quickly, so consider making 1.5x or 2x the recipe for crowd-pleasers like roasted brussels sprouts.
More Thanksgiving Recipes to Consider

Simple Gingerbread Recipes
Easy Soft Gingerbread Cookies | The Best Recipe
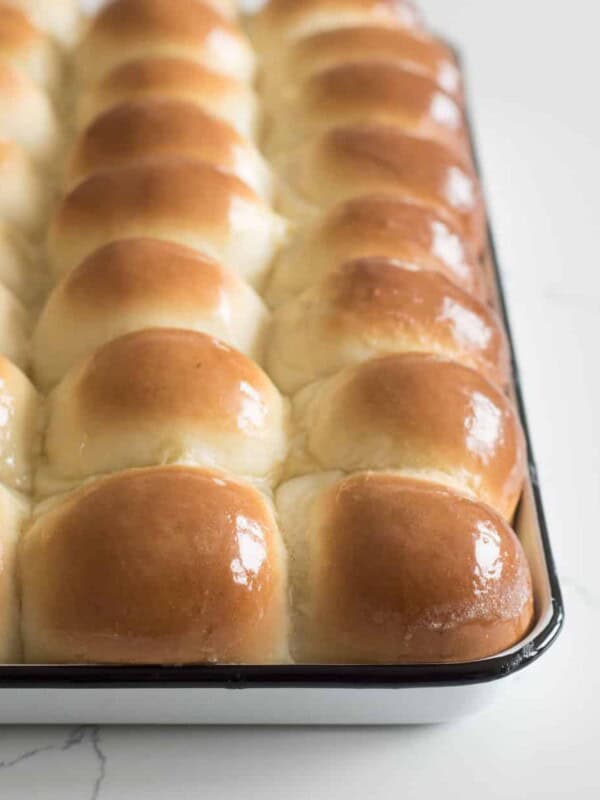
Roll Recipes
Mom’s Jumbo Dinner Rolls
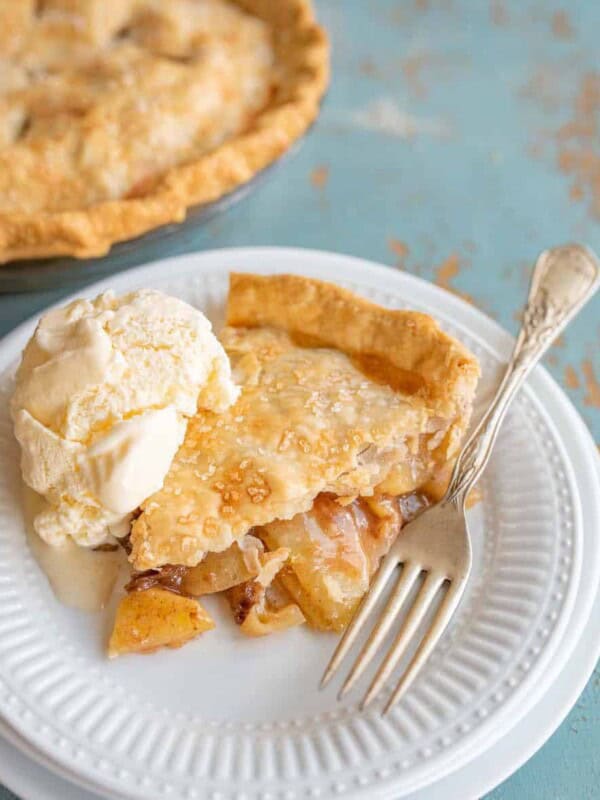
Pies, Crisps & Tarts
Easy Apple Pie Recipe Using Fresh Apples – With Video!
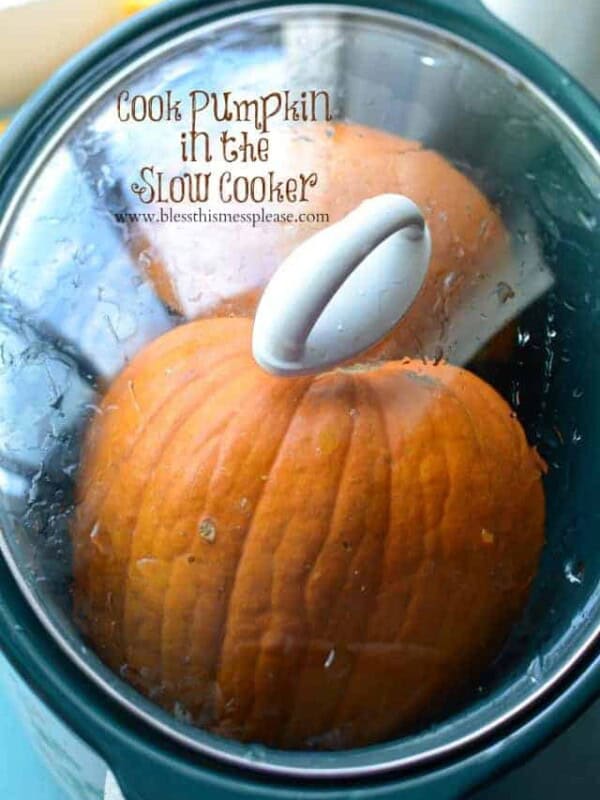
From Scratch Recipes
The Best and Easiest Way to Cook a Pumpkin
Did you make this recipe? Leave a ⭐️ review and share it on Instagram, Facebook, or Pinterest!


This is an awesome list! There’s nothing better than a 5-ingredient recipe — especially on a busy holiday. Great ideas!
I finally found some little spuds to make the salt potatoes….they win the OMG amazing veggie award for the millennium! Thanks for posting this one!!!!!!!!!!!!!!!!!!!!!!!!!!!!!!!!!!!!!!!!!!!!!!!!!
I love all of these! Those Salt Potatoes are forever my favorite (and EASY) potato dish. Thanks for the love for the cookbook. I’m thrilled you like the green beans!