This post may contain affiliate links. Please read our disclosure policy.


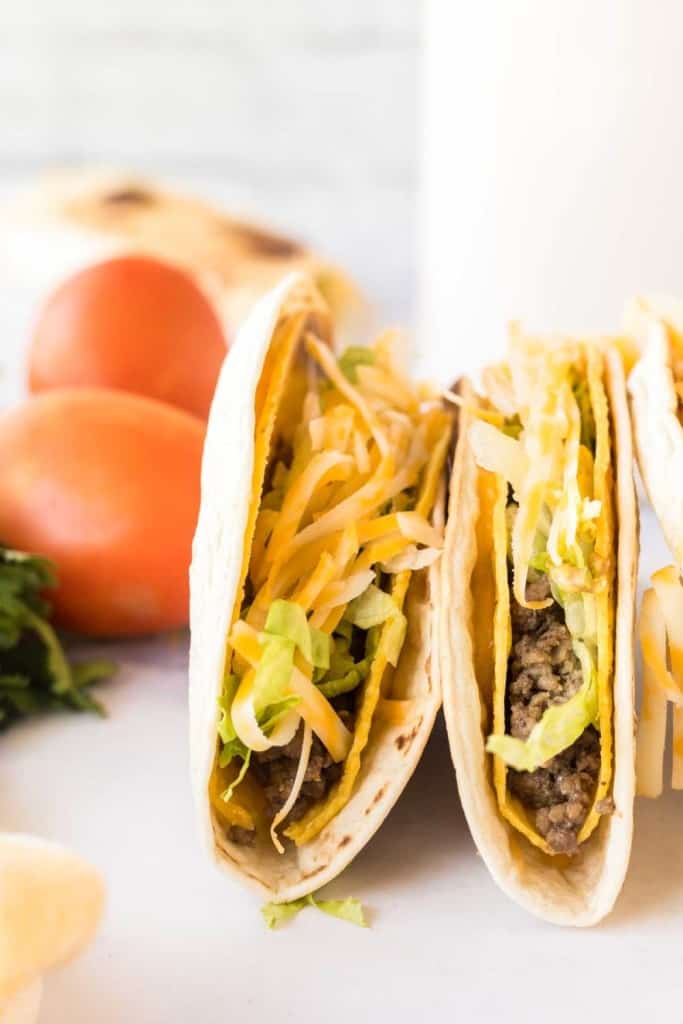
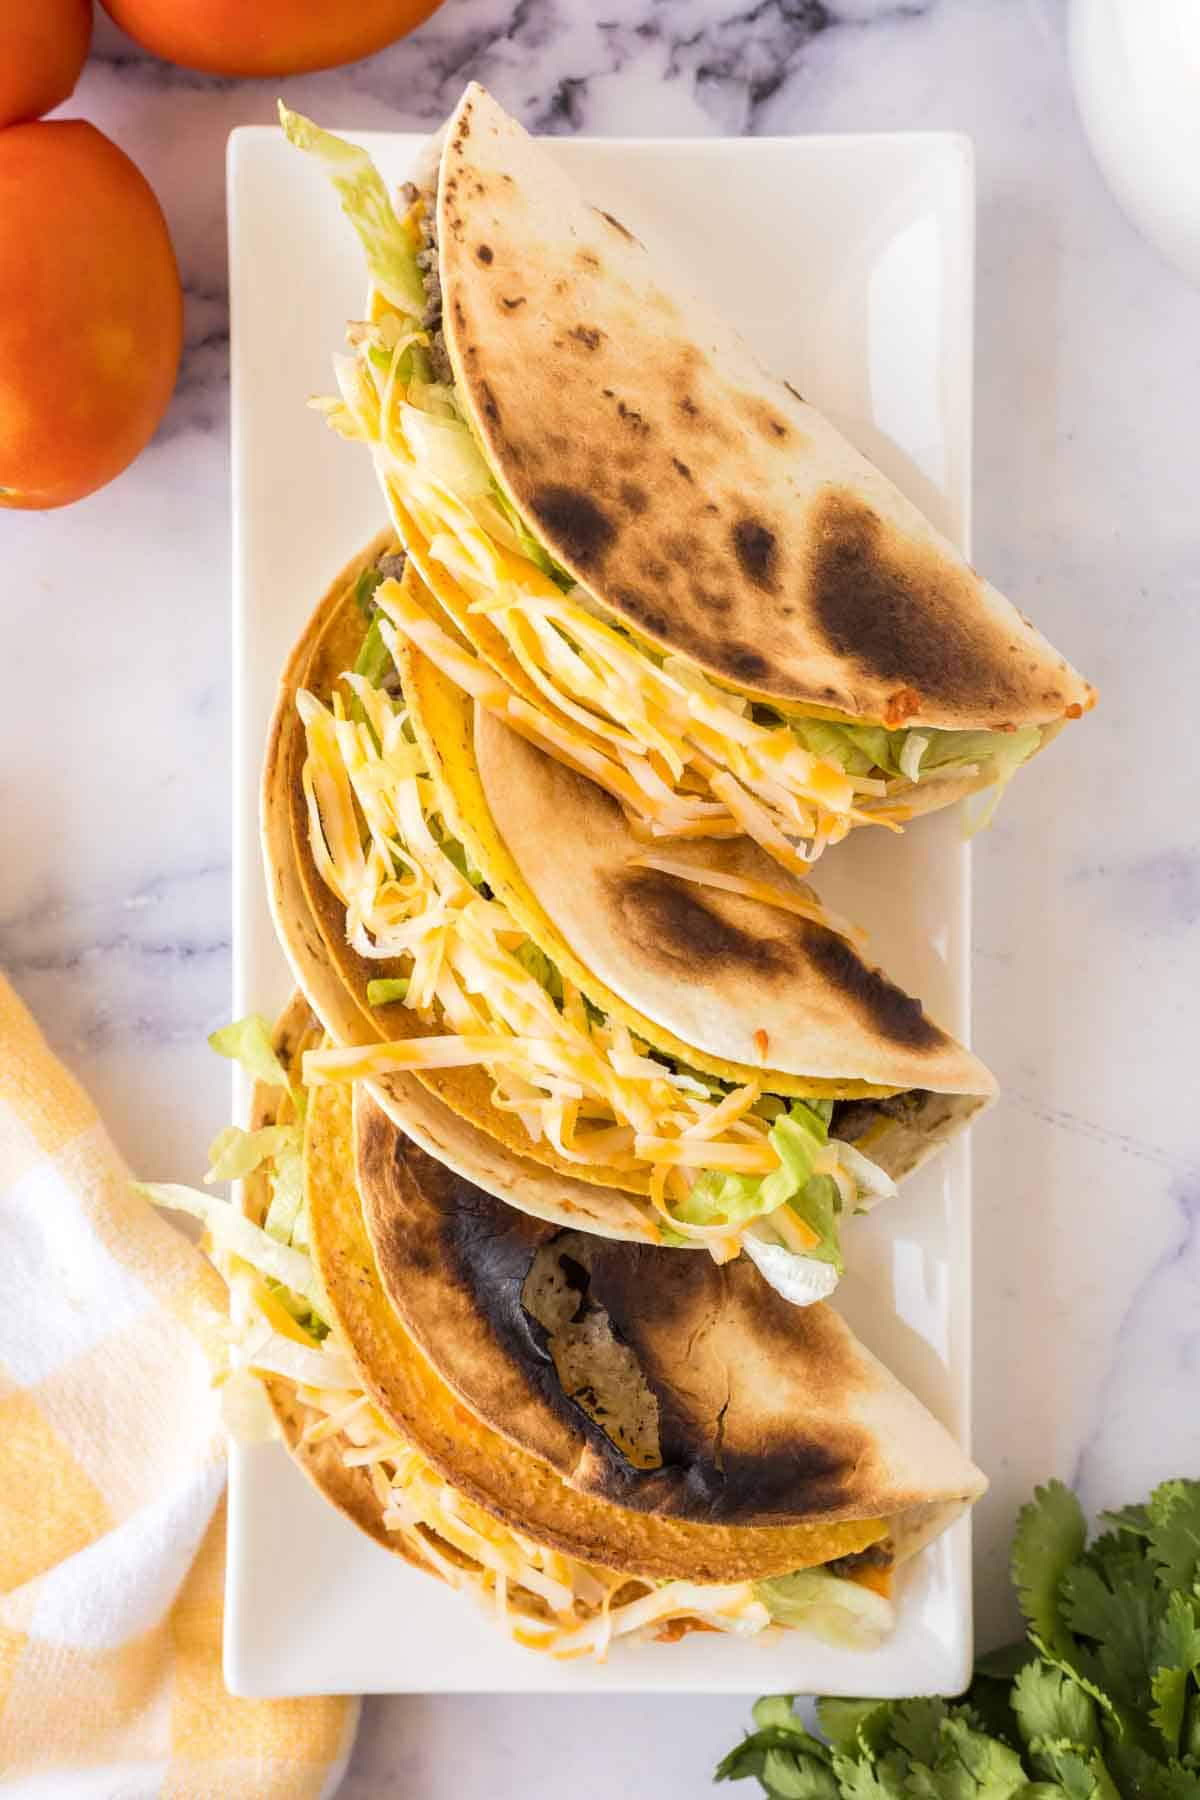
This copycat Taco Bell recipe features a hard-shell taco wrapped in a layer of melted cheese and a soft flour tortilla. Our Cheesy Gordita Crunch recipe tastes just like the real thing!

Craving some quick and easy Mexican-inspired food, but don’t want to leave the house? Try making this homemade cheesy gordita crunch! This copycat Taco Bell recipe comes together in just 30 minutes and is totally savory, cheesy, and satisfying! These crunchy and chewy double wrapped tacos are stuffed with seasoned ground beef and classic taco toppings like lettuce, sour cream, and shredded cheese.
One of the best parts about making this fast food favorite at home is that you can completely customize it! I often add some guacamole, diced tomatoes, red onion, and homemade spicy ranch. No matter how I choose to jazz up this homemade cheesy gordita crunch, I always find it to be just as yummy and satisfying as the original!
Table of Contents
Why You’ll Love This Recipe
- It is a delicious balance of crunchy, chewy, and cheesy!
- It’s the perfect re-creation of a fast food favorite!
- Can be made in less than 30 minutes!
- A dinner that the whole family will enjoy!
Recipe Ingredients
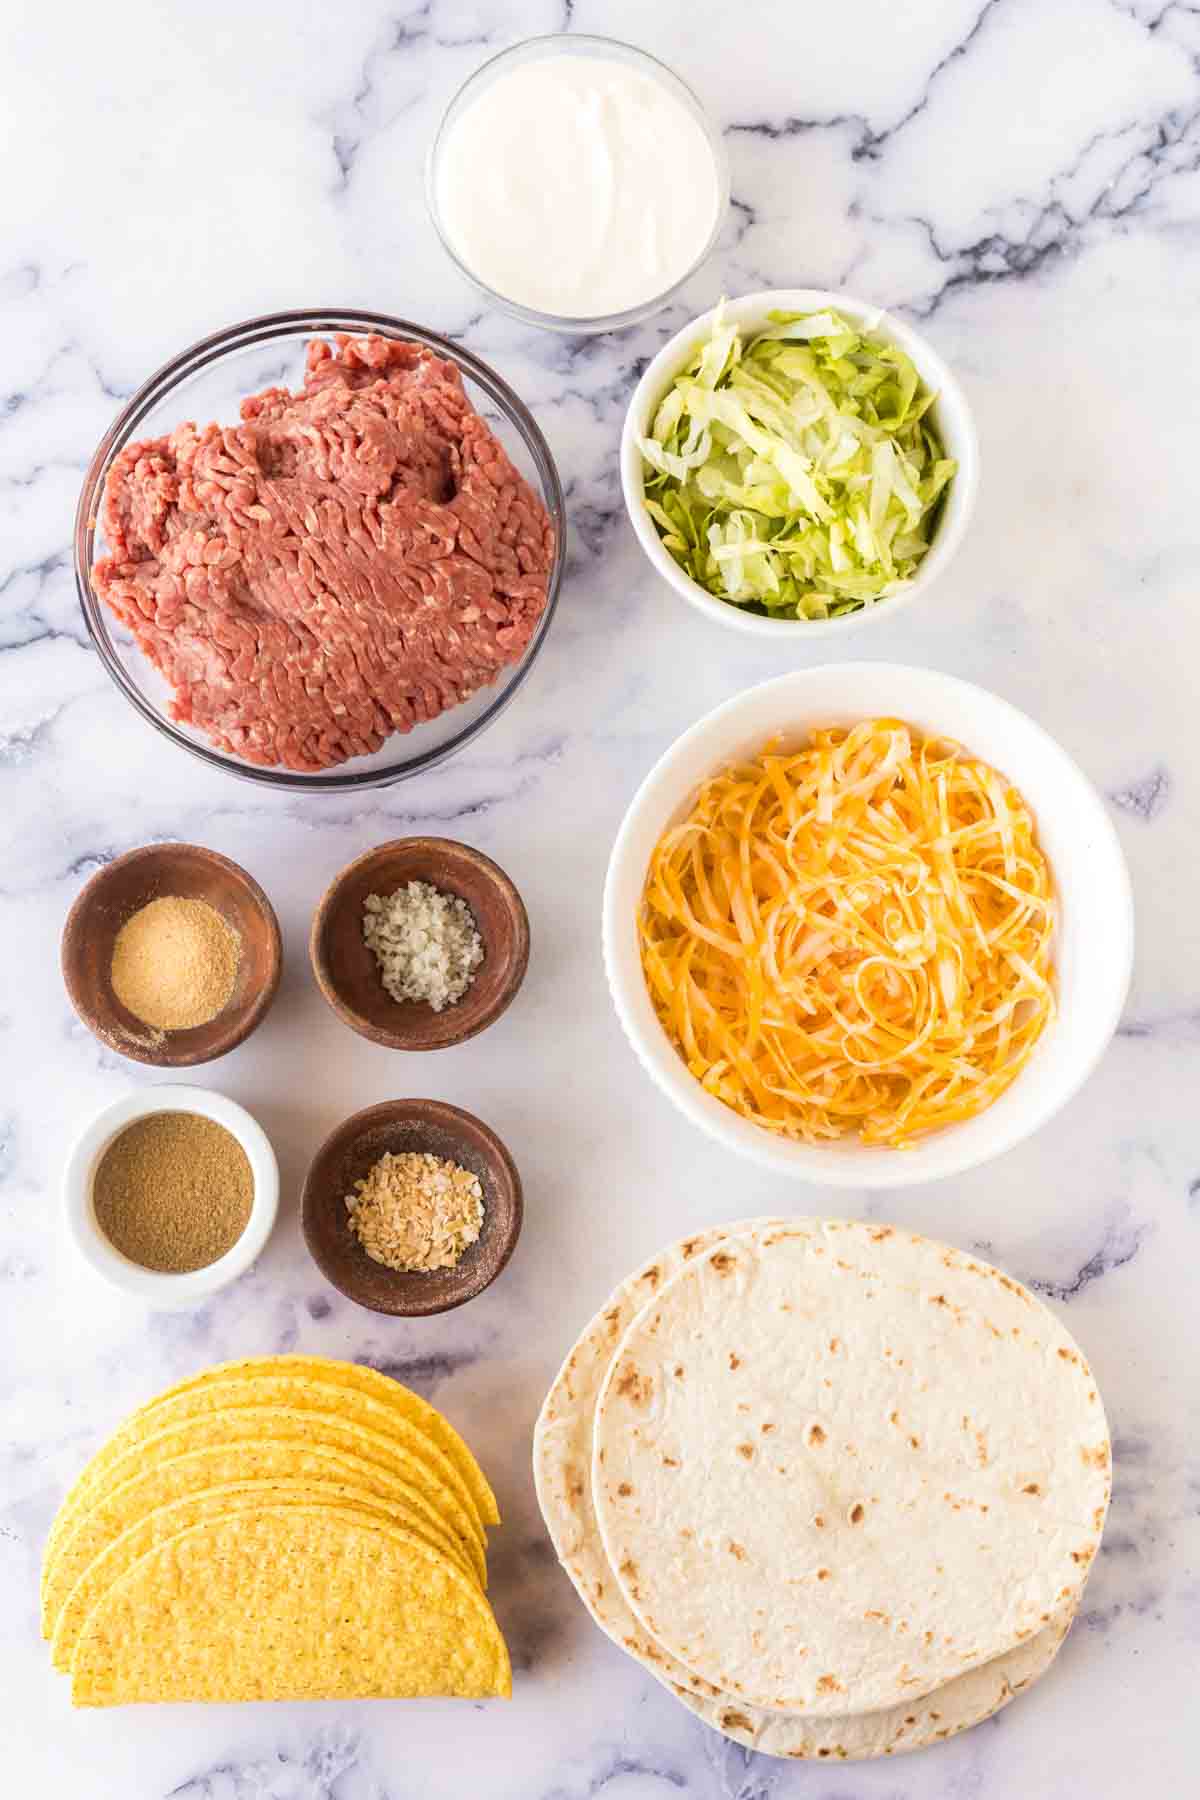
- Ground Beef—Adds heartiness and protein to this dish. You could also use ground chicken or ground turkey.
- Fried Taco Shells—Gives these cheesy tacos an addictive crunch.
- Flour Tortillas—Hold all the other ingredients together.
- Colby Jack Cheese—Or your favorite type of shredded cheese will add creaminess and “glue” the flour tortilla to the crunchy taco shell.
- Sour Cream—Adds a pop of tangy creaminess.
- Lettuce—Shredded or finely chopped.
- Spices—A mixture of ground cumin, garlic powder, dried minced onion, and salt.
See the recipe card for full information on ingredients and quantities.
How to Make a Cheesy Gordita Crunch

Step #1. In a large pan, combine your ground beef, cumin, minced onion, garlic powder, and salt.
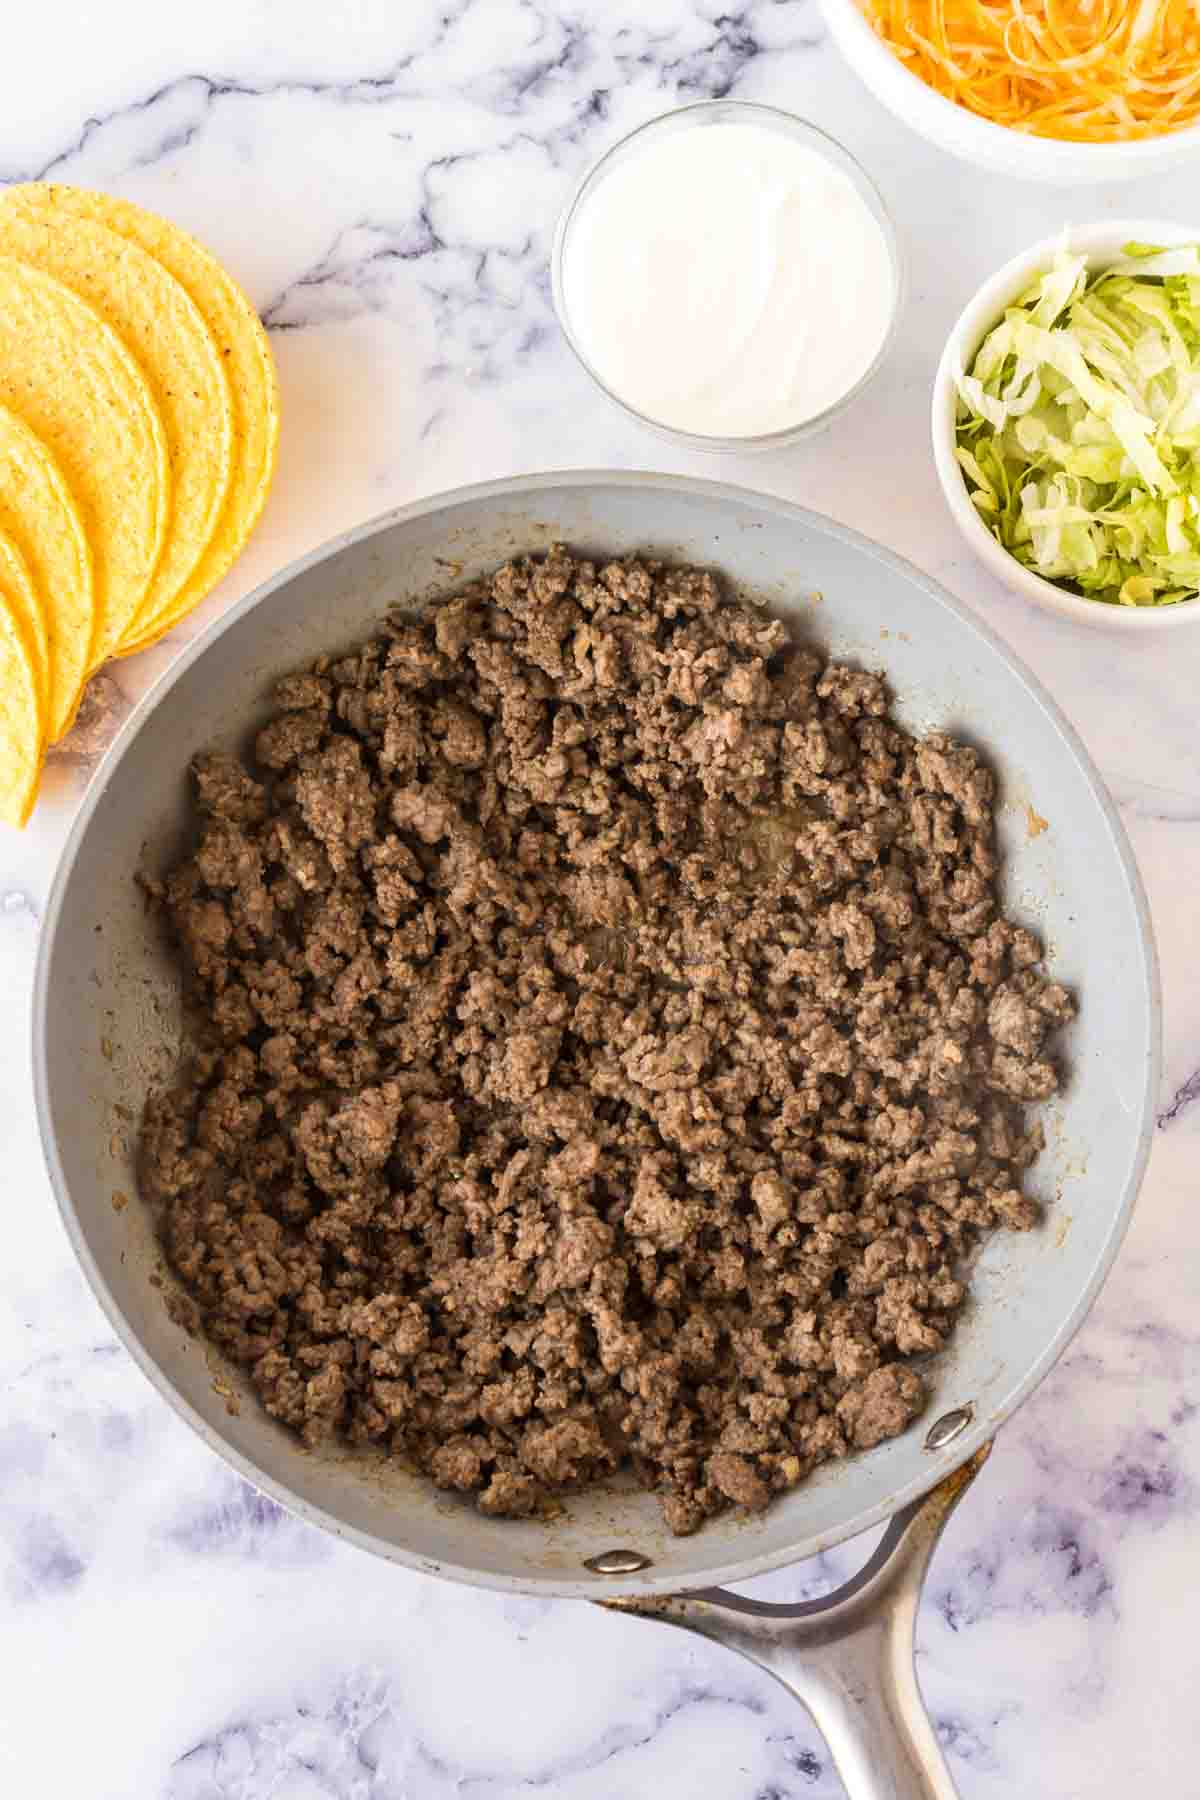
Step #2. Cook until no longer pink. Drain the excess grease and set aside.

Step #3. Line a baking sheet with the flour tortillas and top them with about half of the Colby jack cheese. Broil the flour tortillas until the cheese is fully melted.
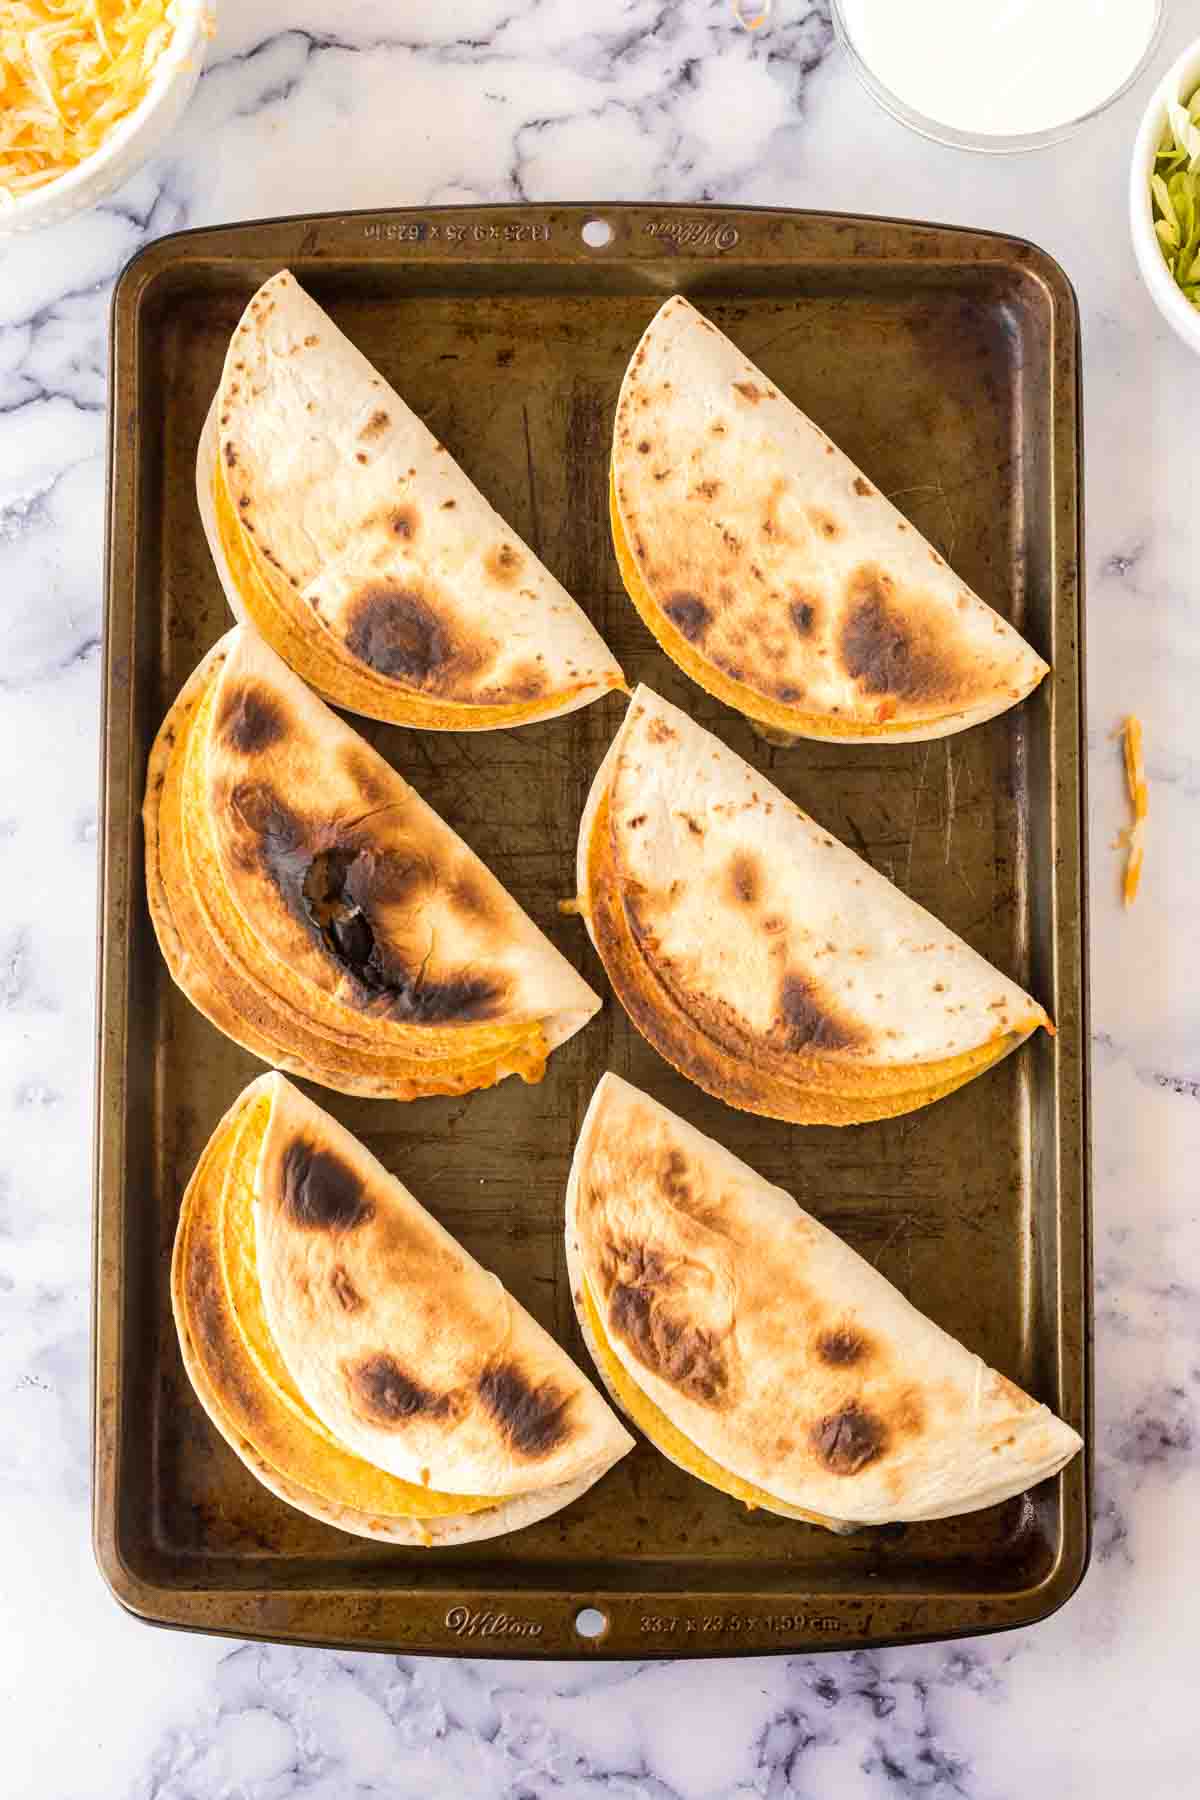
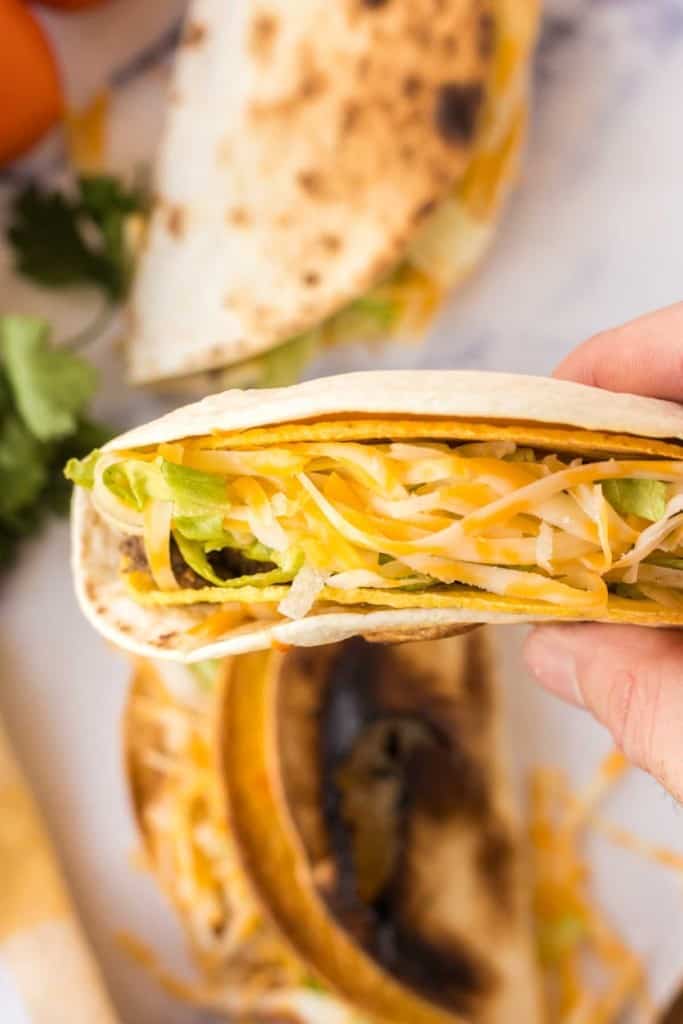
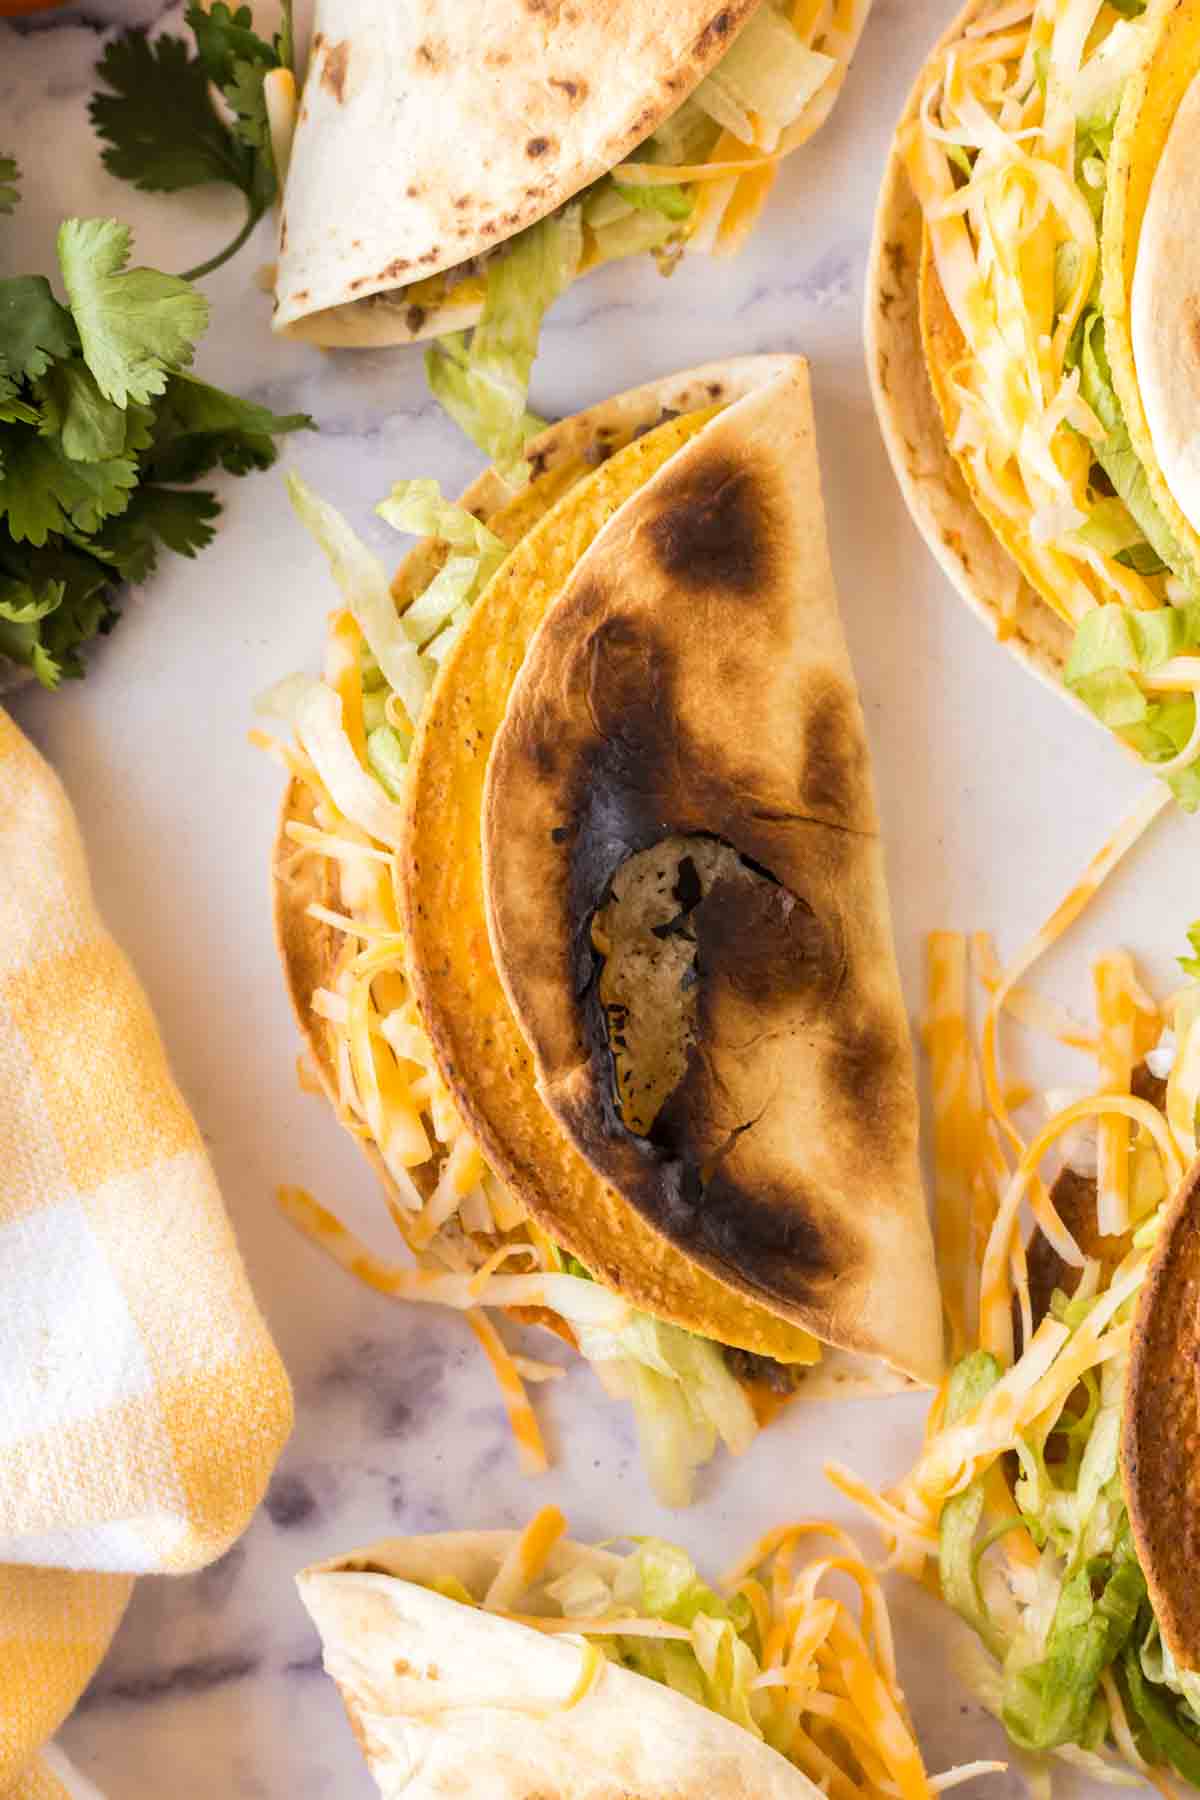
Step #4. Wrap each cheesy flour tortilla around a fried taco shell and broil until the cheese is bubbly. Fill each tortilla shell with the ground beef mixture, remaining cheese, lettuce, and sour cream.
Recipe FAQS
The cheesy gordita crunch is a popular Taco Bell menu item made by placing a crunchy taco inside of a cheese-lined flour tortilla. Everyone seems to love the combination of crunchy fried taco shell, gooey melted cheese, and chewy flour tortilla! When you fill this crunchy and chewy concoction with warm spiced ground beef, fresh lettuce, and sour cream, it creates a meal that is savory and satisfying!
These two Taco Bell dishes are very similar, but the difference between them is that the chalupa is made with a deep fried, corn-based flatbread whereas the gordita crunch features a soft flour tortilla. Both dishes are filled with beef, sour cream and lettuce and are eaten like a taco.
Definitely! You can substitute the ground beef for your favorite plant-based ground “meat” or simply omit it. You can also “beef” up your vegetarian gordita crunch with some additional fillings like refried or black beans, diced tomatoes, and olives!
Expert Tips
- You can replace the mix of spices in this recipe for a packet of your favorite taco seasoning.
- It is important to get the cheese nice and melted on the tortillas before adding the taco shells. This will help ensure that they stick together!
- Some other fillings you can stuff inside your cheesy gordita crunch include homemade salsa, guacamole, olives, or diced tomatoes!
- If you are struggling to get your crunchy taco shells and flour tortillas to stick together, try using some weight and pressure. Wrap the cheesy flour tortillas around the crunchy taco shells, set them on their sides, and place a baking sheet on top to weigh them down. Allow them to cool this way for about 5 minutes.
How to Serve and Store Cheesy Gordita Crunch
These homemade cheesy gordita crunch tacos are a heavy and filling dish, so I recommend serving them with simple side dishes. Plate up your gordita crunch with a side of chips and easy restaurant salsa or rice with lime and cafe rio black beans. I also recommend garnishing this dish with a squeeze of fresh lime juice.
Unfortunately, these cheesy gordita crunches don’t reheat well and I don’t recommend storing them after they’re assembled. If you want to, you can store the seasoned and cooked ground beef in the fridge for up to 4 days. Simply reheat the beef in the microwave before using fresh ingredients to assemble more gordita crunches.
More Dinner Recipes To Consider

Healthy Living
Family Meal Plan: Summer Menu
Chicken Recipes
Instant Pot Chipotle Chicken Taco Meat

From Scratch Recipes
The Best Instant Pot Broccoli and Cheese Soup
Did you make this recipe? Leave a ⭐️ review and share it on Instagram, Facebook, or Pinterest!

Cheesy Gordita Crunch
Ingredients
- 1 pound ground beef
- 2 teaspoons ground cumin
- 1 1/2 teaspoons garlic powder
- 1 1/2 teaspoons dried minced onion
- 1 teaspoon salt
- 6 tortilla shells
- 6 tortillas
- 2 cups Colby jack cheese
- 1 cup lettuce
- 1/2 cup sour cream
Instructions
- In a large pan or skillet, combine your ground beef, cumin, minced onion, garlic powder, and salt. Use a spatula to break up the beef and cook it over medium heat until it’s no longer pink in the middle. Drain the excess grease and set the pan aside.
- Line a baking sheet with tortillas topped with about half of the Colby jack cheese. Broil the tortillas for about 3 minutes, or until the cheese is fully melted.
- Wrap each tortilla around a tortilla shell so that their sides match up and broil for an additional 3 minutes.
- Fill each tortilla shell with ground beef, cheese, lettuce, and sour cream.
- Serve and enjoy!
Notes
- These should be served fresh and do not reheat well. However, the ground beef can be stored in the fridge for up to 4 days.
- You can replace the spice mix with a packet of your favorite taco seasoning.
- Other toppings you can add include homemade salsa, guacamole, olives, diced tomatoes, etc.
it is important to get the cheese nice and melted before adding the taco shells to ensure the tortillas and shells stick together. - If your shells and tortillas are not sticking together, leave them on their sides and place a baking sheet on top to weight them down. Allow them to cool this way for about 5 minutes.


