This post may contain affiliate links. Please read our disclosure policy.
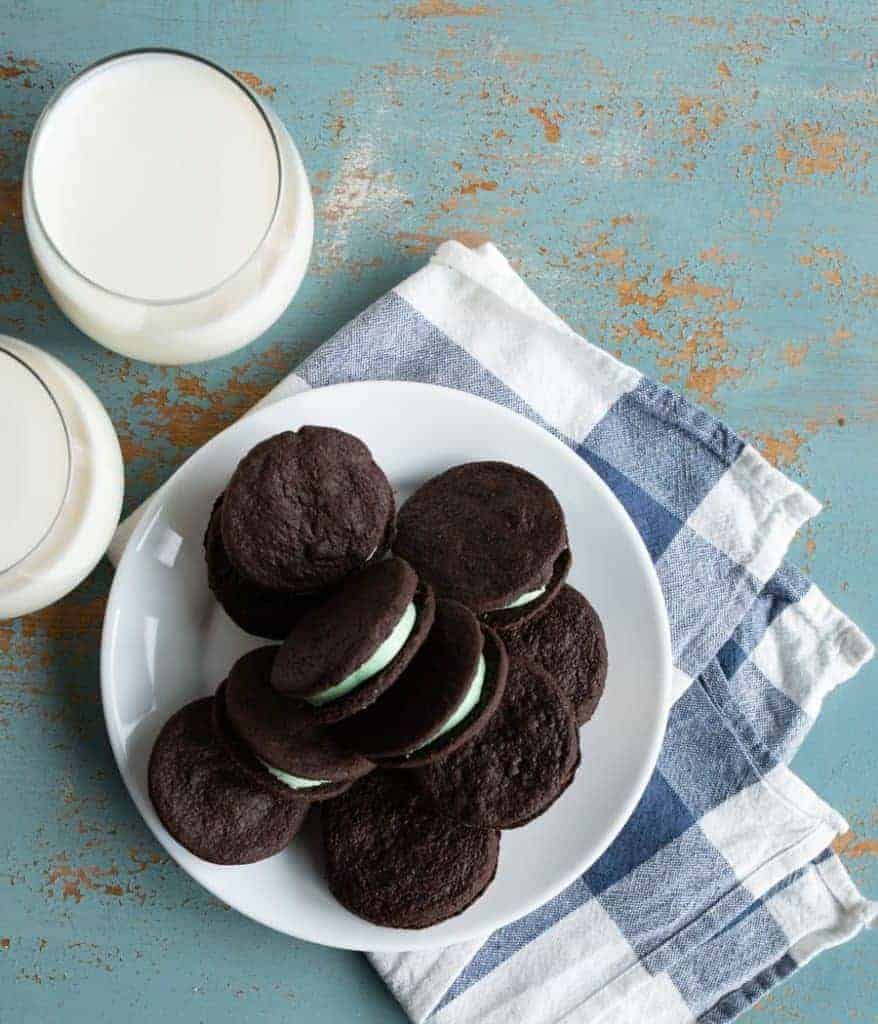
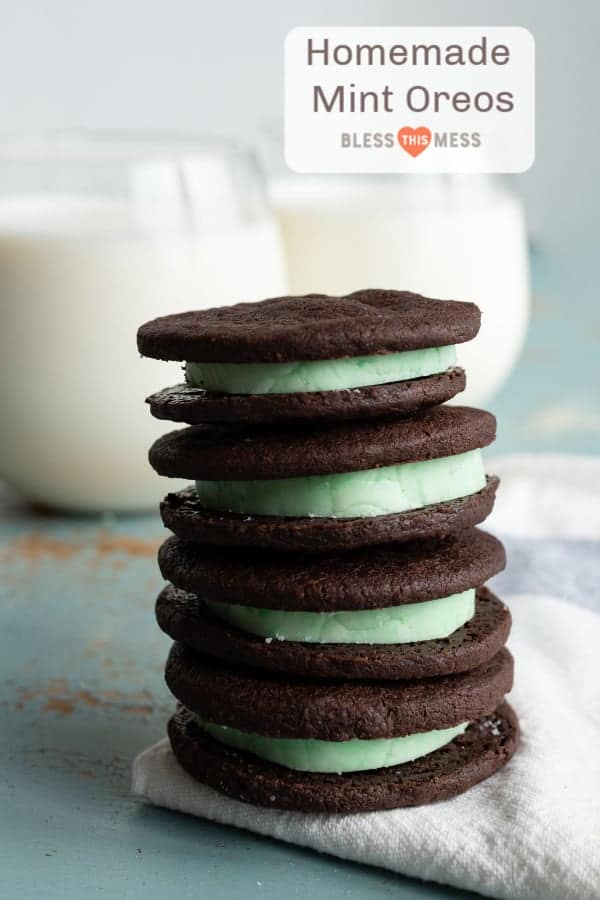
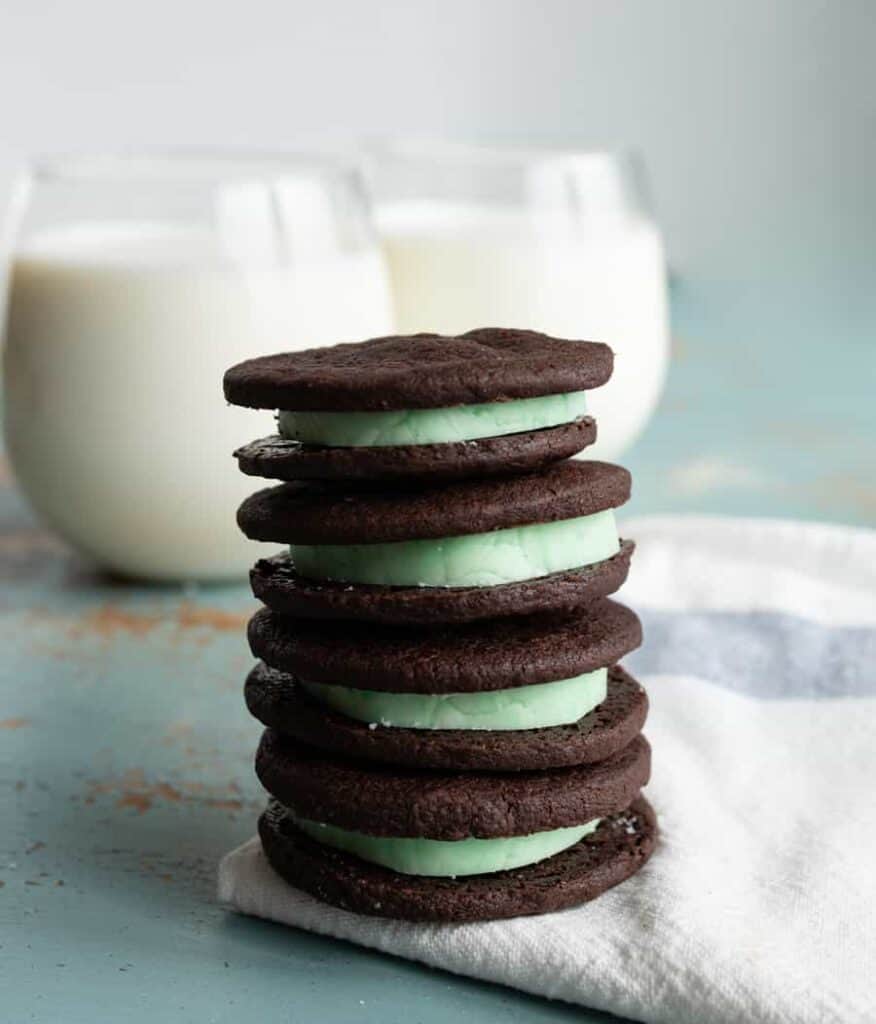
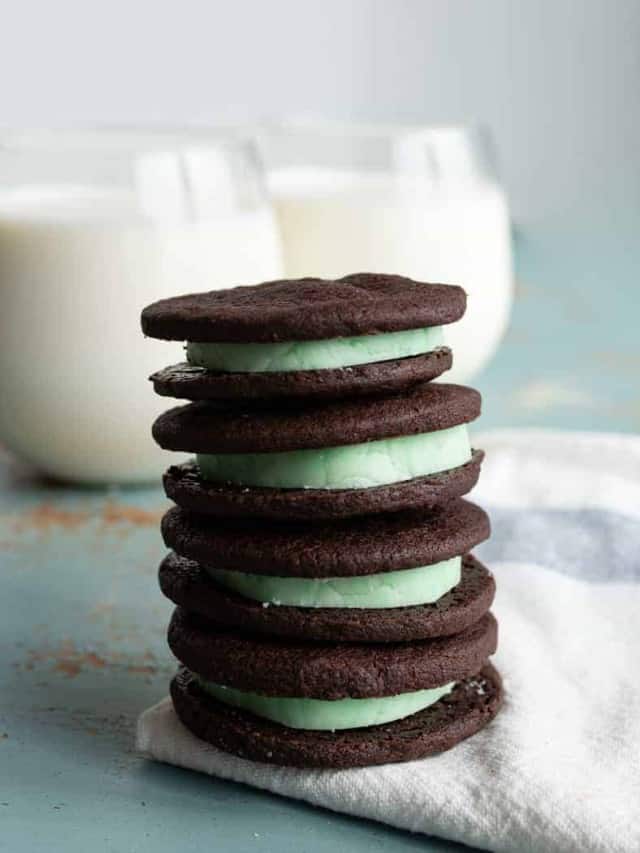
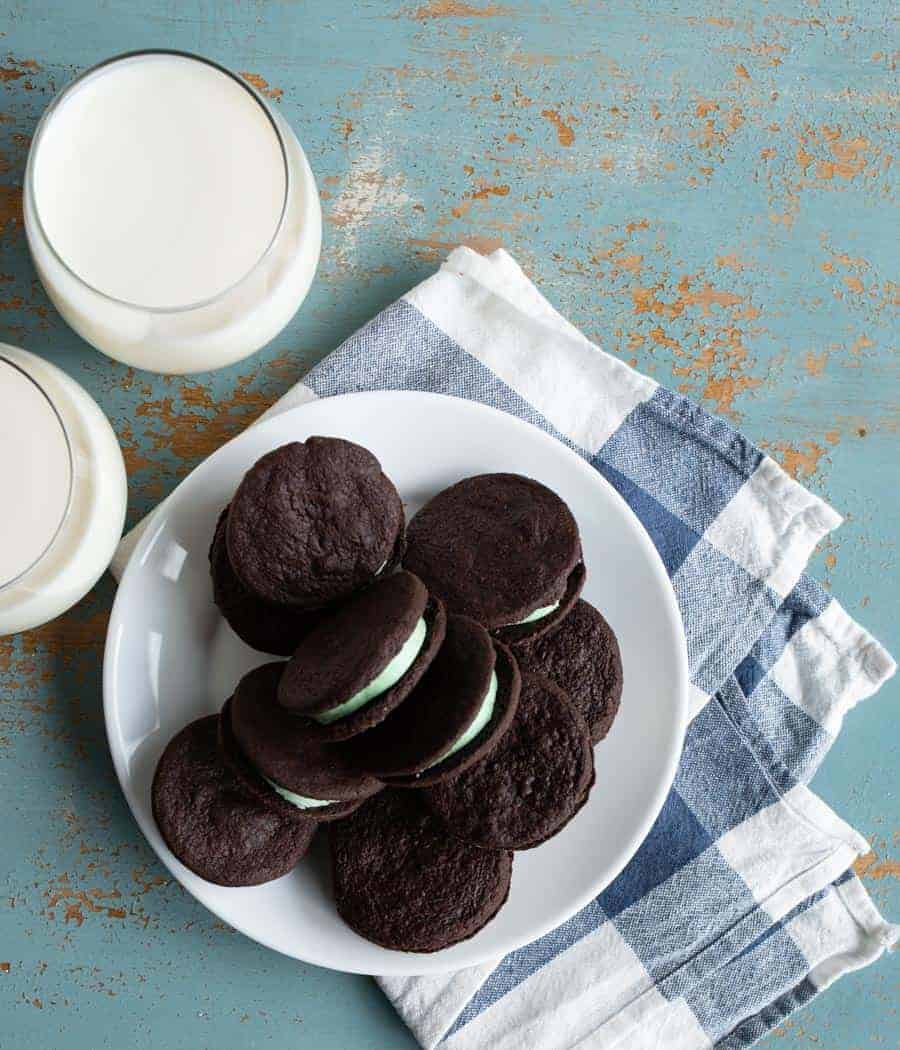
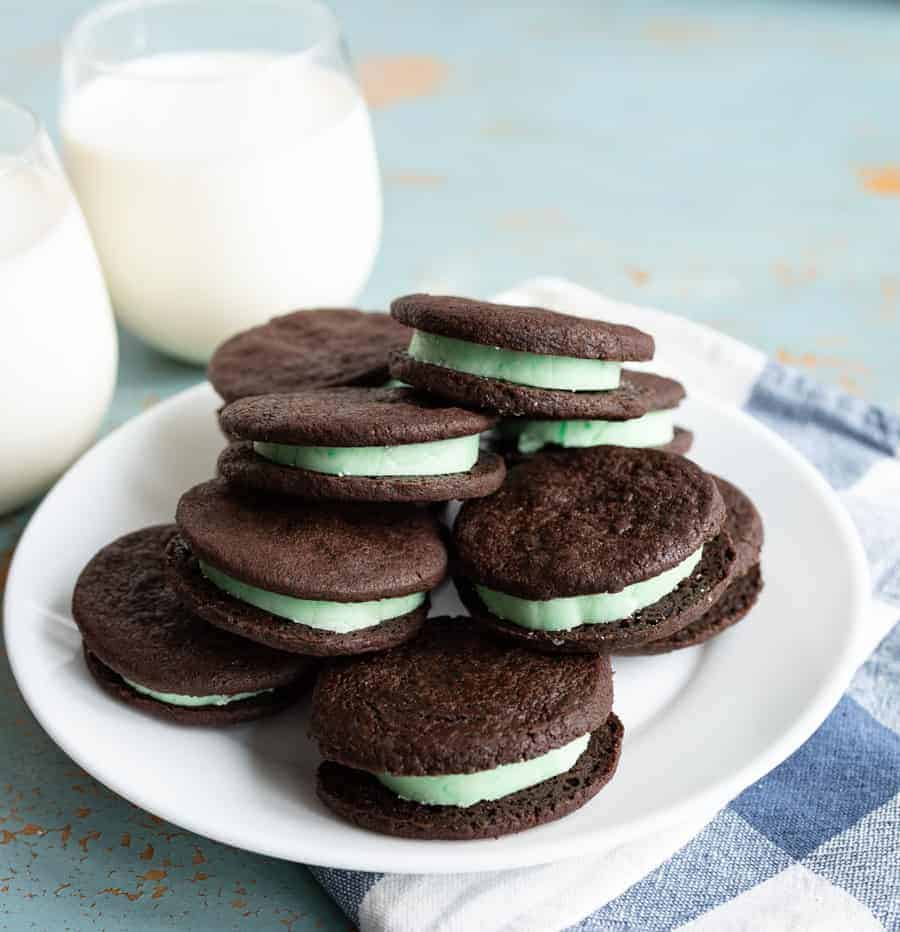
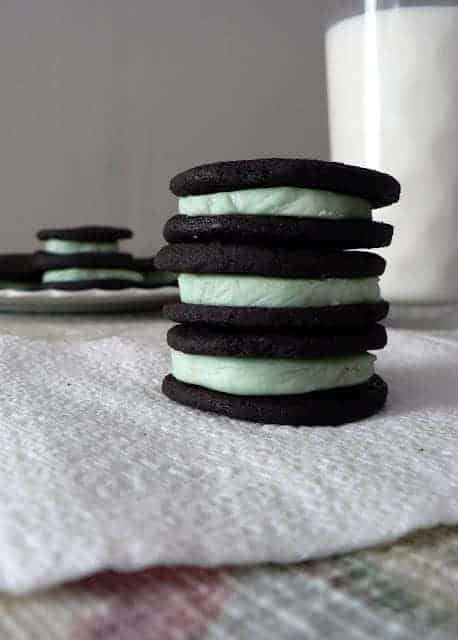
Homemade Mint Oreo cookies made with dark cocoa powder are crispy on the outside, with a perfect mint cream filling in the middle.
Mint Oreos are my favorite cookie, and I love a good mint Oreo milkshake. I also love making a homemade version of my favorite store-bought treats. I have to tell you, homemade Oreo cookies are better than the store-bought kind. There’s something magical about that chocolate and butter combination, and when it’s the real thing, it just tastes awesome.
A homemade Oreo in my neck of the woods is soft cake mix chocolate cookies with frosting in the middle. They are good, but if that’s what you’re looking for, this isn’t it. This recipe is a crunchy dark chocolate cookie filled with a sweet and simple cream and is a fun family treat for the annual Christmas cookie events.
Table of Contents
Why You’ll Love This Recipe
- A lovely homemade replacement for store-bought Oreos that’s even more delicious!
- Crispy outside cookies with a mint cream filling for the perfect balance of chocolate, mint, and creaminess.
- A decadent treat with a cold glass of milk.
Recipe Ingredients
- Butter
- Powdered sugar
- Cocoa powder – dutch-process or dark. I used Hershey’s Special Dark Cocoa.
- Vanilla
- Flour – regular all-purpose flour
- Mint extract – just a little bit to start and adjust to your taste
See the recipe card below for full information on ingredients and quantities.
How to Make Homemade Mint Oreo Cookies
- Make the cookies: Beat the butter and sugar in a mixer, then add in the other cookie ingredients. Chill and bake.
- Prepare the filling: Mix the cream and chill while the cookies bake.
- Assemble the cookies: Put the cream filling between two cookies and devour!
Recipe FAQs
They freeze all right, but it isn’t ideal. They lose some of the crunch when taken out of the freezer. If you want to freeze these, I recommend freezing the cookies and the filling in separate bags, thawing, and then assembling.
They’ll last about a week in an airtight container. I found that they lose their crunch quicker than they spoil. If you’d like to make these ahead of time, I’d recommend making the cookies and filling and keeping them separate until ready to serve them.
Expert Tips
- The dark color of the cookie comes from the cocoa powder. A true dark chocolate cocoa powder will give you that almost-black, dark-brown cookie. A Dutch-process cocoa powder will give you what you see in my photos. A traditional cocoa powder will result in a light brown cookie with a hint of red. I like the dark or Dutch-process cocoa best for these cookies and highly recommend finding some.
- Not a fan of food coloring? You can skip it in this recipe, although there’s something fun about that cool minty color.
- Crumble and add these cookies to a blender with vanilla ice cream and a bit of milk to make a quick and easy delicious milkshake!
More Cookie Recipes to Consider

Christmas Cookies
Easy Peppermint Snowball Cookies Recipe

Christmas Cookies
Cranberry Orange Shortbread Cookies with Pistachios

Christmas Cookies
White Chocolate Peppermint Cookies

Christmas Cookies
75+ Easy Christmas Cookies
Did you make this recipe? Leave a ⭐️ review and share it on Instagram, Facebook, or Pinterest!

Homemade Mint Oreo Cookies
Ingredients
DOUGH
- 1 1/4 cups butter, at room temperature
- 2 cups powdered sugar
- 1 cup Dutch-process cocoa or dark cocoa powder, I used Hershey’s Special Dark Cocoa
- 1/2 teaspoon salt
- 1 teaspoon vanilla
- 1 1/2 to 1 3/4 cups flour
CREAM FILLING
- 4 cups powdered sugar
- 1/2 cup butter, melted and cooled
- 1 tablespoon vanilla extract
- 1 to 1 1/2 teaspoons mint extract
- A few drops green food coloring
- Water
Instructions
- In a stand mixer with a cookie paddle attached, cream the butter and sugar together on medium speed, until the mixture is light and fluffy, about 2 minutes.
- Add the cocoa powder, salt, and vanilla, and mix until incorporated. Add half of the flour and mix.
- Add the remaining flour, 1/4 cup at a time, until you get a pretty dry dough. You don’t want the dough to be sticky at all, and it might even crumble just a little. Don’t be worried about a dry dough; we want a crispy cookie that doesn’t spread when baked.
- Divide the dough into 3 balls, and pat them together to form a disk. Cover the disks in plastic wrap, and refrigerate for about 15 minutes.
- Now, if your world is crazy like mine, and 3 hours, instead of 15 minutes, pass before you get back to baking, let the dough rest at room temperature for 15 minutes. The butter makes the dough super stiff if it’s too cold.
- Preheat oven to 350 degrees. Remove plastic from one disk, and roll your dough out between 2 pieces of parchment paper or on a lightly floured surface. Roll the dough thin! We are talking 1/4-inch to an 1/8-inch thick.
- Use a 2-inch circle cutter to cut out the cookies.
- Place on a cookie sheet and bake for 8 to 9 minutes. It’s super hard to tell when a near-black cookie is done. I baked mine for 10 minutes the first round, and they tasted burnt on the bottom, so you’ll need to adjust as you go.
- Repeat with the rest of the dough. Place the cookies on a wire rack to cool.
- While the dough is chilling, mix up the cream filling. Using a stand mixer with a cookie paddle attachment, mix the powdered sugar, melted butter, vanilla extract, mint extract, and 1 to 2 drops green food coloring together. Add 1 teaspoon of water at a time, if needed, until the mixture resembles a thick dough that is about the consistency of play dough. Adjust the food coloring to meet your needs.
- Divide the filling in half, and roll it into a log that is about 2 inches thick. Roll the log in plastic wrap, and let it chill in the fridge while the cookies are baking.
- After the cookies are cool, it’s time to assemble! Remove the filling from the plastic wrap. Using a sharp knife, slice off a piece that is between 1/4- to 1/2-inch thick.
- This is the fun part of making your own Oreos. You can have traditional cream thickness, double stuffed, or even triple stuffed.
- Stack a cookie, cream, and then another cookie. Press lightly together. Repeat, repeat, repeat.
- Store in an airtight container for up to a week.
Notes
- A true dark chocolate cocoa powder will give you that almost-black, dark-brown cookie. A Dutch-process cocoa powder will give you what you see in my photos. A traditional cocoa powder will give you a light brown, with a hint of red, cookie. I like the dark or Dutch-process cocoa best for these cookies and highly recommend finding some.
- While these cookies can be made ahead, I have found they taste fresher when the cookies and filling are stored separately and put together when they will be eaten within a day.
- You can skip the food coloring if you don’t want to use it! It’s for green coloring purposes only.
- My favorite way to serve these cookies is crumbled into a homemade milkshake, but they’re delicious with a glass of milk, too.


You had a recipe on your site for andes mint dark chocolate cookies dipped in mint melted chips. I LOVED it but I don’t see the recipe anywhere now online. Would you please share it with me again, or re-post it?
I’ll repost it AND I sent you the recipe in email!
I hadn’t had Oreos in years before your recipe…THANK YOU SO MUCH!!! I made these, and they were perfect. I made the original ones a few weeks ago, and forgot to comment, but they came out perfect as well. I do have a question though: If I ever wanted vanilla Oreos, do I just omit the cocoa?
Hmmm. I think you’d have to add more flour since is has such a heavy hand of cocoa in it… and a bit more vanilla?! It’s worth playing with now that you know what the texture should be! Thank you so much for letting me know they turned out. I love getting great feedback!
Thanks so much for the suggestions, and for responding=).
Oh wow, those look fantastic! YUMMY!
yum! and then dipped in chocolate…..yum yum yum!
Best. Idea. Ever.
I am loving your salute to cookies and chocolate this week. Where is your man?
I came across your blog via Rivka, as I was wallowing in self pitty because my kitchen is currently under construction and has been for the last two weeks… and well know I have realized two weeks is nothing. I don’t know how you do it… washing dishes in a tub, that’s just crazy. I am inspired.
Oh! I hope you come back and check on this old blog more! You are a lucky woman for knowing Rivka, and if you are friends with her, than we would be friends too!
I’m sorry about the kitchen remodel mess, I totally feel your pain. Is there an end in sight for you? I’d love a before and after, just so that I can know it does get done, for some people 🙂