This post may contain affiliate links. Please read our disclosure policy.
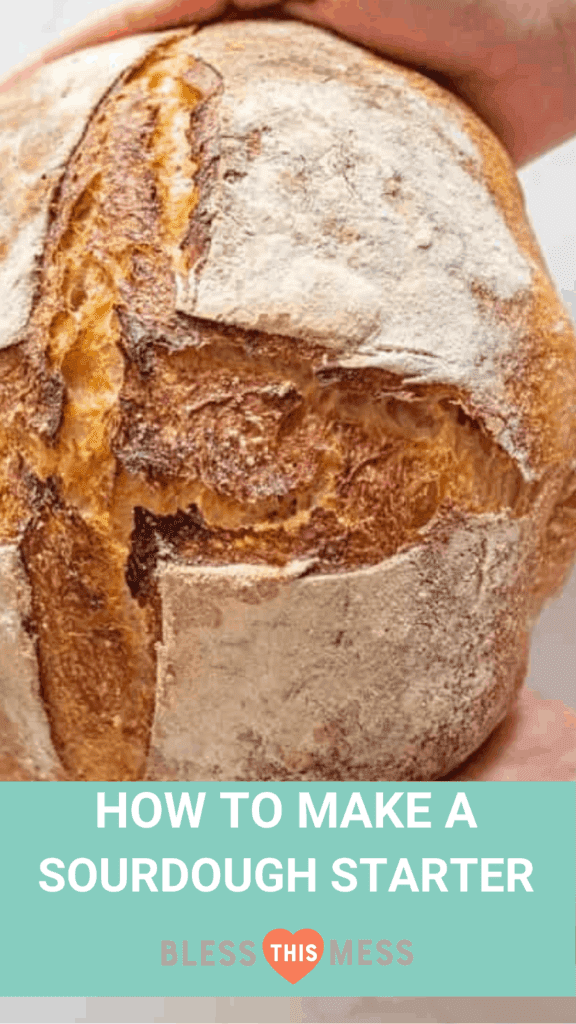
If you want to make your own bread, knowing how to make a sourdough starter will come in handy. It gives your homemade bread incredible flavor and texture! It takes a few days as the starter grows and ferments, but I promise it’s easy. Learn everything you need to know for making and feeding sourdough starter!
Plus, once you do it once, you can use it again and again (and share your sourdough starter with friends and neighbors)!
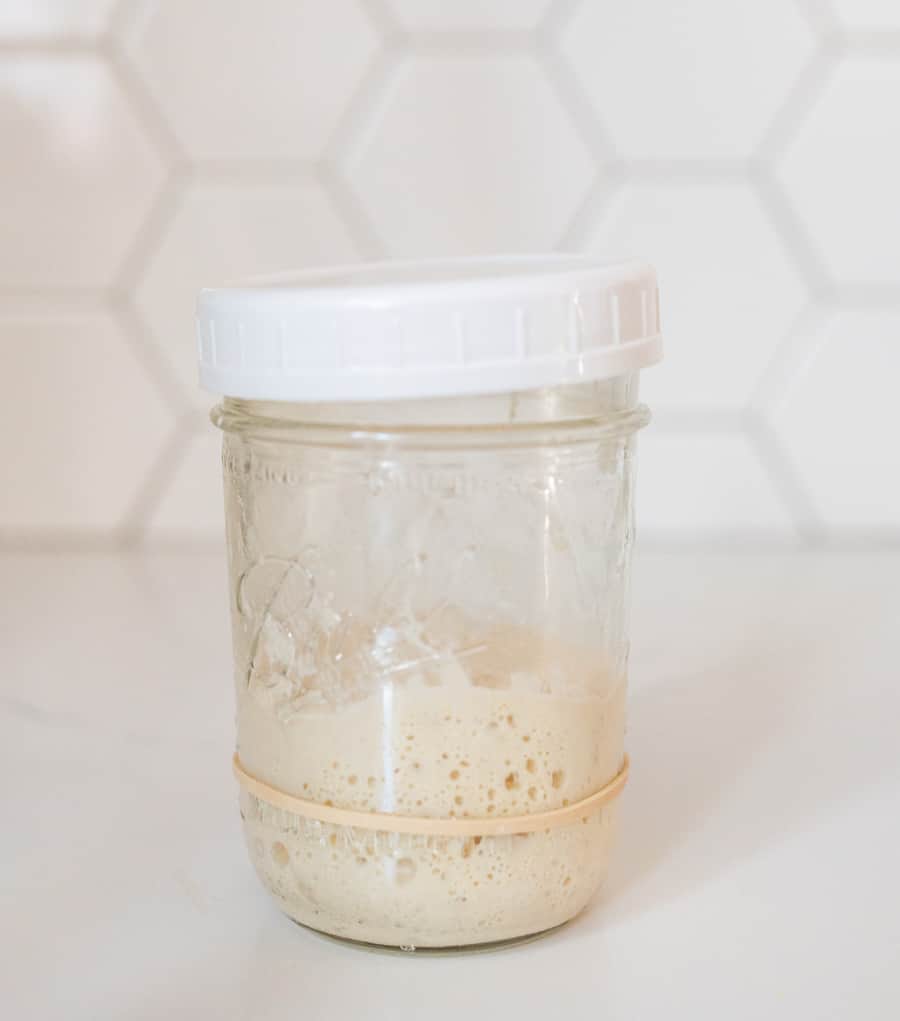
Table of Contents
- How to Make a Sourdough Starter
- What is a sourdough starter?
- How do I get a sourdough starter?
- Here’s how to make your own sourdough starter:
- How to speed up the sourdough starter process:
- Troubleshooting Wild Yeast:
- Frequently Asked Questions:
- Do I have to throw away the “discard” on the days that I’m discarding and feeding?
- How to make a sourdough starter Recipe
How to Make a Sourdough Starter
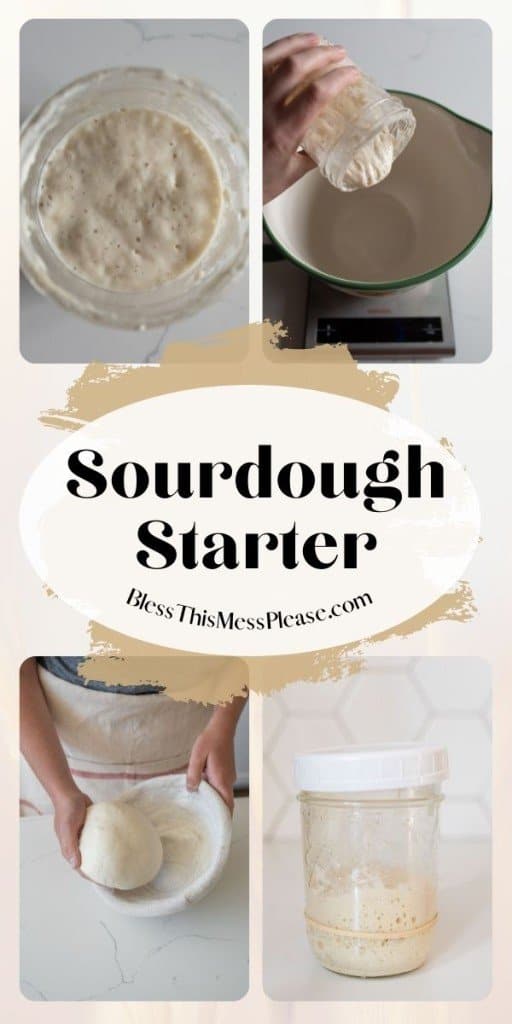
New to bread baking? Then you’ll want to know how to make a sourdough starter! A sourdough starter helps the bread to leaven vigorously and develop a stronger flavor that makes it absolutely delicious. There are a few ways to make a starter — sometimes it’s a liquid batter and other times it’s a stiff dough — and the method I use here is the one I’ve had the best luck with. It’s very simple and just a bit time-consuming in that it has to sit and develop for several days, but if you’re working from home or have a few minutes each day to check in on it, then you should be all set!
The process is so straightforward, too. You essentially make the starter on day 1 and then “feed” it for the remaining days. You’re just cultivating and trapping wild yeast from the air and combining it was a bacteria called lactobacilli. This process helps the bread to rise well and gives the flavor a robust profile that you’ll love. The only ingredients you need are flour and water, plus some simple household items! Let’s learn how to make that sourdough starter!
🍞 18 Easy Sourdough Recipes!
What is a sourdough starter?
A sourdough starter is a live culture of water and flour. After they are combined, the culture begins to ferment, cultivating the natural yeasts and bacteria found in our environment. A small bit of the starter is added to bread dough to help it rise and get the best flavor and texture. A sourdough starter is added to sourdough bread dough and acts as the leavening agent (like commercial yeast does); it’s just a much slow process. I have found that my body much prefers sourdough bread products to others. It’s been much easier on my digestion, and you can’t beat the flavor and texture.
How do I get a sourdough starter?
- Ask around and see if anyone you know in your community has one. If someone has a sourdough starter, they will be more than happy to share it! It’s a gift that is easy to give.
- Make your own sourdough starter by capturing wild yeast in your environment. It’s a simple process and I’ll walk you through it.
Here’s how to make your own sourdough starter:
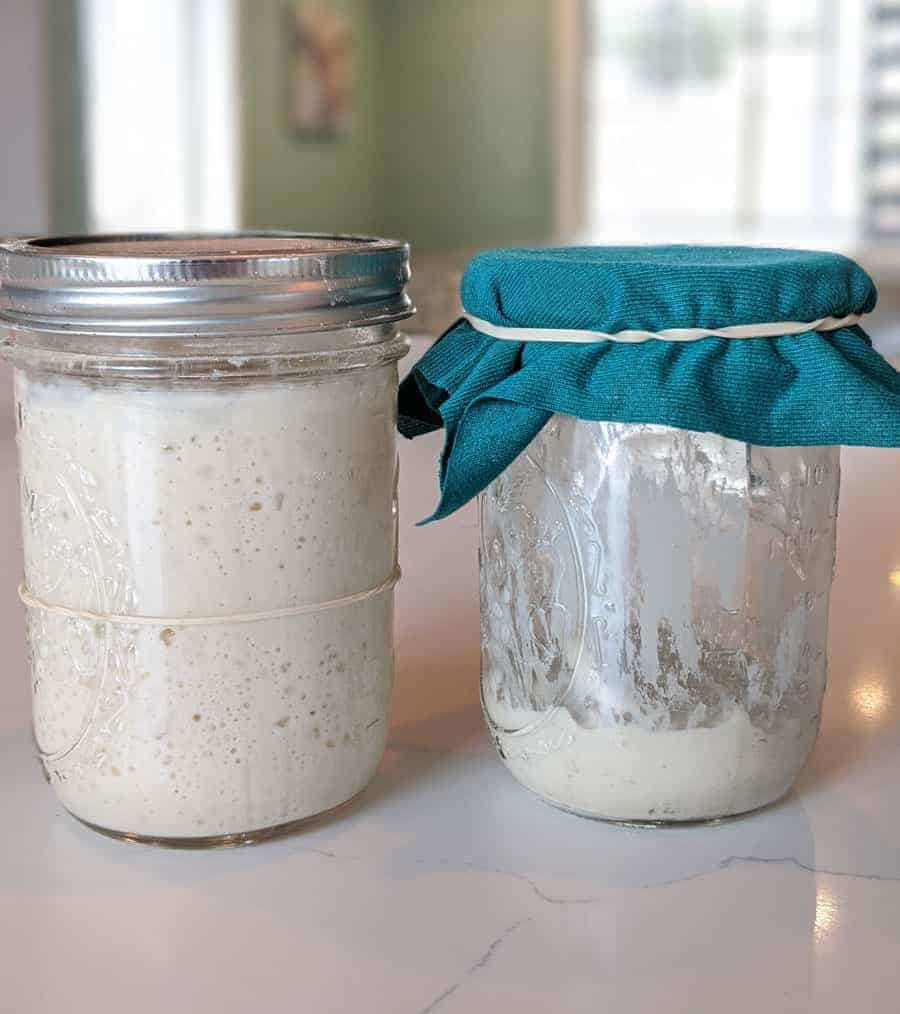
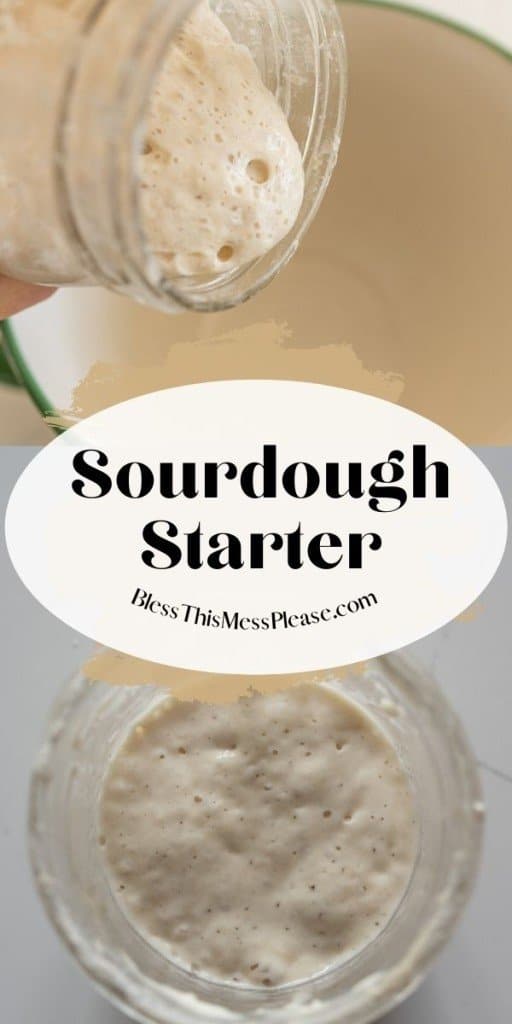
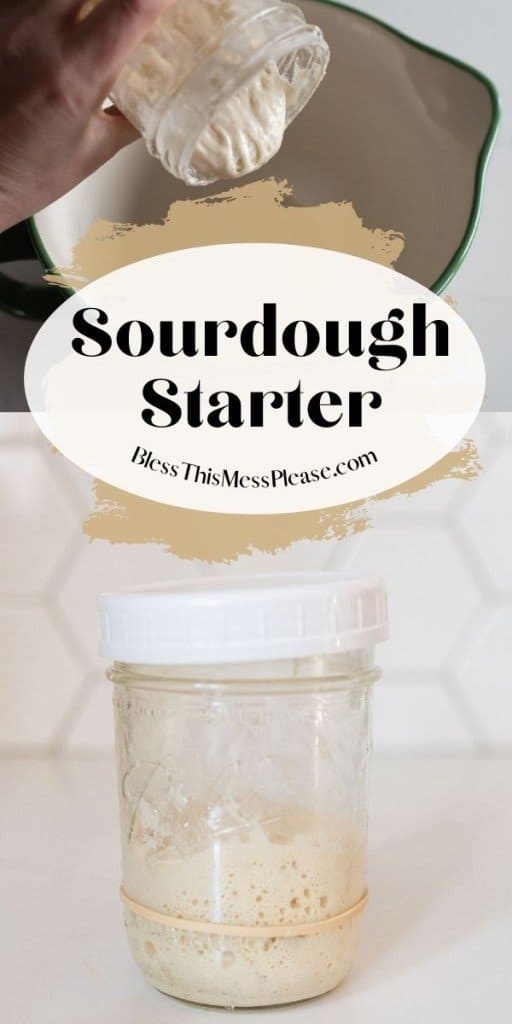
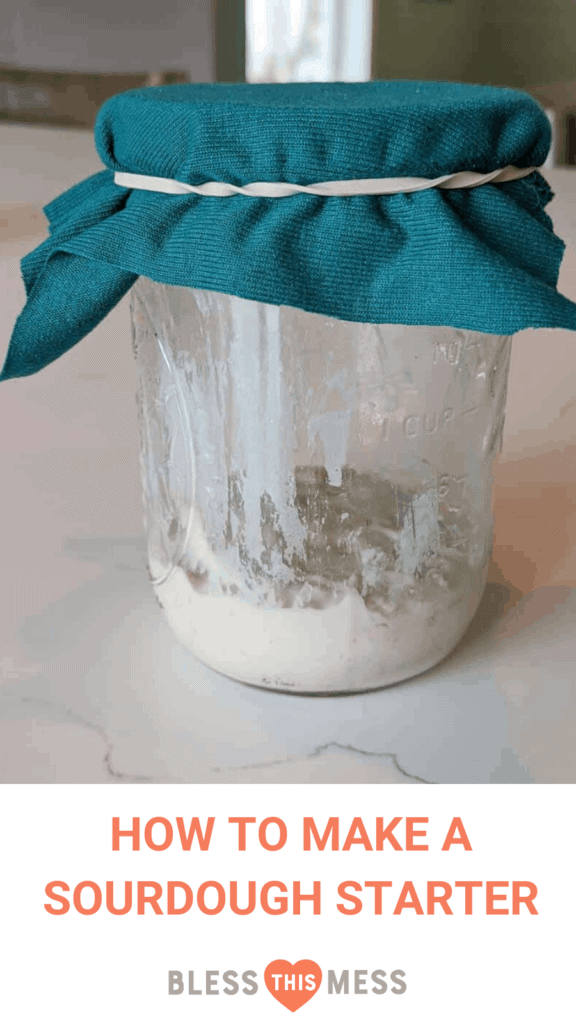
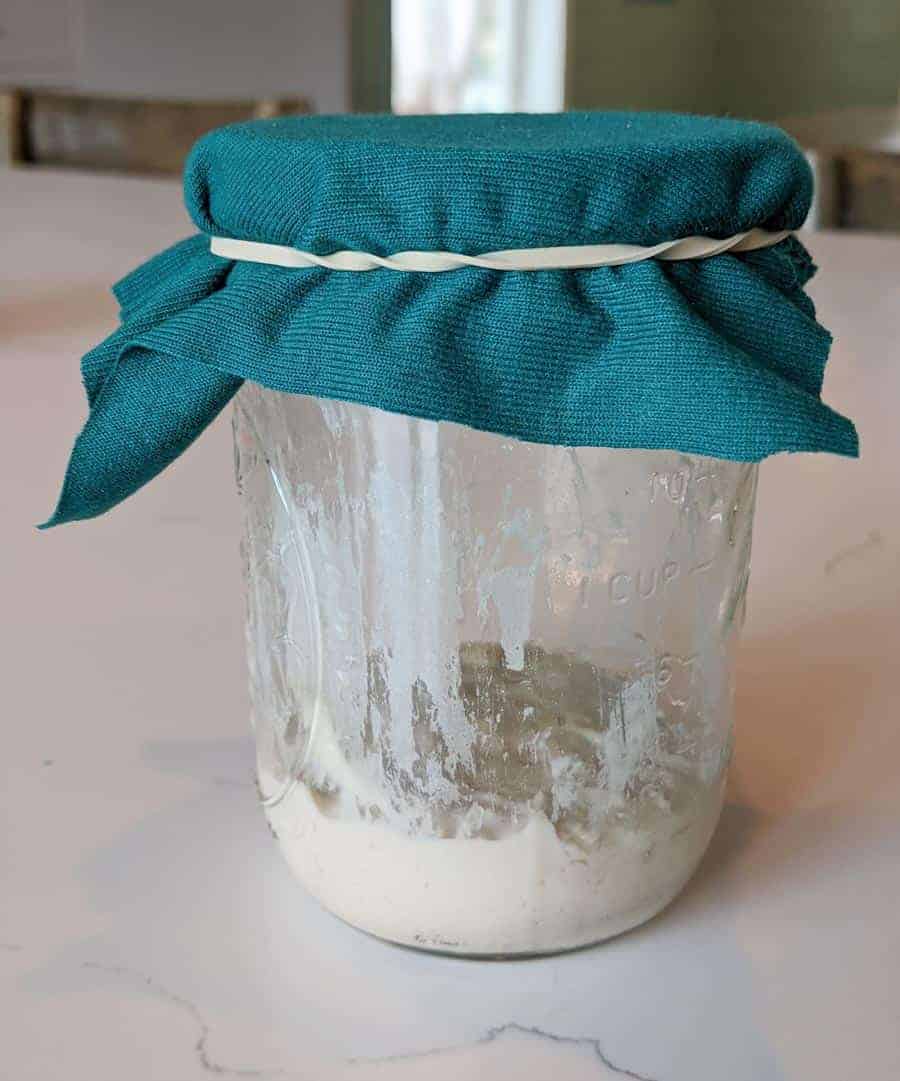
- Start with a clean glass jar (I use a pint mason jar). You’ll also need flour, water, and something to cover the jar that is breathable, like a scrap from an old, clean cotton t-shirt. That’s it!
- Add 50 grams water and 50 grams of flour to your jar, and stir well to combine. Scrape the edges down to the bottom. Cover with a breathable top (I like to use a piece of an old t-shirt and then use the ring that came on the mason jar to screw it on). Set in an out-of-the-way place that stays a somewhat constant temperature (around 70 to 75 degrees F.). If you don’t have something to weigh your flour, it will be about 6 tablespoons of flour and 4 tablespoons of water. You can use just about any flour that you have. You’ll get a quicker start by using a whole grain flour, like rye or whole wheat, and you’ll also have more luck using organic flours if possible (less chemical residues to inhibit yeast growth). Set aside for 24 hours.
- After 24 hours (day 2), add an additional 50 grams of flour and 50 grams of water. Stir well, scrape down the sides, cover, and set aside.
- Day 3: add an additional 50 grams of flour and 50 grams of water, stir well, scrape down the sides, cover, and set aside. You might be seeing a few bubbles in your mixture an hour or so after “feeding” it the flour and water; that’s good!
- Day 4: discard all of your starter mixture except for 25 grams (or you can start with a clean jar and measure in 25 grams of your starter mixture and add your next ingredients to the clean jar, too). Add 50 grams of flour and 50 grams of water, stir well, scrape down the sides, cover, and set aside. (This would be 2 tablespoons of your original starter mixture, and add 4 tablespoons of water and 6 tablespoons of flour.)
- Day 5: add an additional 50 grams of flour and 50 grams of water, stir well, scrape down the sides, cover, and set aside.
- Day 6: add an additional 50 grams of flour and 50 grams of water, stir well, scrape down the sides, cover, and set aside.
- NOTE: there will be a time (generally between day 5/6/7 where you transition to a feed one day/discard + feed the next day schedule and then eventually (around day 7) you’ll transition to a discard and feed daily schedule. When you get really consistent results from day to day and it’s rising a lot, then you’ll start transitioning to these schedules.
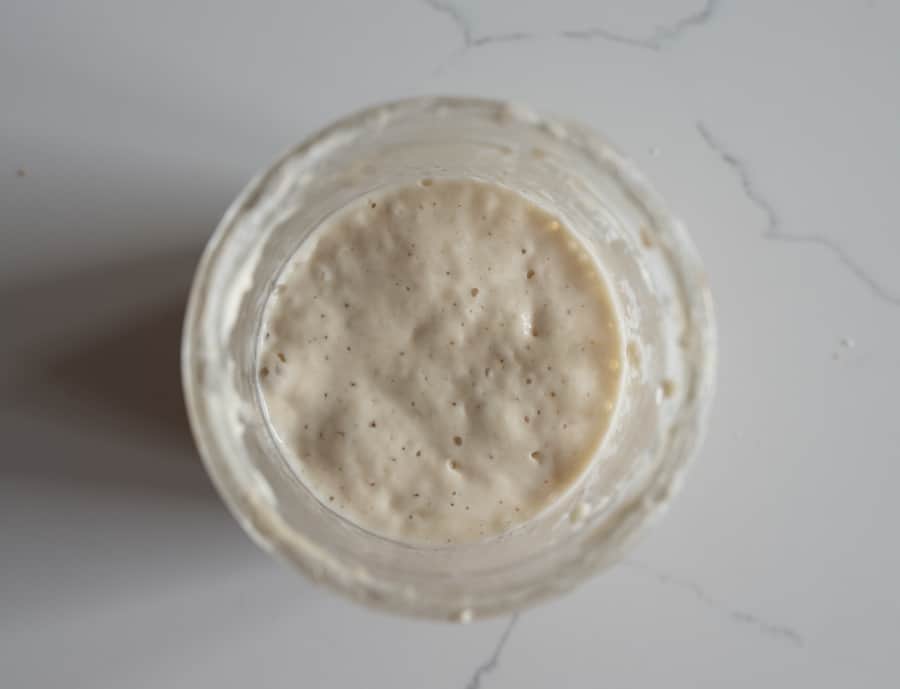
- You are going to keep up this schedule until your starter gets lots of bubbles and grows a few hours after you feed it. It can happen in as short as 5 days and as long as 14 days.
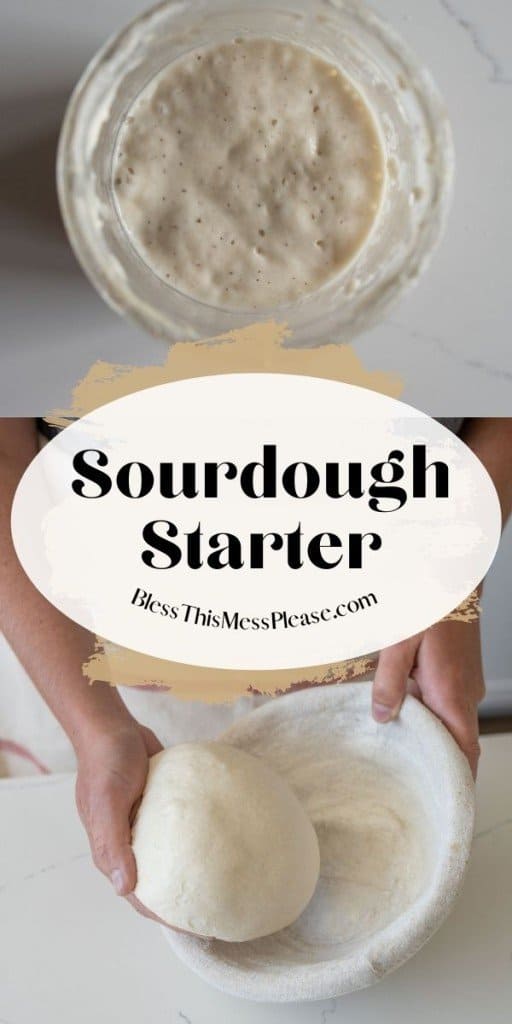
- Your starter is ready when you start getting bubbles, after you feed your starter flour and water, and it doubles in size. Then it is active and ready to bake with!
NOTE: it’s very normal for your starter to be very active in the beginning and then slow down to almost a stop and slowly rev back up again. You did not ruin it! There’s just other bacteria at play in the beginning and those are getting used up. The slow build of the the yeast and the bacteria that you do want is important, so it slowing down is normal. Keep going!
I made a video of the process to help you better understand! You can find it here:

How to speed up the sourdough starter process:
- Most schedules will have you feed your new starter every 24 hours, but you can feed it every 12 hours to develop your starter more quickly. Also, you can incorporate whole grains into your feedings. The whole grains have more natural yeast on them and help the process along.
- If the weather is permitting, try opening a window or allowing your starter to rest in a the shade for an afternoon. Having some fresh air in the house can help the wild yeast find your starter easier.
- Temperature matters and it will do better warm, about 70-75 degrees F. If your house is cold try keeping it somewhere warm like on top of the fridge (appliances tend to give off heat). You can also do all kinds of little tricks like keep it on a heating pad, wrap it in a warm towel, use warm water when feeding it. These things will help aid your starter!
Troubleshooting Wild Yeast:
Like with any fermentation project, which, let’s face it, is basically a science experiment, you may experience problems when capturing and using wild yeast. Here are some common abnormalities you might run into and what you should do about them.
No Bubbles: If your starter has zero bubble by day 7, throw it out and try it again. I haven’t met anyone that this has happened to, but I have heard that if your house is very sterile, there might not be enough natural yeast to take. That being said, as I’ve helped many many people start their own sourdough starter, I have found that if there aren’t any bubbles, people aren’t keeping it warm enough, not giving it enough fresh air, aren’t measuring the ingredients well and starting off with a really thin starter, or they’re not following the schedule very well and things are just off. Also not, it’s very normal for a starter to be very active in the beginning and slow down to almost a stop in the middle before slowly building back up. This is normal and part of the process. If yours slows down in the middle, keep going!
Mold: If your starter starts to look moldy, is tinged red, or stinks, then throw it out and try again. I’d also recommend when you try again, to let your starter rest in a new location, like the dining room or living room. Kitchens can have mold spores really easily, and it just takes one to ruin a batch of starter, especially when it’s new and not developed. Kitchen strainers can have a bit of mold in the legs or where they collect water, and even window sills can get a little mold in the cracks from getting wet with condensation over the winter.
Excess Liquid: If you get a thin layer of water on the top of your starter after the rest period, that’s OK. Just pour it off and feed it like normal. You have the bacteria that you need; you just need more yeast now. Try some of the tricks in the speeding up the process section (I’d move it to a new location in the house with more air flow or take it outside for a few hours).

Frequently Asked Questions:
How do I know when my starter is ready?
Your starter will be very bubbly, double or triple in size after feeding, will smell like yeast bread, and will be a bit frothy on top (you’ll see bubbles and activity on the top of the jar). For most people, it will be ready to go after 7-10 days. If you live in an arid climate, it can take as long as 14 days to be fully ready. Another test: after feeding, when the starter is at its peak of bubbles and height, you can put a 1/4 to 1/2 teaspoon of the starter in a cup of water. If it floats, it’s ready. If it sinks, keep feeding it and try again in a few days (or try sooner after feeding — if it’s started to deflate after feeding, it will sink, too).
Do I have to feed more sourdough starter every day for the rest of my life?
You do not need to feed your starter every day once it is established (doubling or tripling in size after feeding). Simply feed it, allow it to bubble a bit at room temperature (1 to 3 hours after feeding), and then stick it in the fridge, lightly covered (I put a lid on it, but don’t screw the lid down). If you are not baking, remove it from the fridge and feed it once a week. When feeding it, discard all the starter excepts for 25 grams and add 50 grams of water and 50 grams of flour to the 25 grams of remaining starter. Let it rest at room temperature for 1 to 3 hours, and then cover and stick back in the fridge. You can keep up this schedule for a very long time. And if you miss a week here or there, it’ll be fine.
If I’ve kept my sourdough starter in the fridge, how do I prepare it for baking?
To use your starter out of the fridge, simply remove it from the fridge and stir in 50 grams of flour and 50 grams of water (don’t discard here). Let it get bubbly, and then you are ready to use it. I normally pull mine out and feed in the morning to prepare it to make a batch of bread dough that evening (the dough will rest overnight and be baked the next day).
What is that black/brown/white/red spot (or streaks) growing on the top of my starter?
During this process, your starter should smell like yeast bread. If at any time you see mold growing on the top, throw it away and start over. In my 3 years of sourdough making, I’ve only had my starter grow mold once and I know why. (There’s a story here: we were doing a science experiment in the kitchen that involved letting rice mold, and while my starter was not close to the mold, it must has been in the air and traveled to the starter!). That being said, it only takes on mold spore to spoil an immature starter. Mold can be in your kitchen dish drainer or in your window sill from winter condensation. If you have mold issues, try placing your starter in a different part of the house.
How much starter do I need to make bread?
This is a very small starter; you don’t have a lot to manage or throw away each time. I really like that. Some people keep large quantities of starter and make things like crackers from the discard. If you are using recipes that need more than 50 to 75 grams of starter at a time, you’ll want to make your starter a little larger the morning you want to make that recipe. Or if you want to make more than one loaf at a time, simply feed it more! If I’m doing a lot of baking that day, I’ll feed it 100 to 150 grams of both water and flour, and then I’ll have more starter ready to use. If you are doing a lot of cooking, you might want to keep your starter that large very often. You’ll get a feel for it.
Can I share my starter with a friend?
Yes! I’d wait and share it after you have gotten it fully developed and ready to bake with it. Simply feed it a double dose, divide it into two jars, and give it to your friend that day with instructions on how to use it, how to care for it, and how to make bread.
How do I save a starter that has been neglected in the fridge?
If you’ve let your starter go a long time in the fridge without feedings, you will see a layer of liquid on the top. This is hooch or an alcohol that your yeast made. Simply pour off the liquid. It’s OK if the liquid has turned black; it’s just really neglected. If the top of your sourdough starter is a bit black too, scrape it out with a spoon and throw it away. Follow the directions for making a new starter, but on day one, add 1 to 2 tablespoons of your old starter to the mix, then throw the rest away and move forward with the process. It takes about as much effort to bring it back from the dead as it does to make a new one.
Do I have to throw away the “discard” on the days that I’m discarding and feeding?
No! You can collect it in a jar and keep it in the fridge until you are ready to use it. I use mine in waffles most often. Other common sourdough starter discard recipes include crackers, banana bread, tortillas, and pancakes. You can even add it to a traditional loaf of yeast bread in place of some of the flour and water.
Other sourdough bread recipes you’ll love:
- My Favorite Go-To Sourdough Bread Recipe
- Sourdough Bread Baking Cookbook
- Overnight Sourdough Muffins
- Sourdough Banana Bread
- Sourdough Chocolate Chip Cookies
- Sourdough Hamburger Buns
- Easy Sourdough Focaccia Bread
- Light and Fluffy Glazed Sourdough Donut Recipe
How to make a sourdough starter
Ingredients
- 1 Glass jar, (about 2 cups)
- Flour*
- Water
- A scrap piece of fabric or cheese cloth to cover the lid
- Rubber band or screw-on lid to secure cloth
Instructions
- Add 50 grams water and 50 grams of flour to your jar and stir well to combine. Scrape the edges down to the bottom. Cover with a breathable top (I like to use a piece of an old t-shirt and then use the ring that came on the mason jar to screw it on or a rubber band). Set in an out-of-the-way place that stays a somewhat constant temperature (around 70 to 75 degrees F.). If you don’t have something to weigh your flour, it will be about 6 level tablespoons of flour and 4 tablespoons of water.
- You can use just about any flour that you have. You’ll get a quicker start by using a whole grain flour like rye or whole wheat, and you’ll also have more luck using organic flours if possible (less chemical residues to inhibit yeast growth).
- Set aside for 24 hours.
- After 24 hours (day 2), add an additional 50 grams of flour and 50 grams of water, stir well, scrape down the sides, cover, and set aside.
- Day 3: add an additional 50 grams of flour and 50 grams of water, stir well, scrape down the sides, cover, and set aside. You might be seeing a few bubbles in your mixture an hour or so after “feeding” it the flour and water; that’s good!
- Day 4: discard all of your starter mixture except for 25 grams (or you can start with a clean jar and measure in 25 grams of your starter mixture and add your next ingredients to the clean jar, too). Add 50 grams of flour and 50 grams of water, stir well, scrape down the sides, cover, and set aside. (This would be 2 tablespoons of your original starter mixture, plus 4 tablespoons of water and 6 tablespoons of flour.)
- Day 5: add an additional 50 grams of flour and 50 grams of water, stir well, scrape down the sides, cover, and set aside.
- Day 6: add an additional 50 grams of flour and 50 grams of water, stir well, scrape down the sides, cover, and set aside.
- Day 7: discard all of your starter mixture except for 25 grams (or you can start with a clean jar and measure in 25 grams of your starter mixture and add your next ingredients to the clean jar too). Add 50 grams of flour and 50 grams of water, stir well, scrape down the sides, cover, and set aside. (This would be 2 tablespoons of your starter mixture, 4 tablespoons of water, and 6 tablespoons of flour.) NOTE: Sometime around day 5, 6, or seven you make want to start feeding and discarding every day. If you starter is very runny after 24 hours, move to the daily discard and feed schedule.
- You are going to keep up this schedule until your starter gets lots of bubbles and grows in volume to double or triple its size a few hours after you feed it. It can happen in as short as 5 days and as long as 14 days. After day 5, start putting a mark on your jar or a rubber band marking the level of the mixture right after you fed it. Then watch to see if it increased in volume before deflating again.
- Once you start getting bubbles after you feed your starter flour and water and it doubles or triples in volume, then it is active and ready to use! It will smell like yeast dough. ALSO start using a lid that just rests on the jar (don’t screw it down) instead of the fabric at this point so the top of your starter doesn’t dry out.
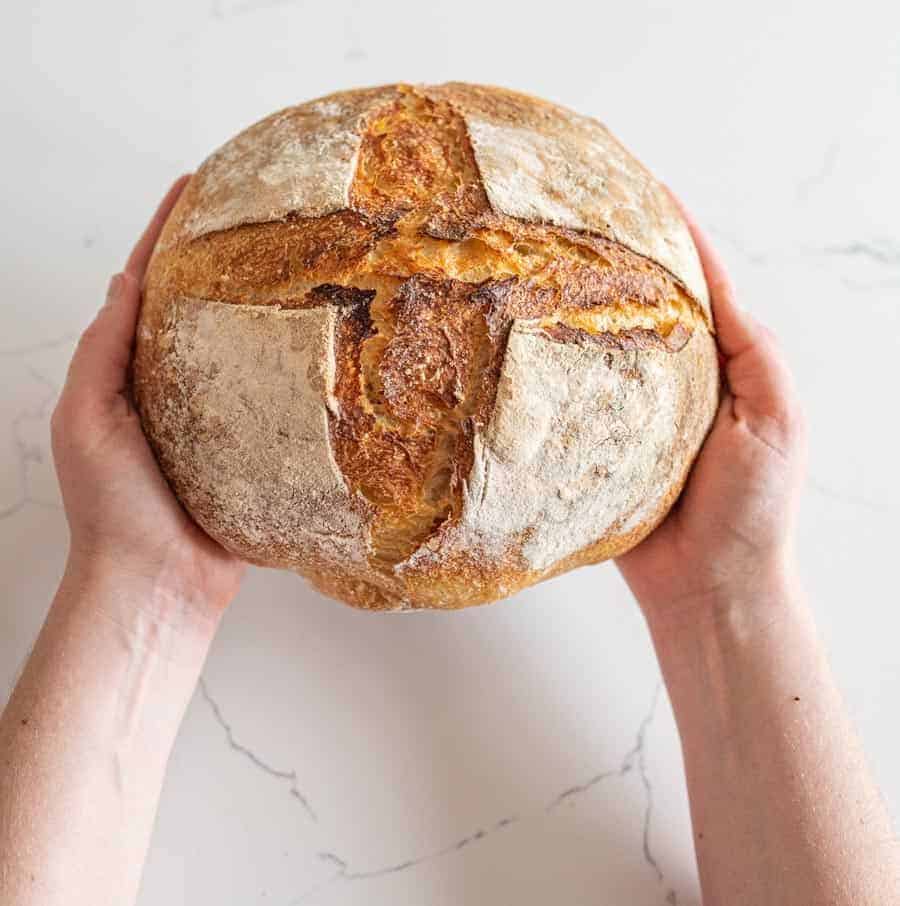
- Use your starter to make my favorite classic sourdough loaf or any other recipes that calls for a sourdough starter.
- TO REFRESH your sourdough starter: Follow the recipe and use the amount of sourdough starter it calls for, but always make sure you are reserving at least 25 grams of starter. After you use what you need for the recipe, simply put 25 grams of starter in jar, feed it 50 grams of water and 50 grams of flour and set it aside. It’ll be ready to bake again tomorrow. Or see the notes on how to store the starter if you are not baking every day.
Notes
- If your starter is really growing well, feel free to a move a feed and then discard and feed rotation sooner. And once it starts doubling in size, you can move to a discard and feed (keep 25 grams starter and mix with 50 grams water and 50 grams flour) every day until it’s ready to bake with.
- You’ll know that your starter is ready when it doubles or triples in size after feed AND when it is at it’s peak (risen in size but not yet falling back down), and you place a very small amount (1/4 teaspoon) of the starter in water. It should float. A starter that isn’t ready will sink. The float test isn’t a 100% guarantee though, so don’t take it as gospel truth. If your starter is rising and falling, it’s ready.
- You do not need to feed your starter every day once it is established (doubling or tripling in size after feeding). Simply feed it, allow it to bubble a bit at room temperature (1 to 3 hours after feeding), and then stick it in the fridge, lightly covered (I put a lid on it, but don’t screw the lid down). If you are not baking, remove it from the fridge and feed it once a week. When feeding it, discard all the starter except for 25 grams and add 50 grams of water and 50 grams of flour to the 25 grams of remaining starter. Let it rest at room temperature for 1 to 3 hours, and then cover and stick back in the fridge. You can keep up this schedule for a very long time. And if you miss a week here or there, it’ll be fine.
- To use your starter out of the fridge, simply remove it from the fridge and stir in 50 grams of flour and 50 grams of water (don’t discard here). Let it get bubbly, and then you are ready to use it. I normally pull mine out and feed in the morning to prepare it to make a batch of bread dough that evening (the dough will rest overnight and be baked the next day).
- During this process, your starter will change a lot. At first it might smell stinky and not good. Then it’ll smell like yeast when it is ready.
- If you starter is very thin after 24 hours and before feeding, more to a daily discard and feed schedule.
- The #1 issue I’m seeing with a sluggish starter is a house temperature that is too chilly. Do what you need to to warm it up.
- If at any time you see mold growing on the top, throw it away and start over. In my 3 years of sourdough making I’ve only had my starter grow mold once and I know why. (There’s a story here: we were doing a science experiment in the kitchen that involved letting rice mold, and while my starter was not close to the mold, it must has been in the air and traveled to the starter!)
- This is a very small starter; you don’t have a lot to manage or throw away each time. I really like that. Some people keep large quantities of starter and make things like crackers from the discard. If you are using recipes that need more than 50 to 75 grams of starter at a time, you’ll want to make your starter a little larger the morning you want to make that recipe. Or if you want to make more than one loaf at a time, simply feed it more! If I’m doing a lot of baking that day, I’ll feed it 100 to 150 grams of both water and flour, and then I’ll have more starter ready to use. If you are doing a lot of cooking, you might want to keep your starter that large very often. You’ll get a feel for it.
- Have more questions? Email me! I’d love to help: melissa @ blessthismessblog.com
- Need more information? I wrote a whole cookbook about sourdough and it has day by day pictures for starting a starter! You can get a digital or hardcover sourdough cookbook here.
Nutrition
See! It wasn’t so scary after all. You’ll find catching a little wild yeast to make a sourdough starter will really challenge and reward you in the kitchen. Plus, it’s a great skill set to have! Enjoy a nice crusty piece of sourdough toast with extra butter for me.


I have one question. Why do you discard most of your starter? If you’re trying to grow it why get rid of it?
It’s not balanced in yeast and bacteria and it needs fresh food. If you have too much starter you’ll get an over growth of bacteria and the yeast doesn’t catch up. It’s a sourdough thing. And I rarely discard, I just use it now that it’s established. So once it’s mature, you’ll bake with the starter instead of discarding and you’ll just replenish the leftovers.
Hi Melissa,
I have had a bubbly starter for about 3 weeks now, but no rising! We keep our house around 71-73, and I’ve tried putting it in a kitchen cabinet in case there’s a draft. Any other ideas? I have rotated between room temperature water from the sink and water from the fridge, trying to see if anything makes a difference. It seems healthy though, because it bubbles almost instantly after feeding, and continues with bubbles on the top and around the sides! Any thoughts?
Thanks so much!
Cristy
What kind of flour are you using and what’s your discard schedule?!
Hi Melissa-
I am on day 17 of my starter, i think due to weather fluctuation, my starter is only doubling in size after a discard and then an additional feed day. On discard day, i see barely any rise, once i feed it the next day, It takes around 12 hours to double in size. There is definitely live yeast as it is doubling, just taking a while. Should i switch to twice a day (discard in the morning + feed in the evening)? Any other suggestions?
What kind of water and flour are you using? And do you know about how warm it is?
Using filtered water and WW flour. It’s been fluctuating between 40-75 degrees since I started. Today it is 55
I think it’s just a temperature thing! If you can warm it up you’ll find more success! You can even feed it with warm water to help or store it near a heat vent or appliance that produces heat!
Thank you!! That has been my hypothesis as well, will try the warm water!
Me again….I’m making my 2nd loaf of bread today. I used 50 grams of starter, as the directions say, but when I went to feed the starter to put back into the refrigerator, I forget to discard so I’m sure there was more than 25 grams. I then added 50 grams of whole wheat flour this time bc I want it to get more sour and 50 grams of water. I put in the refrigerator right away. I checked today and it hasn’t risen at all. Is that because its cold? My first starter when I put in the refrigerator it had peeked and was bubbly and stayed that way until I used it. Did I mess this up? When you feed the starter after you use the 50grams to bake bread, should you keep on the counter till it peeks and then put in the refrigerator ? Thank you so much for your time.
It is cold and that’s why it hasn’t risen after one day! Mine will get a little bubble in the fridge after several, but it doesn’t rise normally, you’ve kind of stopped the process with the cold which is why you do it, you don’t have to feed it daily. I let mine sit at room temp a few hours and get it’s first few bubbles then stick it in the fridge. I don’t wait until it’s peaked but I do wait until it’s a bit active. I’m sure yours is fine, no issues there. Either feed it from the fridge once a week or feed it before you are baking!
Thank you for replying Melissa! I just baked my 2nd bread. Smells delicious. How do you get it to rise more? Your loaf looks really domed. Mine is a little more flat. Can’t wait to bite in.
You say that you feed in the morning , start your dough process, then do your bulk rise overnight. I am just wondering how the timing works out for that. What time do you feed? How long are you letting the starter rise before making the dough? Not sure how that would come out ready to bulk rise overnight instead of much earlier?
Every starter is different and yours will fluctuate as temps in your house change with the seasons! The goal if for you to feed it, give it time to rise to it peak, and then make the dough for an overnight rest. I normally feed mine late morning/at lunch then mix up my dough around 9pm. If yours takes longer to rise, feed him at breakfast to make dough in the evening.
Hi! I was hoping you can help me with some troubleshooting. I am already convinced my starter is not doing what is supposed to do but I would like to make sure before losing all my hopes. I am on day 8 of my starter. Every day after feeding it does a very minimal amount of bubbles on top and that is it. The only time it raised in size was day 3 (I was so excited) and that was it. One day it had a thin layer of water which I drained. Nothing since. I used whole grain flour once, I move it around for airflow, my house temperature is always between 70 to 75 degrees. I even put it in the oven overnight sometimes for more warmth. It always stays the same. In your opinion, does it have any chance or should I start over?
It definitely has a chance! Are you discarding and feeding every day now? Because you should be! And what kind of water are you using?
I discarded and fed it yesterday (day 7) and today. Will be doing it every day now. First day when I made the starter I used previously boiled water from a kettle. I think second day I used tap water. Then I watched again your video on the starter and you talk about what kind of water to use. I did not have filtered water or bottled so I filled a glass with tap water and left it on the counter for a day before I used it and that is what I have been doing since day 3. I do feel like my starter looks a little more runny or thinner consistency then in your video. I use King Arthur AP unbleached flour
Great, I’d consider boiling the water again and just storing enough for a few days at room temp. I’m finding folks who assume their water isn’t too bad actually have water that is killing their starter. The flour sounds good and with a daily discard schedule you should start seeing some changes. Also, is your house warm enough and if not could you put the starter somewhere a bit warmer?
Forgive me for the questions. I’ve investing the time so I’m so i’m hoping doing this right. Now that my starter is ready and I use 50 grams, do I then feed 50 grams of flour and 50 grams of water and let sit till it rises and then put in refrigerator ? That is what I did…I hope its right and I didn’t have to discard and only use 25 grams. And, if I want to bake again the next day…pull it out…discard and use 25 grams of starter and feed 50 grams of flour and water and let sit till it rises. Do I have this right???
Thank you Melissa!!! I know this is easy and you are such an expert but as a first timer and wanting to get this right…I’m scared…
When I want to make more starter or use a recipe that uses more, I just feed it more. The morning I take it out of the fridge, I’ll feed it 100g flour and 100 grams water, no discard, if I want more than that, I’ll feed it again at lunch, without discarding it, the 100g each. And if you want to let it sit another day you can add 200 grams of flour and water, no discard the next day! So try to keep a rough ratio of 1:2:2 starter:flour:water (even parts flour and water and half that amount of starter) and then you can feed it again as soon as it’s doubled in size. So somedays, I’ll feed it three times that day and then again in the morning and then I’ll have tons to bake with, or you can feed it morning and early afternoon in time to have lots of making dough after dinner.
And if you end up using a whole lot more than planned and you only have like 10 grams left in the bottom of the jar, just feed it 20 grams of flour and water, let it rest until it’s tall, and it won’t be that tall, it’s not a lot to work with, (or wait the 24 hours) and then feed it 50 grams flour and water, no discard and you’ll be back to where you want to be!
Hello!
I came home to my starter and it doubled in size on day 3? I fed it like usual. Is it too soon for it to double in size? Should I continue following the instructions provided?
Thanks, Julie
I’d give it another day or two, if it’s doing that by day 5 consistently, start baking!
Can i use my discarded starter from Day 4 to make your sourdough loaf? I feel bad to rid of the the starter on this day.
Nope, it’s not active yet so it won’t help the bread rise. Feel free to look up recipe to use it in, there’s lot. I normally make waffles or crackers with it.
Hi Melissa, So I’m on Day 11. My starter does double in size but it takes up to 5 hours to do so and then overnight it deflates. Do you think its ready ?
One more question…it is taking about 3 hours for me to see the starter rise. If it does double, is it ready? I’m actually Day 12 night now.
No big deal there, if it is rising to double within 24 hours, it’s ready. That rise and fall will vary depending on a lot of thing and will even fluctuate a lot for you once your starter is established. Some days it’s fast, other days it’ll rise slow and stay peaked for a long time… whatever it decides. I can’t wait to hear how baking goes!
Yep, sounds like you are ready! Does it smell yeasty? It sounds just right, that rise and fall will vary a lot as conditions like household temp fluctuates with the seasons.
Hi. I’m on day 2 of my first starter and will be discarding some of my starter tomorrow. Unfortunately I don’t have a scale to measure the 25 mg of my starter I’ll be keeping. Any idea how much that would convert to?
Thanks!
It’ll be 2 tablespoons!
Thank you!! ?