This post may contain affiliate links. Please read our disclosure policy.
Once you get the hang of Feeding Sourdough Starter, it becomes one of those comforting kitchen rituals—like your morning coffee routine, but this one rewards you with the most incredible homemade bread.

Quick Recipe Overview
WHAT: A simple guide to feeding sourdough starter with the right ratios of flour and water to keep your wild yeast culture alive and active.
WHY: Regular feedings maintain the balance of yeast and bacteria your starter needs to produce reliable rises, consistent flavor, and beautifully airy bread every time.
HOW: Measure equal parts starter, flour, and water (typically 50g each), mix thoroughly, and let it double in size at room temperature before baking or storing.
Table of Contents
- Quick Recipe Overview
- Why Feeding Your Starter Matters
- What You’ll Need
- Featured Review
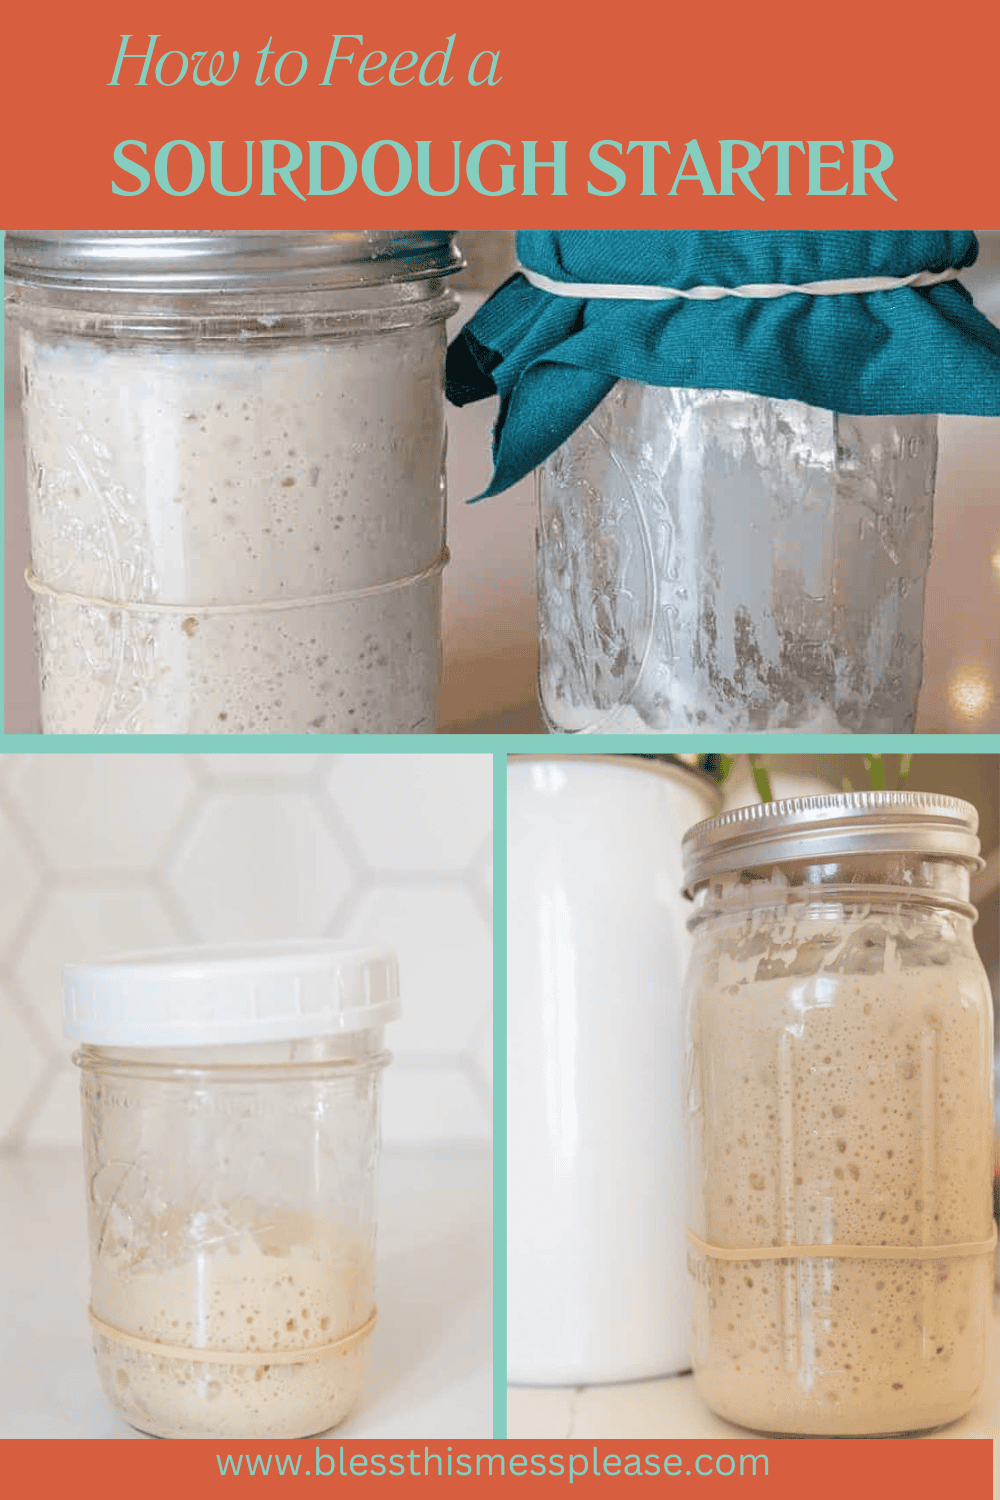
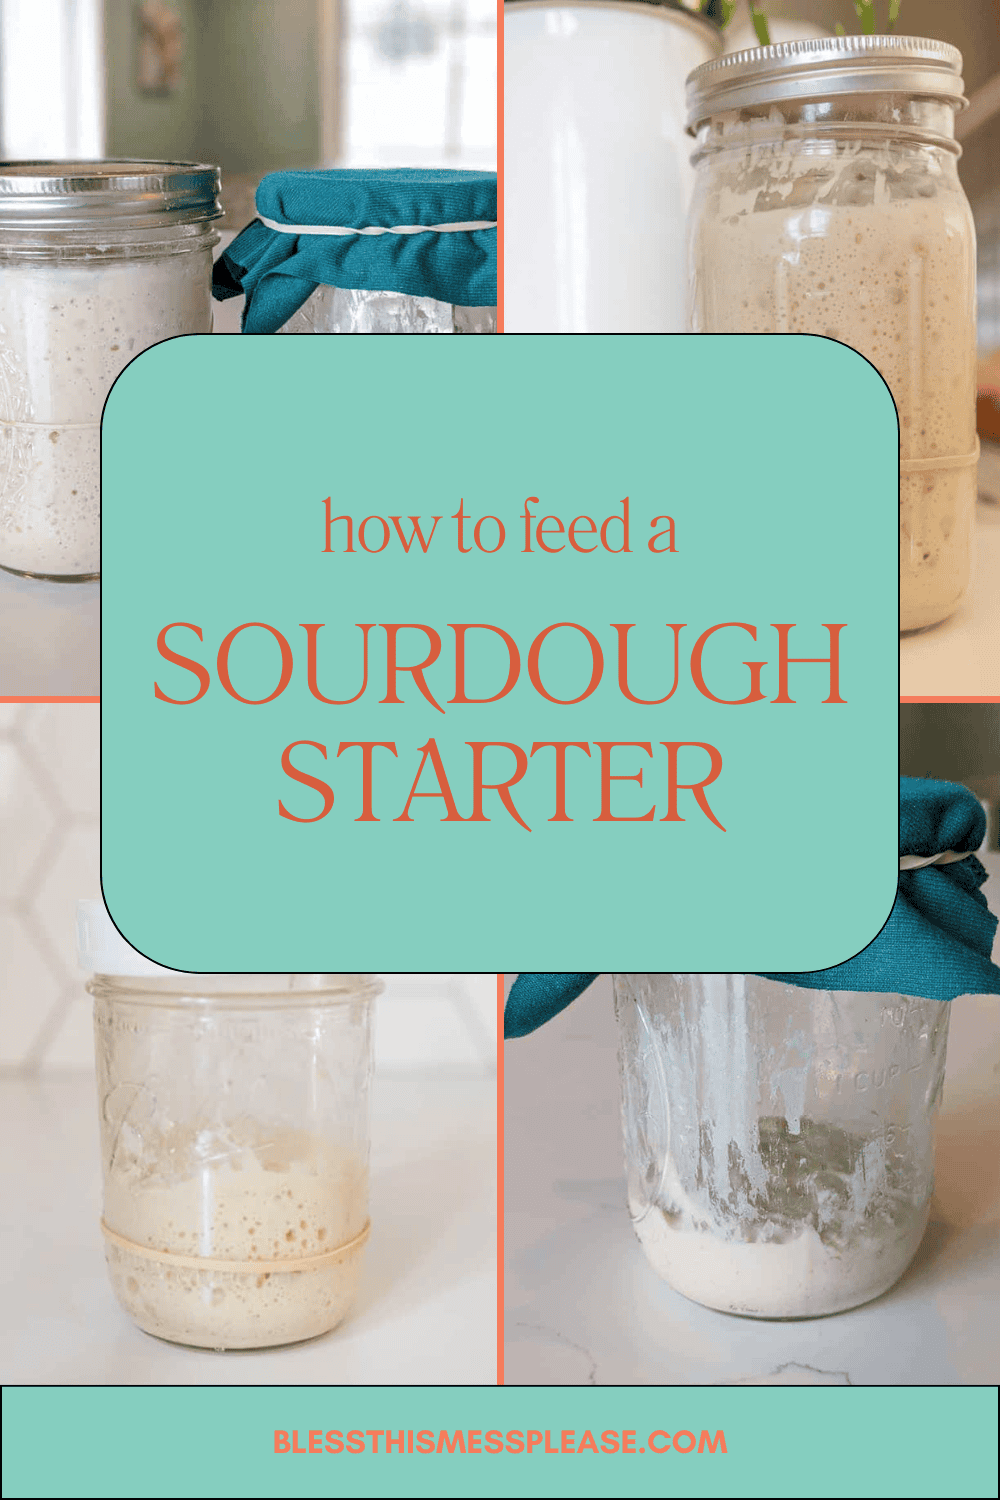
- How to Feed a Sourdough Starter
- Understanding Feeding Ratios
- Sourdough Starter Feeding Schedule
- Adjusting to Your Baking Schedule
- What to Do With Sourdough Discard
- Signs Your Starter is Ready to Use
- Troubleshooting Tips
- Expert Tips for Feeding Sourdough Starter
- Kitchen Equipment Recommendations
- FAQs for Feeding Sourdough Starter
- Common Beginner Mistakes (And How to Avoid Them)
- Final Thoughts
- Video: How to Make a Sourdough Starter
- More Sourdough Recipes to Try
Why Feeding Your Starter Matters
Your sourdough starter is a living ecosystem of wild yeast and beneficial bacteria working together to create that signature tangy flavor and beautiful rise. When you feed it regularly, you’re giving these microorganisms the fresh flour and water they need to stay active and multiply. Skip feedings or let your starter go too long without food, and those little workers slow down or go dormant, which means flat, dense bread instead of those gorgeous airy crumbs we’re all chasing.
Think of feeding your starter like maintaining any relationship: consistency creates trust and predictability. A well-fed starter gives you reliable results every single time you bake, so you’re not crossing your fingers wondering if your dough will rise. Once you establish a regular feeding rhythm, you’ll start to recognize exactly how your starter behaves at its peak, making it so much easier to plan your baking schedule and turn out consistently delicious loaves.
🩷 Melissa
When your sourdough starter is established, keeping it happy and active is key to producing delicious, crusty loaves of bread.
Feeding your starter properly ensures it’s lively and full of the natural yeast and bacteria needed to make your dough rise.
Whether you’re baking a loaf of bread tomorrow or just want to keep your starter healthy, here’s how to feed your sourdough starter and get it ready for baking.
What You’ll Need
- Established sourdough starter: Check out my tutorial for basic steps to making your own sourdough starter!
- Flour: All-purpose or bread flour works, look for unbleached flour, organic is preferred
- Water: Filtered or tap water works fine. If your tap water is heavily treated with chlorine you should filter it first or leave it out overnight before using.
Featured Review
Sara ⭐️⭐️⭐️⭐️⭐️
July 3, 2025
Thank you Melissa, I love your wheat bread recipe. Have tried it before with other recipes with no success. After watching your video, Im going to give it another shot!
🍞🥖 New to sourdough? Find out how to make your own sourdough starter here, find my most popular and basic bread recipe here, and search the sourdough archive here.
How to Feed a Sourdough Starter
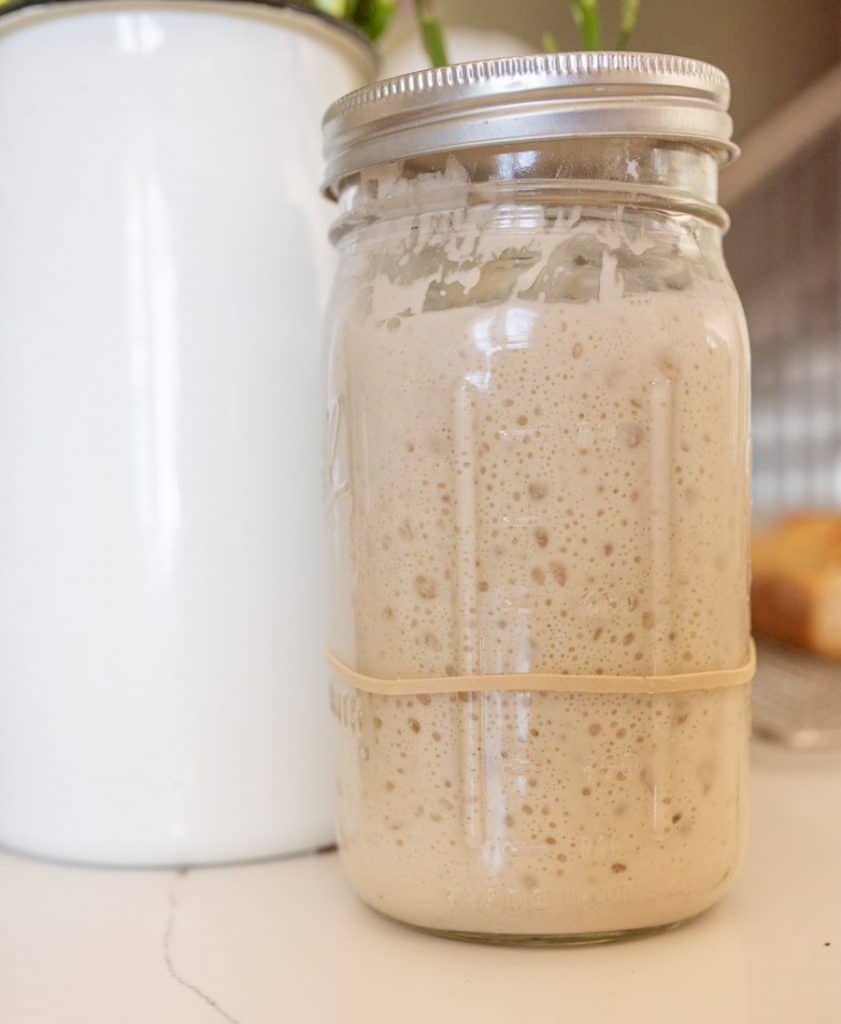
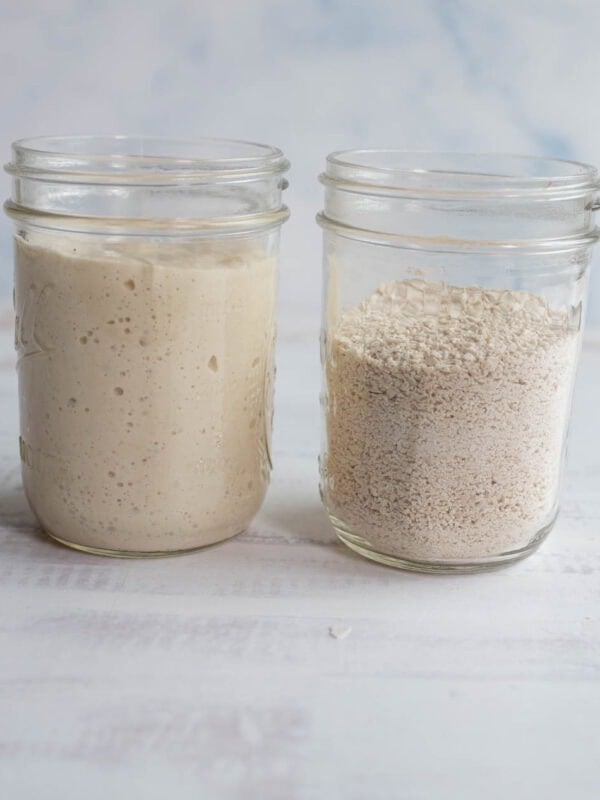
Step 1: The typical feeding ratio is 1:1:1 by weight, meaning if you have 50 grams of starter, feed it with 50 grams of flour and 50 grams of water. This is a great amount of starter for most recipes.
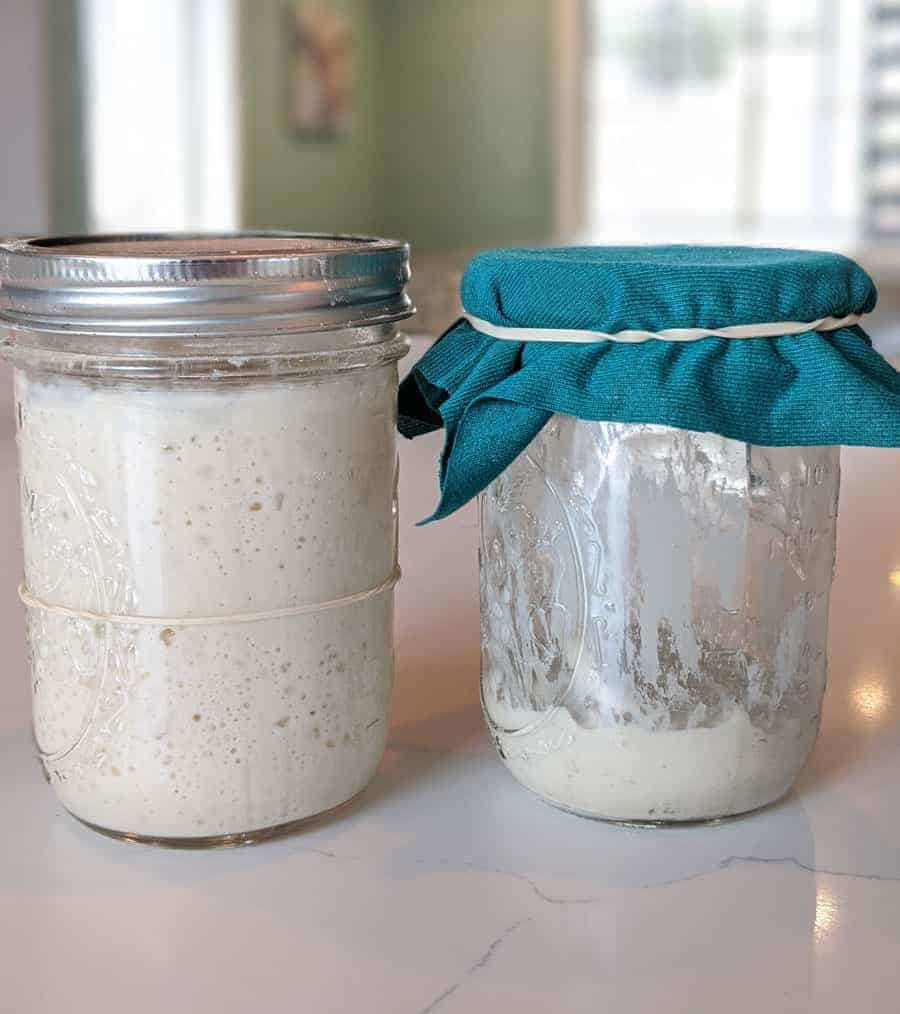
Step 2: First, take out the amount of starter you want to keep. You can place it in a clean jar; 50 grams is a great amount to work with.
Step 3: Now add the same amount of flour and water as you did starter to the jar, 50 grams of flour and 50 grams of water.
Step 4: Stir the mixture until all the flour is incorporated and the starter has a thick, pancake-batter consistency.
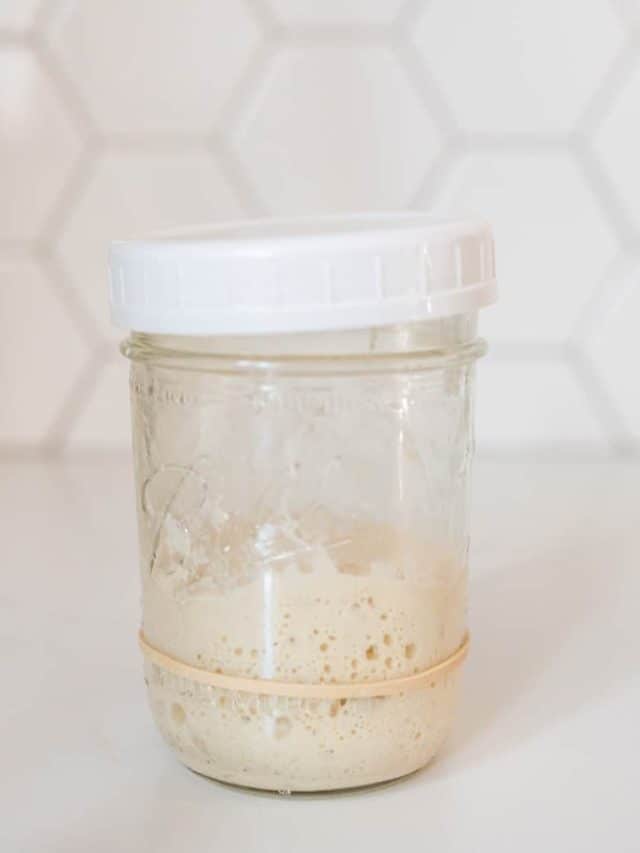
Step 5: After feeding, let the starter sit at room temperature until it doubles in size and becomes bubbly. Depending on the temperature of your kitchen, this can take anywhere from 6 to 18 hours. The starter is ready to use when it’s at its peak, just before it begins to collapse.
Notes:
- A 1:2:2 ratio also works great if you want extra starter for making larger batches of bread. Feed 50 grams of starter, 100 grams of water and 100 grams of flour, it will just take it a little longer to bubble and rise.
- No need to keep a giant starter! Any extra sourdough starter that you had that didn’t fit in your 50g, 50g, 50g ratios is now extra “discard” and can be used in discard recipes. Keep the extra sourdough starter you didn’t use when you fed your starter (to keep your ratio right) in the fridge and use it within 5-7 days.
Understanding Feeding Ratios
If you’ve ever felt confused about how much flour and water to add to your starter, you’re not alone. Feeding ratios are simpler than they sound, and once you understand the two main ones, you’ll have complete control over your starter’s schedule.
The Basic 1:1:1 Ratio:
This is your everyday feeding ratio—50g starter, 50g flour, 50g water. It’s the workhorse of sourdough maintenance and what I use 90% of the time. This ratio keeps your starter nicely balanced, gives it enough food to stay active without creating mountains of excess, and produces just the right amount for most bread recipes (which typically call for 100-150g of active starter).
Why does this ratio work so well? The equal parts create a perfectly balanced environment where your wild yeast and bacteria have plenty to eat without being overwhelmed. Your starter will typically double in size within 6-12 hours at room temperature, making it easy to time your baking. Use this ratio for regular maintenance feedings, whether you’re keeping your starter on the counter or preparing it for the fridge.
The 1:2:2 Ratio:
Here’s where things get interesting—50g starter, 100g flour, 100g water. This ratio gives your microorganisms twice as much food to work through, which means two important things: it takes longer to peak (usually 8-18 hours), and you end up with more starter at the end (250g total instead of 150g).
I reach for this ratio when I’m making multiple loaves or a larger batch of bread dough that needs more than my usual amount of starter. The extended fermentation time also comes in handy when I need to slow things down—like feeding before bed so my starter peaks in the morning, or when my kitchen is particularly warm and I want to give myself a wider window. The flavor develops a bit more complexity too, with that extra fermentation time creating slightly more nuanced tang.
One you understand these ratios, they give you lots of flexibility. Need starter ready in 6 hours? Go with 1:1:1. Want it ready tomorrow morning? Try 1:2:2. Your starter doesn’t care which ratio you choose—it just wants consistent food and a little attention.
Sourdough Starter Feeding Schedule
Sourdough adapts to your life, not the other way around. Your feeding schedule depends entirely on how often you’re baking and where you’re storing your starter.
- Daily Baking (Counter Storage): If you’re baking several times a week, keep your starter at room temperature and feed it once every 12-24 hours. This keeps it consistently active and ready to go whenever inspiration strikes. I do this during my heavy baking seasons, and something is grounding about that daily rhythm.
- Weekly Baking (Refrigerator Storage): For most home bakers, refrigerator storage is the sweet spot. Feed your starter, let it sit at room temperature for 2-3 hours until it shows signs of activity, then pop it in the fridge. It’ll stay happy for up to a week between feedings. When you’re ready to bake, pull it out and give it a good feeding 12 hours before you need it.
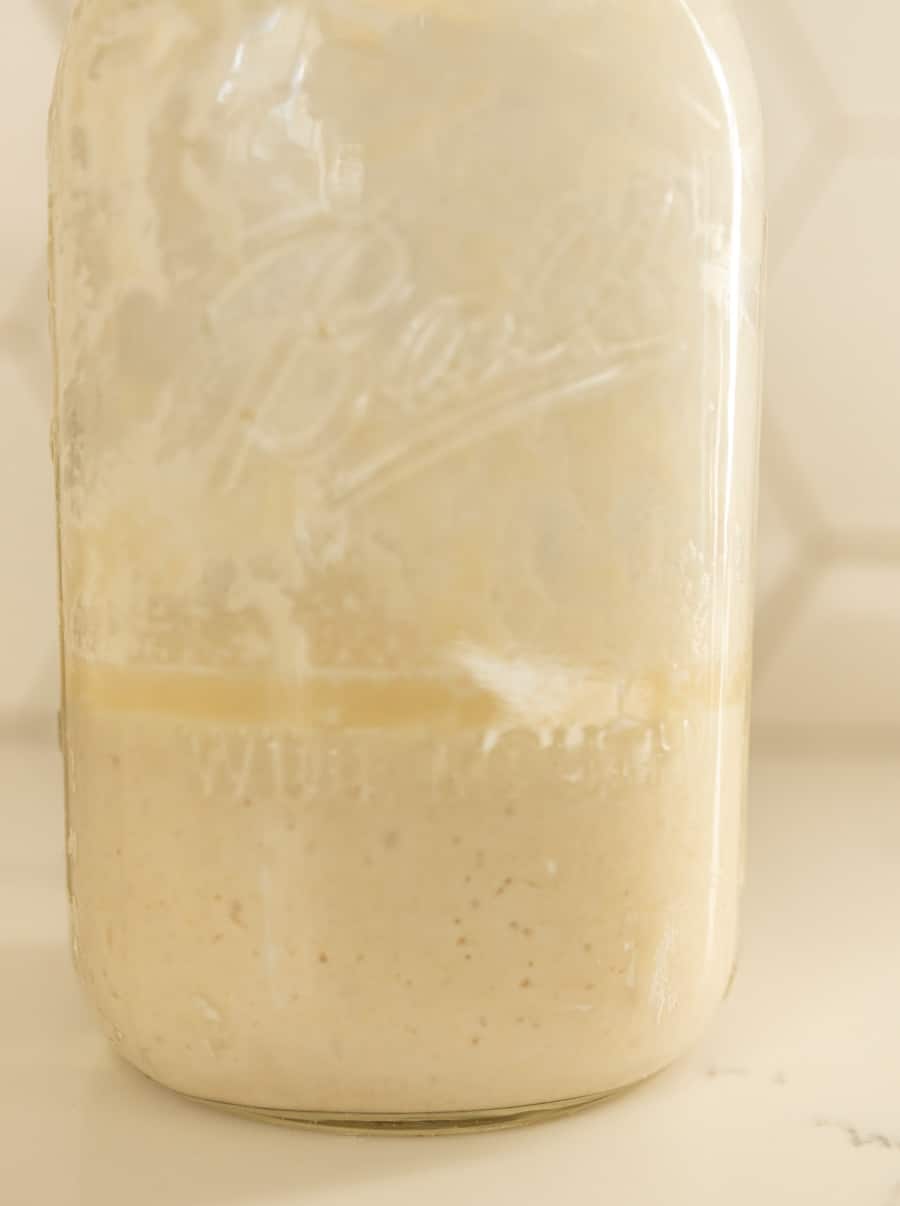
- Occasional Baking (Extended Fridge Storage): Bake once a month or less? Your starter can handle it. Feed it, let it bubble for a few hours, then refrigerate. It can go 2-3 weeks between feedings, though you might need to give it two feedings to wake it up fully before baking. Don’t worry if you see a little liquid on top (called hooch)—just stir it back in or pour it off, then feed as usual.
The key is finding what works for your routine. I’ve kept my starter thriving for years with wildly different schedules, and it’s proven remarkably forgiving.
Adjusting to Your Baking Schedule
- Baking Tomorrow: If you plan to bake the next day, leave your starter on the counter after feeding it. Make sure it reaches its peak before using it in your dough.
- Need More Starter: If your recipe calls for more starter than you have, just double the feeding amount (e.g., 100 grams of water and flour for 50 grams of starter). If you still need more, you can repeat the feeding process once the starter has doubled in size, increasing the amount you are using (so feed 100 grams of starter 100 grams of flour and 100 grams of water and now you have 300 grams of starter!)
- Maintaining Your Starter Between Bakes: If you’re not baking regularly, you can store your starter in the fridge. Before putting it away, feed it and let it rest at room temperature for a few hours then stick it in the fridge. When you’re ready to bake again, take it out and give it a good feeding 12 hours before making your dough to wake it up.
What to Do With Sourdough Discard
Here’s the thing about feeding sourdough starter: to maintain those perfect ratios, you need to remove some of the old starter before adding fresh flour and water. That “extra” starter you’re setting aside? That’s your discard, and it’s actually a gift, not waste. Every time you feed your starter and keep just 50g to work with, the rest becomes discard that’s packed with flavor—even if it’s not quite active enough to leaven bread on its own.
Your discard will keep beautifully in a jar in the refrigerator for 5-7 days, getting a bit more tangy as it sits (which is perfect for pancakes, crackers, and quick breads). I keep a dedicated discard jar in my fridge and just keep adding to it throughout the week.
When the weekend rolls around, I’ll whip up a batch of sourdough pancakes, crispy flatbread, or those addictive sourdough crackers that disappear faster than I can make them. It’s one of my favorite parts of maintaining a starter—you’re never throwing anything away.
Signs Your Starter is Ready to Use
- Bubbly and Airy: Your starter should be full of bubbles and have a sponge-like texture.
- Doubling in Size: The best indication of an active starter is its volume increase. If it’s not doubling in size, try adjusting the water or flour or giving it more time.
- Pleasing Scent: A healthy starter will smell tangy and slightly sweet. If it smells off, give it a couple of feedings to revive it.
When your sourdough starter is checking off all the boxes, then it’s time to pick out an easy sourdough recipe you’ve been wanting to try!
Troubleshooting Tips
- Slow Growth: If your starter is sluggish or not rising well, check the temperature. Colder environments slow down fermentation. Use warmer water or place the jar in a warmer area to speed up the process.
- Too Sour: If your starter has developed a strong vinegary smell, it may need more frequent feedings. Discard a portion and feed it more regularly to balance out the sourness.
After you get a feel for how a healthy sourdough starter should look and smell, you’ll easily be able to troubleshoot basic sourdough problems.
Expert Tips for Feeding Sourdough Starter
☞ No Need to Maintain Large Quantities: One of the biggest mistakes new sourdough bakers make is keeping a massive jar of starter. Trust me, 50-100g is plenty for most home baking. Keeping a smaller amount means less flour waste, less discard, and a healthier starter that’s easier to manage.
☞ Consistency Over Perfection: Your starter doesn’t need perfect conditions—it just needs regular attention. Fed it at 8am yesterday but can only manage 10am today? Completely fine. What matters is developing a rhythm that works for your life and sticking with it. Show up regularly, not perfectly.
☞ Temperature affects timing significantly: This is the game-changer nobody mentions upfront. A starter in a 70°F kitchen might take 10 hours to peak, while the same starter at 80°F could be ready in 6. During winter, I place my jar near a warm appliance. In summer, I switch to the 1:2:2 ratio to slow things down. Temperature is your timing dial.
Kitchen Equipment Recommendations
- Kitchen scale (essential): This is the one tool you absolutely cannot skip. Measuring by weight instead of volume is the difference between consistent results and frustrating guesswork. A simple digital scale that measures in grams will run you about $15 and completely transform your baking.
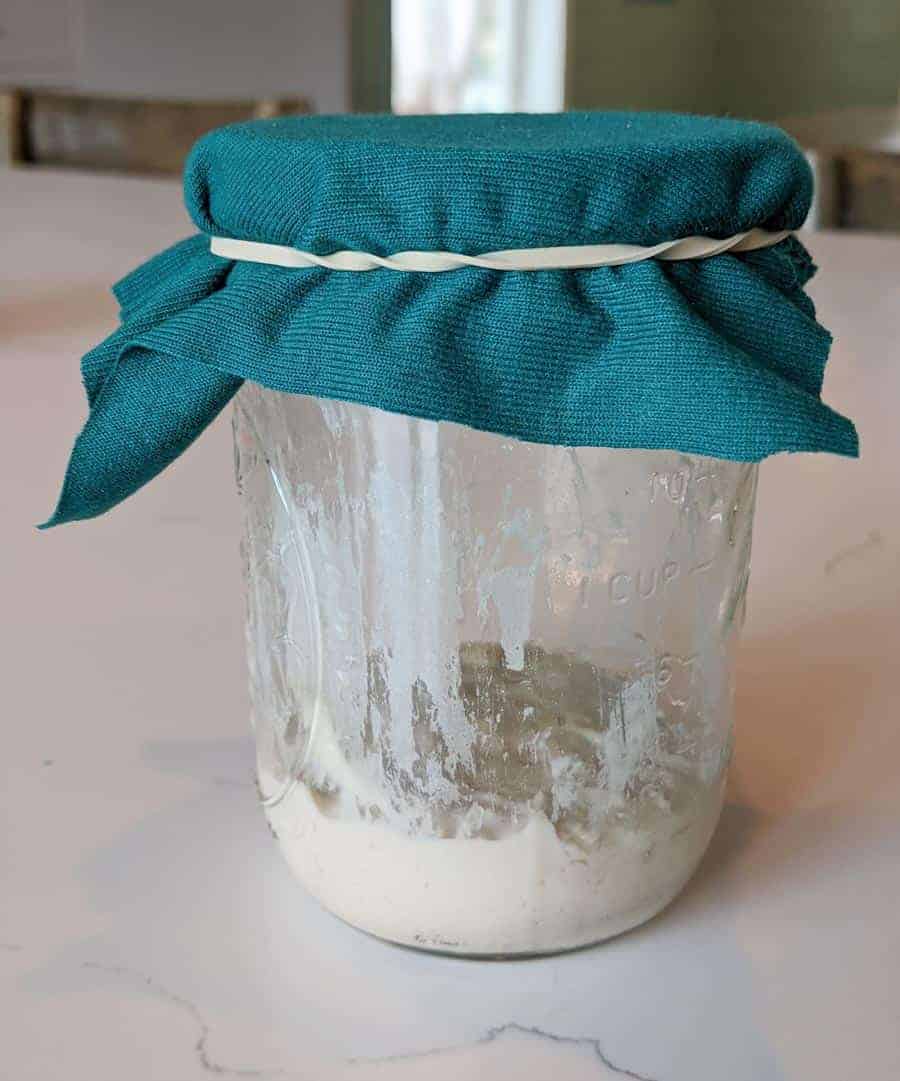
- Glass jars with lids: Wide-mouth mason jars work beautifully for starter storage. Glass lets you see all that bubble activity, doesn’t absorb odors, and cleans up easily. I keep two jars on hand—one for active starter and one for collecting discard.
- Rubber bands for tracking rise: Wrap a rubber band around your jar at the starter’s level right after feeding, and you’ll instantly see when it’s doubled. No more guessing at the rise—it takes two seconds and removes all the uncertainty.
- Thermometer (optional but helpful): Once you understand how temperature affects timing, an instant-read thermometer becomes incredibly useful. Check your water temperature when feeding (75-80°F speeds things up) and predict when your starter will peak. Not essential, but helpful for timing your bakes.
FAQs for Feeding Sourdough Starter
It depends on where you’re storing it. If your starter lives on the counter, feed it once every 12-24 hours. In the refrigerator, it only needs feeding once a week (or even every 2-3 weeks if you’re baking less frequently). I keep mine in the fridge and feed it about 12 hours before I plan to bake—it’s the perfect rhythm for weekend baking.
That’s called “hooch,” and it’s totally normal—it just means your starter is hungry and has been sitting a while. The liquid is alcohol produced during fermentation. You can either stir it back in for a more tangy flavor or pour it off for a milder taste. Either way, just feed your starter and it’ll bounce right back.
Don’t panic—this is usually a temperature issue. If your kitchen is cold (below 68°F), fermentation slows way down. Try using slightly warmer water when you feed it, or place the jar somewhere warmer like near the stove or in the oven with just the light on. Also make sure you’re feeding it regularly and that your starter isn’t too old or neglected. Sometimes it just needs a few consecutive feedings to get strong again.
Common Beginner Mistakes (And How to Avoid Them)
- Using volume measurements instead of weight: Scooping “1 cup” of flour can vary by 30+ grams depending on how you pack it, which throws off your entire ratio. Once I switched to weighing everything in grams, my starter became predictable and reliable overnight.
- Keeping your starter too warm: Yes, warmth speeds up fermentation, but too much heat (above 85°F) stresses out your yeast and creates off flavors. Room temperature (68-75°F) is your sweet spot—patience beats overzealous heat every time.
- Throwing away all your discard: That “discard” is incredibly flavorful and perfect for pancakes, crackers, muffins, and so much more. Start a discard jar in your fridge and suddenly you’ve got the base for quick weeknight recipes.
- Not marking your jar to track the rise: Without that rubber band trick, you’ll spend weeks squinting at your jar wondering if it’s doubled. Mark that starting level and you’ll instantly see the action—no more guessing games.
- Forgetting to feed before refrigerating: Always give your starter a good feeding and let it bubble for 2-3 hours at room temperature before refrigerating. It’ll stay much healthier during cold storage and bounce back faster when you need it.
Final Thoughts
Feeding your sourdough starter is a simple process, but consistency is key. With regular feedings and a little patience, your starter will stay active and strong, ready to create delicious sourdough bread with perfect rise and flavor.
Once you establish your rhythm—whether that’s daily counter feedings or weekly fridge maintenance—you’ll start to recognize your starter’s personality. You’ll know exactly how it looks at peak activity, how it smells when it’s happy, and how long it takes to double in your particular kitchen. That intuition is what transforms starter keeping from a chore into something genuinely enjoyable, almost meditative. Some mornings I actually look forward to checking on my jar, watching those bubbles work their magic, knowing that in a few hours I’ll have everything I need to bake incredible bread. Your starter becomes this living connection to centuries of bread-making tradition, and honestly? That’s pretty special.
Video: How to Make a Sourdough Starter

More Sourdough Recipes to Try
Sourdough Recipes
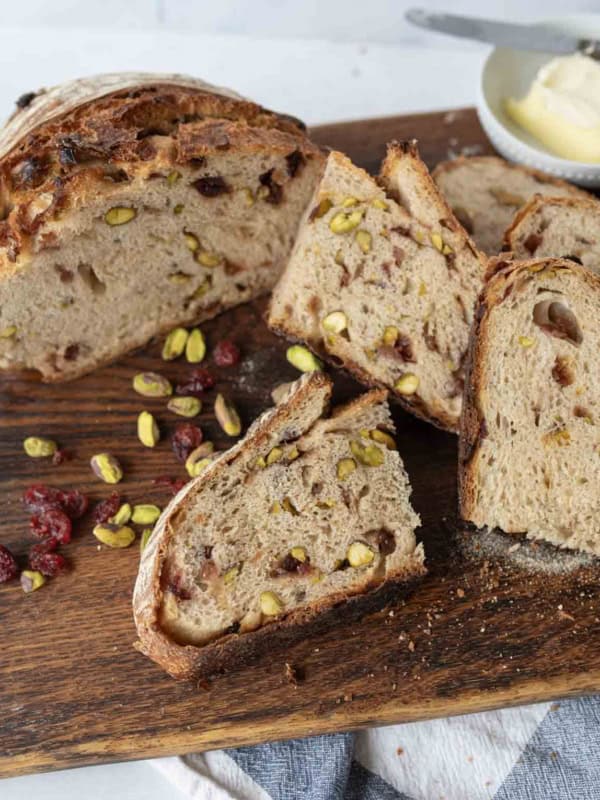
Orange Cranberry Sourdough Bread with Pistachios
French Toast Recipes
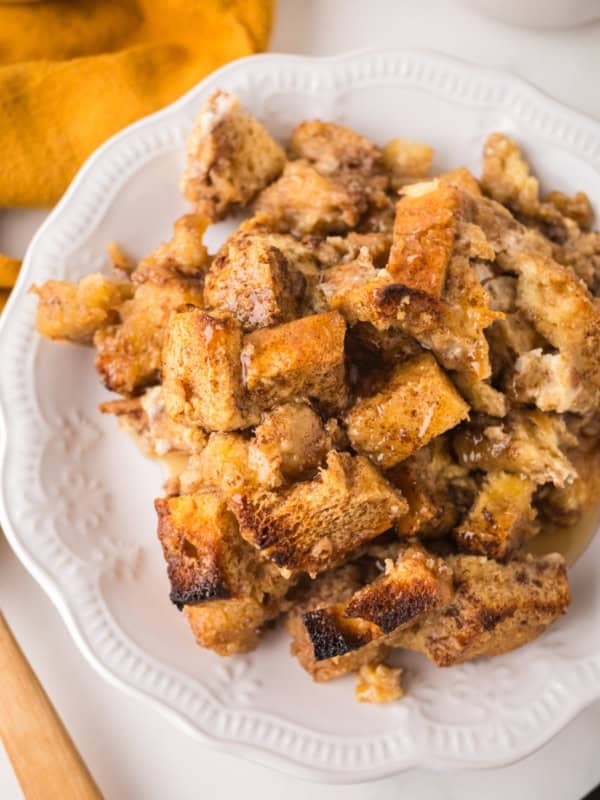
Sourdough French Toast Casserole
French Toast Recipes
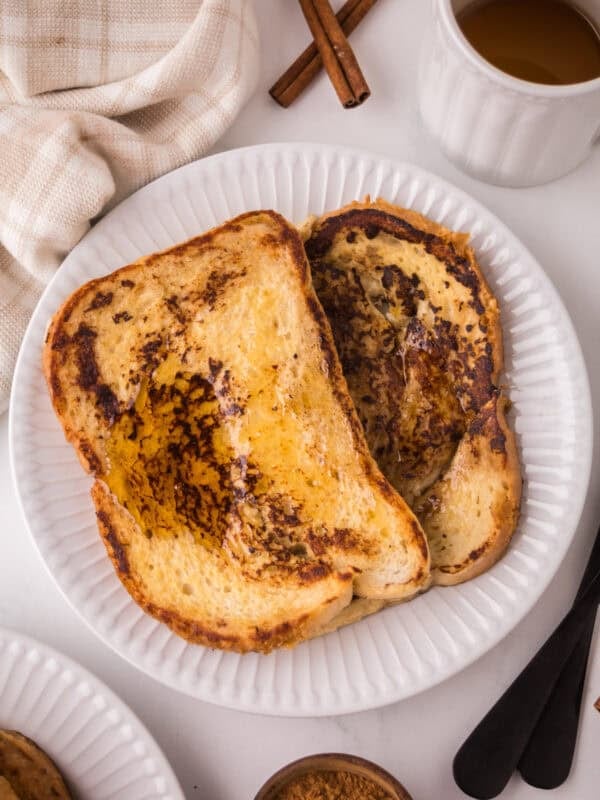
Sourdough French Toast in 15 Minutes
Sourdough Recipes
How to Rehydrate Sourdough Starter
Did you make this recipe? Leave a ⭐️ review and share it on Instagram, Facebook, or Pinterest!


Thank you Melissa, I love your wheat bread recipe. Have tried it before with other recipes with no success. After watching your video, Im going to give it another shot!
Hi! I have followed your Sourdough Starter recipe and I think its finally ready to use. On my discard day yesterday, I split the discard starter into four jars and fed each one (in the morning). They doubled/tripled by the evening. What do I do with them today (I plan to bake your sourdough bread recipe tonight)? Do I feed them again? Stick them in the fridge? Discard/split?
Thanks so much! Can’t wait to bake!
You don’t need that much starter do you? When I’m discarding I just dump it all in one jar, keep it in the fridge and do a discard recipe with it (like crackers, waffles, pancakes, that kind of thing). If you need more starter just feed the one more flour and water. Since they are already in different jars I’d still just dump it all together and make a discard recipe so that you don’t have so much to maintain. Holler if you need more information!