This post may contain affiliate links. Please read our disclosure policy.
Have you ever wondered how to build a farmhouse? This is how we are building our own farmhouse in beautiful Southern Utah.
Happy beginning of June! Part of me literally cannot believe that we have already hit summer and the other part of me said it couldn’t come soon enough. My kids just finished up the school year and we are in full summer/house/garden mode and I’m so happy about it. Now that we are working on the inside of the house more, the farmhouse build updates will come a little more often. I feel like it changes a little every day and it’s too much fun not to share.
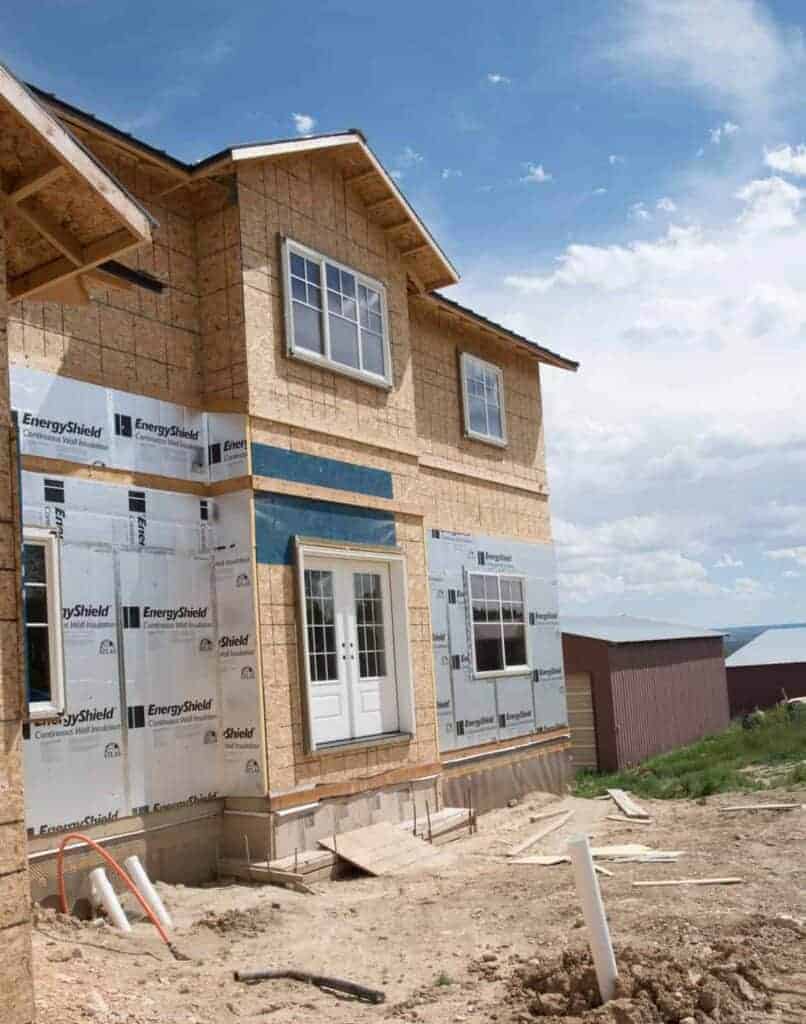
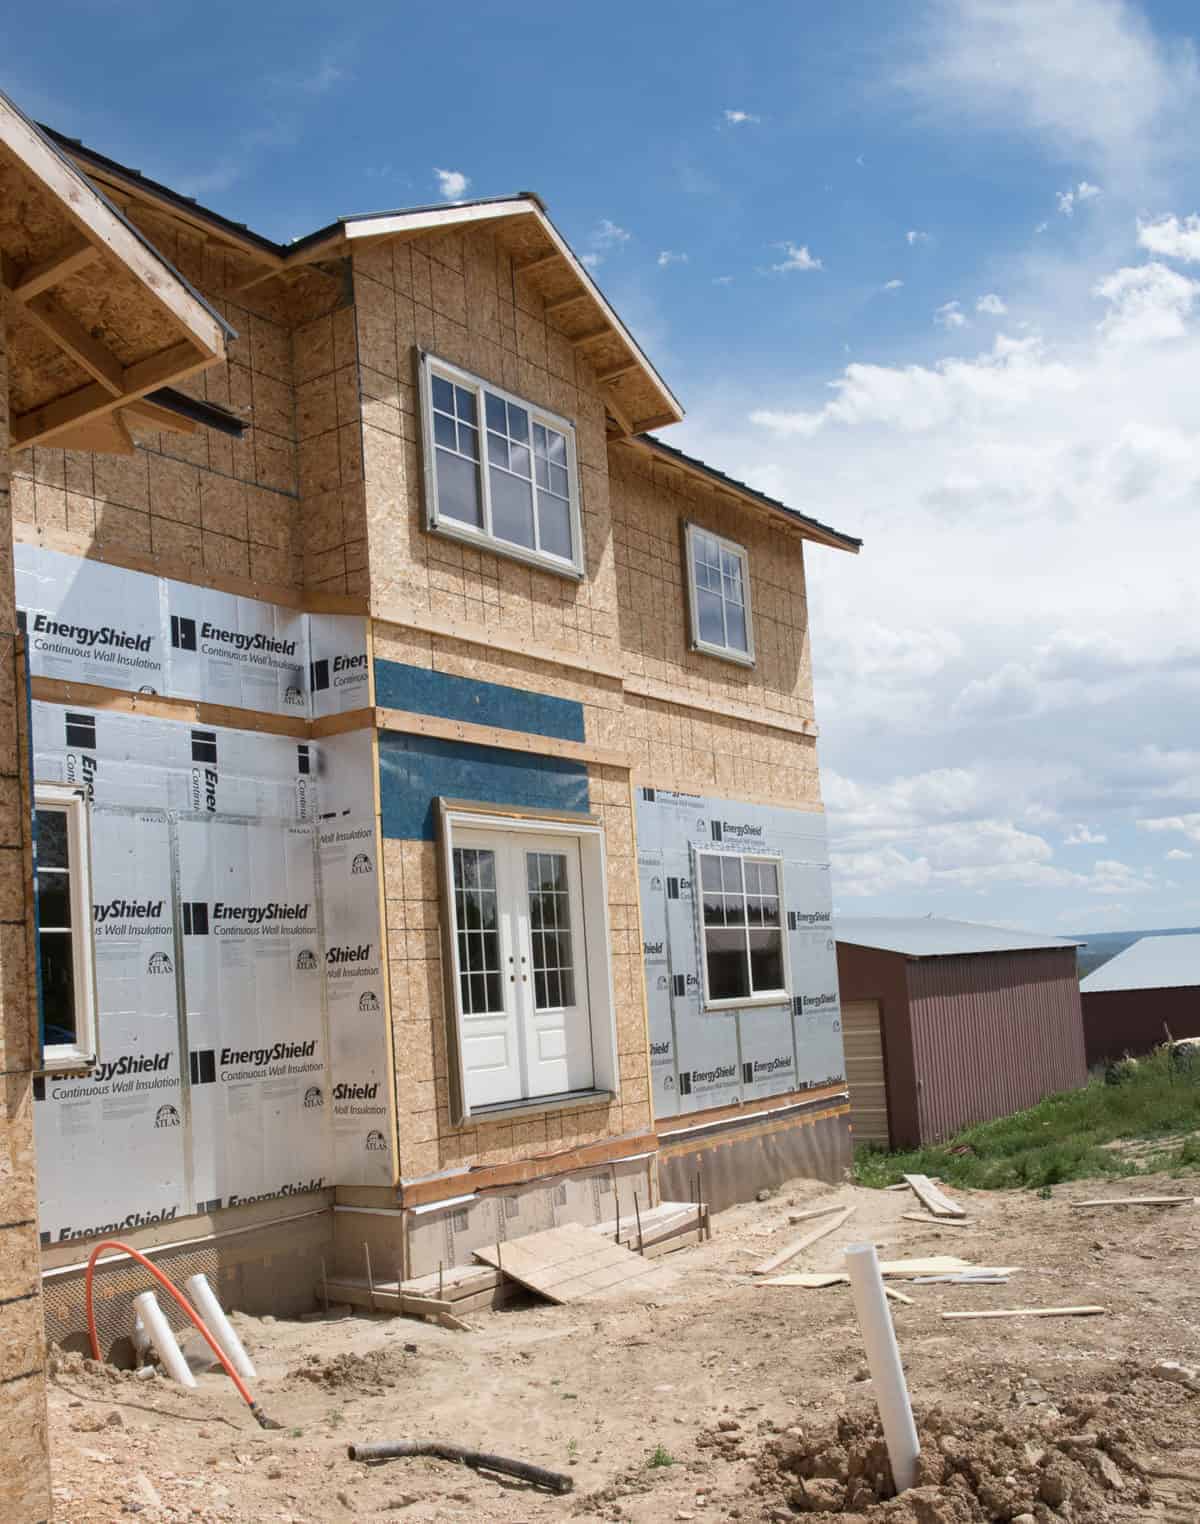
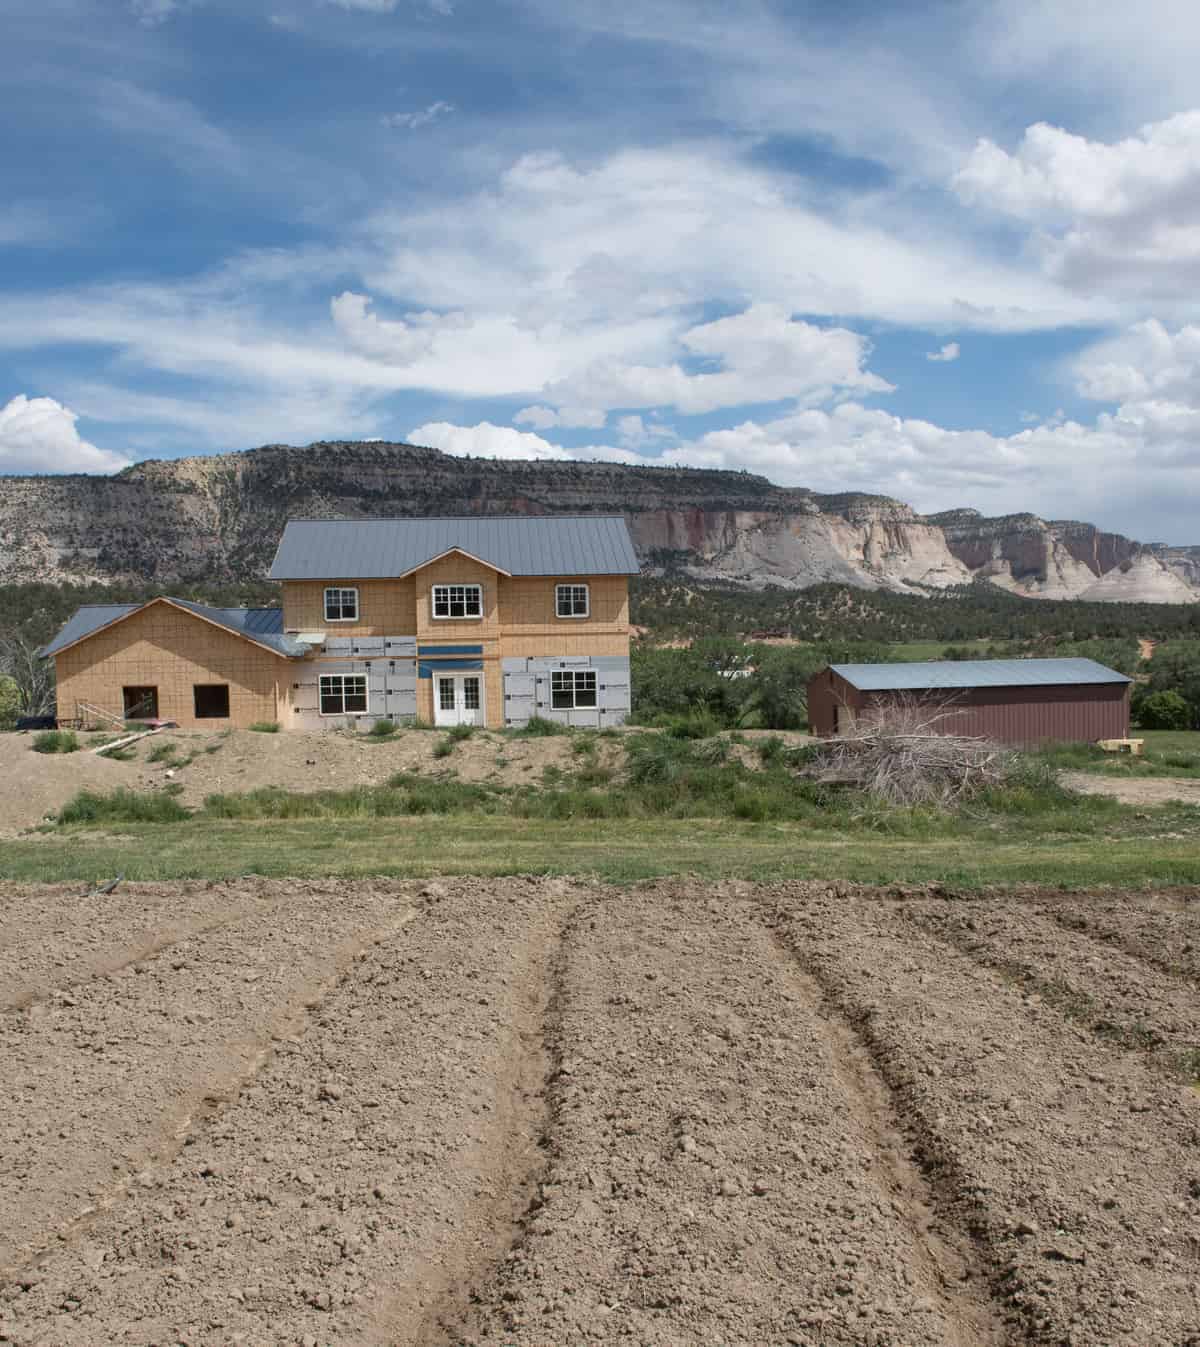
For anyone new to the blog we are 16 months into a DIY house building project. We started building our 5500 square-foot farmhouse in January of 2016. We’ve done all of the work (save the heating and cooling system and spraying foam insulation on the walls) with our own hands and hope to move in around Christmas 2017. Come and see where we are today and enjoy this journey with us!
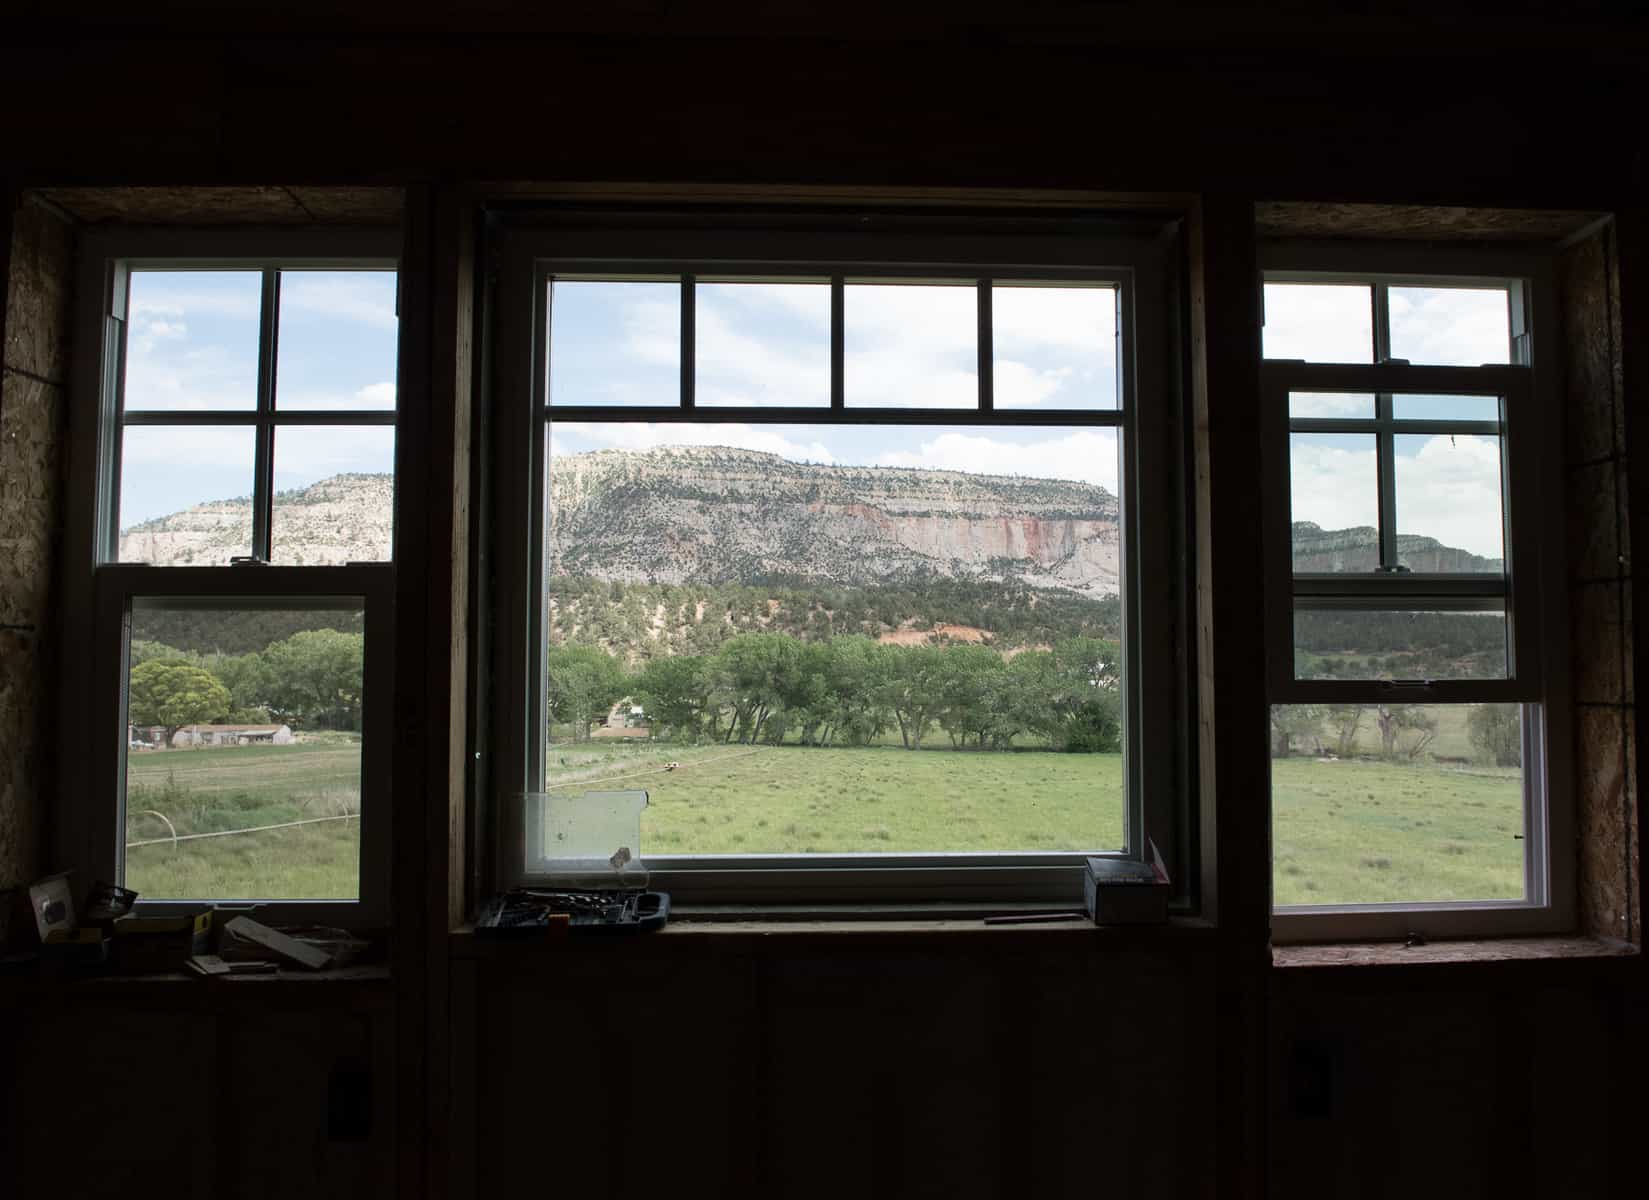
I liked the picture above because I feel like it will be changing soon! We still have a wrap-around porch to add to the the front, right, and back of the house. We’ve had a large (but shrinking) list of pending items which at times seem overwhelming. Some items that were on the list included running water and internet/phone lines 550 feet from the highway to our house (crossing two driveways in the process) and designing the kitchen (cabinets, appliances, counter-tops, etc.). A couple items still on the list are the wrap around porches and the landscaping/driveways. It took a few weeks, but Thomas ran the utility lines this spring and now the porches are the next major hurdle to get over. Other parts of the project take time but Thomas has a great working knowledge of lots of things (thanks to remodeling our last house). Adding porches is not a skill he’s acquired yet and one that feels pretty daunting right now.

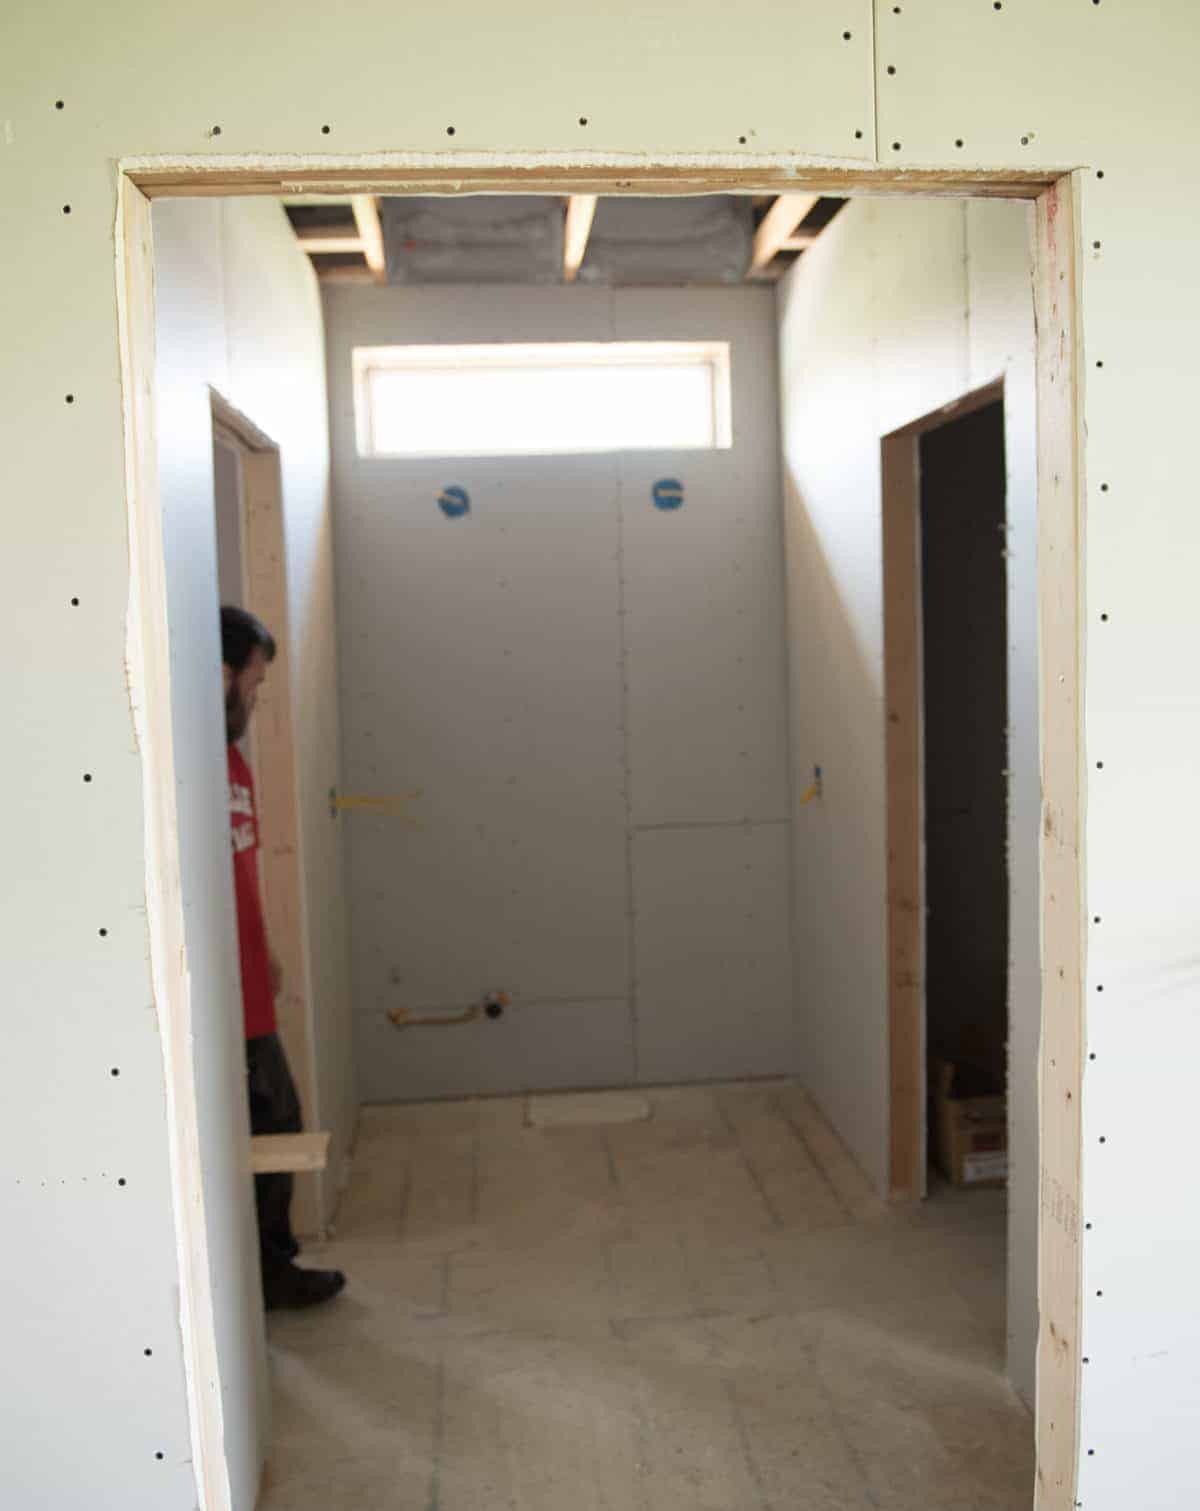
One perk of having water run to the house is that we installed our drinking fountain and it’s working! Having water in the house to drink is going to be so very convenient. We are so excited! So we put the drinking fountain just inside the door to the garage, just outside of the laundry room and main level bathroom. You can’t see it from the living room, it’s just around the corner from your view. In my mind this is going to cut down on dishes (self-serve water, every mom’s dream right?!) and will be something the kids will love. Plus, it’s so pretty, isn’t it?! I totally plan on having an outdoor drinking fountain one day too (just like my grandparents in Indiana had at their farmhouse).
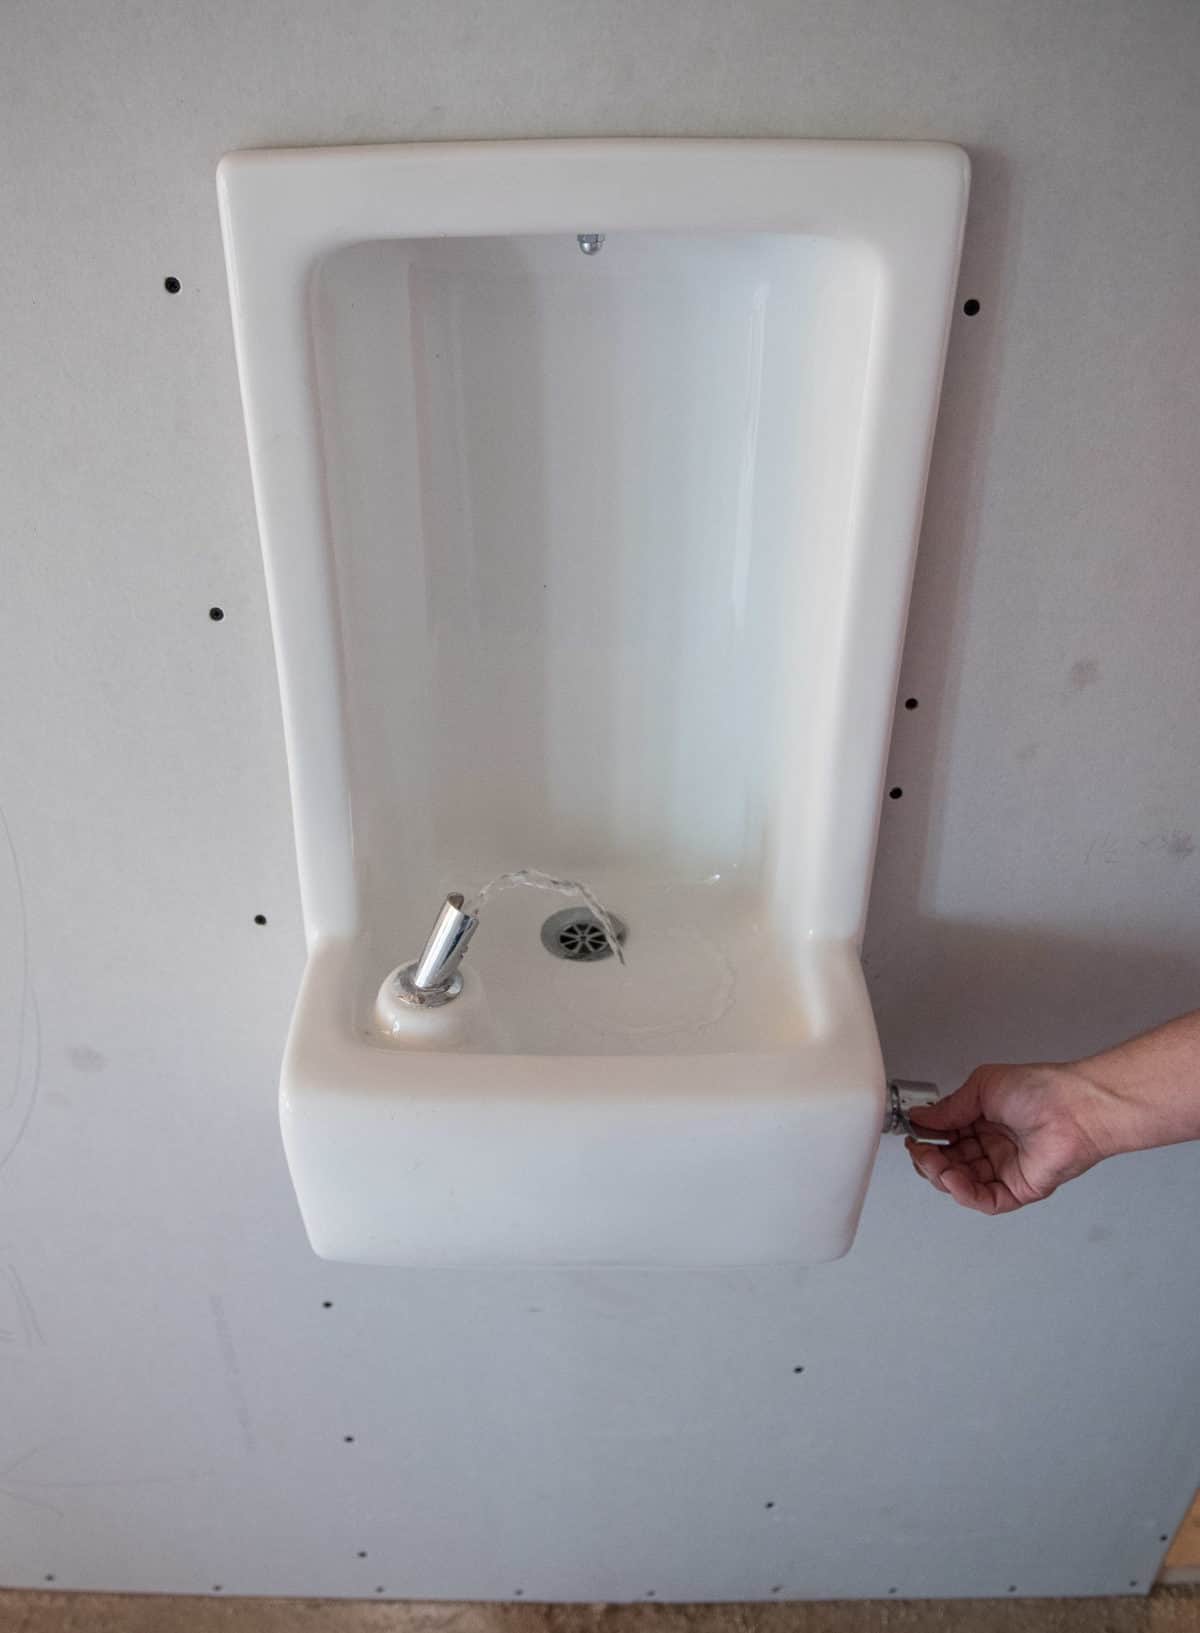
It works, but not until after some serious issues on our end. This water fountain has been a whole lot of work! There are very few semi-recessed (about 4 inches into the wall and four inches out of the wall) drinking fountains in the world (this is the one we bought). There was a single porcelain option that we found. There are a number of fully-recessed stainless steel options (about 10 inches into the wall and 1 inch out of the wall). But we didn’t want to use up that space on the back side of the wall. And if I’m getting a drinking fountain, I want a pretty one. So Thomas found a really good deal for the semi-recessed porcelain fountain on Ebay… and it arrived in 1,000 pieces. It was literally shattered in the box. We ordered a second one from Amazon and it came broken too. Not a million pieces but a few huge cracks that left it in 4 or 5 pieces. The third drinking fountain was the charm (almost)! It finally came in one piece weeks after we started trying to get one here. Then the installation was a nightmare. There was a large gouge in a metal piece inside the handle so it leaked everywhere. What should have taken an afternoon to install turned into a 2 and 1/2 day project. Thomas spent a lot of time on the phone with the folks from Amazon. They acknowledged the flaw but said they couldn’t offer a replacement because they had pulled the item from their warehouse. We didn’t want to remove it and return it (not after all that work to get it here and our lack of other options!) so they ended up giving us a 15% discount for our troubles. Thomas ended up filing the gouge out of the internal metal piece. That stopped the leak, but then no water would come out of the bubbler. He finally ended up filing a rubber washer by the same amount as the metal piece and that did the trick!
So far so good though, and we love having water at the house to drink.
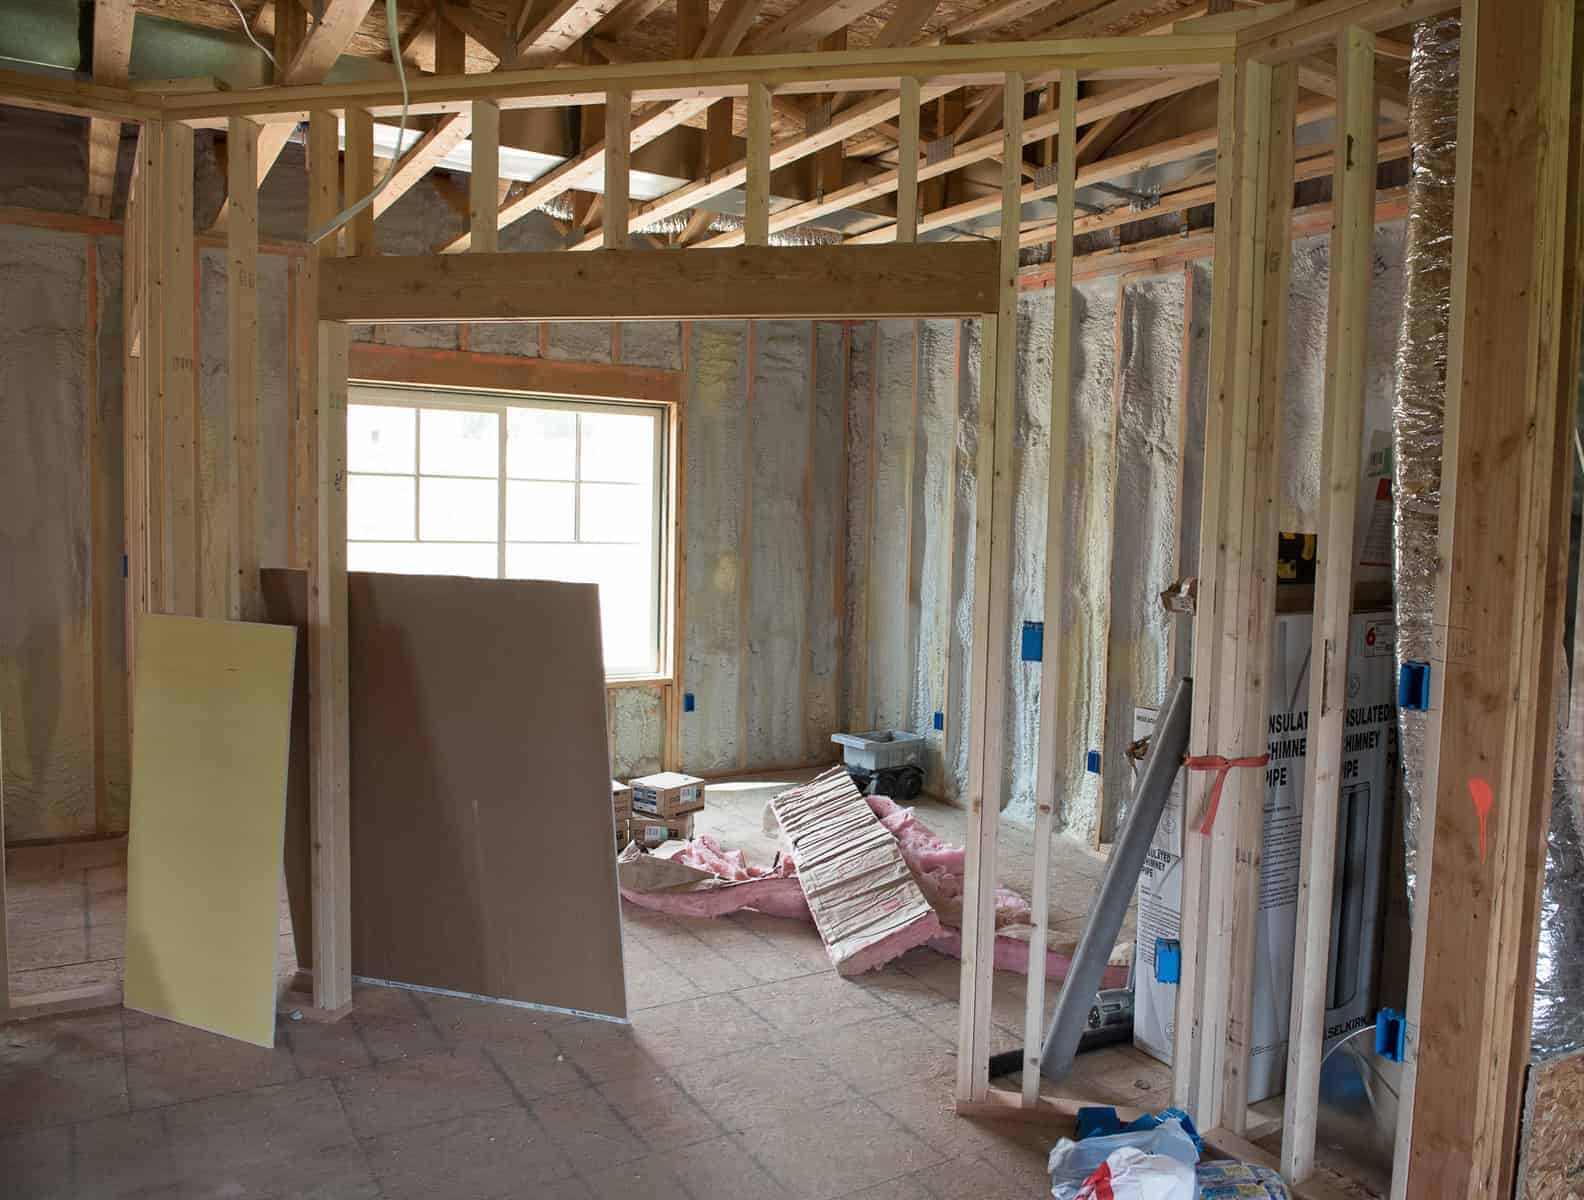
My room is coming right along too!
My bathroom (where the vanity and mirror go).
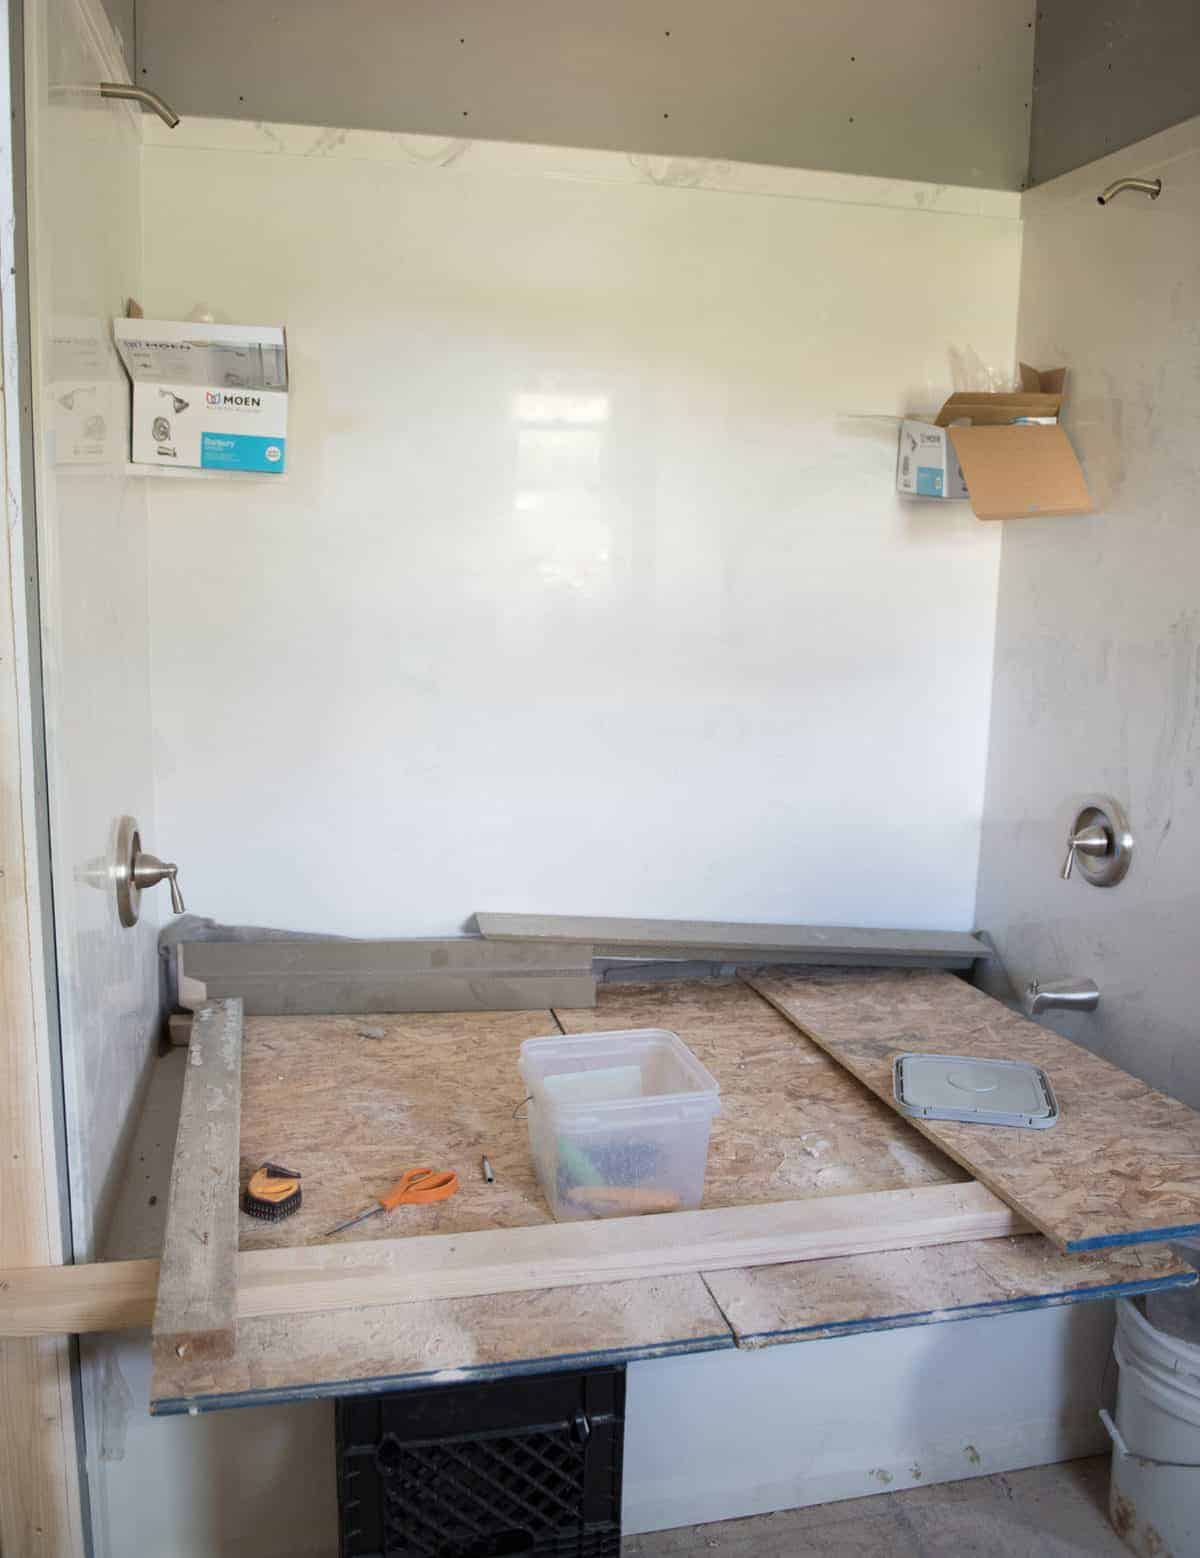
My tub! We had a cultured marble shower surround put in and it looks so good. Can you see all the things Thomas put in the tub to keep from scratching it while he hung the ceiling drywall. Ha! It was pretty funny to see. He used odds and ends from the Thermalbucks we put around our beautiful energy efficient windows. Just when you thought those only had one purpose…
The mud and laundry room are starting to come together too. Don’t they look great? We had a lot of issues trying to get kitchen cabinets from Home Depot. Getting their cabinets was the plan all along, that’s what DIYers do right?! So I made the trip to St. George on three different occasions and spent multiple hours sitting at their kitchen cabinet desk and a few more hours on the phone and it just wasn’t coming together like I wanted. A friend encouraged us to just get a few custom cabinet quotes, “just to see”, since she knew I was having a hard time getting them ordered. Even getting people to return calls for custom cabinets was hard. Out of the 8 people I called, only 3 returned my calls. Out of the three custom cabinet makers that returned my calls, only 1 actually got me a quote.
We were trying to get the cabinet layout designed so that we could wire the kitchen. You need to know where your appliances are going before you can install the wiring for them! And you need to know what cabinets you are getting and where they are going in order to know where you appliances are going. I started working on ordering cabinets before Christmas and here it was, April, and I still had nothing ordered and it was starting to hold things up.
I was at one of Henry’s baseball games sharing a little frustration with a friend and she told me her brother builds and installs cabinets. What?! We knew that he did (small town) but thought he lived out of state. What we didn’t know was in the last year or so he moved back to Utah. Hooray! So a few emails and phone calls later and he sent a quote, and a few weeks later he drove over an hour to our house and laid out our cabinets on the floor (via a measuring tape and permanent marker) so that Thomas could finish plumbing and wiring. It was amazing! His quote was a lot less than the Home Depot cabinets too! So with that “extra” he’s going to install the cubbies in our mud room, install cabinets in our laundry room, make me a closet/cabinet for my bathroom, and make a built-in bench and bookcases in my family room upstairs. Isn’t that a great story? I’m so happy with how all the cabinets are working out even though it was a bit of a mess to get to this point.
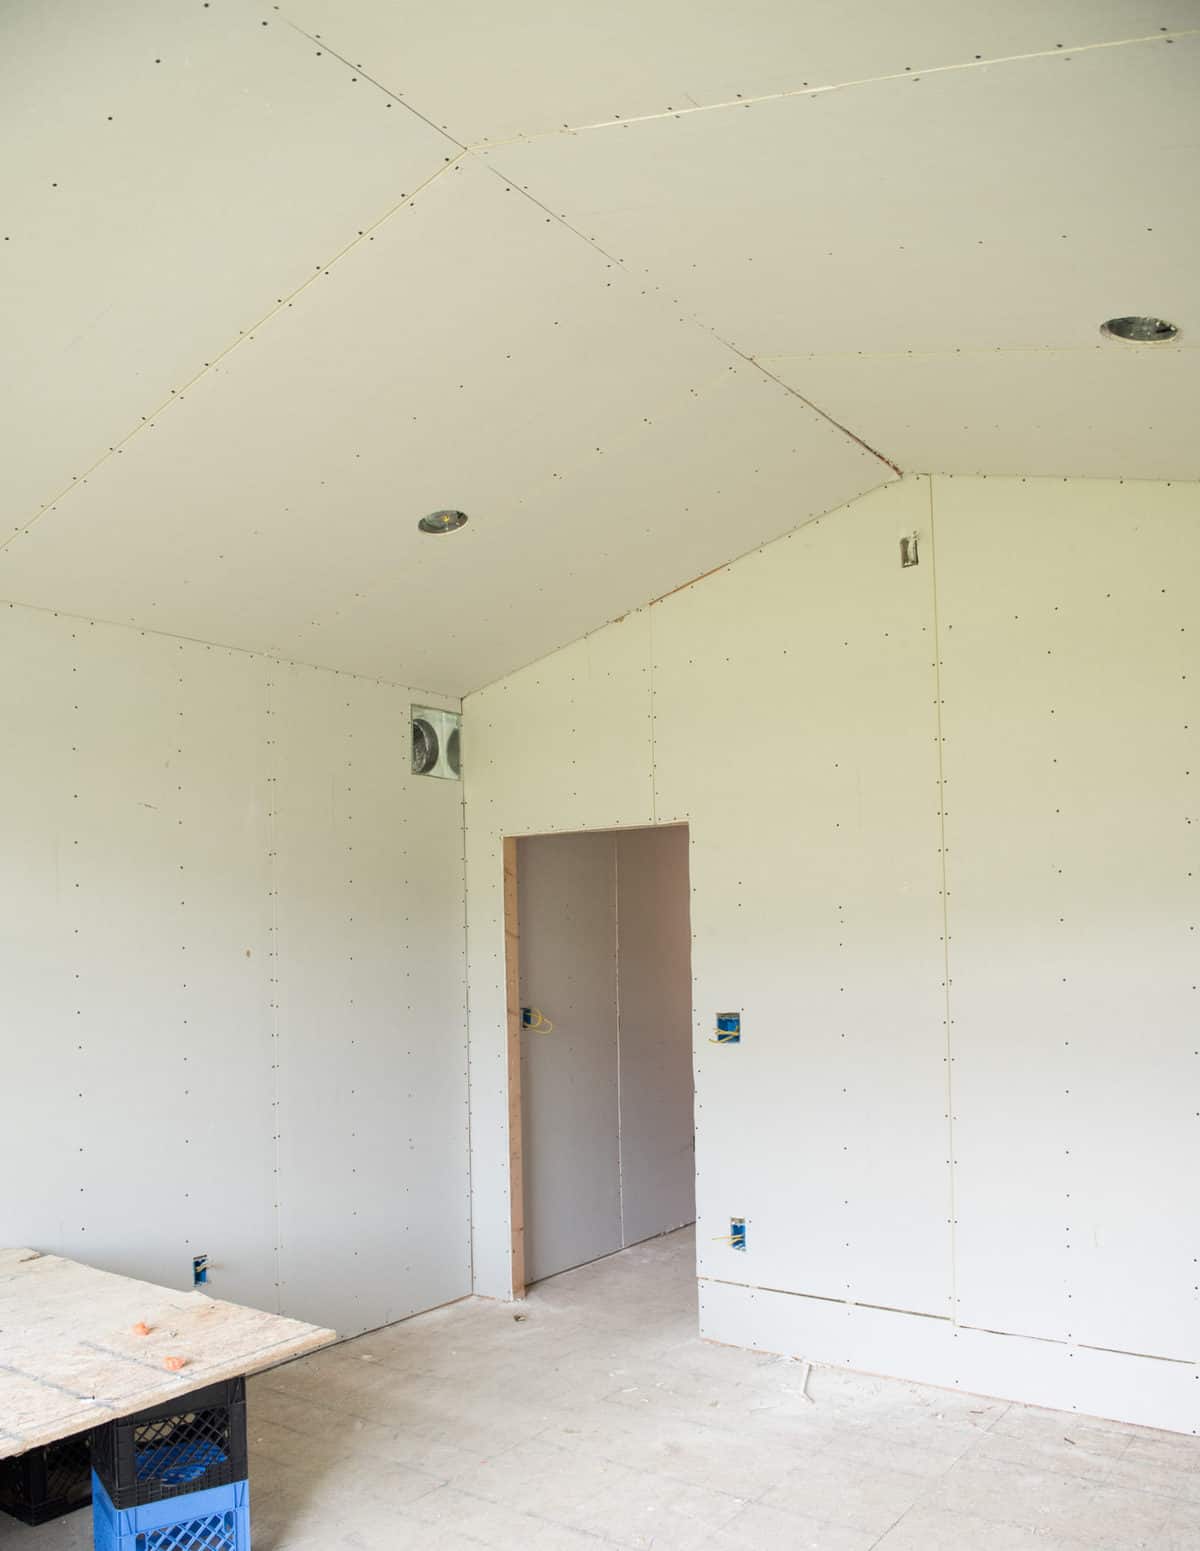
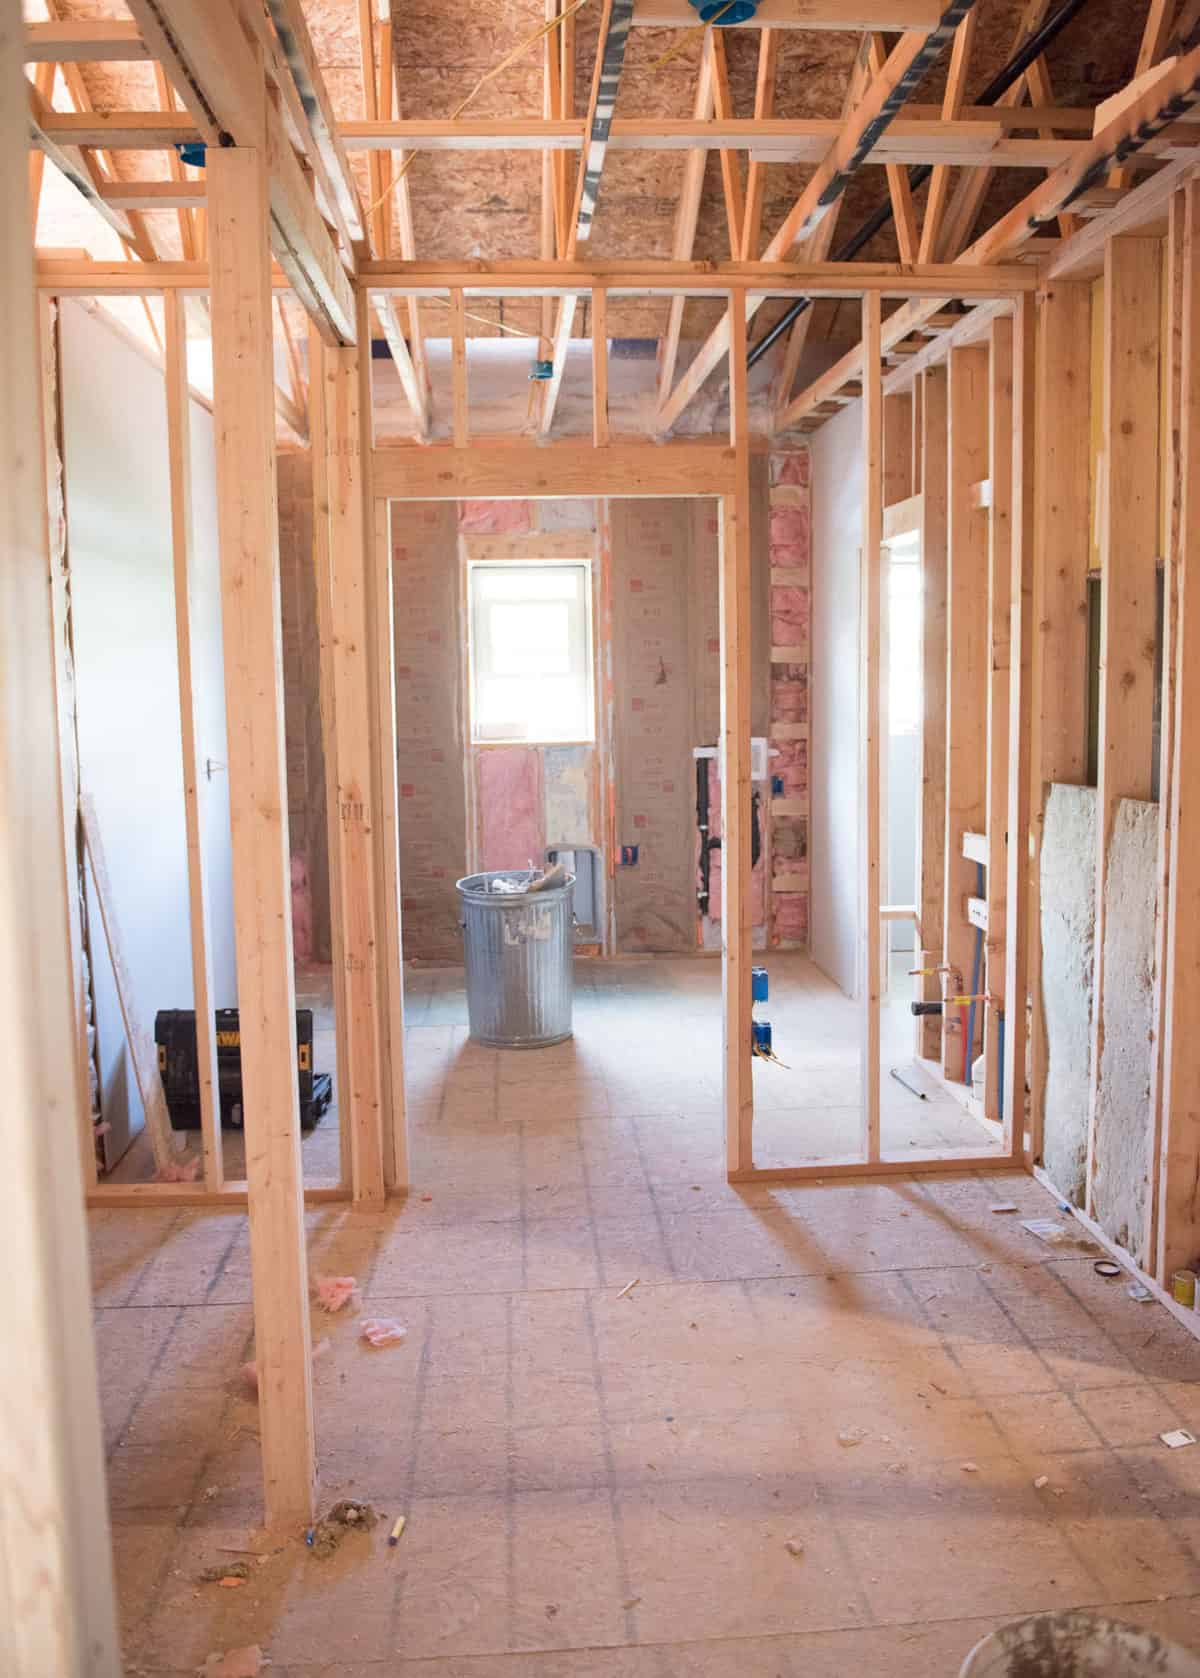
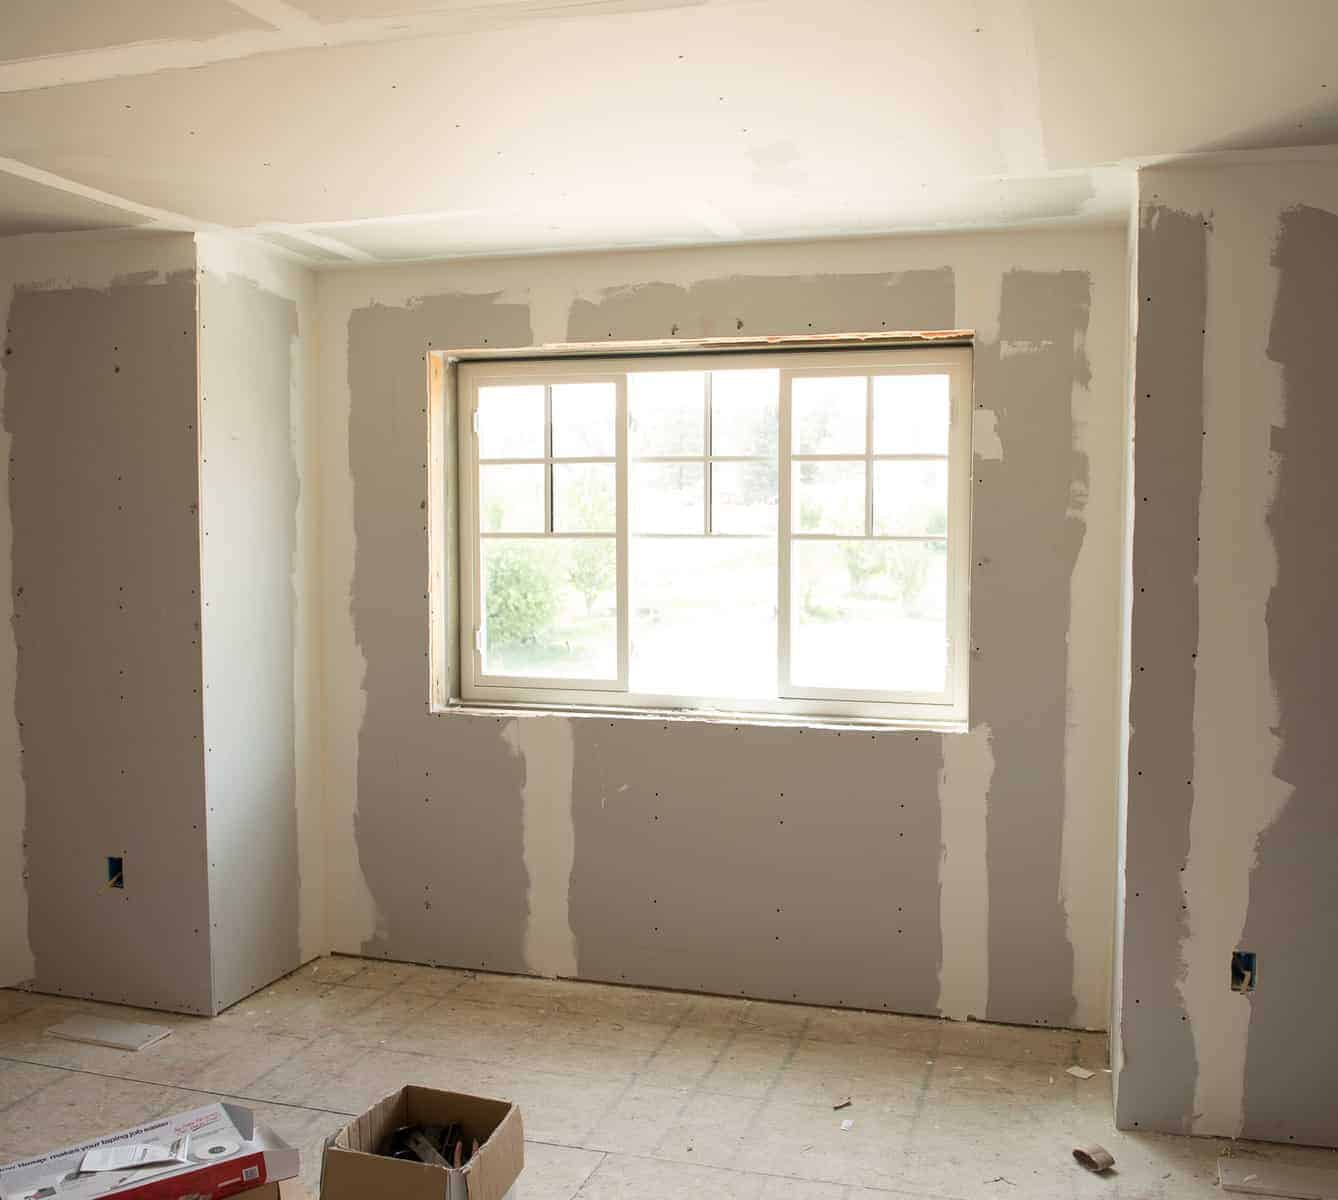
The living room and kitchen still look essentially the same, but now the wiring is done (except for the ceiling lighting; it’s not done). Thomas is way into making the house quiet (we have 5 kids, doing a few extra things to help stop noise is a good thing in our book). So he’s adding some soundproofing clips and “hat” channel to the bottom of the floor joists above the main level. The clips go on first, then the hat channel snaps into the clips, finally the drywall and lighting are attached to the channel. Then when people are walking upstairs, that vibrations don’t move through the floor to the ceiling of the main level. We are also blowing in cellulose insulation into the ceiling of the main level to help with the sound as well. They are a few extra steps but I know we’ll be glad we took the time to do them. So this week will be more drywall on the main level, adding the channels, installing recessed and pendant lighting, drywalling the ceiling, and then blowing in the insulation.
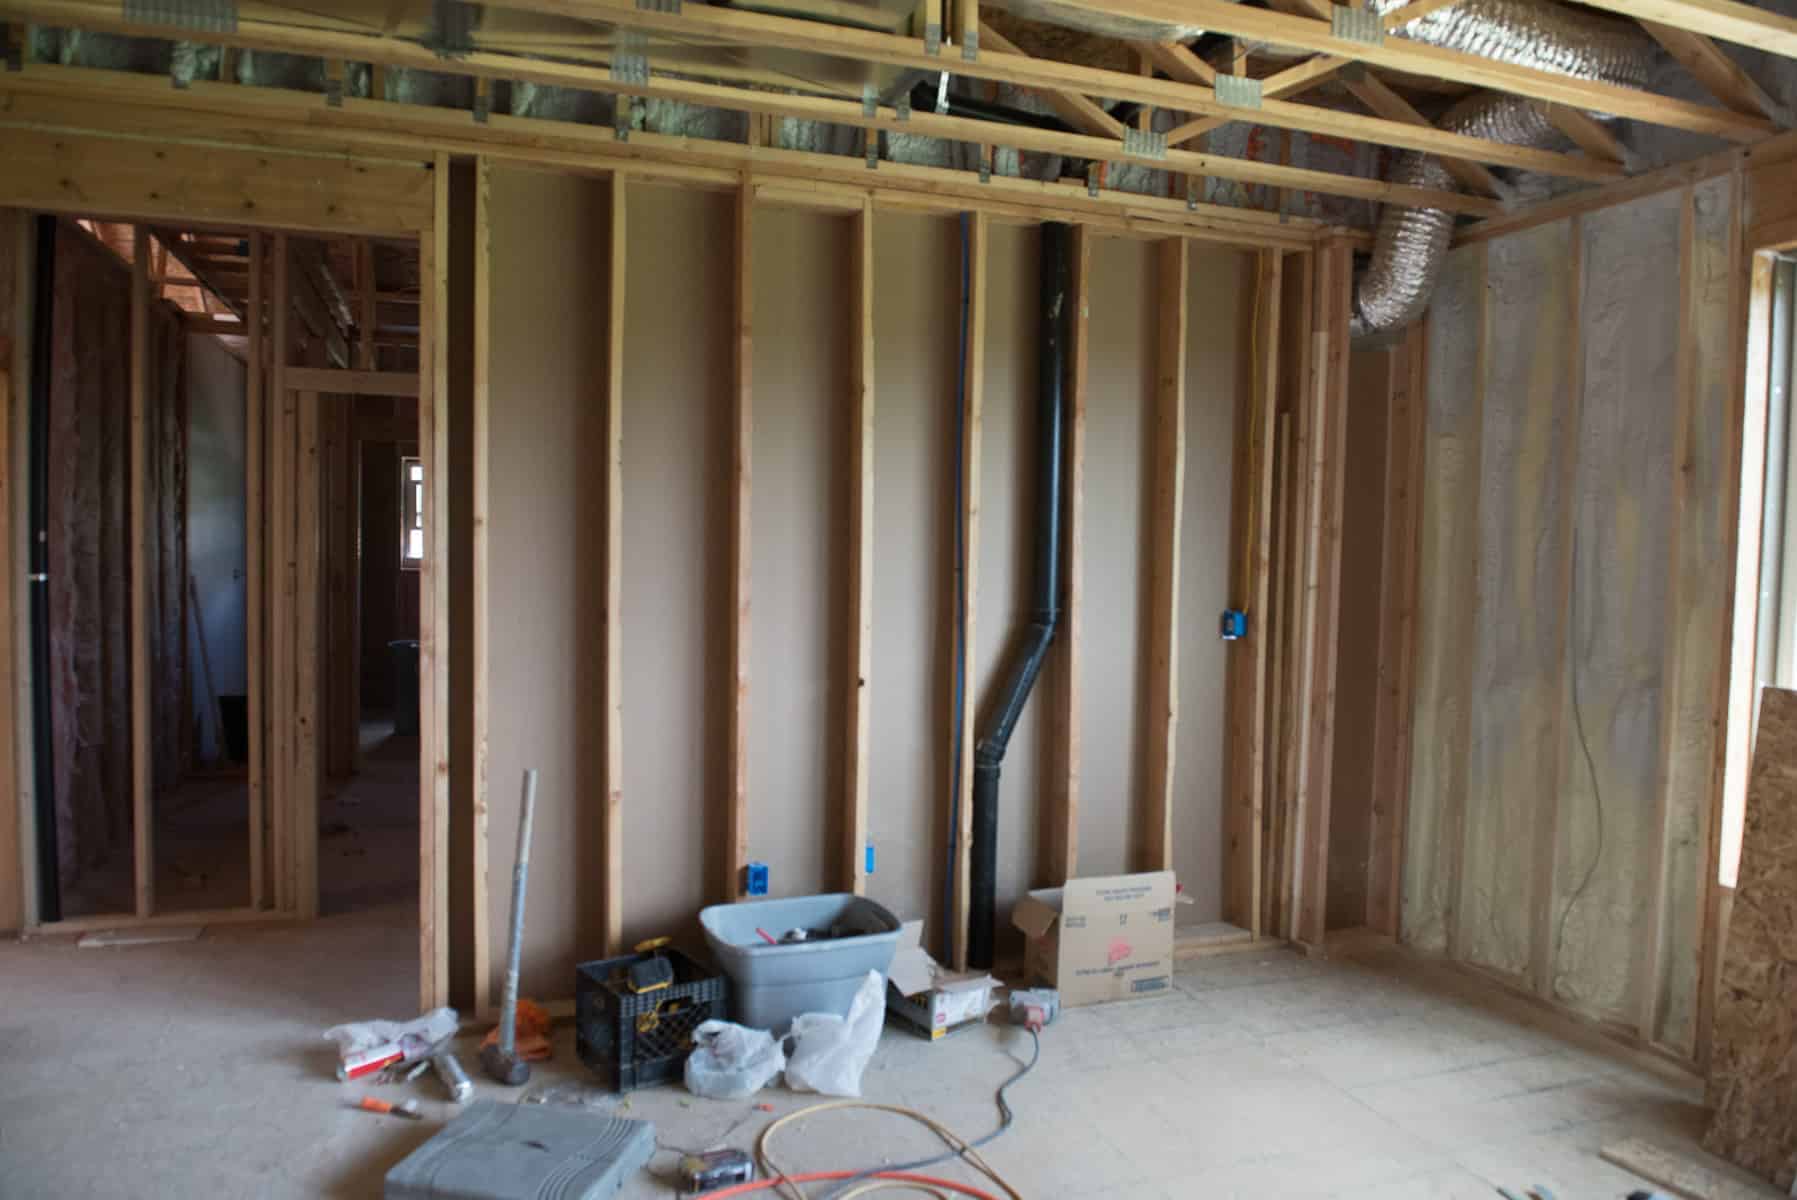
This corner of the living room will have the fireplace. The drinking fountain is through that hall.
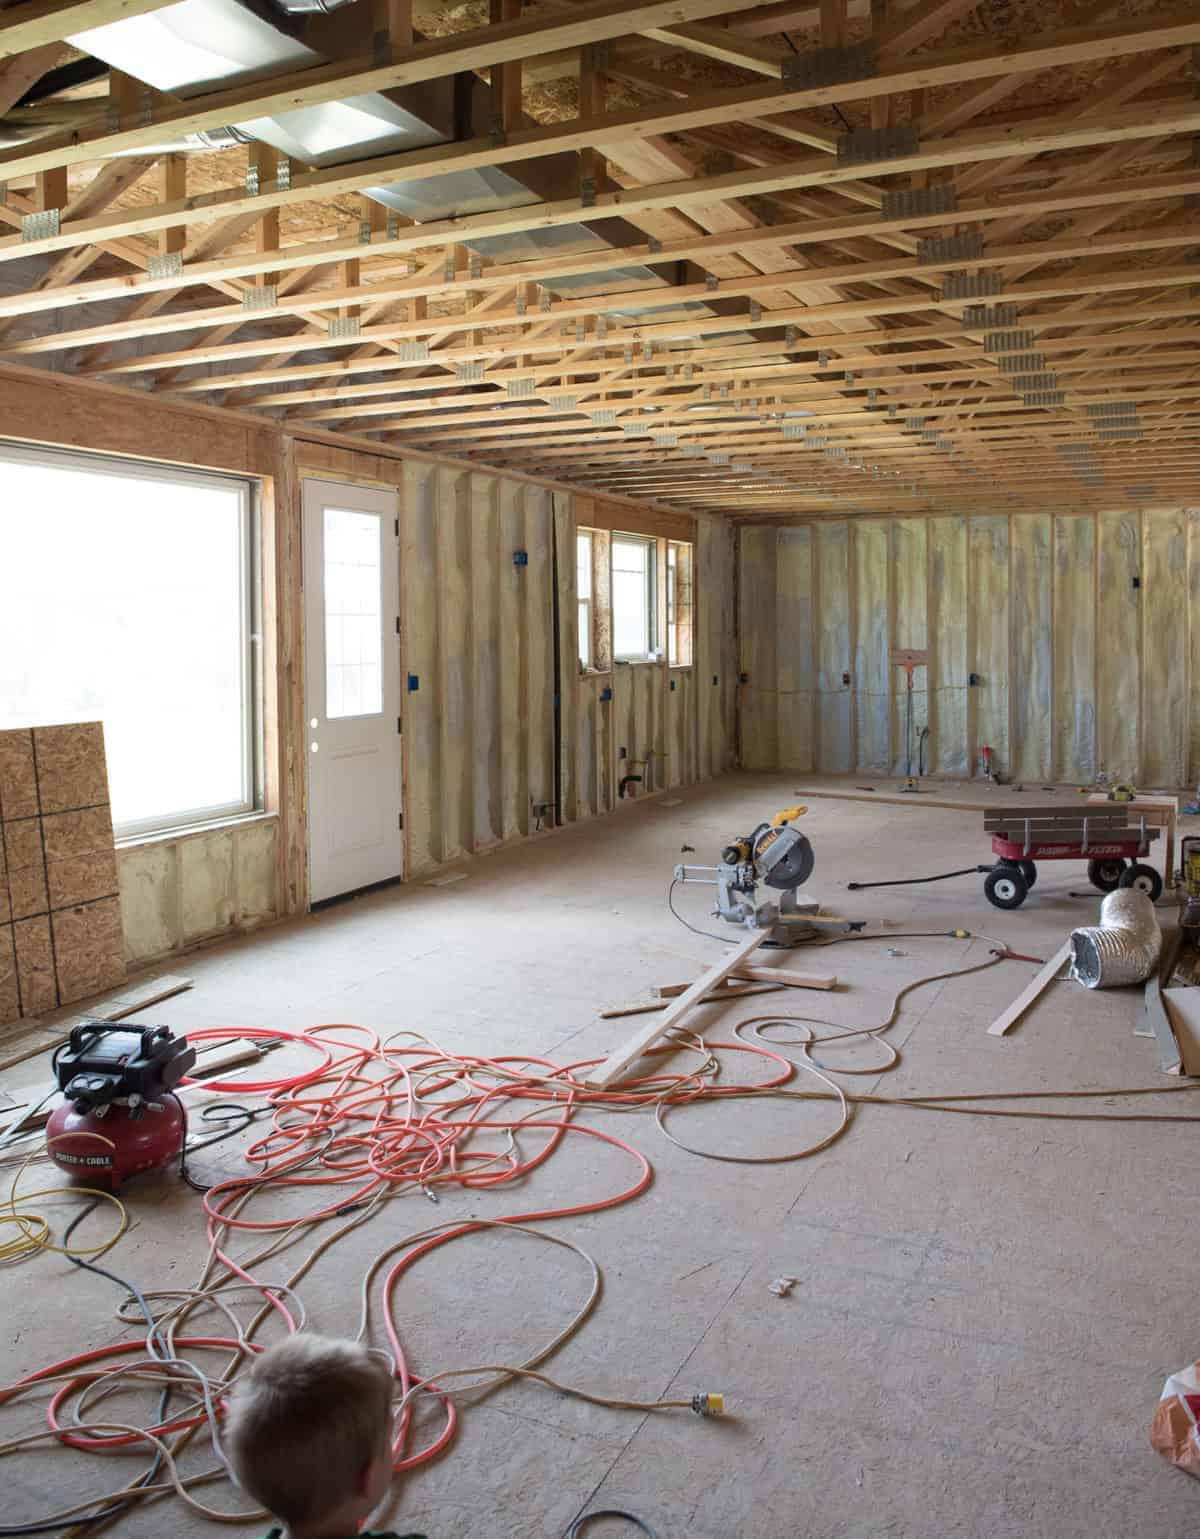
Dish-washing view. Not sad about it.
Office/toy room/whatnot room.
So this is the upstairs family room where we are having the bench put in under the window and built-in bookcases. SO excited about this. I was going to have the bookcases face each other on the insides of the window – does that make sense? This is a north-west(ish) facing window, do you think the books will be OK?
Last but not least, some of the things I’ve been buying lately!
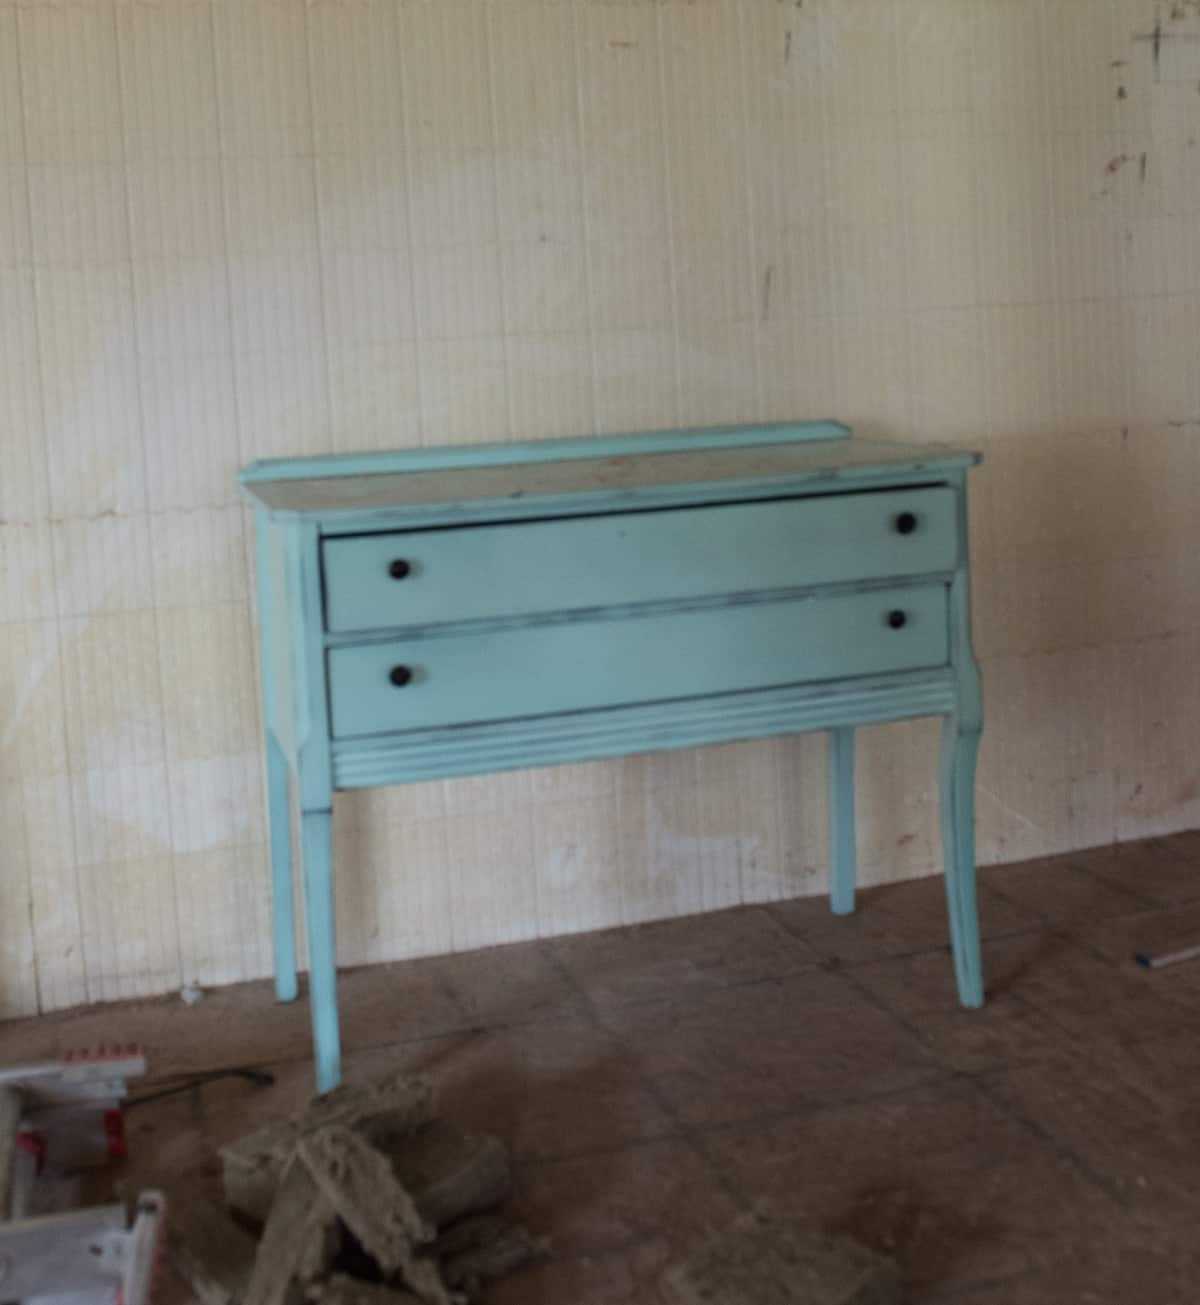
I had my friend Heather (Hi, Heather!) help search the interwebs for a piece of furniture to use as the vanity in the main level bathroom. She outdid her self and it only cost $80! Hooray! I quite like the color it came with and don’t plan on changing much of anything right now. It needs a good coat of some kind of sealer but other than that I love it. I’m going to put a white vessel sink on top (and by I, we all know that I mean Thomas right?!) and it’s going to be so very fun.

I also found a church pew at an antique shop last weekend! I’m so, so, so excited about this well-built $85 find. I’m not sure if it will go on the porch, inside the entry way, or by my stairs near the piano (facing the back door and the living room/kitchen), but I love it with my whole heart. Every farmhouse needs a church pew right? There might be lots of cool old stuff in your neck of the woods but there sure isn’t a lot in my neck of the woods. Finds like these feel pretty lucky and exciting!
And there you have it! An early June 2017 update on how to build a farmhouse, Griffiths style!
Thank you so much for enjoying this journey with us, we love sharing the ups and downs with you.


This is AMAZING!! EVERYthing looks amazing! Excited to see an update again.
Looking good! Thanks for the update. I am getting excited for you guys. I hope to one day have my own house built, but I know my husband won’t be doing the work. Good to know what I might expect.
Wow! So much accomplished in what seems like a short amount of time. Your house is going to be absolutely beautiful!
Wow, what a beautiful view you are going to have! I can’t wait to see what everything looks like in a couple of months!
Your drywall looks horrible you should have hired a professional
LOL, it’s not done! It’ll look better once it’s finished.
Nice move on soundproofing the floors! I have wood floors and minimal insulation between floors….ya hear every step! I needed Thomas to be my contractor! I love your reasoning behind having an outdoor water fountain! Perfect!
We are hoping the extra time/money/effort makes a huge difference! Perk of self building right 🙂
I loved the update!!!! I think the bookcases will look great facing each other!!! I wish we were driving through soon to see all the progress. I can’t wait to come visit. Let me know when you start to fill your reservation calendar ?
Oh, Melissa!!! It’s really coming together. it’s going to be gorgeous 😀