This post may contain affiliate links. Please read our disclosure policy.

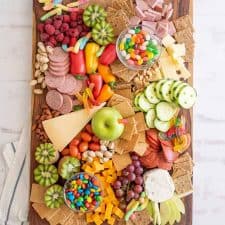
Here’s a full guide on how to make a family-friendly and party ready cheese board for all of your picnics, parties, and gatherings this summer. A cheese board doesn’t have to be expensive, stuffy, or fussy and I’m here to show you how to make a cheese board that’s perfect for everyone at the gathering, kids and non-gluten eaters alike!
I’m here to tell you that making a cheeseboard doesn’t need to be fancy, fussy, or overly expensive to be a delicious meat and cheese board to snack on. I love making a family friendly cheese board for an easy meal, to take to a party or get together, or to make a movie night in extra special.
Cheeseboards are so fun. I have lots of variations for you to try: Everyday Cheese Board, Easy Fall Apple and Cheese Board, My Favorite Classic Cheese Board, Halloween Cheese Board, DIY Christmas Cheese Board for a Party, and Valentine’s Chocolate and Cheese Board.
Table of Contents
Why You’ll Love This Recipe
- Versatile and Customizable: Cheese boards can be tailored to fit any kind of preferences or dietary concerns. That makes them easy to change up for any occasion, too.
- Easy to Assemble: You can use what you have on hand or gather up your favorite things from the store, then put them any way you like on the board and it’s going to look fantastic. Plus, they require no cooking which is definitely a win.
- Kid-Friendly: Including mild cheeses, kid-friendly crackers, and fruit guarantees that you’ll have kids ready to devour it.
Ingredients
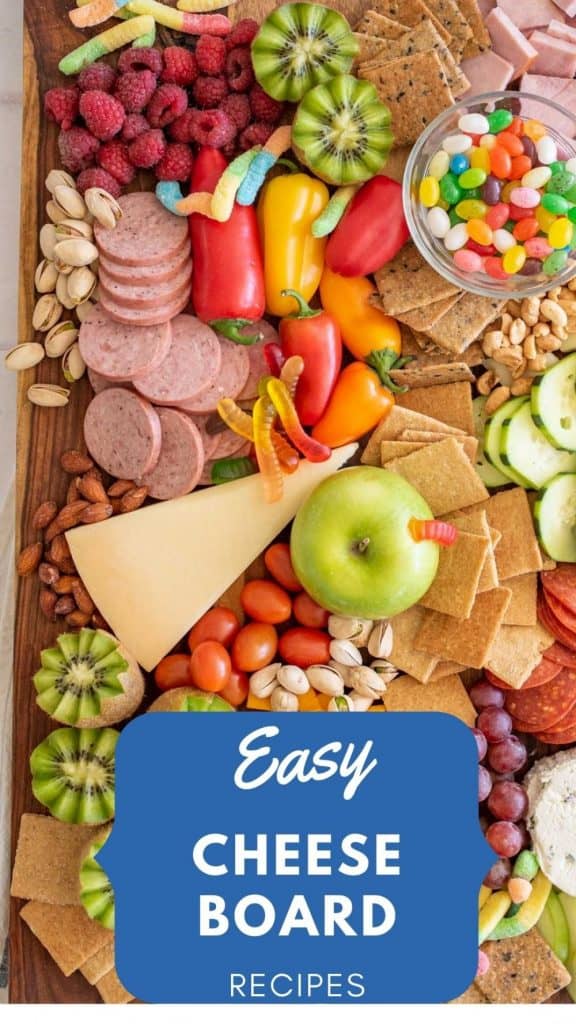
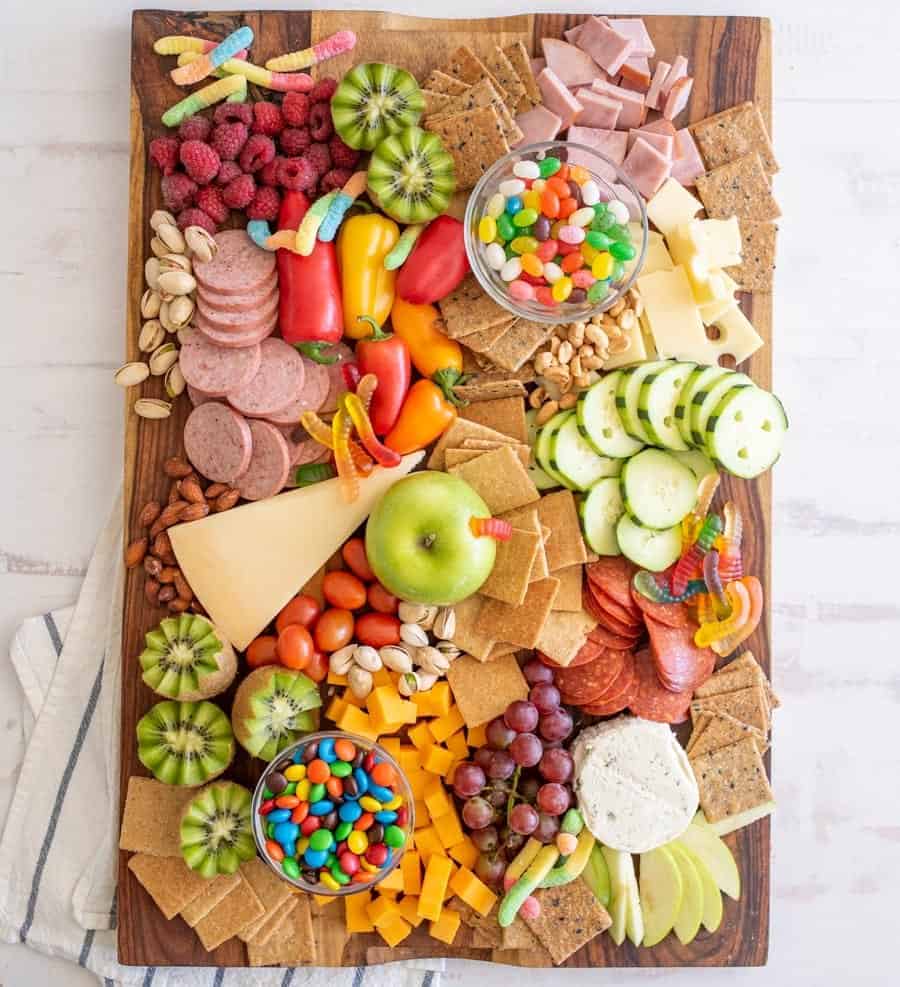
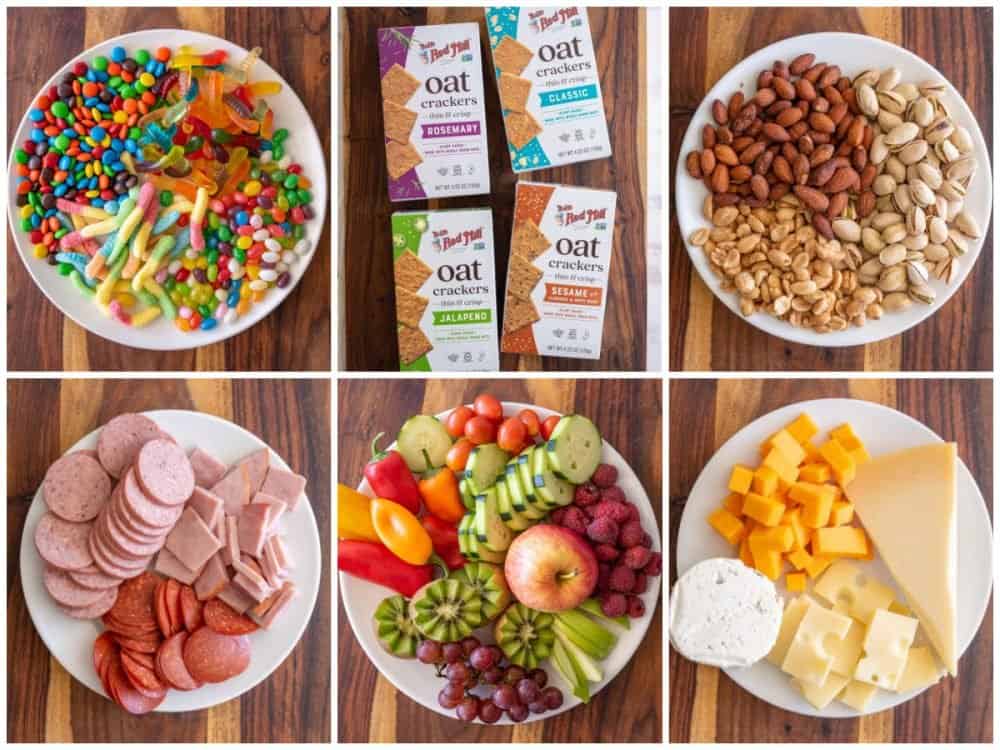
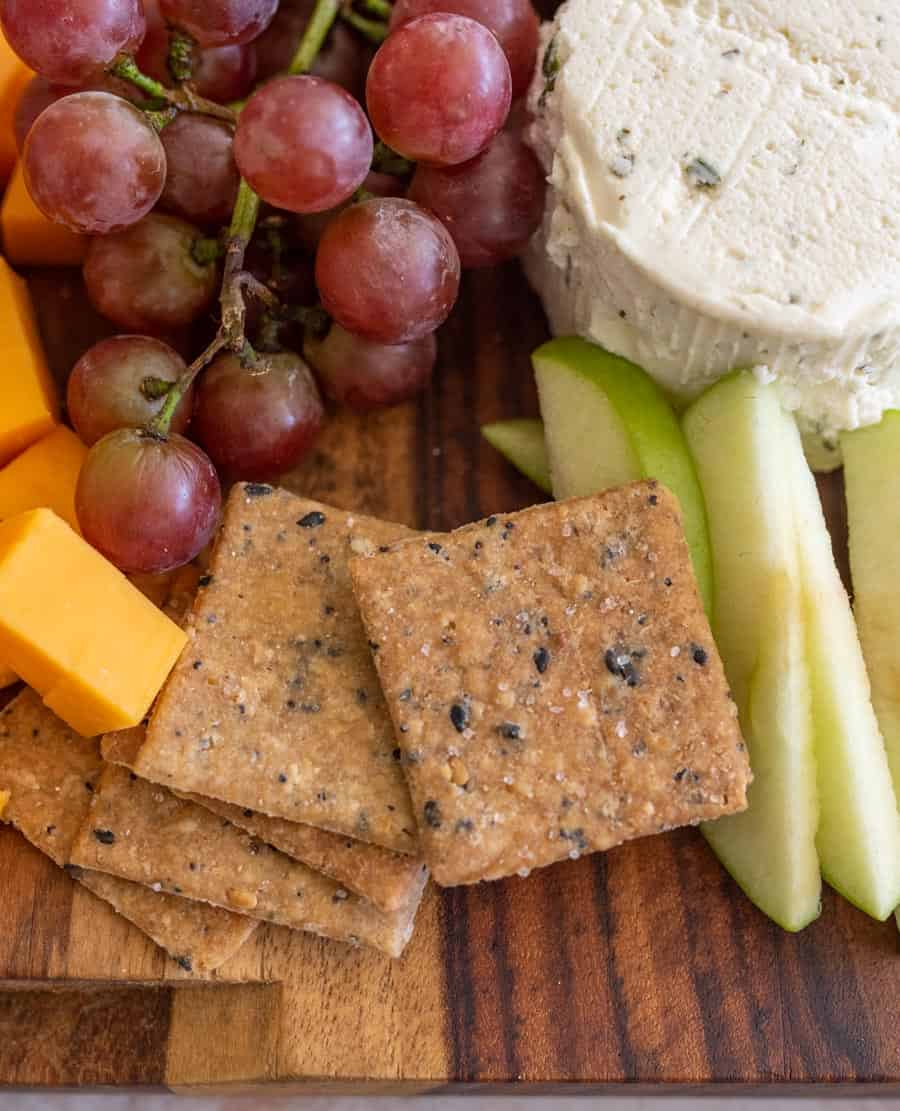
- 3-4 Cheeses: think cheddar, swiss, and pepper-jack. You can add Parmesan, simple goat cheeses, or something like an herb and garlic cheese as well. No need to pick cheeses you don’t know, just cut the usual cheeses into different shapes or serve them whole (like the parmesan).
- 3-4 Fruits and 3-4 Vegetables: this helps to fill in the board, is a familiar option for kids, and they look pretty. Pick fruits and vegetables that are in season and pick ones that are different colors from the others. Apples and grapes are staples and go well with the cheeses.
- 2-3 Meats: sticking with the theme of simple go for cubed ham, pepperoni, and summer sausage.
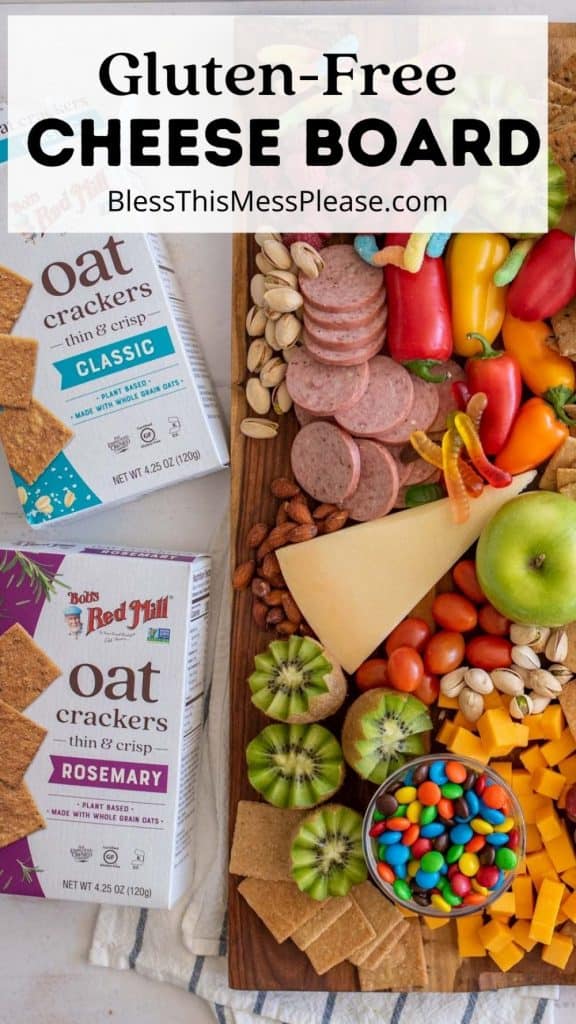
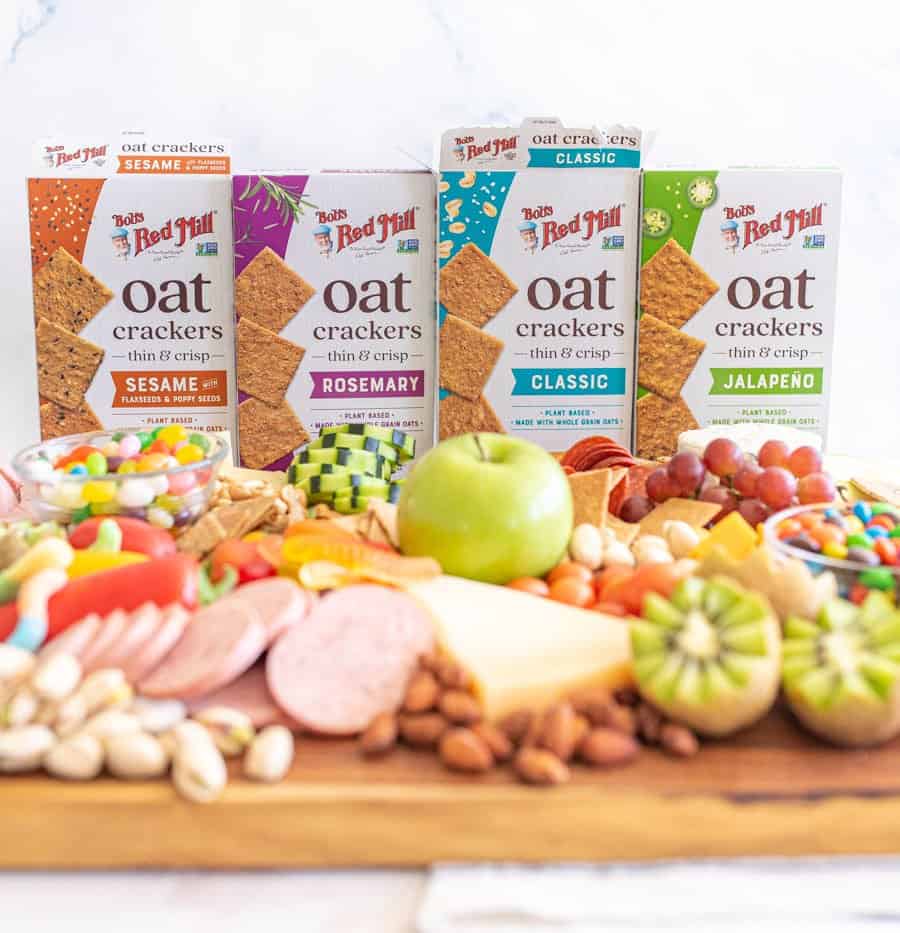
- Crackers: when I’m taking a board like this to a party I always load it up with gluten free crackers (and check the cheese/meats) so that everyone can enjoy the spread! I love Bob’s Red Mill new Oat Crackers. Highly recommend.
- Candy and Nuts: I pick bright candies that don’t melt so that the board can be eaten outside at a picnic.
See the recipe card below for full information on ingredients and quantities
How to Make a Family Friendly Cheese Board
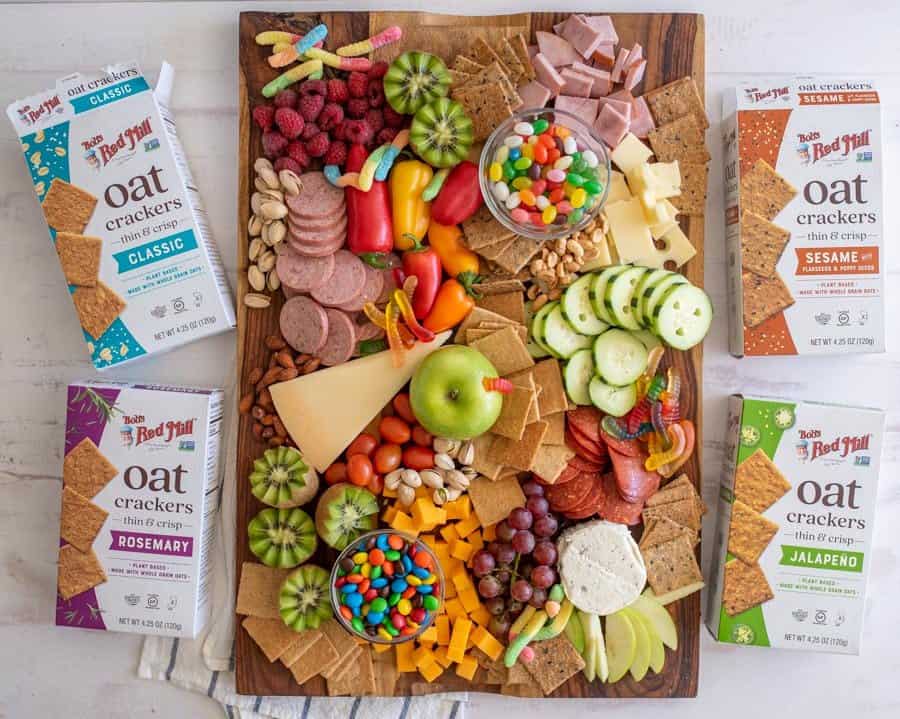
Step #1. Find a large cutting board or pretty rimmed baking sheet. Arrange the meats and cheeses on the board.
Step #3. Add crackers in the main spaces left.
Step #2. Arrange the fruits and vegetables around the meats and cheeses.
Step #4. Place the candies and nuts in small dishes in the remaining spaces. Serve right away or wrap well in store in refrigerator until ready to use.
Expert Tips
- If you are planning on taking the board with you somewhere you can get your board all ready, prep the board right before leaving, and them wrap it up well in plastic wrap and travel with it.
- If you are traveling farther than that, you can cut up your meat, cheese, fruits, and veggies ahead of time and just keep them in containers and assemble on site. This is normally what I do.
- Don’t feel obligated to buy fancy meats and cheeses you don’t know if you like, are super expensive, or you can’t even pronounce, especially if you are taking the board to a party. People love the look of a cheeseboard and most appreciate eating things they already know they like. Save the fancy cheeses for a smaller board at home where you can experiment a little more.
- Add variety and interest by cutting things into different shapes and in fun ways and by varying the colors. If you picked a red apple, get green grapes. Variety is really what makes the presentation pop.
- I use cutting boards for my cheese boards! I have a variety of boards that I’ve gotten on Etsy, had locally made, or bought at Ross or Home Goods. I use them as cutting boards, serving trays, and cooling racks for hot pans when they aren’t being used as cheeseboards so I don’t mind keeping them on hand.
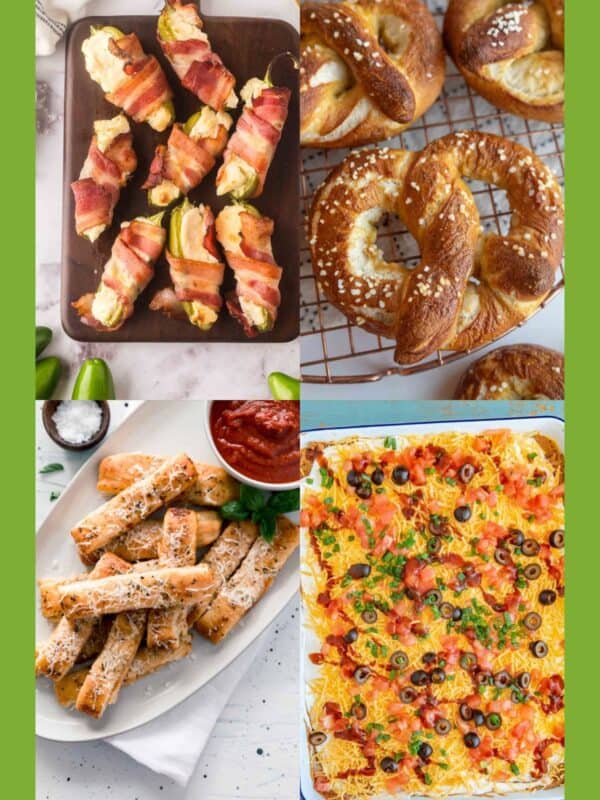
More Appetizer Recipes to Consider
Dip Recipes
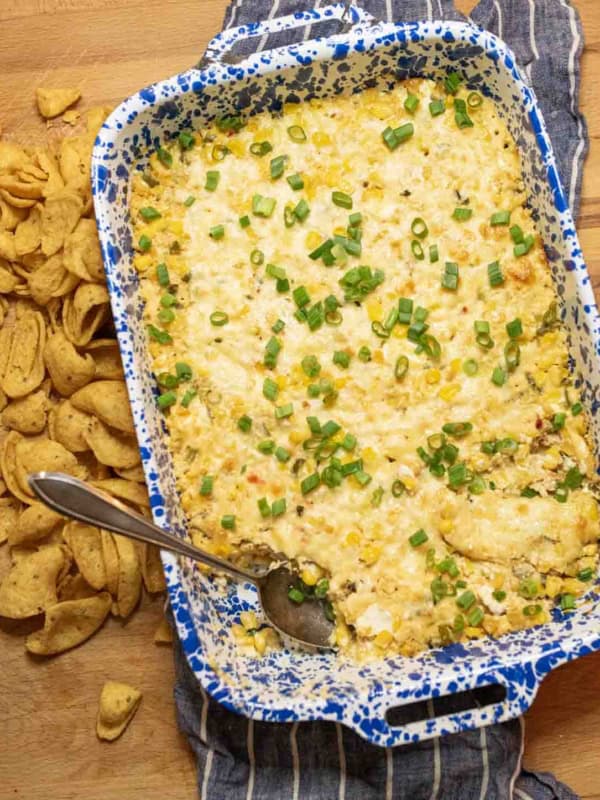
Spicy Hot Corn Dip
Beef Recipes
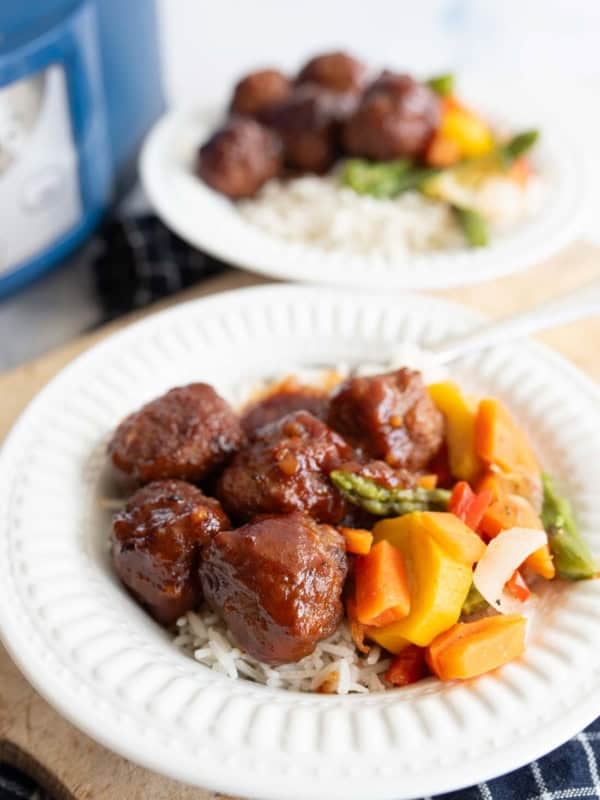
Slow Cooker Garlic Honey Meatballs
Dip Recipes
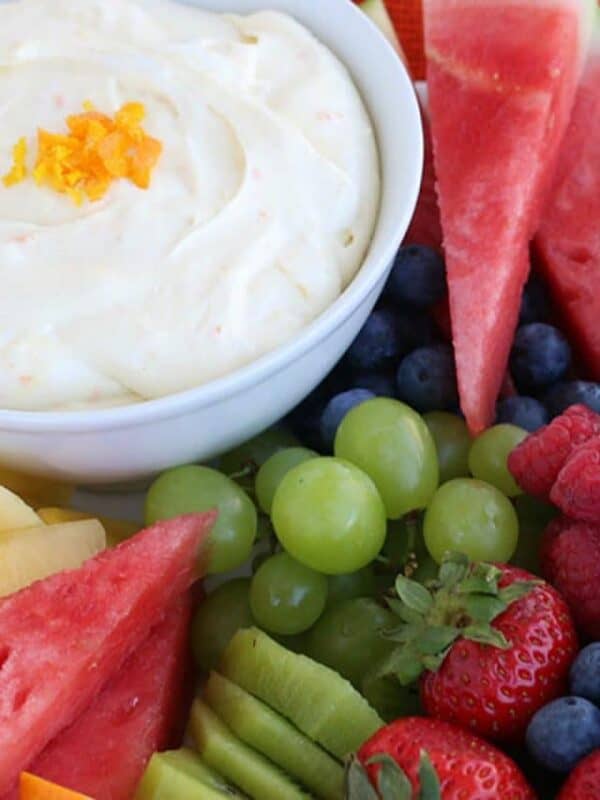
Orange Marshmallow Fruit Dip Recipe
Did you make this recipe? Leave a ⭐️ review and share it on Instagram, Facebook, or Pinterest!
Family Friendly Cheese Board
Ingredients
- 3-4 simple cheeses, Think cheddar, swiss, and pepper-jack. You can add Parmesan, simple goat cheeses, or something like an herb and garlic cheese as well.
- 3-4 fruits and 3-4 vegetables, This helps to fill in the board, apples and grapes are staples and go well with the cheeses.
- 2-3 simple meats, Go for cubed ham, pepperoni, and summer sausage.
- Gluten-free crackers, I love Bob's Red Mill Oat Crackers. Highly recommend.
- Add fun extras like candy and nuts, Pick things that won't melt if taking to a party like gummies or jelly beans.
Instructions
- Find a nice large cutting board or a pretty rimmed baking sheet.
- Start by adding the meats and cheeses to the board since they take up quite a bit of room. I like to clump them together by the type of meat or cheese but don’t feel like you have to keep things from touching.
- Add your fruits and veggies next.
- Add the crackers in the main spaces remaining.
- Put the candy and nuts in little dishes and/or in the few smaller spots left, these are kind of your garnish, so use them to make the board look full.
- Serve right away or wrap well and stick in the fridge until you are ready to party (can be made a few hours ahead of time. If you need to make it farther ahead of time don’t add the crackers until you are ready to serve so that they don’t get stale).
Notes
- You can’t mess this up! One key is to let the board look full so don’t try to keep things from touching.
- Add your favorite things or what you have on hand – you just want a variety of each.
- Cut the cheese, fruits, and veggies into different shapes to keep it interesting to look at it and help people tell the cheeses apart.
- Aim for a mix of colors and textures – different textures of cheeses, fruits, and vegetables to complement and contrast the rest of the things on the board.


