I’m so proud of my coop. I have had a hard time adjusting to the fact that the chickens are pooping all over it. I knew they would do that, but it hasn’t made all the poop any easier. All in the name of fresh eggs, right?
I had a few things in mind when I started. I want the coop to be portable so that I could move it around the yard and not kill the grass in any one spot. I also wanted it to be totally enclosed, so that I could leave the birds in it if I needed to for a long time and not feel bad, as in go on vacation and feel like they would still be happy in their home. I also wanted to have a way for the ladies to access the yard on days I wanted them to roam around.
I spent around 18 hours building it and would say I did 83% of the work by myself. Thomas only helped me with the roof which I was struggling with. I am so glad that I did this project. This was my first real experience with power tools which I was previously nervous around. Now I have gained great confidence in my ability to build things and I can start on other projects of this type that I’ve been wanting to do for a while. Thomas isn’t the only engineer in the family, huh?
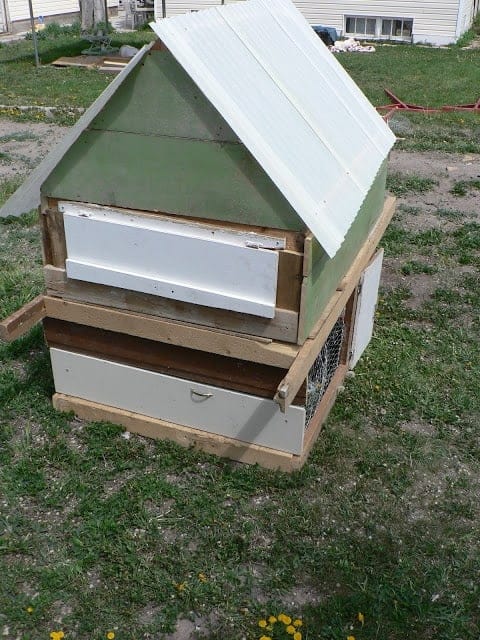
The finished coop is about 3.5 feet wide and 6 feet tall. The white door here is the access door to the nesting boxes. It allows easy access to where the birds lay so that the kids can help collect the eggs. The door is from the old kitchen cabinets.
This side of the coop is where the birds can access the yard when I want them to. The little door at the bottom can be opened during the day so that they can roam. Again, the door was part of the kitchen cabinets.
The string that you see here is attached to the ramp that lets the ladies access the top of the coup from the bottom. I wanted the top area to be able to be closed off at night to help keep the ladies safe and to help keep the cold out in the winter. The ramp is hinged, so when I pull on the string it pulls the ramp up and closes off the top area.
And I bet you didn’t see this coming! This is why I needed help with the roof: it hinges open. I wanted easy access to the top to clean it out and to change their food and water.
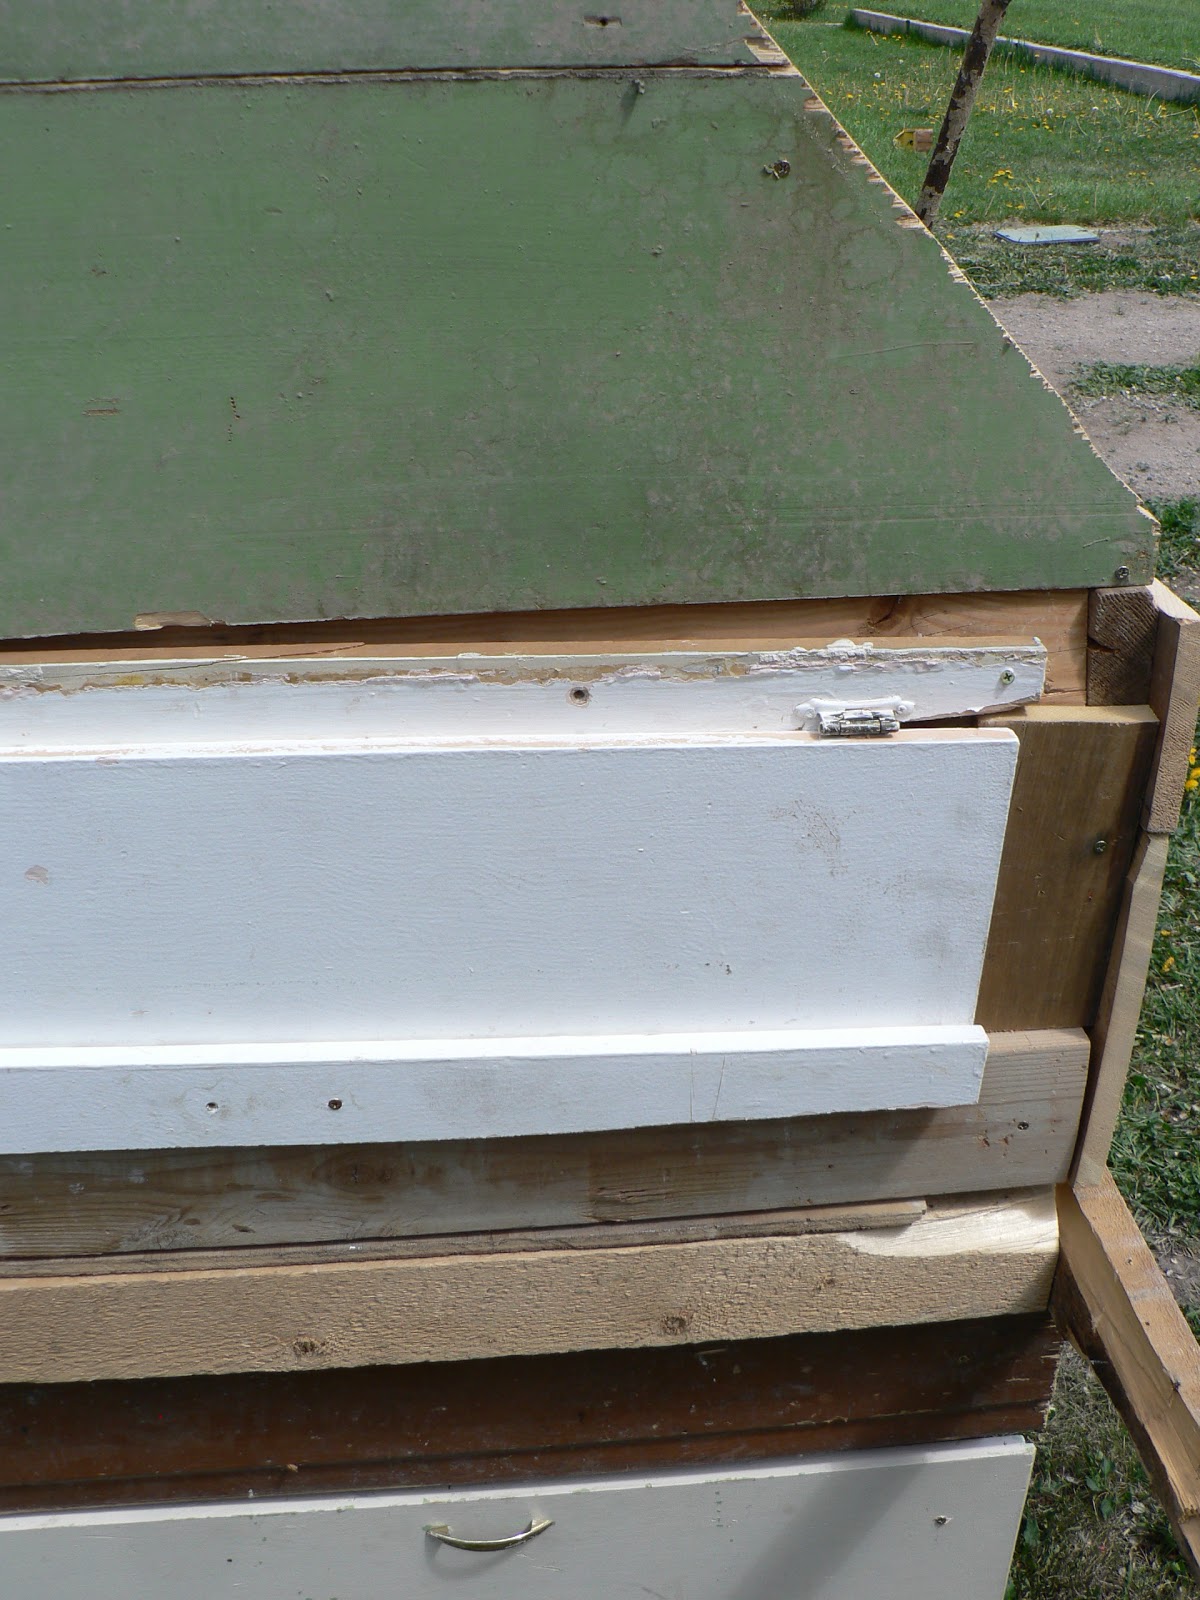
Here are the three nesting boxes. The white at the back is the door that opens to gather the eggs.
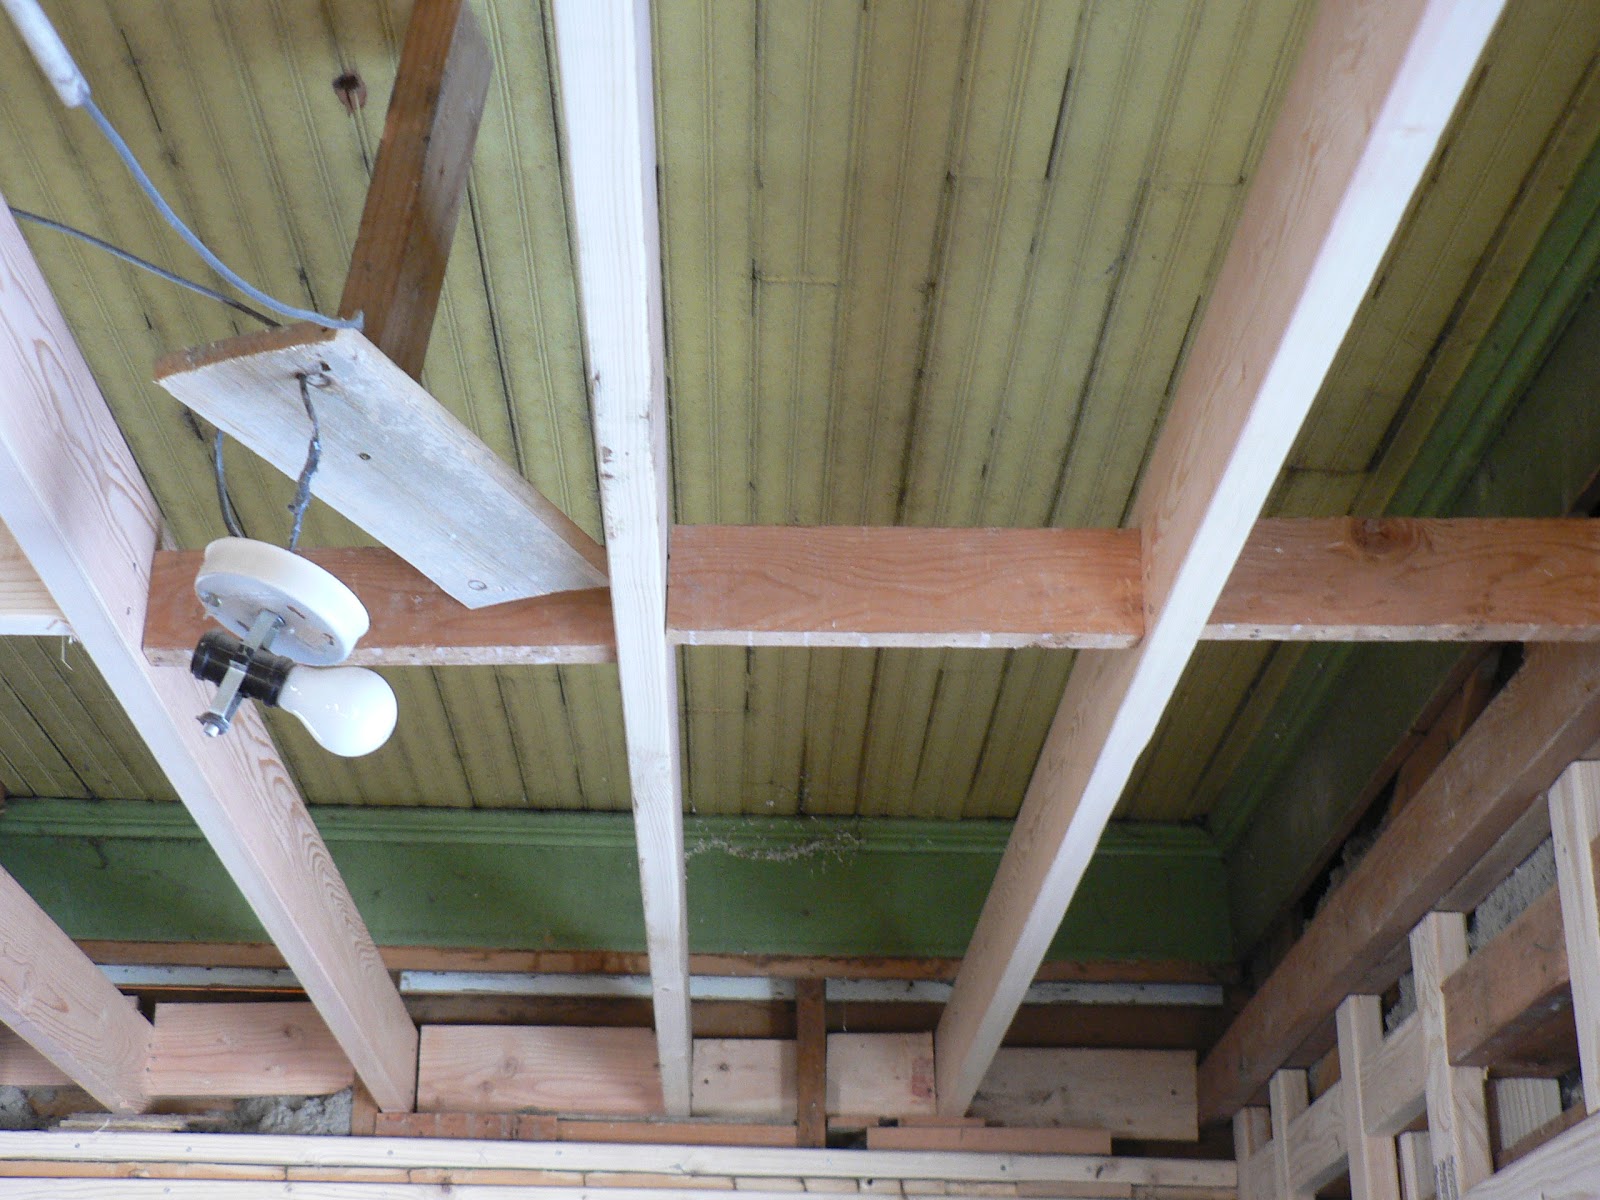
Chickens like to sleep sitting on a stick, which is called roosting. I wanted the birds to have a natural roost (not just a board) and so I used a stick from our apple tree. I’m excited to see them sitting on it. Won’t that be cute? And here is my string to pull up the ramp.
I put on some snazzy boards that stick out on each end at the handles to carry the coop.
After I took a few pictures I filled the top with straw in hopes of keeping things a little cleaner. I plan on changing the straw as needed. So far the straw seems to be working and they like to poke around in it.
Here is a picture of some of the cabinets that I used which used to live in my kitchen. Why did we tear this out again? If you are new here, you can check out our crazy remodel under the “Our Biggest Mess” tab at the top.
The rest of the wood came from the house too. The green boards were above the ceiling in our living room and kitchen. Here they are in the house.
Thomas is a saver, but I was the one who was packing all the boards out to the barn and pulling out the nails. I thought he was a crazy man at the time, but now I’m so glad he insisted on saving lots. Wood is expensive!
Here’s the breakdown of what I paid for the coop:
20 feet of plastic roofing: $47
10 feet of chicken wire: $6.50
7ish pounds of screws: $8
2 locking clasps for the doors: $5.50
Straw : $4
Wood: Free(ish) We did pay for the house…
Total out-of-pocket cost for me: $71
I’ll be honest. I was shocked at how much the roofing jazz was and I spent a lot more than planned. Still cheaper than the coop at IFA that was half the size and a little over $500 with tax.
And since I’m in a numbers mood here’s the rest of what I’ve spent on my birds:
5 chicks from IFA: $15
3 chicks from a friend: Free
Waterer: $3
Feeder: $2
Chick starter (food for very young chicks): $10
Egg laying mash (what they eat now): $16
Heat lamp: $10
Bulb for heat lamp: $10
Total: $66
Plus the coup: $71
Grand total: $137
And just because we can:
I buy fresh eggs for $2 a dozen right now. It will take 70 dozen eggs to recoup my cost. Chickens lay an average of 20 dozen eggs in their life time, so I should get around 140 dozen eggs from these birds (I am 99% sure one is a him, so I only have seven that will lay). Once you add in the continuing cost of food and electricity to use the heat lamp I should gain my money back sometime next year.
There you have it. The coop and what it costs to start raising a small brood of chickens. Wasn’t that fun? Who else wants their own chickens now?
I really want to paint a sign to hang on the coop that says something, but I just can’t figure out what it should say. Something about chickens or eggs, obviously. Any ideas?


Where are the plans with measurements? I need information on lengths and widths…
How do get the plans?
I love the coop! These plans are so helpful.
I added this coop to my ‘Ultimate Chicken Coop Guide’ where you can search over 70 coop plans for inspiration: http://www.milefour.com/blogs/chicken-coop
Thank you so much for including me, such an extensive guide!