This post may contain affiliate links. Please read our disclosure policy.
This is the perfect Candied Walnuts Recipe, sweetened with maple syrup — just 2 ingredients! In only 10 minutes, you’ll have a sweet and crunchy snack or addition to salads and desserts.
This quick candied nuts recipe takes just 10 minutes! It’s perfect for when you need a last-minute addition to salads, a quick snack, or an elegant garnish for desserts.
My 2 Best Tips For Making This Candied Walnuts Recipe
Use Low to Medium-Low Heat: Patience is key with this recipe. Cooking over low heat ensures the maple syrup reduces slowly and evenly without burning the nuts. High heat will burn the nuts before the syrup has time to crystallize properly.
Stir Frequently and Consistently: Constant stirring prevents hot spots and ensures even coating. This becomes especially crucial in the final minutes of cooking when the crystallization process is happening quickly!
🩷 Melissa
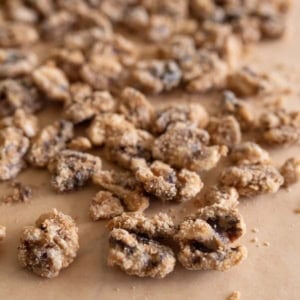
You only need raw walnuts and pure maple syrup to create these delicious candied nuts. No complicated ingredient lists or hard-to-find items – just wholesome, natural ingredients that deliver amazing flavor.
Unlike recipes that use refined sugar, these candied walnuts get their sweetness from pure maple syrup, which adds a rich, complex flavor that perfectly complements the nuttiness of the walnuts.
These candied walnuts are perfect for everything from weekday salads to holiday entertaining. Add them to trail mix, sprinkle over yogurt, toss with greens, or enjoy them as a standalone snack.
Candied Walnuts Recipe
Ingredients
- 2 cups raw walnuts, (I like whole nuts better than chopped or pieces.)
- 1/2 cup pure maple syrup
Instructions
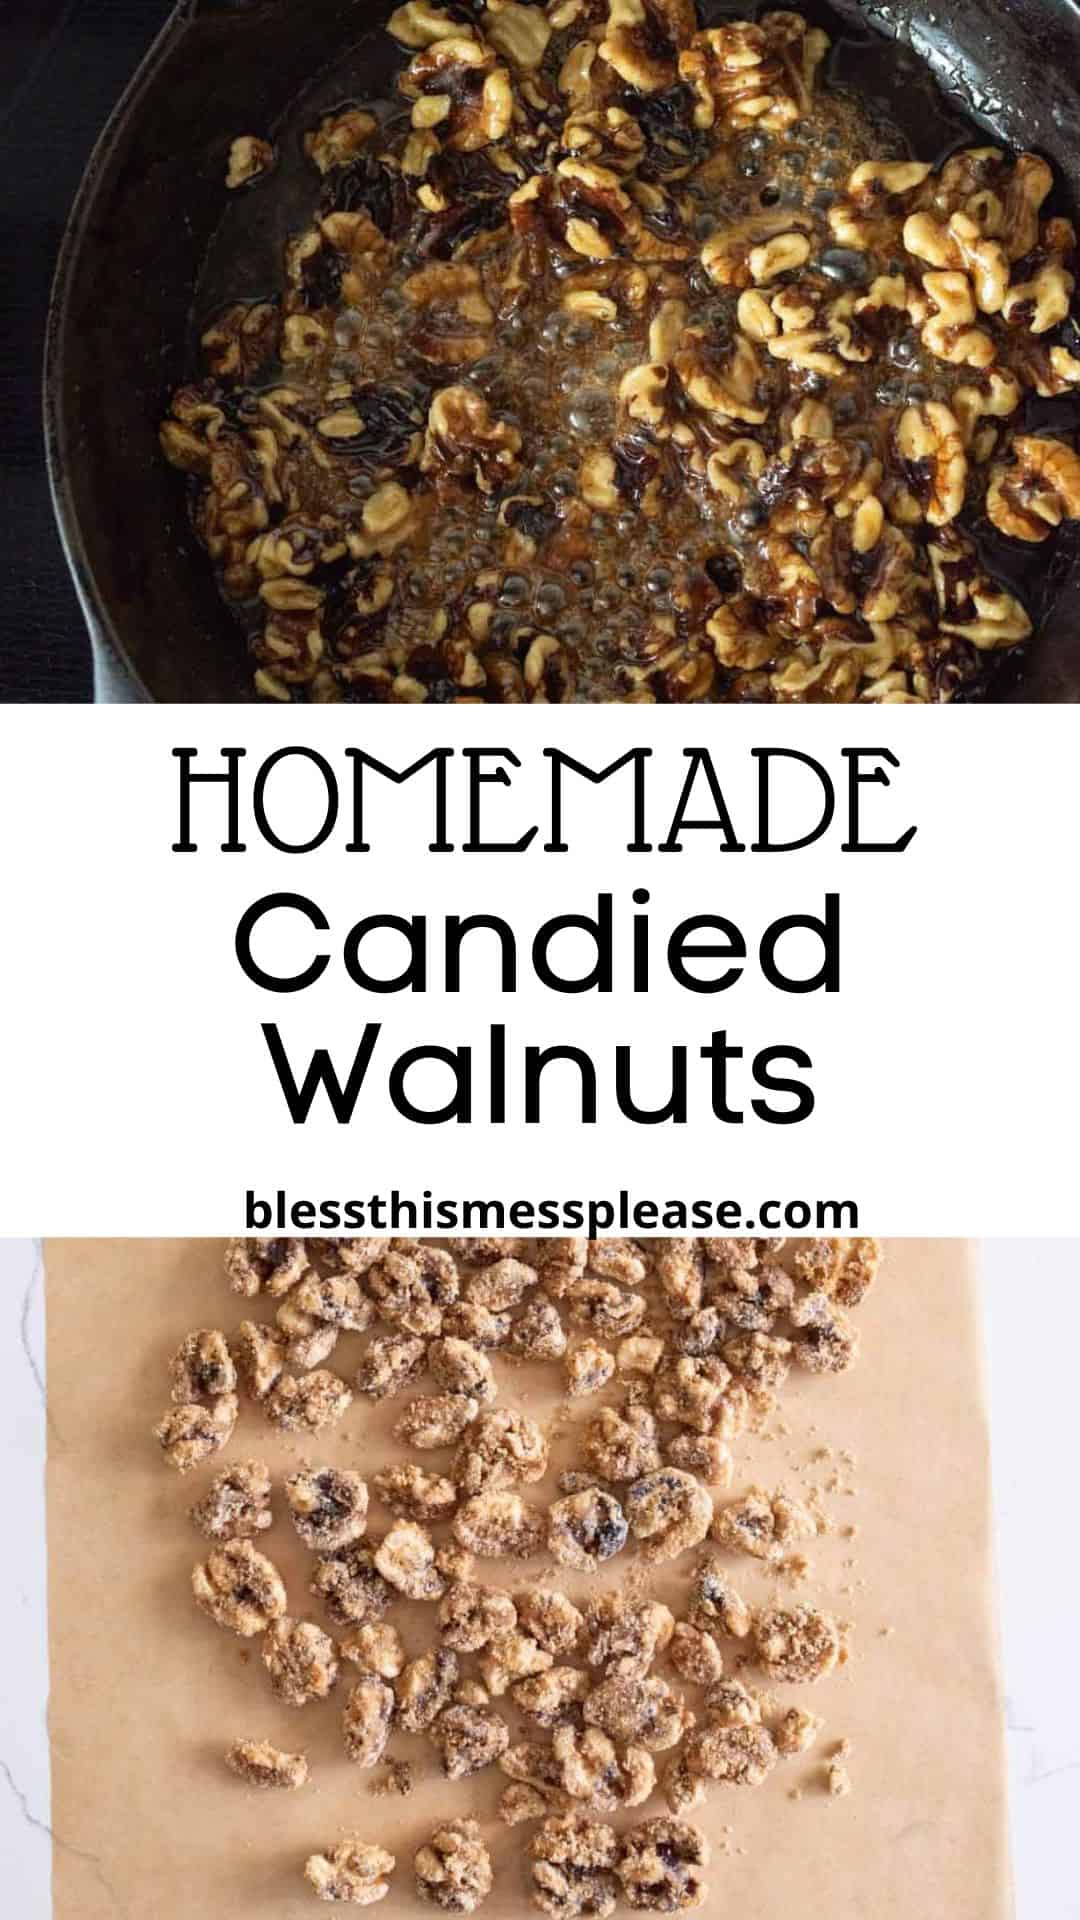
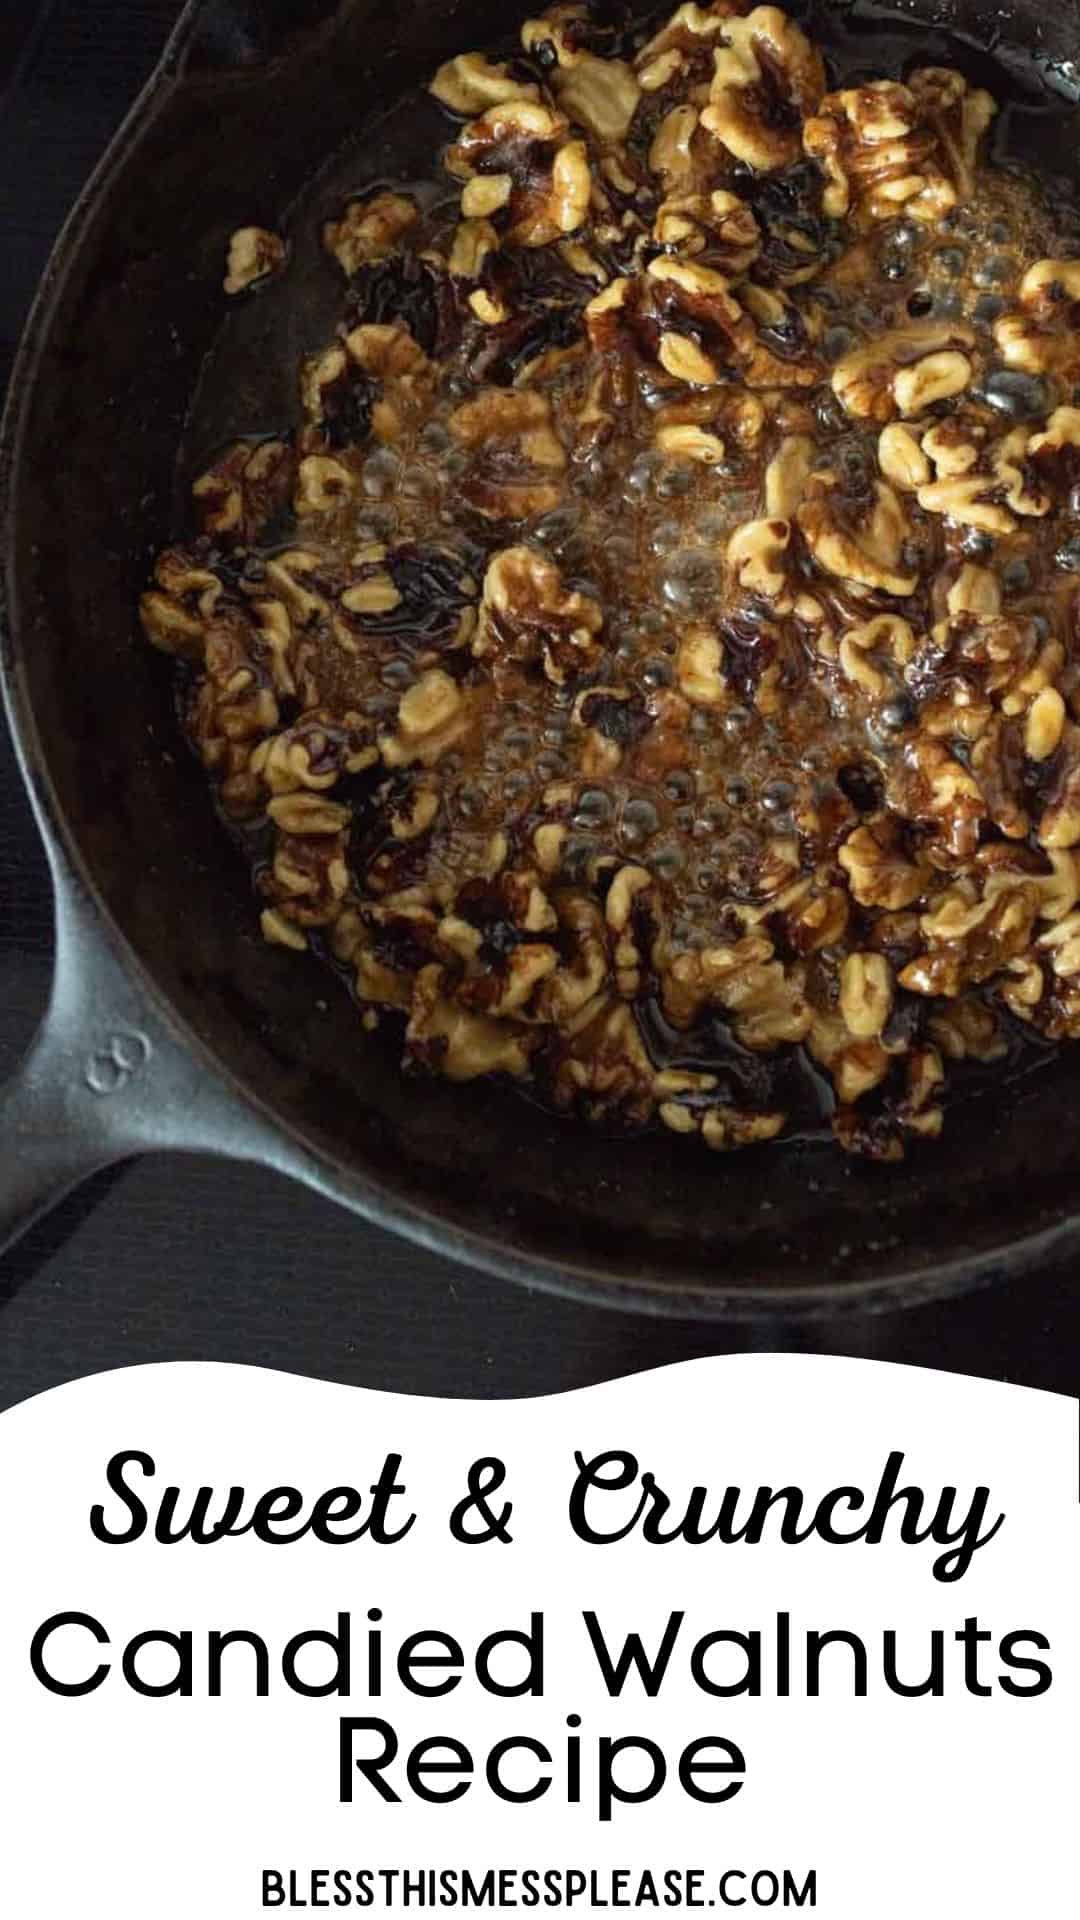
- In a heavy bottomed skillet or pan, heat the walnuts and maple syrup over low to medium-low heat, stirring very often. The maple syrup will start to bubble and you'll see the extra moisture evaporating.
- Keep cooking and stirring until all of the extra moisture has evaporated and the maple syrup sugars starts to crystallize and stick to the nuts. This should take 5-8 minutes. Make sure you stir frequently so that you don’t burn the nuts. This is especially important at the end of the cooking time.
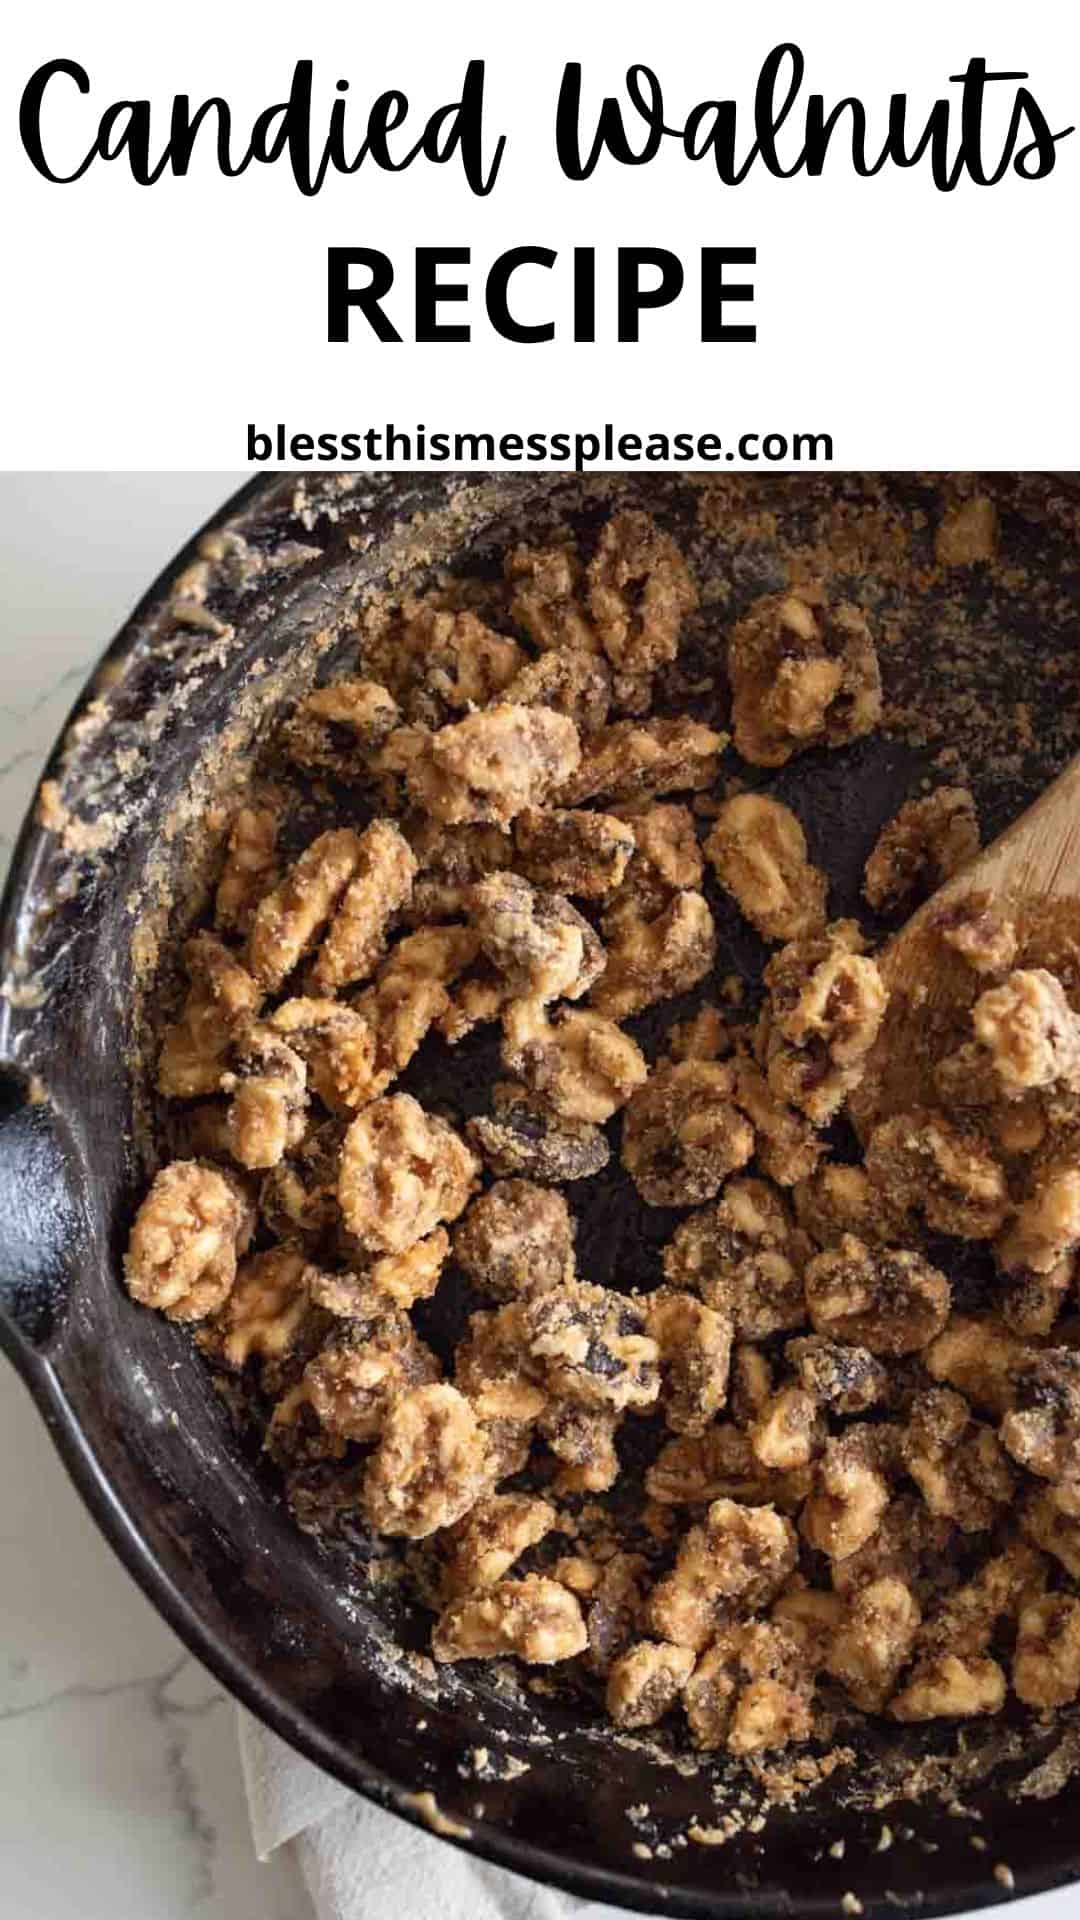
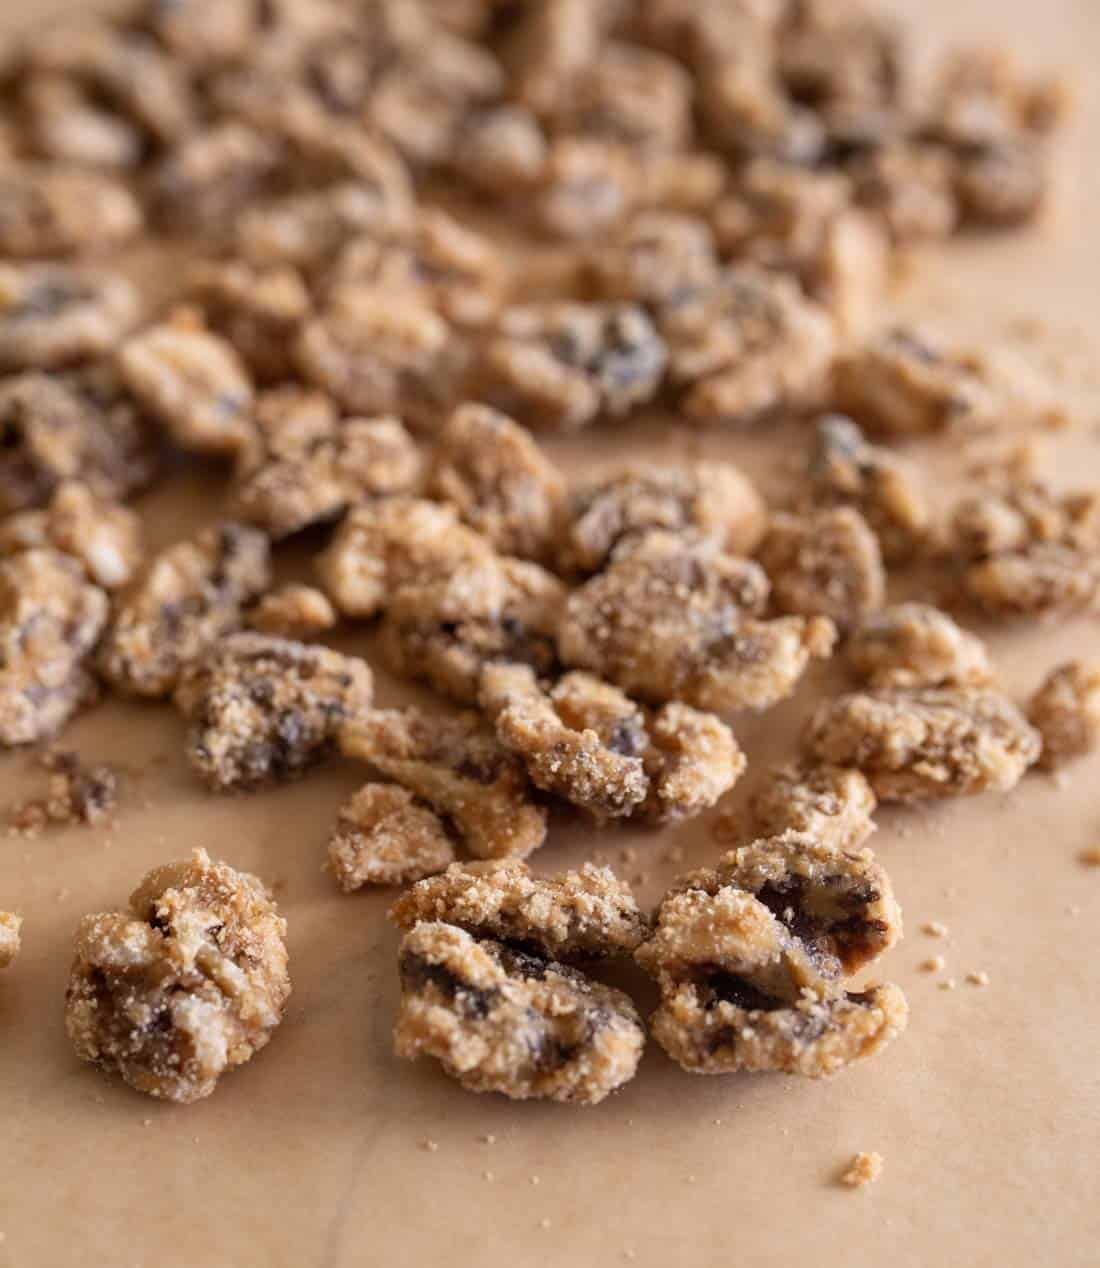
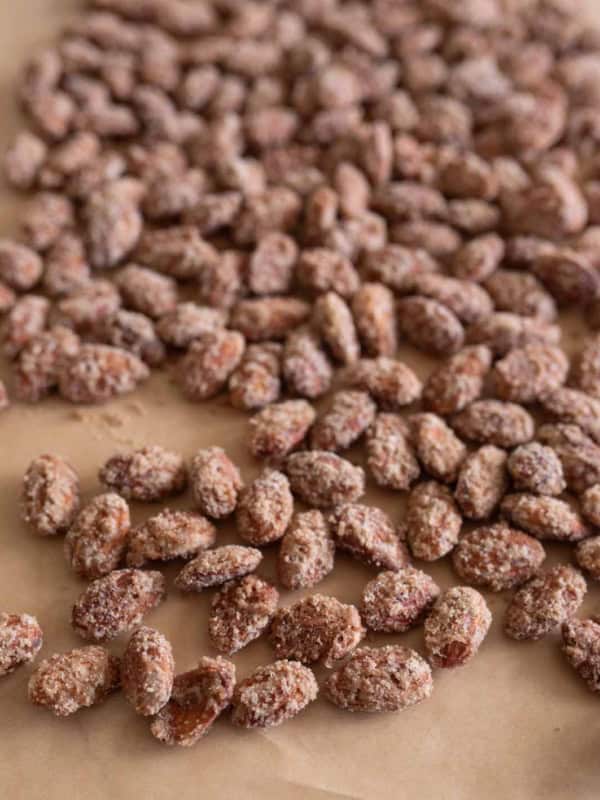
- When the moisture is all gone, the nuts will have no shine to them and you’ll see the granulated sugar sticking to them. Turn the nuts out onto a baking mat or a piece of parchment (or waxed) paper and let the nuts cool.
- Enjoy just as they are or add to your favorite salads, trail mix, granola, popcorn, or dessert.
Notes
- You’ll know when the walnuts are done when it looks dry, and there are no shiny spots left on the nuts or in the pan.
- The sugar in the maple syrup will crystalize and you’ll see the little chunks of it sticking to the nuts right before they are done.
- You can use almonds or pecans in place of the walnuts if needed.
- You can add spices to this at the beginning of the cooking time if you like spiced candied nuts (like cinnamon or pumpkin pie spice!). You can also add 1/4 to 1/4 teaspoon of salt if you’d like.
- Don’t use imitation maple syrup or sugar free maple syrup. These syrups will cook down, and the nuts will get thick and sticky but they won’t finish crystalizing. They’ll just remain sticky and wet—blah.
- Add spices like cinnamon, pumpkin pie spice, or even a pinch of salt (1/4 to 1/2 teaspoon) at the beginning of the cooking process for extra flavor dimension.
Nutrition
How To Make Candied Walnuts With Maple Syrup
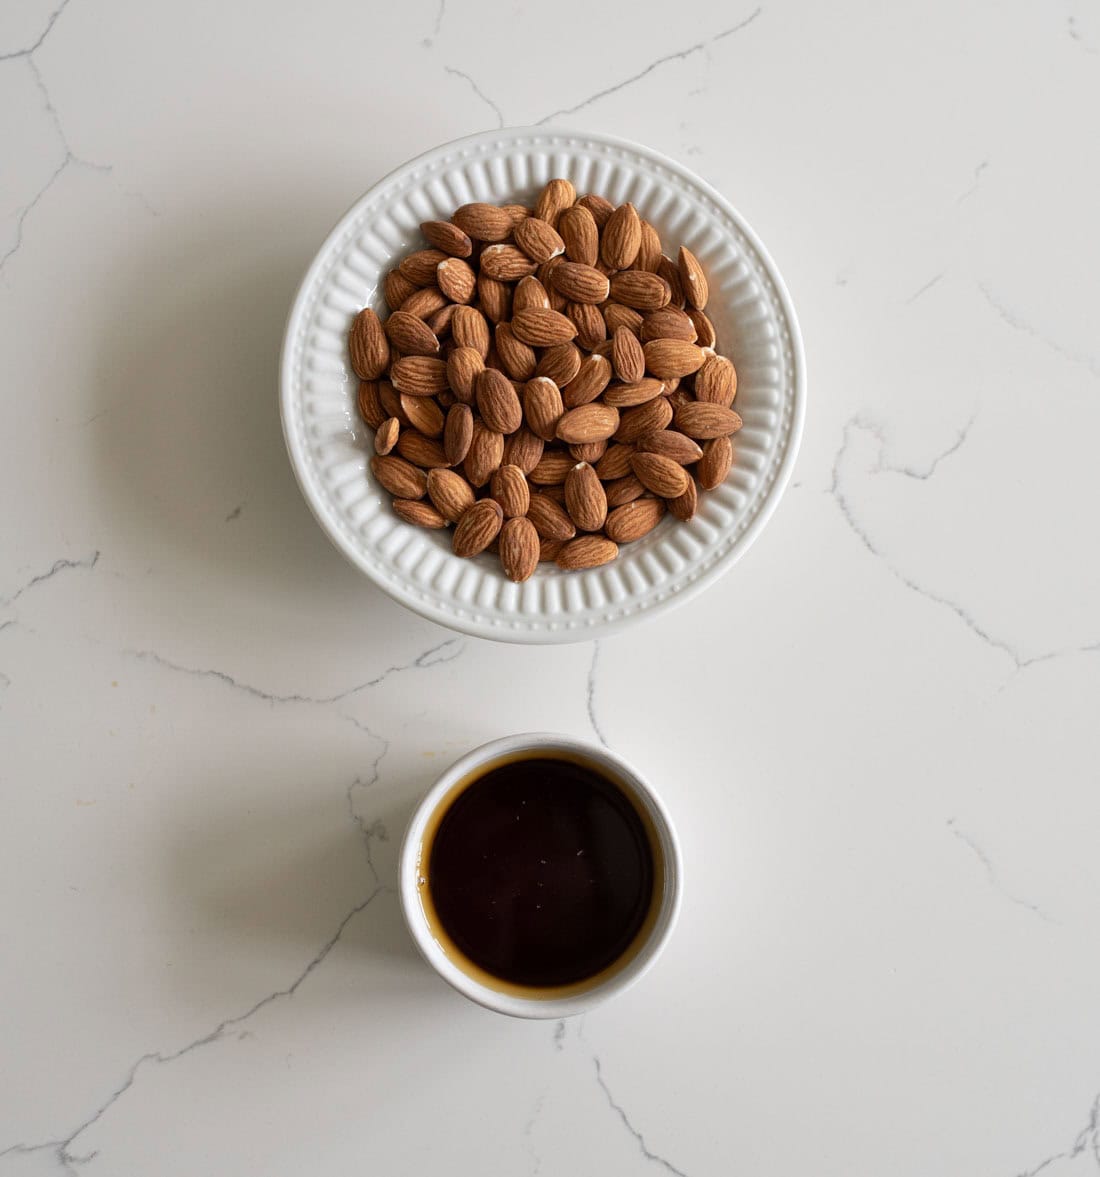
Step 1: In a heavy bottomed skillet, heat the walnuts and maple syrup over low to medium-low heat, stirring very often. The maple syrup will start to bubble and you’ll see the extra moisture evaporating.

Step 2: Keep cooking and stirring until all of the extra moisture has evaporated and the maple syrup sugars starts to crystallize and stick to the nuts.
Step 3: Make sure you stir frequently so that you don’t burn the nuts. This is especially important at the end of the cooking time!
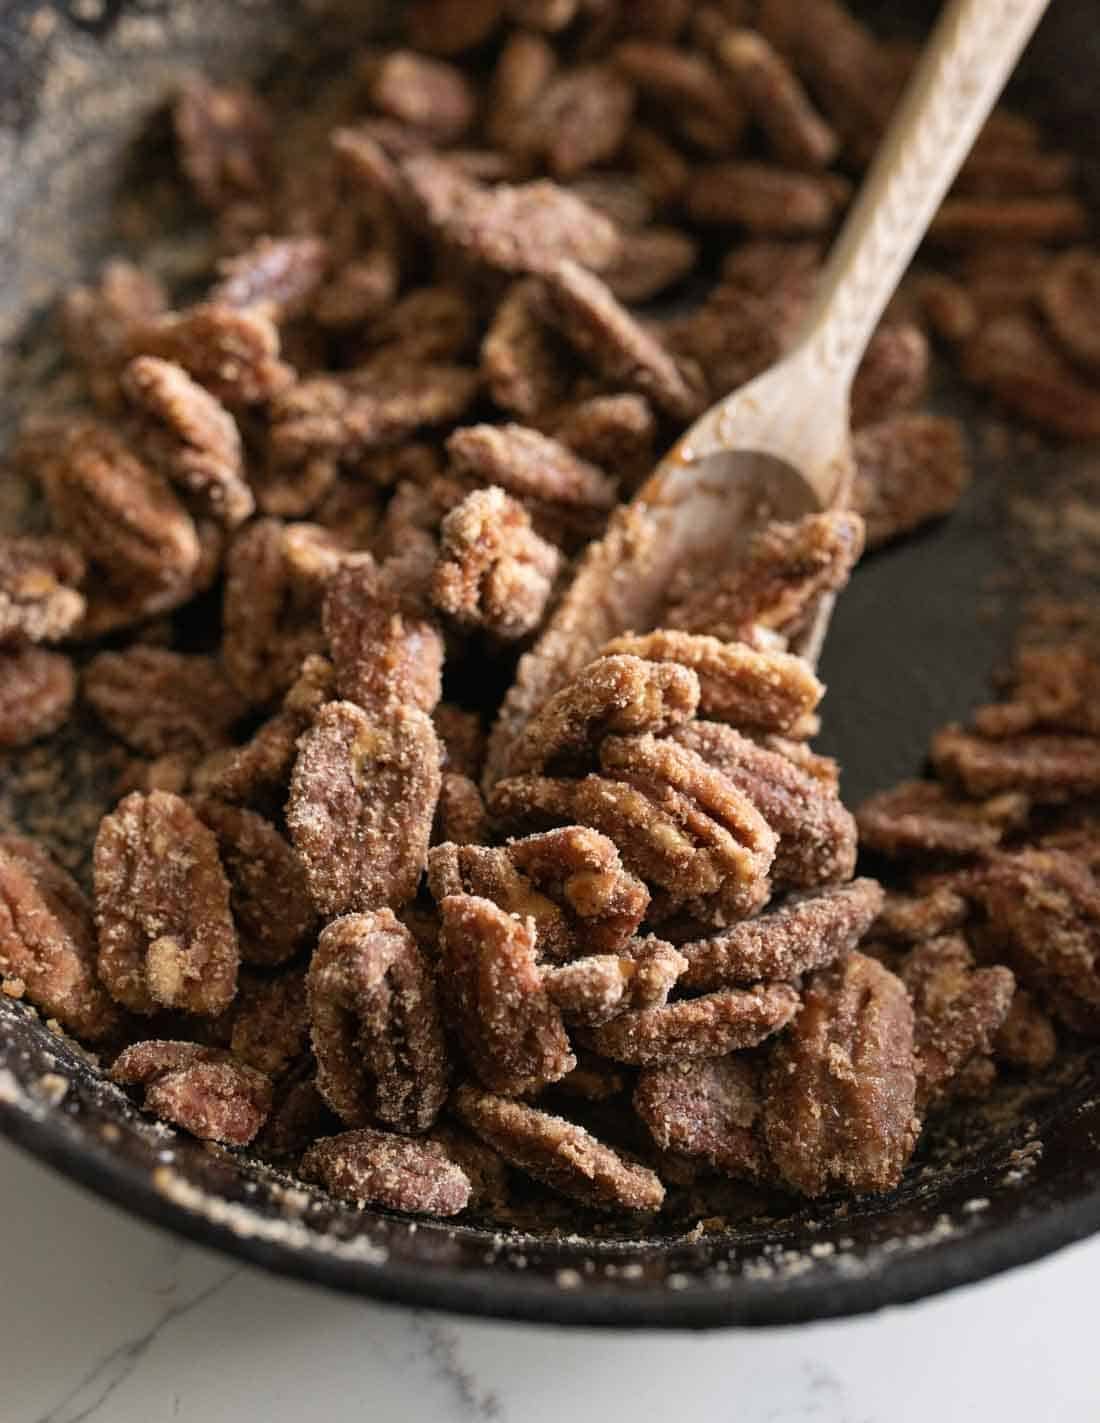
Step 4: When the moisture is all gone, the nuts will have no shine to them and you’ll see the granulated sugar sticking to them. Turn the nuts out onto a baking mat or a piece of parchment paper and let the nuts cool.
Recipe FAQs
This recipe works wonderfully with almonds or pecans. The cooking time remains the same, but keep a close eye on smaller nuts as they may cook slightly faster.
Real maple syrup contains natural sugars that crystallize during cooking, creating the signature coating on the nuts. Sugar-free and imitation syrups lack these natural sugars, so the nuts will remain sticky and wet instead of developing the proper crystallized coating.
The nuts are ready when they look completely dry with no shiny spots remaining on the nuts or in the pan. You’ll see granulated sugar crystals sticking to the nuts, and the maple syrup will have completely evaporated.
More Delicious Candy Recipes To Try

Did you make this recipe? Leave a ⭐️ review and share it on Instagram, Facebook, or Pinterest!


I use this recipe for Christmas and it was amazing everybody loved it. Sorry I didn’t get any pictures but I know I’ll be making it again. I used pecans and I added smoked paprika and cinnamon they were absolutely delicious thank you for this recipe
This comment was prompted by your candied walnut recipee. YUM!!!
Unlike other blogs, your site is clear and specific. I like the pictures and LOVE the videos of you entire cooking process. Cookbooks often leave out information critical to success of an amazing recipee. I am particularly impressed with your candied walnut recipee as it clearly shows the use of a cast iron skillet. (I have a very old one passed down from my grandmother, born shortly after the civil war and it is amazing!) Thank you for showing the pans you are using as they can make or break a recipee. I would stress this in your recipees/books. OUCH!
The pan does help doesn’t it Judith!