This post may contain affiliate links. Please read our disclosure policy.
A few years ago Thomas and I were Webelos leaders and we had a lot of fun learning about the Cub Scout organization. 2010 was the Boy Scouts of America’s 100th Birthday. We celebrated in our February Pack Meeting by having a dinner and cake contest, which turned out great. We asked all of the boys who wanted to participate to decorate a Cub Scout-themed cake. All of the entries were voted on and awards were giving. We then ate cake! I love a contest turned dessert.
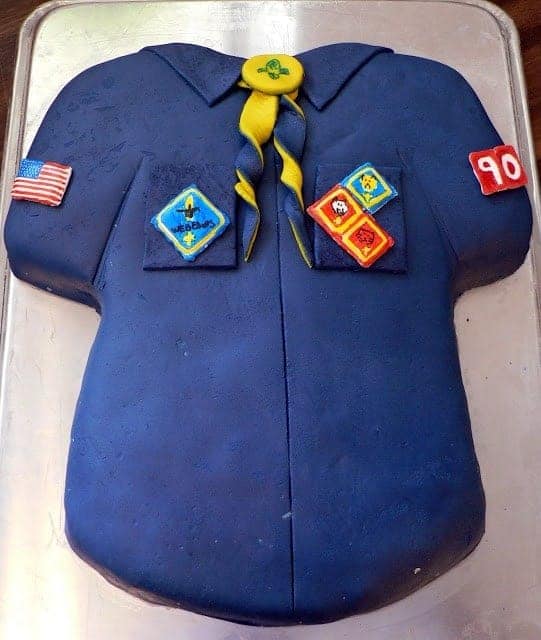
I wanted to bring a cake too, though I didn’t enter the contest. I had a close friend come and give me a Fondant 101 class in my kitchen and here was the end result:


I just thought I’d pass on the cute cake idea for all you mothers of Cub Scouts and Boy Scouts. Now that my husband is the Scout Master in our area, I have a new appreciation for all those moms of Scouts.
Annie’s Eats has an awesome post on making your own marshmallow fondant and great tips for using it. I think I’m going to try it soon!


It looks great! I bet the boys loved it.
Did you make the neckerchief & clasp out of fondant also? Great job!
Yes Ma’am! Fondant for both the neckerchief and clasp, with the decoration on the clasp from the edible ink markers.
Did you pipe the patches onto wax paper in the size that you wanted them to be and then let them harden? How did you attach the patches to the fondant?
Thanks so much!
Yes! Have you ever take the Wilton Cake Class 2 where you learn “color flow”? It is essentially stiff royal icing, piped into the outline of the design on waxed paper, then you thin the icing with water and fill in the inside of the design with that. So I determined the size of patches I wanted on paper, put the paper under the wax paper (since you can see through it) and traced my outline from that. It does take some time to dry, depending on the weather. I live in the dessert and can get away with making them a day in advance. I would plan on 2 or 3 days for drying the royal icing pieces if you are in a more humid area. Once they are dry they last forever.
Interesting fact: while remodeling our house I found Wilton boxed red royal icing roses in the WALL! Weird but cool. They are perfect and hard as a rock. So they really can last forever!
I would recommend making a double of each piece you need just in case you break or crack one while handling. Nothing is worse than putting all that work into a cake and then having the details fall apart last minute! Especially since you need drying time on these pieces and can’t just whip a new one out.
If you make something similar I’d love to see the end result! Happy Caking!
Oh, and I just used a smidge of royal icing to “glue” them to the cake.
that cake is beautiful!
That was a really cute cake. Also, loved the cookie bar idea.