How to Cook Pinto Beans in the Instant Pot
Learning how to cook pinto beans in the Instant Pot is a great and easy skill to know. Make perfect beans and enjoy them as a side dish or in entrees like chili or burritos!
Servings: 6 cups of cooked beans
Ingredients
- 1 pound about 2.5 cups dried pinto beans
- 8 cups of water
- 1 teaspoon neutral oil
- 3 bay leaves, 2 cloves garlic, 1/2 medium onion (all optional)
- Salt to taste
Instructions
- Rinse and sort your pinto beans (this means make sure there aren't any weird beans or rocks in the package).
- Add the beans to the insert of your pressure cooker. You do NOT need to soak your beans before cooking.
- Add the water and the oil.
- You can add an optional 3 bay leaves, 2 cloves of garlic (no need to peel), and a 1/2 an onion if you'd like. These will add more flavor -- great if you are eating these beans as a side. If you are just adding them to something like chili, you don't really need to add the extras. It's up to you. Just place them on top of the beans.
- Place the lid onto the pressure cooker, and move the valve to sealing. Adjust the pressure cooker to low pressure and set the timer for 35 minutes*.
- Once the cook time has elapsed, let the pressure cooker do a natural pressure release.
- After the pressure cooker comes down from pressure, remove the lid. If you used the bay leaves, garlic, and onion, use a small spoon or tongs to carefully remove them, and discard.
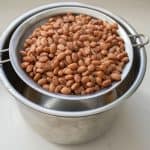
- Drain the extra water off the beans (I dump them into a colander or strainer and let them sit a minute so the extra water drains off well).
- Add salt to taste if you'd like, and serve warm or use in your favorite recipes that call for canned beans. A scant 2 cups of beans is close to a 15-ounce can.
- Store in an airtight container in the fridge for up to 3 days or in the freezer for much longer.
Notes
- In the picture, I quartered my onion, but it fell apart and was hard to get back out of the beans after they cooked. I would recommend not removing the root end of the onion, cutting it through root to stem, and leaving the half of the onion still all together (root end still attached). You'll be able to remove it from the pot after cooking much easier.
- *I feel like you have three cooking time options when it comes to beans in the Instant pot. First, you can cook them for 35 minutes, low pressure, and do a natural pressure release. This yields the best tender beans that keep their shape the best, but it's slow (natural pressure release can take over and hour in itself). They tend to be a bit creamier in the centers too but don't fall apart. If you have time, this is my favorite bean cooking method (works well for all the kinds of beans I have tried). Two, you can cook the beans for 50 minutes at low pressure and do a quick pressure release. This is faster and the beans are still tender and hold their shape. The third option is to cook them for 35 minutes on high pressure and do a quick pressure release. This is the fastest way, but you end up with a few beans that "blow out," or split when cooking, and lose some of their shape. I feel like the end result is a little less consistent too, you'll have a few over-cooked beans and a few barely under cooked beans. Great for making chili or refried beans, but my least favorite way to cook them when eating them as a side.
- I don't like to soak my beans before putting them in the Instant Pot. They tend to split and fall apart when I soak them first.
- There's something about beans -- they don't store in the fridge well. They seem to get "the funk" really quickly. You can store beans in the fridge for up to 3 days, but after that use them or move them to the freezer for longer storage. I portion out my beans into 1 to 2 cup servings and freeze them. Then I can pull them out as needed. They thaw and reheat well.
Nutrition
Serving: 1 of 6 cups | Calories: 268kcal | Carbohydrates: 47g | Protein: 16g | Fat: 2g | Saturated Fat: 0.2g | Polyunsaturated Fat: 0.5g | Monounsaturated Fat: 1g | Trans Fat: 0.003g | Sodium: 9mg | Potassium: 1053mg | Fiber: 12g | Sugar: 2g | Vitamin C: 5mg | Calcium: 85mg | Iron: 4mg