Crock Pot or Slow Cooker Yogurt
on Sep 17, 2017, Updated Feb 24, 2022
This post may contain affiliate links. Please read our disclosure policy.
Slow cooker yogurt is an easy, healthy and inexpensive way to make homemade yogurt without a yogurt maker. Prepare it in five minutes, go to bed, and wake up to a freshly made breakfast!
I have a few more yogurt recipes that you will enjoy. 4 Ingredient Healthy Strawberry Frozen Yogurt (5 minute recipe!), Homemade Fruit on the Bottom Yogurt Cups and 5 Easy Healthy Yogurt Bowl Ideas are all winners.
How to Make Slow Cooker Yogurt
Yogurt can be expensive and often times it has a long list of artificial colors, flavors, and who knows what else. So here is a super easy recipe to make your own slow cooker yogurt. It is plain yogurt, but you can add honey, jams, fresh fruit, and just about anything else you like. I also use it in place of sour cream in most recipes. This is a great way to to get organic yogurt on the cheap. You can buy a carton of organic milk and turn it into yogurt for about half the price of organic yogurt.
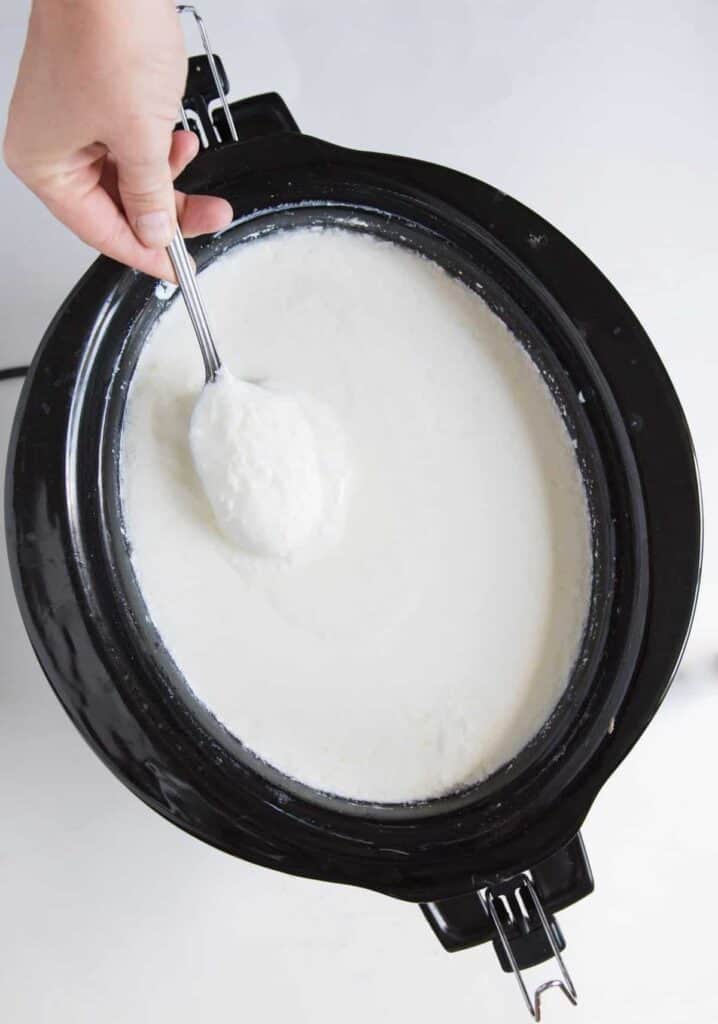
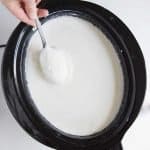
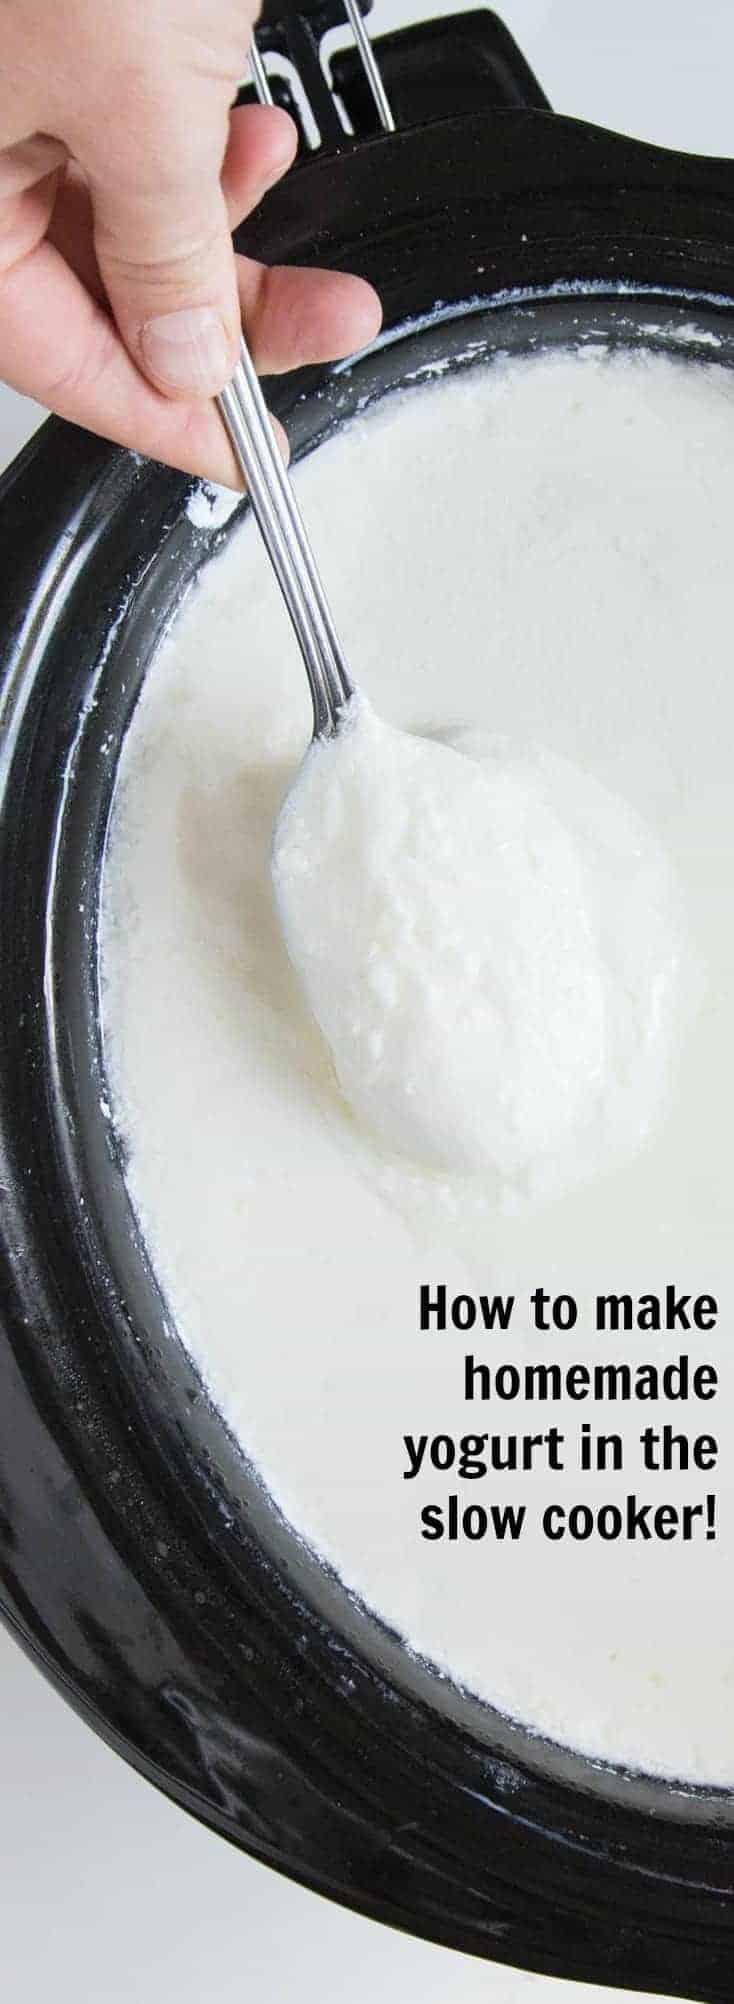
The recipe is so easy that it practically makes itself. You just have to commit a little time to the process! You essentially just use your slow cooker to scald the milk and then the heavy warm crock radiates heat all night long to help culture your new batch of yogurt. The hands-on time is about 5 minutes, though the waiting time is about 15 hours. I like to start this in the afternoon so that it’s ready to sit for its long 8-12 hour warm resting period overnight. We then wake up to fresh yogurt and I’ll serve it with fresh fruit and some homemade granola.
I really recommend straining this yogurt through 3-4 layers of cheese cloth for a few hours too. This helps it to thicken up to a more “Greek yogurt” consistency which my kids prefer (and it’s easier to eat). I explained more of how I do that in the tips and tricks section. Before you know it, you’ll know how to make homemade yogurt with your eyes closed.

Tips and Tricks for making Slow Cooker Yogurt
- I’d highly recommend getting a little instant-read thermometer to make homemade yogurt – it’s all about the temperature! I use this $10 thermometer all the time.
- The goal is to scald the milk which takes place around 180 degrees. So you could check it with a thermometer the first time to see if the “warm” setting is warm enough or if maybe an hour and 45 minutes would work on low. Once you figure it out, I don’t think you would have to use the thermometer every time.
- After the milk is scalded, the waiting time is meant to bring the milk down to around 115-110 degrees so that it’s still warm but won’t kill your yogurt culture!
- You don’t have to buy commercial plain yogurt every time. Just save 1/2 cup of your own yogurt for the starter for the next batch.
- I really recommend straining this yogurt through 3-4 layers of cheese cloth for a few hours, too. This helps it to thicken up to a more “Greek yogurt” consistency which my kids prefer (and it’s easier to eat). I simply set a large colander in a bowl, line it with cheese cloth, and then pour my yogurt in from the slow cooker. I cover it with a clean dish towel and let it sit for a few hours until it’s the consistency that I like. Do note that the yogurt will also thicken some when refrigerated. Play around with it until you figure out how thick or how thin you prefer your yogurt and make notes. That’s the perk of cooking from scratch – you get a product that is truly customized to your preferences.
How long does homemade yogurt last?
Homemade yogurt is generally good for eating for up to 2 weeks when properly stored in the refrigerator.
Do I have to buy store bought yogurt every time in order to make homemade yogurt?
You don’t have to buy commercial plain yogurt every time. Just save 1/2 cup of your own yogurt for the starter for the next batch.

How can I make homemade yogurt thicker:
There’s a few ways to make your yogurt thicker!
- Use whole milk instead of 2% or skim. The higher milk fat lends to a thicker yogurt.
- Stick it in the fridge. Your yogurt with thicken up some as it gets cold.
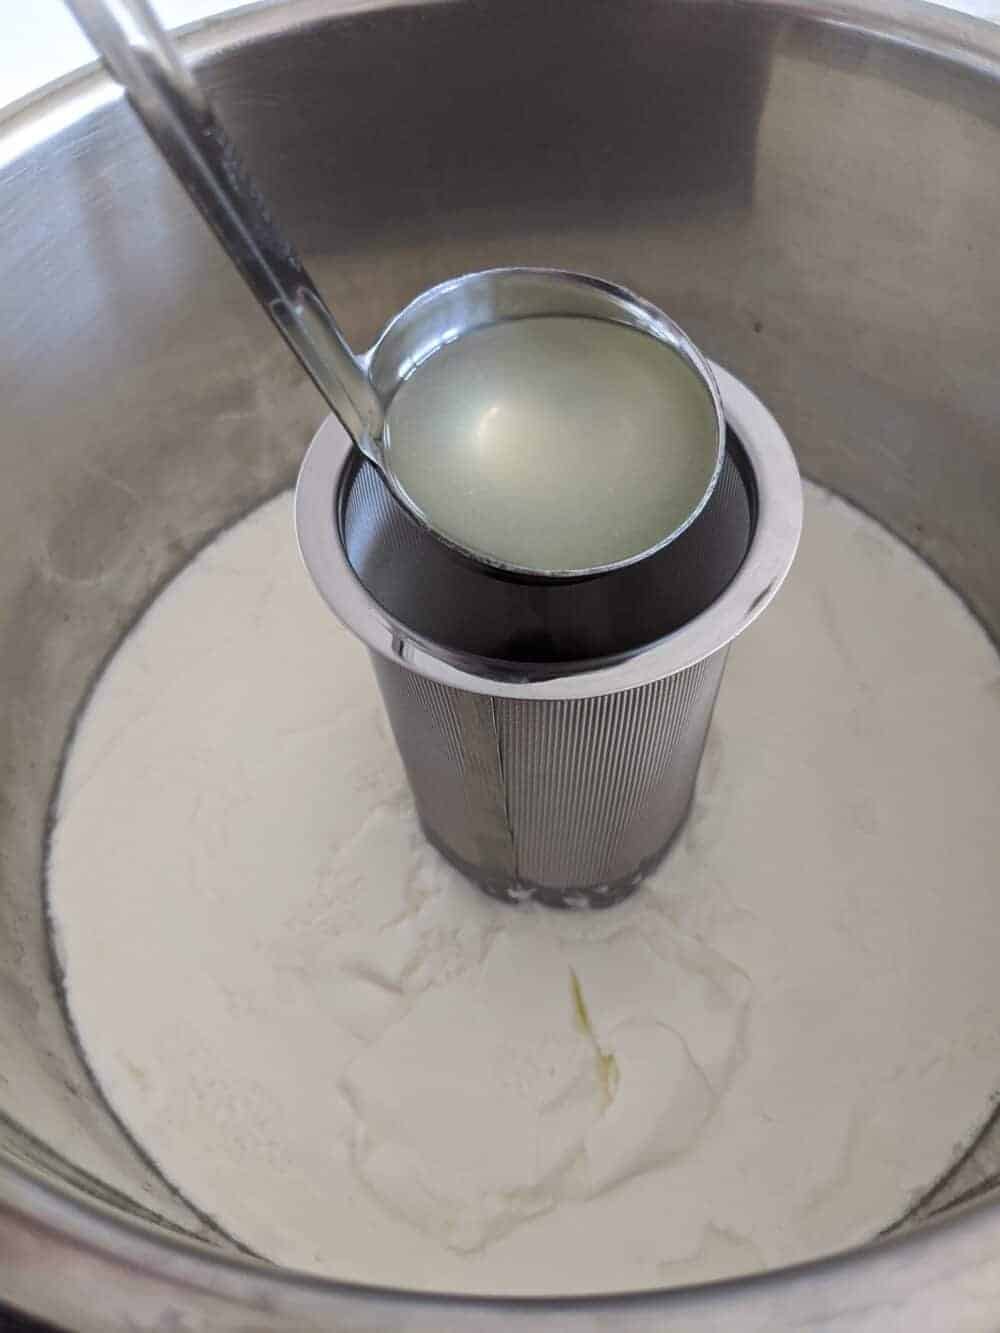
- Strain your yogurt. By removing some of the whey, you are left with a thicker Greek style yogurt.
- I strain my yogurt 2 ways, one is by straining the yogurt through 3-4 layers of cheese cloth for a few hours, too. Simply set a large colander in a bowl, line it with cheese cloth, and then pour yogurt in from the slow cooker. Cover it with a clean dish towel and let it sit for a few hours until it’s the consistency that you like. Do note that the yogurt will also thicken some when refrigerated. Play around with it until you figure out how thick or how thin you prefer your yogurt and make notes. That’s the perk of cooking from scratch – you get a product that is truly customized to your preferences.
- The second way I strain my yogurt is new to me, but I’m loving it. I just got a stainless steel yogurt strainer and it’s awesome. I just stick the tube in my yogurt after the incubation time and let it rest about 2 hours. Then the middle fills with the whey and you ladle it out. I normally do this a in three spots down the middle of the slow cooker (over the course of the morning or so) before placing it in the fridge and it works so great. The tube I just rinse off or you can stick it in the dishwasher. It’s a cool thing that if you make yogurt a lot, it’s great to have (it works in the 6 and 8 quart Instant Pots too!).
Slow Cooker Yogurt
- Total Time: 12 hrs 5min
- Yield: Makes 8 Cups 1x
Description
Slow cooker yogurt is an easy, healthy and inexpensive way to make homemade yogurt without a yogurt maker. Prepare in five minutes, go to bed, and wake up to a freshly made breakfast!
Ingredients
- 1/2 gallon (8 cups) whole milk (you’ll get a thinner product with a lower fat content milk)
- 1/2 cup commercial plain yogurt that says “Live and Active Cultures” on the tub (I have great success with Mountain High yogurt for my culture)
Instructions
- In a large crock pot, add the milk. Add the lid.Turn it on low for around 2 1/2 hours*.
- After that time has passed, unplug the crock pot and let it sit for 3 hours. I always set a timer for these or I don’t remember.
- After the 3 hours has passed, stir in the 1/2 cup of yogurt. Replace the lid of the crock pot and cover with 2 big towels or a blanket. Let rest for 8 to 12 hours (overnight works well). In the morning you’ll have yogurt!
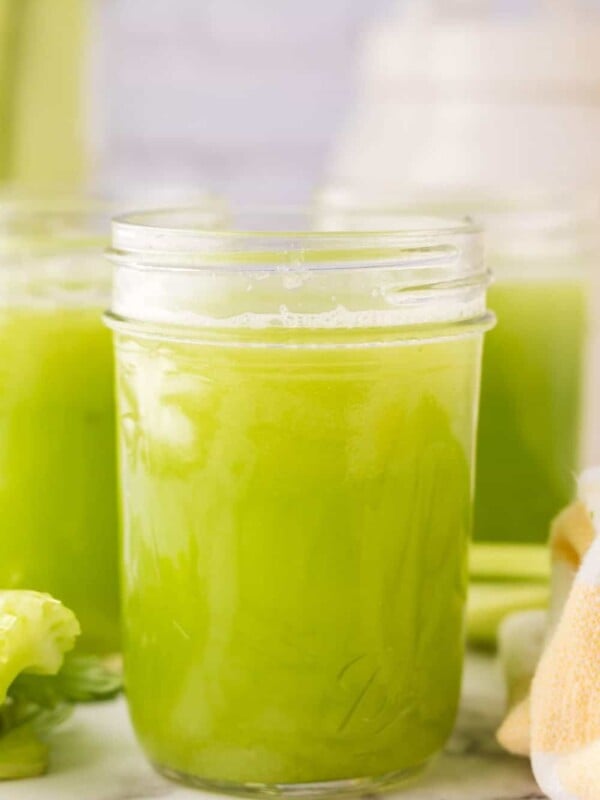
- Place it in a 1/2 gallon mason jar and refrigerate for a few hours before serving. It will thicken up in the fridge. Keep a 1/2 cup of this yogurt for your next batch and say goodbye to buying yogurt!
- You can also let the yogurt strain in cheese cloth in the fridge for a few hours and you’ll get a thicker Greek yogurt!
Notes
- *The goal is to scald the milk which takes place around 180 degrees. So you could check it with a thermometer the first time to see if the “warm” setting is warm enough or if maybe an hour and 45 minutes would work on low. Once you figure it out, I don’t think you would have to use the thermometer every time.
- After the milk is scalded the waiting time is menat to bring the milk down to around 115-110 degrees so that it’s still warm but won’t kill your yogurt culture!
- Prep Time: 5 min
- Cook Time: 12 hrs
- Category: Breakfast
- Method: Slow Cooker
- Cuisine: American


Yogurt recipes that are worth a try:
- Soft and Puffy Greek Yogurt Sugar Cookies
- 5 Easy Healthy Yogurt Bowl Ideas
- 4 Ingredient Healthy Strawberry Frozen Yogurt (5 minute recipe!)
- Homemade Fruit on the Bottom Yogurt Cups


Just making sure I understood what you said in a previous comment – you just use 1/2 cup of your current batch of homemade yogurt when it comes time to make the next batch, right?
Yep! All the live and active cultures will now be in your homemade yogurt and you can use it in the future instead of the store-bought!
Several friends and I have tried it and it turned out great. Can you add vanilla to it to make it vanilla flavored during the process? Also, are there any tips to making it thicker? We are drinking ours but would love to be able to eat with a spoon too.
I’m so glad you are having success with it! I get too nervous that I’ll kill the yogurt cultures to add much while it’s processing, but you sure could try adding vanilla. As far as the thickness goes – it’ll be more thicker the more fat your milk has, whole milk is your best option and you could even add a quart of cream to it. Also you could strain it in through cheese cloth overnight in your fridge to thicken it up and to make a more greek-style yogurt (I use what comes out in pancakes the next morning so that I don’t wast it). I’ve heard of people adding gelatin too but I haven’t ever tried it. Let me know how that works for you and thanks for the great feedback!
I don’t understand………it says no more buying store yogurt and store yogurt has artificial ingredients but didn’t you buy store yogurt and just add it to milk?
You gotta start somewhere when it comes to yogurt and it’s live cultures… you buy that first initial tub of yogurt (and you should be buying the spendy stuff that is organic and free of odd things) and then you get to make your own. Once you do that though you never have to buy it again if you keep making it and keeping your own live cultures in the fridge.
how long will the 1/2 cup of yogurt last for the next batch? Could you freeze it, if you think you wont be using it right away…..Thanks
It just depends on your yogurt… it’ll last 7 to 10 days but once it starts to mold it will mold in the most amazing colors (mine was orange and pink last time I let it go!). I have no clue about freezing. In my mind it will ruin the live cultures that make it yogurt but I don’t know if that’s true or not. Good luck!
My children’s pediatrician makes her own yogurt and said it is fine to freeze it. She wondered about the live cultures being affected but learned that it is fine to freeze! I am looking forward to trying this and some of your other clean eating recipes! Thanks for sharing!
I love this yogurt! I made some a couple of weeks ago, and I’m starting my next batch. Unfortunately, I forgot to pin it the first time around, and then I couldn’t find it again! Just so you know, it doesn’t show up under “yogurt”, or “crock pot”, so it was really hard to find. 🙂
Also, I love your website! I have been cooking primarily from your recipes, and my family has liked all of it. Thanks so much!
My recipe index needs some love but thanks for the motivation to get it done. I’m so glad you like it! I have a batch going right now too 🙂
Sorry to bring this up…. Am I the only one noticing the typo in the last sentence lol. Thanks for the recipe!!!.
That’s an awesome typo, Erica! I had not noticed!
I’m interested in making my own yogurt and your version seems really easy. How long will it keep in the fridge and approximately, how much does it make? Thanks!
The whole half gallon turns into yogurt, so it makes about 8 cups (very little is whey) and it keeps great! We eat ours pretty quick but it won’t start growing any bacteria for a week to 10 days! I think you’ll like it if you try it… it’s really quiet easy!
Thoughts for you on the yogurt in the crock pot! Your crock pot sounds like it runs a little hotter than most. So you could A) try the warm setting or B) shortening the period of time you leave the milk on low
The goal is to scald the milk which takes place around 180 degrees. So you could check it with a thermometer the first time to see if the warm setting is warm enough or if maybe an hour and 45 minutes would work on low… once you figured it out I don’t think you would have to use the thermometer every time.
I burned the milk in mine before too and it smelled so weird and good at the same time!
After the milk is scalded the waiting time is to bring the milk down to around 115-110 degrees so that it’s still warm but won’t kill your yogurt culture!
I just made another batch last night and I just love it. I make blueberry muffins that call for 1 1/2 cups yogurt for a batch, that’s why I make so much! They are the best muffins. I’ll post the recipe. I had no idea you had such a fun blog. Thanks for the comment, now I can keep up on yours!
Can I just say how much I love your recipes on here? Well, they are amazing.
So I tried this about a month ago and my crock pot browned the edge, making a not-so-appetizing semi-crispy gelatinous ring around the top. I was thinking of setting my crock pot to the warm setting after being on low for the first hour- do you think it would still turn out okay? Let me know what you think!
I want to try this some time!
Leaving milk unrefrigerated on the counter all night is ok health-wise? I’m sure this is something I just have to get over mentally:) want to try this!
LOL, fun right! And yep, leaving it out give all those good cultures time to grow! It’s actually super healthy for you.
I was just curious how long it needs to stay on at 180 degrees for?
When it got to 180 degrees I turned it off.. was that right?..lol
Excited to finally be trying this years later .lol.
Thanks
It just comes up too that temp and then you are trying to keep it warm. It’ll come down as soon as you hit 180, but that’s just fine, no need to hold the temperature for this recipe.